Monster Cookies are the ultimate crowd-pleaser, and honestly, they’re practically my spirit animal in cookie form! When I first started NoobRecipes, I wanted to create a space where *anyone* could bake something amazing, no matter their experience level. And let me tell you, these cookies were one of the first things I perfected. They’re just so forgiving and ridiculously delicious. If you’re looking for a recipe that’s basically foolproof and guaranteed to make everyone happy, you’ve found it. Get ready to bake some magic!

What Makes These Monster Cookies So Special
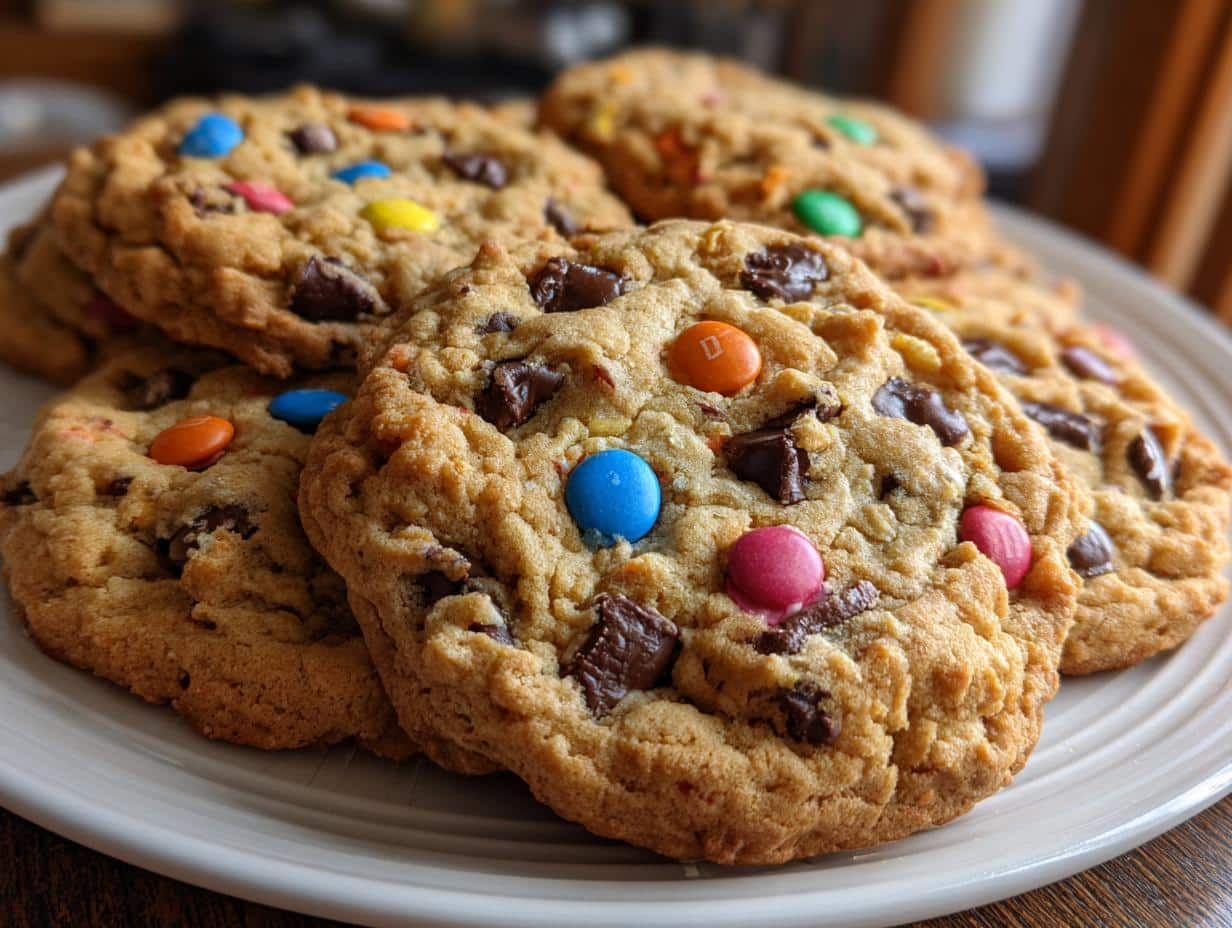
These aren’t just any cookies; they’re the “everything cookie” dream! What makes them truly special is that perfect balance of thick, chewy texture from the old-fashioned oats and peanut butter, loaded with all the good stuff – melty chocolate chips and fun M&Ms. They’re the kind of cookie that just screams “kid-friendly” and makes even the pickiest eaters do a happy dance. Seriously, they’re so easy and so good, they might just become your new favorite go-to recipe.
My Journey with Monster Cookies
Back when I was first learning to cook, my kitchen was frankly a disaster zone. I remember attempting basic cookies and ending up with flat, sad disks. Then, I stumbled upon a monster cookie recipe, and it was a total game-changer. The dough seemed pretty forgiving, and the mix-ins were just pure fun. It was one of the first recipes I made that actually looked and tasted like the picture! It taught me that baking doesn’t have to be intimidating. This recipe embodies everything NoobRecipes is about: simple steps, awesome results, and a whole lot of joy. It’s proof that even a total beginner can whip up something fantastic.
The Best Monster Cookie Recipe Ingredients
Okay, let’s talk about what makes these monster cookies so darn good. It all comes down to using the right stuff, and thankfully, most of these ingredients are probably already hanging out in your pantry! We’re going for that perfect balance of chewy, soft, and packed-with-goodies. Trust me, you don’t need fancy stuff to make these babies shine. Just good, honest ingredients that work together to create cookie magic. Getting these right is the first big step to making cookies that taste like they came straight from a bakery, but with that special homemade touch.
Ingredient Table
| 1 cup unsalted butter, softened | Make sure it’s softened, not melted! |
| 1 cup brown sugar, packed | Gives that amazing chewiness and caramel flavor. |
| 1/2 cup granulated sugar | Helps with texture and sweetness. |
| 1 cup creamy peanut butter | Any creamy kind works great. |
| 2 large eggs | They bind everything together. |
| 1 teaspoon vanilla extract | For that classic cookie aroma and taste. |
| 1 teaspoon baking soda | Gives them a little lift. |
| 2 1/2 cups old-fashioned oats | These are key for that chewy, hearty texture! |
| 1 cup semi-sweet chocolate chips | The more, the merrier! |
| 1 cup peanut butter M&Ms | The classic monster cookie star! |
Ingredient Notes and Substitutions
So, why these specific ingredients? Well, the brown sugar is super important here. It’s what gives these monster cookies that wonderfully chewy texture and a deeper, richer flavor compared to just using white sugar. And those old-fashioned oats? They’re not just for show; they add a fantastic heartiness and chew that makes these truly “old fashion” style cookies. If you absolutely can’t find old-fashioned oats, quick oats will work in a pinch, but you might lose a little bit of that satisfying chew. For the M&Ms, feel free to swap them out for regular M&Ms if peanut butter ones are hard to find, or even toss in some chopped nuts if that’s more your style. The goal is to make them your own!
How to Make Monster Cookies: Step-by-Step Instructions
Alright, buckle up, buttercups, because we’re about to dive into the fun part: making these amazing monster cookies! This is where all those lovely ingredients come together. Don’t worry if you’ve never baked before; I’ve broken it down super simple. We’re aiming for thick, chewy cookies that are loaded with goodies, and this process makes it totally achievable. Seriously, these steps are so easy, you’ll be a cookie pro in no time. Get your apron on, and let’s do this!
Preparing Your Dough
First things first, let’s get that oven preheated to 350°F (175°C). And grab some parchment paper to line your baking sheets. This is a game-changer for easy cleanup, trust me on this one! Now, in a big bowl – and I mean *big* – we’re going to cream together that softened butter and both sugars until they’re nice and fluffy. This is where you get those little air bubbles that help make the cookies thick. Then, stir in that creamy peanut butter until it’s all combined. Next up, add your eggs, one at a time, beating well after each one. Don’t forget to add that teaspoon of vanilla extract for that classic cookie smell and taste. Now, it’s time for the dry stuff: mix in the baking soda and those old-fashioned oats. Give it a good stir until everything is just combined. We don’t want to overmix here! Finally, the best part: fold in those glorious chocolate chips and peanut butter M&Ms. Gently mix them in until they’re evenly distributed. You should have a thick, chunky dough that looks absolutely irresistible.
Shaping and Baking Your Monster Cookies
Once your dough is ready, it’s time to get them onto those prepared baking sheets. I like to use a cookie scoop or even just two spoons to drop rounded balls of dough onto the parchment paper. Leave about two inches between each cookie because they will spread a little. You want them to have room to become perfectly thick and chewy. Now, pop those baking sheets into your preheated oven. Bake them for about 10 to 12 minutes. You’re looking for the edges to be golden brown, but the centers should still look a little soft. That’s the secret to chewy cookies! Don’t overbake them, or they’ll turn crunchy. Once they’re out of the oven, let them hang out on the baking sheets for about 5 minutes. This is crucial because they’re still a bit delicate and need that time to firm up just enough. Then, carefully transfer them to a wire rack to cool completely. And there you have it – perfect, thick, chewy monster cookies ready to be devoured!

Tips for Perfect Monster Cookies Every Time
Making these monster cookies is pretty straightforward, but a few little tricks can make them absolutely spectacular. We’re going for that signature thick and chewy texture, so let’s make sure you nail it! Don’t stress if your first batch isn’t *exactly* like the picture; baking is a journey, and these tips are here to help you along the way. Remember, the goal is delicious, fun cookies that everyone will love.
Achieving the Perfect Texture
The secret to thick and chewy monster cookies is all in the dough and how you bake them. First, make sure your butter is softened, not melted. Melted butter leads to flat cookies, and nobody wants that! When you’re creaming the butter and sugars, really give it a good whip until it’s light and fluffy – this incorporates air, which helps them puff up. Don’t overbake! Pull them out when the edges are golden but the centers still look a little soft. They’ll continue to cook on the hot baking sheet. Letting them cool on the sheet for a few minutes before moving them to a wire rack is also crucial for that chewy center.
Mix-In Magic
The “monster” part of these cookies comes from all the yummy goodies mixed in! To get an even distribution of chocolate chips and M&Ms, I like to fold them in gently at the very end. Make sure your dough isn’t super sticky or wet, or the mix-ins might sink to the bottom. If you’re feeling adventurous, you can totally add other things! A handful of chopped peanuts would be amazing, or even some white chocolate chips for a different flavor. Just try not to go overboard, or your cookies might spread too much. Stick to about 2 cups total of mix-ins for the best results.
Frequently Asked Questions About Monster Cookies
Got questions about whipping up these amazing monster cookies? I totally get it! Baking can sometimes feel like a science experiment, but I promise, these cookies are super forgiving. Here are a few things folks often ask, and I’m here to give you the noob-friendly answers!
Can I Make These Monster Cookies Healthier
You know, I love that you’re thinking about this! While these are definitely an indulgent treat, we can make a few simple swaps to lighten them up a bit without ruining that classic monster cookie vibe. You could try using whole wheat flour instead of all-purpose for a little extra fiber, or maybe swap out half the chocolate chips for a good quality dark chocolate. Some people even like to add a bit of flaxseed meal mixed with water (that’s called a flax egg!) instead of one of the regular eggs. Just remember, the goal is to make them *slightly* healthier, not to turn them into health bars. They’ll still be delicious, just with a little less guilt!
How to Store Leftover Monster Cookies
This is a great question, because who wants stale cookies, right? The best way to keep these monster cookies fresh and chewy is to store them in an airtight container at room temperature. They’ll stay yummy for about a week like that. If you know you won’t get through them that fast (unlikely, but hey!), you can totally freeze the dough balls before baking them. Just pop them on a baking sheet, freeze until solid, then transfer them to a freezer bag. You can bake them straight from frozen, just add a minute or two to the baking time. They’re also fantastic if baked and then stored in the freezer, ready for a quick cookie craving!
Nutritional Information for Monster Cookies
Alright, let’s talk about the numbers! While these monster cookies are an absolute blast to make and eat, it’s always good to have an idea of what you’re getting. Keep in mind these are just estimates, because, you know, baking can be a little wild and every cookie might have slightly different amounts of chocolate chips or M&Ms!
Estimated Nutritional Breakdown Per Cookie
| Serving Size | 1 cookie |
| Calories | 250 |
| Fat | 15g |
| Saturated Fat | 7g |
| Unsaturated Fat | 8g |
| Trans Fat | 0g |
| Carbohydrates | 30g |
| Fiber | 2g |
| Sugar | 20g |
| Protein | 5g |
| Cholesterol | 30mg |
| Sodium | 100mg |
Sharing Your Monster Cookies
Now that you’ve whipped up a batch of these amazing monster cookies, I’d absolutely LOVE to see them! Snap a pic and tag me on social media, or leave a comment below telling me how they turned out. Seeing your baking triumphs makes my day!
Print
Amazing Monster Cookies: 10 Minute Prep
- Total Time: 27 minutes
- Yield: 24 cookies
- Diet: Vegetarian
Description
Monster Cookies are thick, chewy, and packed with chocolate chips and M&Ms. This easy recipe is perfect for beginners and kids.
Ingredients
- 1 cup unsalted butter, softened
- 1 cup brown sugar, packed
- 1/2 cup granulated sugar
- 1 cup creamy peanut butter
- 2 large eggs
- 1 teaspoon vanilla extract
- 1 teaspoon baking soda
- 2 1/2 cups old-fashioned oats
- 1 cup semi-sweet chocolate chips
- 1 cup peanut butter M&Ms
Instructions
- Preheat oven to 350°F (175°C). Line baking sheets with parchment paper.
- Cream softened butter, brown sugar, and granulated sugar until fluffy.
- Stir in peanut butter.
- Add eggs one at a time, then vanilla extract.
- Mix in baking soda and oats.
- Fold in chocolate chips and M&Ms.
- Drop dough balls onto baking sheets.
- Bake for 10-12 minutes until golden.
- Cool on sheets for a few minutes, then transfer to a wire rack.
Notes
- Store in an airtight container at room temperature for up to a week.
- Dough can be frozen.
- Prep Time: 15 minutes
- Cook Time: 12 minutes
- Category: Dessert
- Method: Baking
- Cuisine: American