Mini Sugar Cookies used to feel like something only professional bakers made, especially when you saw those perfectly decorated ones in the bakery window. When I was first starting out on NoobRecipes, I remember trying a recipe that called for chilling the dough for 24 hours—I almost quit baking right there! That’s why I spent months perfecting this version. These are the softest, sweetest little cookies you’ll ever make, and the best part? You can mix them up and have them cooling on the rack in under 30 minutes total. Trust me, if you can press a button on an electric mixer, you can master these cookies. They are proof that simple ingredients, handled correctly, produce fantastic, reliable results every single time.

Why You Will Love These Mini Sugar Cookies
Forget complicated rolling and cutting! These cookies bake up perfectly every time, making them a favorite for anyone new to the kitchen. They are incredibly fast to whip up.
- They yield about 60 mini sugar cookies, perfect for sharing or snacking.
- That unique texture is soft in the middle but has a slight crisp edge.
- You only need common pantry staples—no fancy equipment required.
Perfect for Beginner Bakers
This recipe is designed for the NoobRecipes crowd. There’s no chilling time, the dough is easy to handle, and the instructions are broken down into simple actions. If you can measure ingredients and turn on your oven, you’ve got this! We use accessible items like oil alongside butter to ensure you get that perfect soft bite without any fuss or failure.
Equipment List for Your Mini Sugar Cookies
You don’t need a professional kitchen to tackle this recipe; simple tools make all the difference when making these fantastic mini sugar cookies. Having these items ready means you can jump straight into the fun part!
Essential Tools You Need
- Electric mixer (handheld or stand mixer)
- Large mixing bowls
- Whisk and rubber spatula
- 2-teaspoon cookie scoop (highly recommended!)
- Three standard baking sheets
- Parchment paper
- Shallow dish for rolling the dough balls
Gathering Ingredients for Mini Sugar Cookies
Getting your ingredients lined up is half the battle won when baking, especially for something fast like these mini sugar cookies. The combination of butter and oil is what gives us that amazing texture—richness from the butter, softness from the oil. Don’t just dump the flour in! Measuring it correctly is crucial for these delicate cookies, so please use the spoon-and-level method we always talk about on NoobRecipes.
Ingredient Notes and Substitutions
We need both granulated sugar and powdered sugar here; they play different roles in the texture. The oil is non-negotiable for that pillowy center, so stick with canola or vegetable oil. Also, make sure your butter is softened but still feels cool to the touch—too warm and the mixing process goes sideways!
| Ingredient | Quantity/Description |
|---|---|
| Unsalted Butter | 1/2 cup (113 g), softened but cool |
| Granulated Sugar | 1/2 cup (115 g) + 3/4 cup divided for rolling/topping |
| Powdered Sugar | 1/2 cup (60 g) |
| Canola or Vegetable Oil | 1/2 cup (108 g) |
| Pure Vanilla Extract | 1 1/4 teaspoons |
| Almond Extract | 1/4 teaspoon |
| Large Egg | 1 |
| All-Purpose Flour | 2 1/3 cups (291 g), spooned and leveled |
| Baking Soda | 3/4 teaspoon |
| Cream of Tartar | 3/4 teaspoon |
| Salt | 1/2 teaspoon |
Step-by-Step Instructions for Perfect Mini Sugar Cookies
Okay, let’s get baking! This process is super straightforward, which is why these mini sugar cookies are so great for beginners. First things first: get your oven roaring to 350\u00b0F. Line up three baking sheets—trust me, you’ll need them since these bake fast. Now, grab your electric mixer and let’s start building that base.
Preparing the Dough Base
In a big bowl, cream together your softened butter, the granulated sugar, and the powdered sugar. Beat it until it looks light and fluffy. Next, slowly stream in that oil while the mixer is running. Once that’s happy, toss in your egg, vanilla, and that little bit of almond extract. Don’t panic if the mixture looks a little curdled or separated after adding the egg—that’s totally normal with oil in the mix! Just scrape down the sides of the bowl and keep going.
Mixing Dry Elements and Combining
While that wet stuff is resting, take a separate bowl and give your flour, baking soda, cream of tartar, and salt a good whisking. We want everything evenly distributed so we don’t get salty spots! Now, add the dry mix into the wet mix slowly. Beat it on low speed until *just* combined. Stop mixing as soon as you don’t see any more streaks of dry flour. Overmixing is the enemy!
Rolling and Shaping Your Mini Sugar Cookies
Time to set aside about a quarter cup of that plain granulated sugar for sprinkling later. Pour the rest of the sugar into a wide, shallow dish. Use a 2-teaspoon cookie scoop—this is my secret weapon for perfectly uniform cookies—to scoop the dough. Drop the balls right into the sugar and roll them around until they are completely coated. Place about 30 balls on each sheet. Then, take the bottom of a glass or a cookie stamp and gently press each dough ball down flat.
Baking and Initial Cooling
Pop those sheets into the 350\u00b0F oven for about 9 to 12 minutes. You’re looking for them to puff up a little and for the edges to just start looking set. As soon as you pull them out—and I mean immediately—sprinkle them with that reserved sugar you set aside. Let them sit on the hot pan for just a minute or two to firm up before transferring them to a wire rack to cool completely. If you move them too soon, they might crumble!

Tips for Success with Your Mini Sugar Cookies
These little guys are so forgiving, but a few tricks will make your batch of mini sugar cookies absolutely perfect every time. It’s all about managing the heat in your kitchen, especially since they bake so quickly. Follow these small adjustments, and you’ll get that ideal soft-yet-sturdy cookie.
Maintaining Dough Temperature
Don’t ever put new dough balls onto a hot baking sheet! This is a rookie mistake that guarantees spreading. Always cool your baking pans completely between batches, or better yet, rotate between your three prepared sheets. If you’re having a hot day, even chilling the dough for 15 minutes can help prevent the cookies from flattening out too much while they bake.
Serving Suggestions for These Mini Sugar Cookies
Because these mini sugar cookies have that lovely hint of almond mixed with the vanilla, they are fantastic all on their own! But if you want to dress them up for a party, skip the heavy frosting. A light dusting of colored sugar before baking looks gorgeous. They are also perfect served alongside fresh berries or a simple cup of coffee. They disappear fast, so make extra!
Storing and Keeping Your Mini Sugar Cookies Fresh
The great news about these mini sugar cookies is that they truly hold up well! Since they are small and use oil, they stay soft longer than your typical cut-out cookie. You really don’t need to do anything fancy to keep them delicious for a few days. I usually just stack them carefully in a single layer inside a good container.
Storage and Reheating Guide
If you need them to last longer, the freezer is your friend. Just make sure they are completely cool before you tuck them away for the winter!
| Storage Method | Duration | Reheating Guidance |
|---|---|---|
| Room Temperature (Airtight container) | Up to 3 days | None needed; serve as is |
| Refrigerated | Up to 5 days | Allow to come to room temperature before serving |
| Frozen | Up to 2 months | Thaw completely before serving |
Frequently Asked Questions About Mini Sugar Cookies
I get so many questions about these quick cookies because everyone wants them to turn out perfect the first time! Don’t worry about mistakes; that’s why we have this section. Baking should be fun, not stressful!
Why did my cookies spread too much?
Usually, spreading happens for two reasons. Either your oven wasn’t quite hot enough when you put them in, so they melted before they could set, or your butter was too soft. Remember, we want the butter softened but still cool. If your pans are hot from a previous batch, that melts the bottom of the dough too fast. Always cool those sheets down!
Can I skip the cream of tartar in these mini sugar cookies?
You technically *can*, but I wouldn’t recommend it if you want that signature soft yet slightly chewy texture. The cream of tartar reacts with the baking soda to create lift, but it also keeps the cookie tender. Without it, you might end up with a flatter, slightly crisper cookie that loses that special melt-in-your-mouth quality.
How do I get perfectly round shapes?
Consistency is key here! I swear by using a 2-teaspoon cookie scoop to make sure every dough ball starts at the same size. After you roll them in the sugar, place them on the sheet, and then use the bottom of a flat glass or a small measuring cup to gently press them down. Pressing them flat before baking is what keeps these mini sugar cookies from looking like little hockey pucks!
Share Your Baking Experience
I truly hope you loved making these as much as I love sharing them with you! Baking shouldn’t be a solitary activity; it’s all about community here at NoobRecipes. Did you try them? Did they disappear in five minutes like mine always do?
Please, please leave a comment below and let me know how they turned out for you and your crew. Tell me what you thought about that butter-and-oil texture—I’m obsessed! If you made them, snap a picture and tag me on social media so I can see your perfect little creations. A rating helps other new bakers feel confident jumping into this recipe, so don’t forget to give it stars if you enjoyed it. Happy baking, friends! You can also follow our journey on Pinterest for more great ideas.
Print
60 Amazing Mini Sugar Cookies Done Fast
- Total Time: 27 minutes
- Yield: About 60 cookies
- Diet: N/A
Description
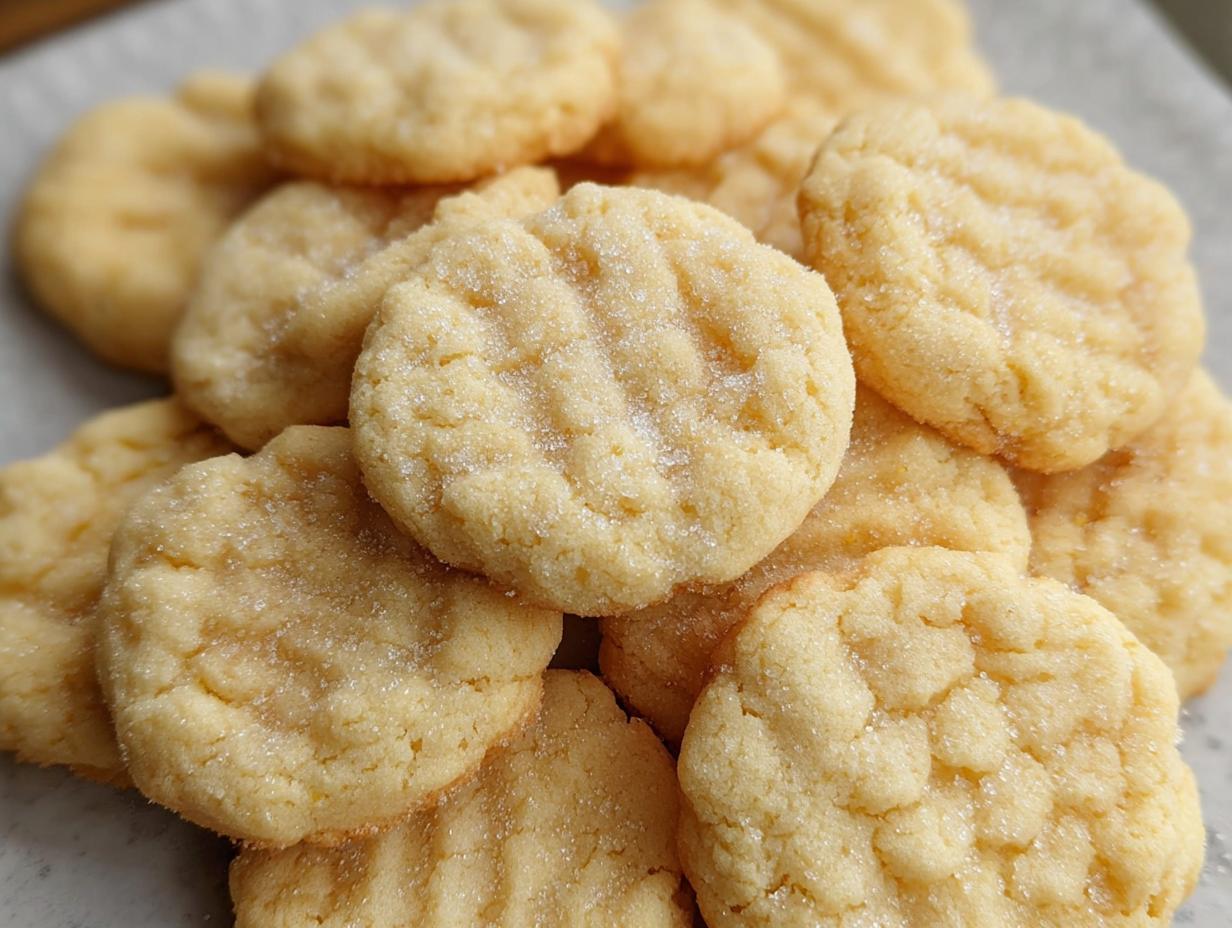
These mini sugar cookies are simple to make, yielding soft, sweet treats perfect for beginners. The dough uses both butter and oil for a unique texture.
Ingredients
- ½ cup (113 g) unsalted butter, softened but still cool to the touch
- ½ cup (115 g) granulated sugar
- ½ cup (60 g) powdered sugar
- ½ cup (108 g) canola or vegetable oil
- 1¼ teaspoons pure vanilla extract
- ¼ teaspoon almond extract
- 1 large egg
- 2⅓ cups (291 g) all-purpose flour, spooned and leveled
- ¾ teaspoon baking soda
- ¾ teaspoon cream of tartar
- ½ teaspoon salt
- ¾ cup (173 g) granulated sugar, divided, for rolling and sprinkling
Instructions
- Preheat your oven to 350°F. Line three baking sheets with parchment paper.
- In a large bowl, beat the butter, granulated sugar, and powdered sugar using an electric mixer.
- Add the oil and beat until combined. Scrape the sides and bottom of the bowl as needed.
- Add the egg, vanilla extract, and almond extract. Do not worry if the mixture looks slightly curdled.
- In a separate bowl, combine the flour, baking soda, cream of tartar, and salt. Add this dry mixture to the wet ingredients and beat until just combined, scraping the bowl as needed.
- Set aside ¼ cup of the remaining sugar for topping. Place ½ cup sugar in a wide container for rolling the dough balls.
- Scoop the dough into 2-teaspoon portions. Drop about 8–10 dough balls into the sugar container and gently roll to coat them completely.
- Place the coated dough balls a couple of inches apart on the prepared baking sheets (about 30 per sheet). Flatten each ball with a cookie stamp or the bottom of a glass.
- Bake for 9–12 minutes. The cookies are done when they puff and the edges start to set. They will crisp while cooling.
- Place the pans on wire racks. Immediately sprinkle the tops with some of the reserved sugar.
- Cool the cookies completely before you store them.
Notes
- The soft dough benefits from using a cookie scoop for consistent sizing.
- Cool the baking pans between batches; never place new dough on a hot sheet.
- Store cookies at room temperature for up to 3 days.
- Refrigerate for up to 5 days or freeze for up to 2 months.
- Prep Time: 15 minutes
- Cook Time: 12 minutes
- Category: Dessert
- Method: Baking
- Cuisine: American