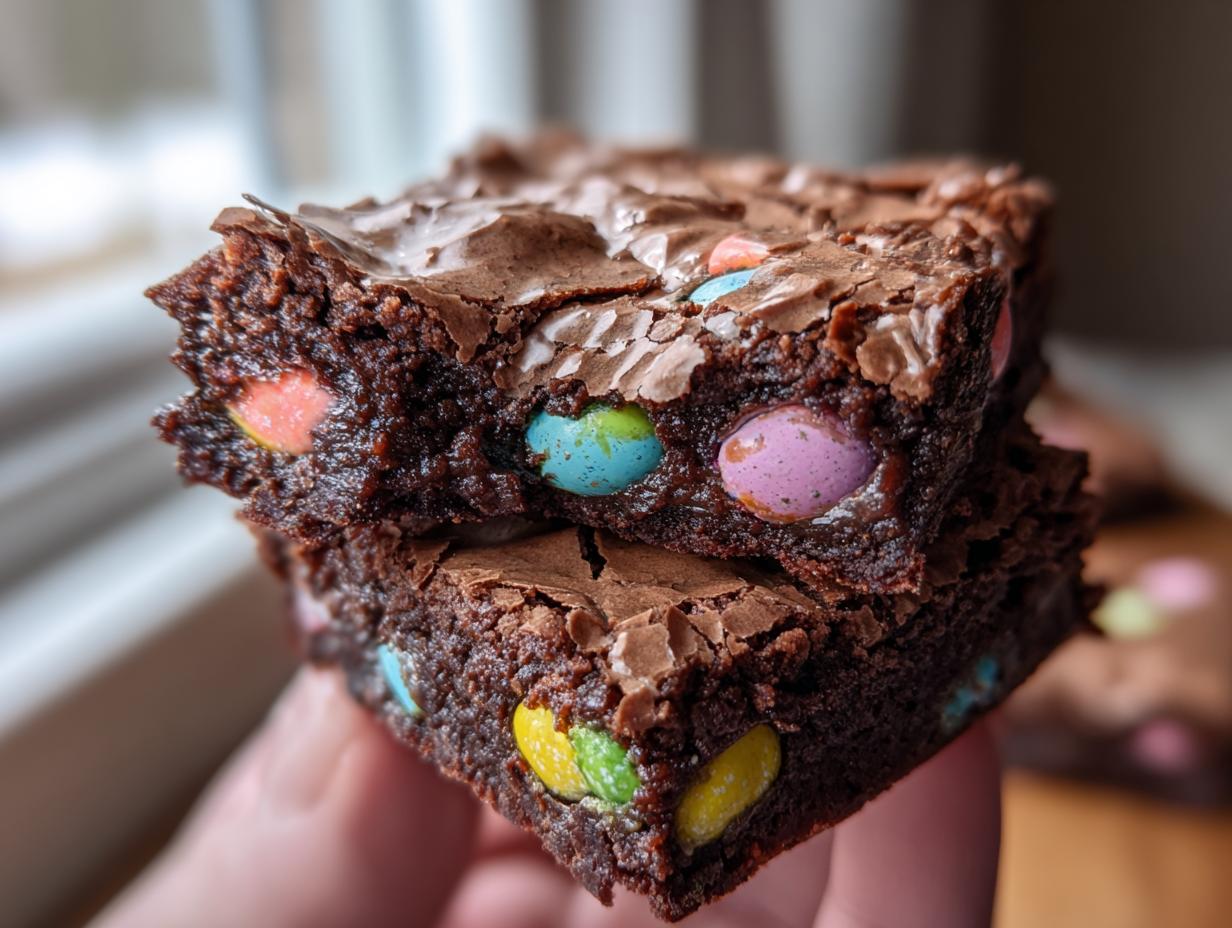
Forget those dry, cakey things you sometimes get around Easter. I’m here to tell you that making truly fudgy Mini Egg Brownies with that gorgeous, shiny crinkle top is easier than you think! Seriously, this recipe is foolproof, even if you usually burn water. I used to think that perfect, crackly top was reserved for professional bakers, but this simple method changed everything for me.
When I first tried making brownies that looked like they came from a fancy bakery, I failed. Hard. My first batch looked like flat chocolate rocks. But then I realized the secret wasn’t just the ingredients; it was the technique—specifically, how long you beat the eggs and sugar. That’s what creates the magic crust! This recipe is truly beginner-friendly because the technique is specific but very easy to follow. You’ll be a brownie master by lunchtime!
My Journey to the Perfect Mini Egg Brownies
My early attempts at rich brownies were always a disaster. They were either too gooey in the middle or just plain dense without any shine. I spent an entire weekend trying to figure out the crinkle top. I read every article, and honestly, most of them just made me more confused!
The breakthrough came when I stopped rushing the whisking stage for the eggs and sugar. I mean, five full minutes of beating until your arm aches a little—that’s the key! That vigorous incorporation traps the air needed to create that beautiful, paper-thin crust on top. Once I focused on that one step, the fudginess followed right along. Now, when I fold in those colorful candy eggs, I know exactly what texture I’m aiming for, and I can guarantee you’ll nail it on your first try too!

Gathering What You Need for Mini Egg Brownies
Okay, let’s talk ingredients! Don’t panic if you see chocolate bars instead of chips; trust me, the bar melts way better and gives you that superior fudgy texture we’re after in these Mini Egg Brownies. Most of what you need is probably already in your pantry, but the quality of the chocolate really makes a difference here. Make sure you have those pastel eggs ready to go because they are the stars of the show!
Essential Ingredients List
Here is the rundown of everything you need. Note that the butter needs to be melted and hot when you start, and those eggs should definitely be at room temperature. It really helps them whip up properly!
| Ingredient | Amount | Notes |
|---|---|---|
| Salted Butter | 1/2 cup | Melted and hot |
| Granulated Sugar | 1 cup | |
| Semi-Sweet Chocolate Bar | 4 ounces | Chopped finely |
| Large Eggs | 2 | Room temperature! |
| Alcohol-Free Vanilla | 1 teaspoon | |
| All-Purpose Flour | 3/4 cup | |
| Unsweetened Cocoa Powder | 1/4 cup | Sifted is best |
| Salt | 1/2 teaspoon | |
| Pastel Candy-Coated Eggs | 1 1/4 cups | Divided for mixing and topping |
Equipment Check for Baking Mini Egg Brownies
You don’t need any fancy stand mixers for this, thank goodness! Just grab an 8×8-inch baking pan and line it well with parchment paper. You’ll need a microwave-safe bowl for melting chocolate, a sturdy mixing bowl, a whisk, and a good rubber spatula. That’s it! Simple tools for a truly impressive result.
Step-by-Step Guide to Making Fudgy Mini Egg Brownies
This is where the magic happens! Follow these steps closely, especially the whisking part, and you’ll have the fudgiest, shiniest brownies you’ve ever made. Don’t rush the process; let the ingredients do their work.
Preparing the Pan and Melting the Chocolate
First things first, get your oven fired up to 350 degrees Fahrenheit. I always use parchment paper in my 8×8 pan, letting it hang over two sides like little handles. This makes pulling the whole slab out later ridiculously easy—no sticking worries! Next, deal with your chocolate. Chop that semi-sweet bar up small so it melts nicely. Pop it in a safe bowl and microwave it in short bursts, maybe 20 seconds at a time, stirring well in between. You want it perfectly smooth, not scorched. Set that melted chocolate aside so it can cool down just a tiny bit while you work on the next essential step.
Developing the Glossy Crinkle Top: The Critical Whisk
This is the most important part for that beautiful, shiny crust! Take your hot, melted butter and pour it right into the sugar in a big bowl. Whisk them together by hand for a good two or three minutes until they look glossy and totally combined. Now, add your room temperature eggs and that vanilla. Get ready to whisk hard—I mean really whisk—for a full five minutes straight. Seriously, don’t stop early! You are looking for the batter to change color, becoming pale and thick, almost like it’s ribboning off the whisk. This action traps the air that creates that famous crinkle top on your Mini Egg Brownies.
Folding in Dry Ingredients and Candy Eggs
Once your eggs are perfectly whipped, pour in that slightly cooled melted chocolate and whisk just until everything is one uniform color. Now, switch gears! Put the whisk away and grab your rubber spatula. It’s time to add the flour, sifted cocoa powder, and salt. You must fold gently here. Just mix until you don’t see any more white streaks of dry stuff. Overmixing at this stage is what makes brownies cakey, so stop as soon as it’s combined!
Next, gently fold in about one cup of those colorful candy eggs. Try to distribute them evenly throughout the batter. Scrape every bit of that beautiful batter into your prepared pan and smooth the top gently with your spatula. For the grand finale, sprinkle the remaining quarter cup of eggs right on top. Press them in lightly so they stick but stay visible for that festive look during baking.

Baking and Cooling Your Mini Egg Brownies
Slide the pan into the preheated oven and set a timer for 26 minutes. The edges should look firm, and the center shouldn’t jiggle wildly. Remember, we are aiming for fudgy, so if a toothpick comes out with moist crumbs clinging to it—that’s perfect! If it’s wet batter, give it another minute or two. The internal temperature should be around 180 to 200 degrees Fahrenheit if you use a thermometer. Here’s the hardest part: You absolutely must let these cool completely in the pan on a wire rack. If you try to slice them warm, they will fall apart into a gooey mess. Patience! Once completely cool, use those parchment handles to lift them out and slice them neatly into 16 squares.
Tips for Achieving Expert-Level Mini Egg Brownies
Even with a great recipe, sometimes little things trip us up when we’re aiming for that bakery-quality texture. Don’t worry if your first batch isn’t perfect; I certainly made mistakes learning the ropes! The main goal here is to keep things fudgy and shiny, which means avoiding two major brownie villains: cold eggs and overmixing. Mastering these little details is how you guarantee fantastic Mini Egg Brownies every single time you bake them.
These pro tips, learned through trial and error (and a lot of eating!), will ensure your brownies are chewy, rich, and have that irresistible shine we talked about. It’s all about respecting the process! If you want more baking tips, check out our Pinterest page.
Temperature Matters: Eggs and Oven Settings
I cannot stress this enough: Use room temperature eggs! If your eggs are straight from the fridge, they don’t incorporate properly when you whisk them vigorously with the sugar. They cool down the mixture too fast, and you won’t trap enough air to build that beautiful crinkle top. Just leave them out on the counter for about 30 minutes before you start mixing. Also, make sure your oven is truly preheated to 350°F. If it’s too cool, your brownies will spread too much before the structure sets, leading to a flatter, less fudgy result overall.
Avoiding the Cakey Texture Pitfall
We want fudgy, not cakey, right? Cakey brownies happen when you develop too much gluten in the batter, and that happens when you mix the flour in too much. Once you add the flour, cocoa, and salt, stop using the whisk immediately! Switch to a rubber spatula and fold just until you see no more white streaks of dry ingredients. If you mix it like you would pancake batter, you’ll end up with tough, cake-like squares instead of the chewy Mini Egg Brownies you deserve. Stop mixing the moment it looks uniform!
Storage and Saving Your Leftover Mini Egg Brownies
So, you managed to save some of these incredible treats? Good for you! Honestly, these are so good they rarely last past the first day in my house, but if you do have leftovers, keeping them fresh is simple. The main thing to remember when storing Mini Egg Brownies is to keep them away from air, which is what dries them out.
I find that airtight containers work best, but you have to do one little thing first to keep them from sticking together. You’ll want to store them in a single layer if possible, or separate the layers with parchment paper. They stay wonderfully fudgy at room temperature for about three or four days. If you need them to last longer, the fridge is fine, but let them sit out for 20 minutes before eating to soften up that chocolate again! For more baking inspiration, follow us on Facebook.
| Storage Method | Duration | Tip for Best Results |
|---|---|---|
| Airtight Container (Room Temp) | 3-4 days | Place parchment between layers to prevent sticking. |
| Freezer (Wrapped Tightly) | Up to 3 months | Wrap individual brownies before placing them in the freezer bag. |
Frequently Asked Questions About Mini Egg Brownies
I get so many questions when people try this recipe for the first time! It’s that perfect mix of rich chocolate and springy fun that everyone wants to get just right. Here are the things people ask me most often about achieving the best results with these Mini Egg Brownies.
How long should I cool my Mini Egg Brownies before cutting?
This is the most common question, and the answer is always: completely! I know it’s torture waiting when they smell this amazing, but you have to let them cool fully, usually about two hours on the counter. If you try to cut them while they are even slightly warm, the center—which is supposed to be wonderfully fudgy—will ooze out everywhere, and your squares won’t look clean. Patience is the final ingredient for perfect slices!
Can I substitute the chocolate eggs in this recipe?
Absolutely! While I love the pastel look of the classic candy eggs for spring, this recipe is very adaptable. If you can’t find them, or if you’re making these in the fall, feel free to swap them out. You can use M&Ms, chopped peanut butter cups, or even just extra chopped semi-sweet chocolate for an intensely rich, purely fudgy brownies experience. Just stick to about 1 1/4 cups total mix-ins! If you are looking for other chocolate treats, check out our recipe for Hot Chocolate Cookies.
Why is my top not getting that shiny crinkle finish?
If you aren’t seeing that beautiful, thin, shiny crust, you almost certainly didn’t whisk the eggs and sugar long enough. Remember I said five full minutes? That vigorous whisking creates the sugar-protein structure that bakes into the shiny layer. If you stop too soon, you just get a dull top. Make sure your eggs are room temperature before you start whisking, too—that really helps trap the air needed for that perfect crinkle top!
Understanding the Estimated Nutrition in Mini Egg Brownies
Now, I’m definitely not a nutritionist—I’m just a person who loves to bake! So, please take these numbers with a grain of salt, as they are just estimates based on the core ingredients we used in these decadent Mini Egg Brownies. When you’re dealing with butter, sugar, and chocolate, we know it’s not exactly a salad, but knowing the basics helps!
These estimates are based on dividing the recipe into 16 squares, which is a pretty standard size for a rich brownie like this. It gives you a good idea of what you’re indulging in.
| Nutrient | Estimated Amount Per Brownie |
|---|---|
| Calories | Around 210 |
| Fat | About 10g |
| Carbohydrates | Roughly 28g |
| Protein | Approximately 3g |
Since we used a solid chocolate bar and not chips, the fat content is rich, but those carbs come mostly from the sugar and the chocolate coating on the eggs. Treat yourself—you totally earned these fudgy squares! For more sweet inspiration, see our post on Medium.
Print
5 Flawless Mini Egg Brownies Secrets
- Total Time: 43 minutes
- Yield: 16 brownies
- Diet: Omnivore
Description
Chewy Mini Egg Brownies with a shiny crinkle top, packed with pastel candy-coated chocolate eggs. These are rich, fudgy, and perfect for spring.
Ingredients
- ½ cup salted butter, melted and hot
- 1 cup granulated sugar
- 4 ounces semi-sweet baking chocolate bar, chopped
- 2 large eggs, room temperature
- 1 teaspoon alcohol-free vanilla flavoring
- ¾ cup all-purpose flour
- ¼ cup unsweetened cocoa powder, sifted
- ½ teaspoon salt
- 1 ¼ cups pastel candy-coated milk chocolate eggs, divided
Instructions
- Preheat your oven to 350°F. Line an 8×8-inch square baking pan with parchment paper, leaving an overhang on two sides for easy removal.
- Place the chopped semi-sweet chocolate in a microwave-safe bowl. Heat in 20-second intervals, stirring in between, until completely smooth and melted. Set aside to cool slightly.
- Pour the hot melted butter and granulated sugar into a large mixing bowl. Whisk by hand for 2 to 3 minutes until the mixture looks well-combined and glossy.
- Add the eggs and alcohol-free vanilla flavoring to the butter mixture. Whisk vigorously for a full 5 minutes until the batter transforms into a pale, thick ribbon-like consistency.
- Pour the melted chocolate into the egg mixture and whisk until the color is uniform.
- Add the flour, sifted cocoa powder, and salt. Switch to a rubber spatula and fold gently just until the dry streaks disappear; do not overmix.
- Fold in 1 cup of the candy-coated chocolate eggs until evenly distributed.
- Scrape the batter into the prepared pan and smooth the top with your spatula.
- Press the remaining ¼ cup of chocolate eggs gently into the surface of the batter for a festive look.
- Bake for 26 to 28 minutes. The edges should be firm and the center set (internal temperature around 180°F to 200°F), though a toothpick may still have moist crumbs.
- Cool the brownies completely in the pan on a wire rack before using the parchment overhang to lift them out for slicing.
Notes
- Vigorously whisk the eggs and sugar to develop the glossy, paper-thin crust.
- Use room temperature eggs for better incorporation.
- Do not overmix the batter once the flour is added.
- Cool completely before slicing for clean cuts.
- Prep Time: 15 minutes
- Cook Time: 28 minutes
- Category: Dessert
- Method: Baking
- Cuisine: American