Oh my gosh, you are going to absolutely adore this recipe! Forget everything you thought you knew about complicated weekend baking projects. These mini egg brownies are the answer to every chocolate craving you have this spring. Seriously, I used to struggle so much with brownies—they were either cakey messes or raw puddles in the middle. It took me forever to figure out the perfect balance!
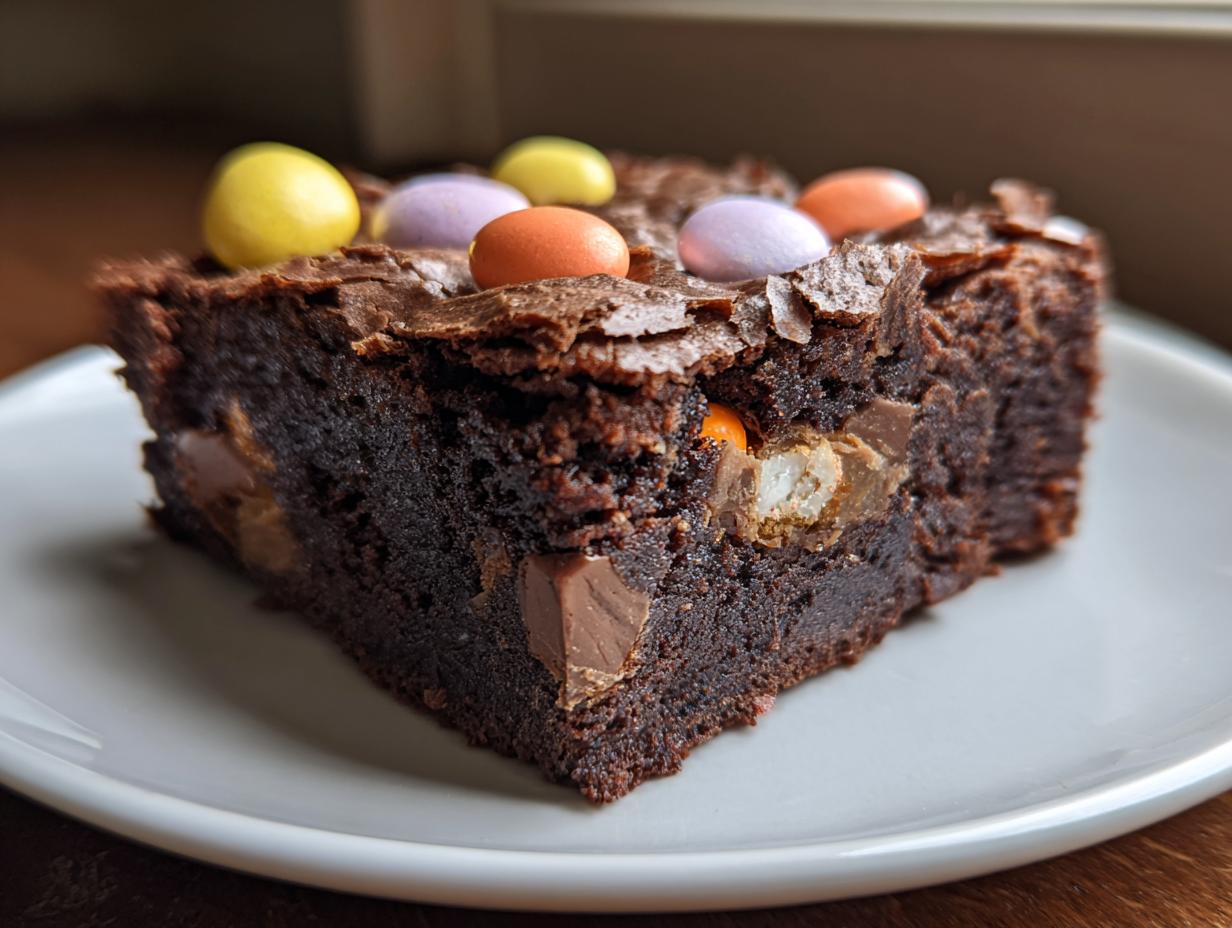
But this one? This is magic. It’s an incredibly easy one-bowl wonder. You dump the wet stuff, you whisk it until it’s glossy and gorgeous, and then you gently fold everything else in. That’s it! The texture is exactly what I always chased: perfectly chewy, deeply chocolatey, and topped with that irresistible crunch from the candy eggs. When you pull these mini egg brownies out of the oven, the smell alone is worth the effort. Trust me, you need this recipe in your life right now.

Gather Your Ingredients for Perfect Mini Egg Brownies
The beauty of these mini egg brownies is that they come together so fast, but you still need to make sure everything is ready to go before you start mixing. Unlike some fussy recipes, this one is forgiving, but prepping your ingredients first keeps the process smooth and prevents that panic when you realize you forgot to chop the chocolate!
I always lay everything out on my counter before I even think about turning on the oven. It’s my little assembly line, and it ensures I don’t accidentally dump in too much cocoa powder or forget the vanilla. Getting these components ready is half the battle won for perfect, chewy brownies. If you are looking for other chewy treats, check out my recipe for chocolate chip sweet sourdough recipe.
Essential Components for Rich Mini Egg Brownies
Here’s what you’ll need on hand for these incredible mini egg brownies. Pay close attention to how the chocolate and flour need specific handling:
| Ingredient | Amount | Preparation Note |
|---|---|---|
| Semi-Sweet Baking Chocolate | 4 ounces | Chopped |
| Unsalted Butter | 1/2 cup | Melted |
| Granulated Sugar | 1 cup | |
| Large Eggs | 2 | Room temperature is best! |
| Vanilla Extract | 1 teaspoon | |
| All-Purpose Flour | 3/4 cup | Spooned and leveled |
| Unsweetened Cocoa Powder | 1/4 cup | |
| Salt | 1/2 teaspoon | |
| Candy-Coated Chocolate Eggs | 1 cup + extra for topping |
Equipment Needed for Your Baking Project
You don’t need a fancy stand mixer for this, which is another reason I love it! You’ll want a sturdy 8×8-inch baking pan. Make sure you have parchment paper ready to line it—that overhang is your best friend for lifting the whole thing out later.
Also grab a few mixing bowls: one small one for the chocolate, and a large one where all the whisking magic happens. And of course, a good rubber spatula for folding everything together at the end. That’s really all you need! You can find more baking inspiration on our Pinterest page.
Step-by-Step Guide to Making Amazing Mini Egg Brownies
Okay, are you ready to turn this simple ingredient list into the best mini egg brownies you’ve ever tasted? Don’t rush this part, but also don’t stress! We’re moving quickly here, but precision in these early steps is what gives us that amazing fudgy chew later on.
Preparing the Pan and Melting the Chocolate
First things first, get that oven preheated to 350°F. While it warms up, line your 8×8-inch pan with parchment paper. I mean it—leave big “handles” or overhangs on the sides. This is how we get the brownies out in one perfect slab later without breaking them into sad little pieces!
Next, handle the chocolate. Chop it up, put it in a microwave-safe bowl, and zap it in short bursts—20 seconds at a time—stirring in between. You want it completely smooth, but stop before it gets scorching hot. We need it to cool down just a touch before it meets the butter and sugar, otherwise, it can mess with our texture later. Set that bowl aside for now.
Creating the Chewy Brownie Base
Now for the real texture work! In your big mixing bowl, dump in that melted butter and all the sugar. You need to whisk this together for a good two or three minutes until it looks glossy. This starts dissolving the sugar and setting up the base structure. Don’t cheat this part!
Once it’s glossy, toss in your room temperature eggs and the vanilla. This is where you need some elbow grease! Whisk this mixture vigorously for a solid four or five minutes. I know, it feels like a long time, but it’s crucial! You’re incorporating air, and this air is what gives these mini egg brownies that beautiful, slightly lighter interior and that shiny top we all crave. Keep going until the mixture looks lighter in color and feels thicker when you lift the whisk.
Combining Wet and Dry Mixtures Gently
Now, gently pour that slightly cooled, melted chocolate into your glossy egg mixture and whisk just until it’s blended. Don’t worry if it looks a little streaky; that’s fine!
In a separate small bowl, sift together your flour, cocoa powder, and salt. Sifting is important here because cocoa powder loves to clump up! Now, gently dump the dry stuff over the wet ingredients. Take your spatula and fold—don’t stir!—until you see *just* combined. If you see a few streaks of flour, stop folding. Overmixing the flour is the fastest way to make your brownies tough instead of chewy. Remember: gentle hands! For more baking tips, see our Medium profile.
Folding in the Chocolate Eggs and Baking
Finally, the fun part! Gently fold in your cup of candy-coated chocolate eggs. You want them distributed, but don’t mash them up. Spread the batter evenly into your prepared pan. I like to press a few extra eggs right on top for decoration before it goes into the oven.
Bake them for 26 to 28 minutes at 350°F. You are looking for the edges to look set and maybe slightly pulling away from the parchment paper. When you insert a toothpick near the center, you want it to come out with moist crumbs clinging to it—not wet batter, but not totally dry either! Let these babies cool completely in the pan before you lift them out and slice. Patience pays off for the best mini egg brownies!
Tips for Achieving Fudgy Mini Egg Brownies Success
Getting these mini egg brownies to that perfect fudgy, chewy spot takes just a couple of small tricks that experienced bakers know. It’s mostly about what you do right after they come out of the oven, honestly. If you rush the cooling, you ruin the structure we worked so hard to build!
The secret to that beautiful, almost glass-like shiny top? That comes from the vigorous whisking of the eggs and sugar we did earlier. You are essentially dissolving that sugar into the eggs while whipping in air. If you don’t whisk long enough, the top stays matte. So, even though it feels like forever, keep whisking until it gets light and thick!
Why Cooling Completely Matters for Your Mini Egg Brownies
This is the hardest part, but you absolutely must let your mini egg brownies cool completely—and I mean completely—before you even think about slicing them. When they are hot, the internal structure is still super soft and gooey. If you try to cut them now, they will just smear and stick to your knife, leaving you with a messy pile instead of neat squares.
Cooling allows the fats to solidify again, locking in that fudgy texture. Once they are totally cool, you can use those parchment handles to lift the whole slab out onto a cutting board. Then, a big sharp knife (wiped clean between cuts!) gives you those clean, beautiful edges. Trust me, waiting an hour or two is worth seeing a perfect slice of chewy goodness. If you want to see how we handle other brownie variations, check out our small batch brownies fudgy cure.
Ingredient Notes and Simple Swaps
Don’t skip the room temperature eggs; they whip up way better and incorporate without shocking the melted chocolate. If you forget to take them out, just place the whole eggs in a bowl of warm (not hot!) water for about five minutes. That little trick works wonders.
As for the chocolate, I insist on good quality baking chocolate rather than just chips. Chips have stabilizers that keep them from melting smoothly, and we want smooth! If you run out of semi-sweet, dark chocolate works great, but you might want to bump the sugar up by a tablespoon to balance the bitterness. But for the candy eggs? Stick to those, they are the star of the show!
Storing and Reheating Your Delicious Mini Egg Brownies
It’s rare that I have leftovers because my family devours these, but when I do, knowing how to store them correctly keeps that fudgy texture intact. You want to protect them from air so they don’t dry out. Since these are so rich, they actually keep really well for several days if you treat them right. Don’t just leave them sitting on the counter uncovered! You can also connect with us on Facebook for more updates.
Best Practices for Storing Leftovers
The key here is an airtight container. Once the brownies are completely cool—and I mean stone cold—layer them carefully in a container. I like to put a small piece of parchment paper between layers so they don’t stick together, especially if they are topped with extra eggs.
Here’s a quick guide on how long they last and how to bring them back to life if you want that melted chocolate feel again:
| Storage Method | Duration | Reheating Tip |
|---|---|---|
| Airtight Container (Counter) | Up to 3 days | Enjoy at room temperature for softest chew. |
| Airtight Container (Refrigerator) | Up to 1 week | Microwave for 10-15 seconds to soften. |
| Freezer (Wrapped Tightly) | Up to 3 months | Thaw on the counter overnight before eating. |
Frequently Asked Questions About Chewy Brownies
I get so many questions about these brownies because everyone wants that perfect, shiny, chewy square! Here are the answers to the most common things folks ask me when they try this recipe for the first time. Don’t worry if you have questions; baking is all about learning as you go!
If your first batch isn’t perfect, just try again! Sometimes the altitude or even the humidity can change things slightly, but sticking to the whisking instructions usually solves 99% of texture issues.
Can I use different types of candy-coated chocolate eggs in these mini egg brownies?
You absolutely can play around here, but just know it might change the final look and texture a little bit. I love the classic ones because they hold their shape well and give that nice color contrast. If you use larger eggs, they might sink more into the batter, so you might want to only fold in half a cup and save the rest for the top decoration.
If you can’t find the candy eggs, chopped-up chocolate bars or even M&Ms work in a pinch, but you’ll lose that springtime vibe these mini egg brownies are famous for! Just make sure whatever you add is roughly the same size so they distribute evenly.
How do I get that signature shiny top on my brownies?
This is the million-dollar question! It all comes down to that vigorous whisking step where you combine the eggs and sugar. You need to whisk them until the mixture is visibly lighter in color and thickens up—you’re building a meringue-like structure without adding any whites separately. It should look glossy and almost ribbon-like when you lift the whisk.
If you under-whisk, the sugar doesn’t fully dissolve, and you end up with a dull, matte top. If you overmix the flour later, you develop gluten and get a cakey texture, which also ruins the shine. So, whisk those eggs hard, fold gently, and you’ll have that beautiful, crackly top that makes these treats look professional!
Sharing Your Homemade Mini Egg Brownies Experience
I truly hope you loved making these rich, chewy mini egg brownies as much as I love eating them! They’re honestly my go-to spring dessert now. Once you’ve sliced them up and had a taste, I would just love to hear what you think!
Did you manage to get that shiny top? Did your family love the crunch? Please leave a rating below or drop a comment telling me how your batch turned out. Happy baking!
Print
3 Amazing mini egg brownies Chewy Secret
- Total Time: 43 minutes
- Yield: 9 large or 16 small brownies
- Diet: Omnivore
Description
Bake rich, chewy mini egg brownies with a shiny top and chocolate crunch. This is an easy one-bowl recipe perfect for a spring dessert.
Ingredients
- 4 ounces semi-sweet baking chocolate, chopped
- 1/2 cup unsalted butter, melted
- 1 cup granulated sugar
- 2 large eggs, room temperature
- 1 teaspoon vanilla extract
- 3/4 cup all-purpose flour, spooned and leveled
- 1/4 cup unsweetened cocoa powder
- 1/2 teaspoon salt
- 1 cup candy-coated chocolate eggs, plus extra for topping
Instructions
- Preheat oven to 350°F. Line an 8×8-inch baking pan with parchment paper, leaving overhang for easy removal.
- Melt the chopped chocolate in a microwave-safe bowl in 20-second intervals, stirring until smooth. Set aside to cool slightly.
- Whisk melted butter and sugar in a large bowl for 2–3 minutes until glossy.
- Add eggs and vanilla. Whisk vigorously for 4–5 minutes until the mixture lightens in color and thickens slightly.
- Pour in the melted chocolate and whisk until combined.
- Sift flour, cocoa powder, and salt over the wet ingredients. Gently fold the dry ingredients into the wet using a spatula until just combined. Avoid overmixing.
- Fold in 1 cup of mini chocolate eggs.
- Spread the batter evenly into the prepared pan. Press extra mini eggs into the top.
- Bake for 26–28 minutes, or until the center is just set and a toothpick inserted comes out with a few moist crumbs.
- Cool completely in the pan before slicing into squares.
Notes
- Room temperature eggs incorporate better into the batter.
- Do not overmix the flour to keep the brownies chewy.
- Cooling completely ensures clean slices.
- Prep Time: 15 minutes
- Cook Time: 28 minutes
- Category: Dessert
- Method: Baking
- Cuisine: American