Oh my goodness, have you ever tried to make bread at home and ended up with something that felt more like a brick than a pillow? I’ve been there! That’s why I’m so excited to share my absolute favorite loaf with you today. Seriously, if you’ve been intimidated by yeast, put those fears away right now.
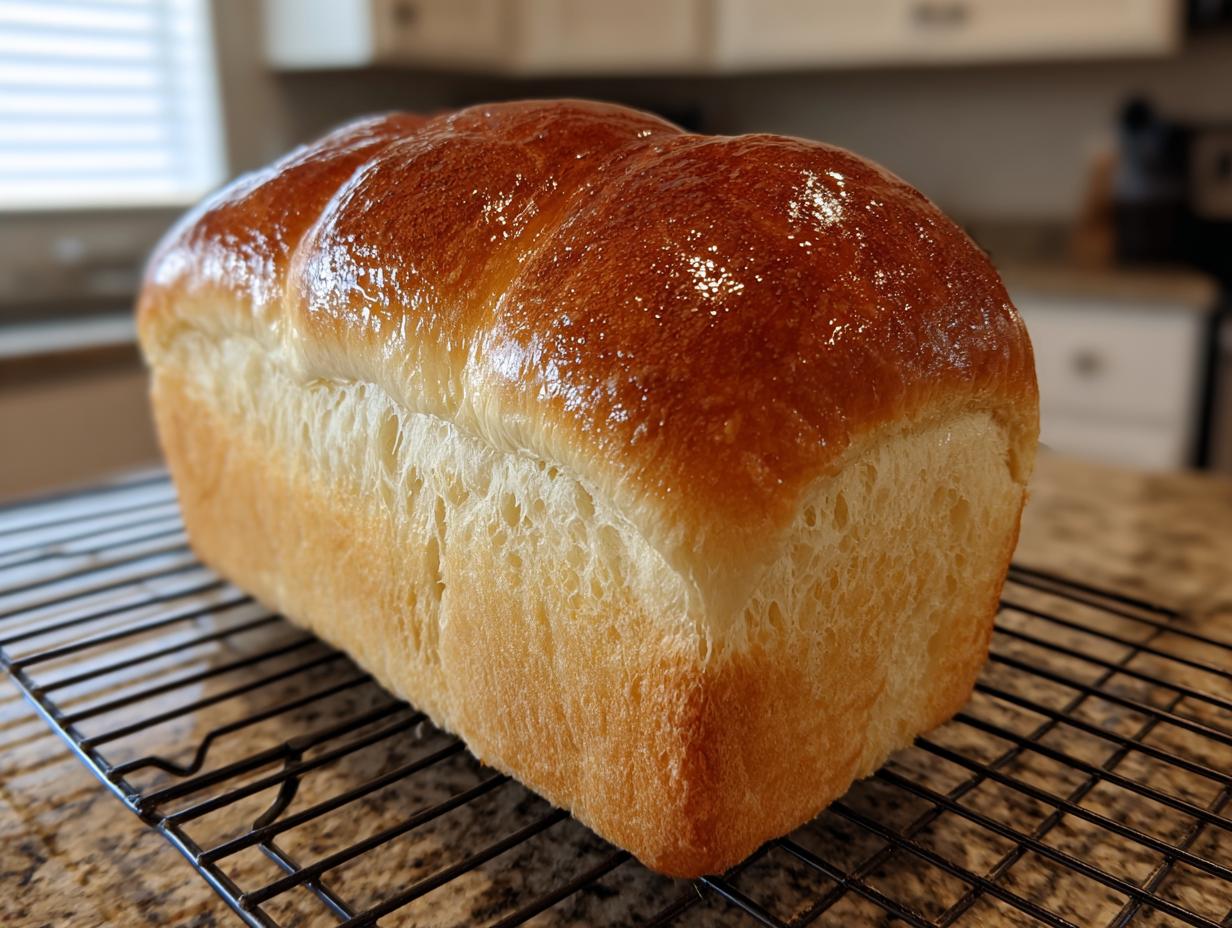
This isn’t just any bread; this is the softest, fluffiest, most tender thing you’ll ever pull out of your oven. It’s lightly sweet—perfect for slathering with butter or making the world’s best grilled cheese. I’ve spent ages perfecting this technique so that even if you’re a total beginner, you’ll nail it on the first try. This level of detail comes from years of trial and error, making sure every single instruction is trustworthy.
When people ask me for an easy bread that delivers on texture, I point them straight to my Milk Bread Recipe. It relies on simple ingredients and the magic of warm milk to get that incredible height. Trust me, once you smell this baking, you’ll never go back to the store-bought stuff! 
Why This Milk Bread Recipe is Your New Favorite
I know what you’re thinking—bread is hard. But I promise you, this loaf changes everything! The secret is the milk and that little bit of butter folded in at the end. It yields a crumb so fine and fluffy it practically melts in your mouth. It’s tender, never dry, and has just the right amount of sweetness for any occasion.
This is genuinely a beginner-friendly bake. You don’t need a fancy stand mixer, though it helps! The steps are straightforward, and the results are professional-looking every time. If you’ve ever wanted to conquer yeast baking, this Milk Bread Recipe is your perfect starting point. I guarantee you’ll be beaming when you slice into that first warm piece.
Equipment Needed for Your Milk Bread Recipe
You don’t need a huge arsenal of tools for this fantastic Milk Bread Recipe. Honestly, just a good sturdy bowl and a clean counter for kneading will get you started. Make sure you have a standard 9×5 inch loaf pan ready to go, and a nice wire rack for cooling down once it’s out of the oven. That’s basically it!
Gathering Ingredients for the Perfect Milk Bread Recipe
Okay, let’s talk ingredients! This is where the magic for our incredibly soft Milk Bread Recipe really starts. The beauty of this loaf is that it uses pantry staples, but the *way* we use them makes all the difference. You don’t need specialty flours or anything crazy; just standard bread flour will give you that beautiful, tall structure.
I always lay everything out before I start mixing, which Grandma called *mise en place*. It prevents those frantic mid-recipe searches! We need the yeast to wake up happy, and for that, the milk temperature is critical. Don’t just eyeball it; use a thermometer if you have one! Having the egg at room temperature also helps it incorporate smoothly without shocking the yeast mixture.
This list might look long, but once you see how perfectly everything blends, you’ll understand why this Milk Bread Recipe works so reliably. It’s all about balance! 
Ingredient Preparation Notes
Before you even turn on the oven, a few small steps make a huge difference in your Milk Bread Recipe. The whole milk absolutely needs to be warm—I aim for 110 degrees Fahrenheit. If it’s too hot, you’ll kill your yeast, and if it’s too cold, they just won’t wake up! Also, make sure that egg has been sitting out for about half an hour so it’s room temperature.
The butter should be softened, not melted. That soft texture allows it to incorporate fully during the kneading phase, which is key to that tender final crumb. These little prep details are what separate a good loaf from a *great* one!
| Ingredient | Amount | Preparation Note |
|---|---|---|
| Bread Flour | 3 1/2 cups | |
| Whole Milk | 1 cup | Warm about 110\u00b0F |
| Granulated Sugar | 3 tablespoons | |
| Active Dry Yeast | 2 1/4 teaspoons | |
| Large Egg | 1 | At room temperature |
| Unsalted Butter | 2 tablespoons | Softened |
| Salt | 1 teaspoon |
Step-by-Step Instructions for Your Milk Bread Recipe
Alright, time to get our hands dusty! Making this Milk Bread Recipe is really just a series of simple, satisfying steps. We start by waking up the yeast, which is always my favorite part because you know things are about to get exciting. Take your warm milk—remember, about 110 degrees? Pour that into your big mixing bowl.
Toss in your yeast and the sugar. Give it a quick little swirl, and then we wait. About five minutes is all it takes for it to get foamy and bubbly. If it looks like a creamy head on a root beer float, you’re golden! If it does nothing, your milk was too hot or too cold, so start over. Don’t skip that foam check!
Once it’s happy, whisk in your room-temperature egg and the salt. Now for the flour. Add it all in and mix it up until it starts looking like a shaggy, messy ball of dough. It won’t look pretty yet, so don’t panic!
This is where the real work begins for that amazing texture. You need to knead this dough for a good 8 to 10 minutes, either by hand on a lightly floured surface or with your mixer hook. You’re looking for smooth and elastic—it should stretch a bit without tearing right away. Once it feels good, it’s time for the fat!
Slowly knead in your softened butter, a little bit at a time. This can feel weird because the dough might look like it’s breaking apart at first, but keep working it! The butter will get completely absorbed, and suddenly, the dough will transform into this incredibly soft, supple pillow. That’s the sign you nailed the kneading for this Milk Bread Recipe.
Shape it into a nice ball and put it in a bowl you’ve lightly greased—just a slick of oil works fine. Cover it up with plastic wrap or a damp towel and let it hang out somewhere warm for about an hour to 75 minutes. It needs to double in size; don’t rush this first rise!
When it’s puffy, gently punch the air out—don’t smash it, just deflate it nicely. Then shape it into a log and tuck it snugly into your greased loaf pan. Cover it again and let it have its second nap, which is usually shorter, around 35 to 45 minutes. Watch for it to crown just above the rim of the pan.
Mastering the Rise Times in Your Milk Bread Recipe
Honestly, the rising times are the secret weapon for a truly stellar Milk Bread Recipe. That first rise builds the flavor and structure, so let it double completely. Don’t stick it near a drafty window! The second proofing is what gives you that beautiful dome on top. If you under-proof it, the bread will be dense; if you over-proof it, it might collapse in the oven. Patience here pays off big time in fluffiness!
Baking Tips for a Golden Finish
Get your oven hot—350 degrees Fahrenheit is the magic number here. Bake the loaf for about 30 to 35 minutes until it’s deeply golden brown on top. Don’t trust your eyes alone! Use an instant-read thermometer right in the center of the loaf. You’re looking for 190 degrees Fahrenheit. That ensures it’s baked through without drying out the edges.
Tips for Success with Homemade Bread Baking
When you’re kneading, especially when incorporating that final bit of butter, the dough will feel sticky and messy for a minute or two. Don’t grab for extra flour! Resist the urge! Keep kneading, and trust the process. The gluten network needs to develop before it can fully absorb that fat, and adding flour now will just make your final loaf tougher.
The dough should feel soft, almost like a baby’s cheek, when it’s perfectly kneaded. If you poke it gently, it should spring back slowly. That elasticity is what traps the gases created by the yeast, leading directly to that fine, fluffy crumb we love so much.
Remember to be gentle when you punch it down after the first rise. We want to release the big bubbles but keep the small ones intact for that tender texture. A gentle shaping technique keeps the loaf smooth and ready for a beautiful rise in the pan!
Storing and Reheating Your Milk Bread Recipe
This beautiful, tender loaf is best eaten the day you bake it, but luckily, it stores really well! For short-term storage, just wrap your cooled Milk Bread Recipe tightly in plastic wrap or pop it into an airtight container. It stays soft on the counter for about two or three days. If you want it to last longer, freezing is the way to go! You can find more baking tips on our blog.
When you’re ready to enjoy a slice later, a quick warm-up brings back that fresh-from-the-oven softness in seconds. Never let that amazing texture go to waste!
| Storage Method | Instructions |
|---|---|
| Counter Storage (1-3 Days) | Wrap tightly in plastic wrap or place in an airtight container at room temperature. |
| Freezing (Up to 3 Months) | Slice the cooled loaf, wrap slices individually in plastic wrap, then place in a freezer bag. |
| Reheating Slices | Microwave for 10-15 seconds, or toast lightly. |
| Reheating Whole Loaf | Wrap loosely in foil and warm in a 300\u00b0F oven for 10 minutes until soft again. |
Common Questions About Making Milk Bread
I get so many questions about baking bread, especially yeast breads. It’s totally normal to have a few bumps in the road when you’re starting out! Here are a few things people often ask me about this soft loaf. Feel free to connect with us on Facebook for more community interaction.
Q1. My dough didn’t double in size during the first rise. What went wrong?
Nine times out of ten, it’s your water temperature. If the milk was too hot, it killed the yeast right away. If it was too cool, the yeast just woke up slowly. Next time, make sure that milk is right around 110 degrees. Also, check the temperature of your kitchen! Cold kitchens slow down yeast significantly, so try putting the bowl in a slightly warmer spot, like inside an oven with just the light on.
Q2. Can I substitute whole wheat flour for the bread flour?
You absolutely can mix them, but don’t go 100% whole wheat if you want that signature fluffy texture. Whole wheat flour doesn’t have the same strong gluten structure as bread flour, so it won’t rise as high or be as tender. Try replacing just half a cup of the bread flour with whole wheat to start. It adds a nice nutty flavor!
Q3. Why does the recipe call for butter last?
This is a classic technique! We add the fat (butter) after the gluten has already developed through kneading the flour, water, and yeast. If you add the fat too early, it coats the flour particles and stops the gluten from forming properly. Adding it last ensures you get that strong, elastic dough that can hold all the air bubbles, resulting in that super fine crumb we are aiming for.
Share Your Experience with This Milk Bread Recipe
I put my heart and soul into making sure this Milk Bread Recipe works perfectly for you, and I just can’t wait to hear how it turns out! Did you slice it warm? Did you make the world’s best toast? Please drop a comment below and let me know your results. Seriously, five stars if you loved it! You can also save this recipe on Pinterest.
Print
Amazing Milk Bread Recipe: 1 Secret Tip
- Total Time: 55 minutes
- Yield: 10 slices
- Diet: Vegetarian
Description
Soft homemade milk bread that is fluffy tender and lightly sweet. This easy loaf recipe works well for sandwiches, toast, and daily baking.
Ingredients
- 3 1/2 cups bread flour
- 1 cup whole milk warm about 110°F
- 1 large egg at room temperature
- 3 tablespoons granulated sugar
- 2 tablespoons unsalted butter softened
- 2 1/4 teaspoons active dry yeast
- 1 teaspoon salt
Instructions
- Warm the milk to about 110°F and pour into a large mixing bowl.
- Add the yeast and sugar and stir briefly then rest for 5 minutes until foamy.
- Whisk in the egg and salt until combined.
- Add the flour and mix until a shaggy dough forms.
- Knead by hand or mixer for 8 to 10 minutes until smooth and elastic.
- Knead in the butter until fully absorbed and the dough is soft.
- Shape the dough into a ball place in a greased bowl and cover.
- Let rise in a warm spot for 60 to 75 minutes until doubled in size.
- Punch down the dough and shape into a loaf.
- Place into a greased 9 by 5 inch loaf pan and cover.
- Let rise for 35 to 45 minutes until the dough crowns just above the pan.
- Bake at 350°F for 30 to 35 minutes until golden and the center reaches 190°F.
- Cool in the pan for 10 minutes then transfer to a rack to cool completely.
Notes
- This bread is tall, fluffy, and tender with a fine crumb.
- It is beginner friendly.
- Ideal for slicing sandwiches or enjoying warm with butter.
- Prep Time: 20 minutes
- Cook Time: 35 minutes
- Category: Bread
- Method: Baking
- Cuisine: American