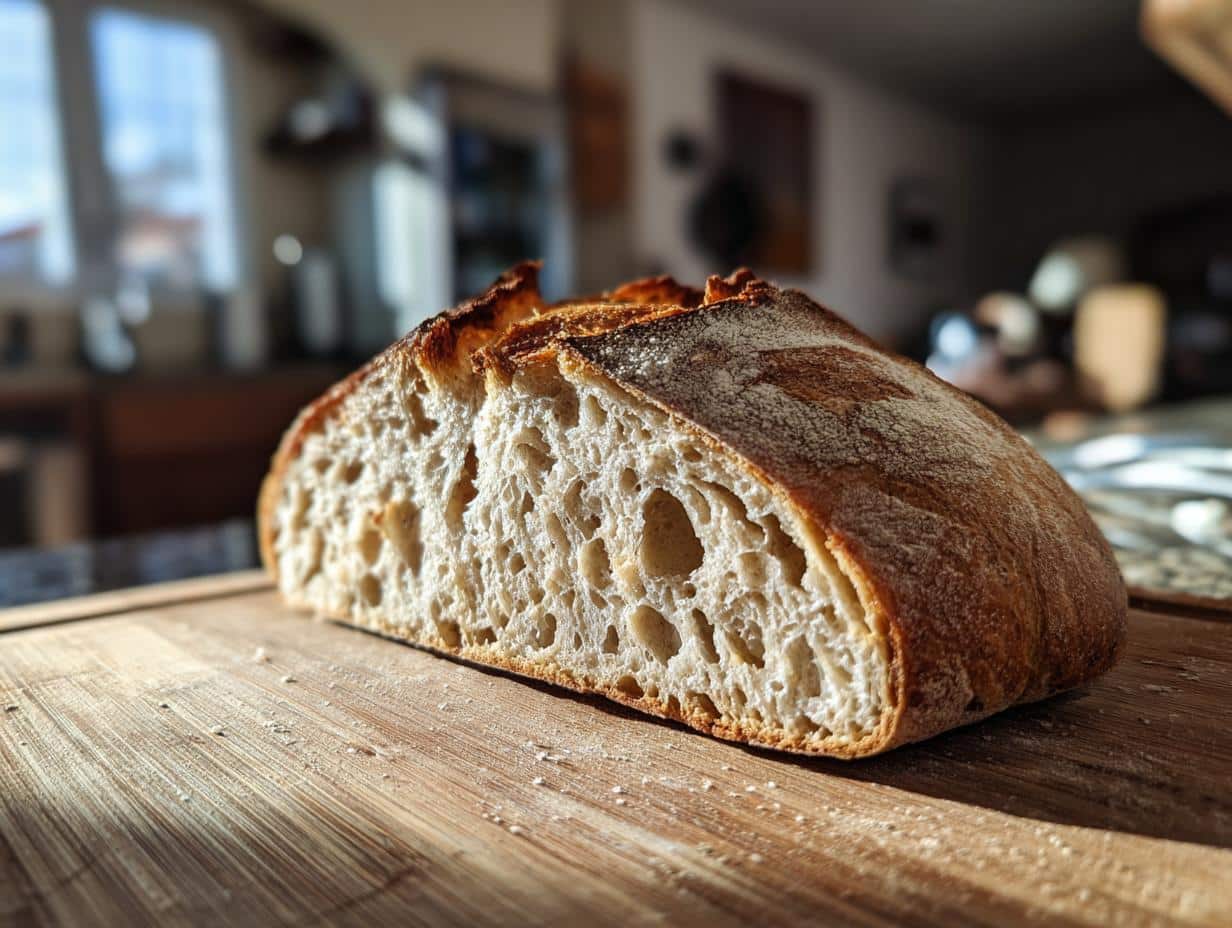
There’s nothing quite like the smell of freshly baked sourdough filling your kitchen—that warm, yeasty aroma that makes you feel like a professional baker even when you’re just wearing pajamas. My love affair with Dutch oven sourdough bread started during lockdown (like so many others!), when I finally had the time to nurture my starter like a pet. After countless loaves—some glorious, some hockey pucks—I landed on this overnight method that gives you that perfect crackly crust and soft, holey interior every home baker dreams about.
What makes this Dutch oven sourdough bread special? That magical overnight proof in the fridge. It’s like the bread fairy visits while you sleep, transforming your dough into something with incredible depth of flavor. The Dutch oven does the rest, creating that professional bakery-style crust we all crave. Trust me, once you pull that first golden boule from your oven, you’ll understand why people get obsessed with sourdough baking!

Why You’ll Love This Dutch Oven Sourdough Bread
This isn’t just another bread recipe—it’s a game-changer for home bakers. Here’s why you’ll be making it on repeat:
- Crackly, golden crust that shatters when you tap it (thank you, Dutch oven magic!)
- Deep, tangy flavor that only comes from slow, overnight fermentation—like a flavor booster for your tastebuds
- No fancy equipment needed beyond a Dutch oven and some patience (though I won’t judge if you want to buy a cute proofing basket)
- Impressive results that’ll make your friends think you trained at a Parisian boulangerie
- That addictive chew with just the right amount of air pockets—perfect for catching pools of melted butter
The best part? It’s so much easier than it looks. I promise—if I can do it after my early hockey puck failures, so can you!
Ingredients for Dutch Oven Sourdough Bread
Here’s the beautiful thing about sourdough—it only needs four simple ingredients to work its magic. But oh, how those four ingredients matter! Here’s what you’ll need for that perfect loaf:
- 500 grams organic bread flour (I like King Arthur or a good local mill—the protein content makes all the difference)
- 300 grams water (filtered if your tap water is heavily treated)
- 100 grams active sourdough starter (this means bubbly and recently fed—more on that below!)
- 10-15 grams fine sea salt (I use 12g for that perfect balance—enough to enhance flavor without overwhelming)
Notice I’m giving weights, not cups? Trust me on this—a kitchen scale is your best friend for consistent sourdough. Flour compacts differently in cups, but grams never lie!
Ingredient Notes & Substitutions
Flour: No bread flour? All-purpose works in a pinch, but your loaf might be slightly less chewy. For whole wheat lovers, try replacing up to 20% of the flour—any more and you’ll need extra water.
Starter: “Active” means your starter should be bubbly and at least doubled in size after its last feeding. If it’s been sitting hungry in the fridge, feed it 4-12 hours before baking. For more on starter health, check out this guide on maintaining a sourdough starter.
Salt: I prefer fine sea salt for even distribution, but any non-iodized salt works. Reduce to 10g if you’re watching sodium—but don’t skip it completely, or your bread will taste flat.
Equipment You’ll Need
Good news—you probably have most of this in your kitchen already! Here’s the short and sweet list:
- Dutch oven (5-7 quart works best—that enameled one you got as a wedding gift is perfect)
- Kitchen scale (non-negotiable for sourdough success—I use a $20 one that lives permanently on my counter)
- Large mixing bowl (glass or ceramic—nothing too small!)
- Proofing basket (or a clean bowl lined with a floured tea towel in a pinch)
- Parchment paper (for the hot Dutch oven transfer—don’t skip this or you’ll curse my name!)
That’s it! No fancy stand mixers or bread machines needed—just simple tools and your own two hands.
How to Make Dutch Oven Sourdough Bread
Okay, let’s get our hands doughy! This process looks more complicated than it is—think of it like a relaxing afternoon with some gentle dough yoga followed by a long nap (for the bread, not you). Here’s exactly how I make my favorite loaf, step by step.
Mixing and Stretch-and-Fold
First, grab your largest mixing bowl—this dough expands like a happy balloon. Combine the flour, water, starter, and salt with your hands until there’s no dry flour left. Don’t overthink it! At this stage, it’ll look shaggy and messy—that’s perfect.
Now the magic begins: the stretch-and-fold technique. Here’s my foolproof method:
- Mist your clean countertop and wet your hands (trust me, wet hands = no sticky disaster). Turn the dough out onto the damp surface.
- Stretch the top of the dough gently downward, then fold it over the bottom like you’re tucking in a blanket.
- Rotate the dough 90 degrees and repeat the stretch-and-fold with the sides.
- Place it back in the bowl seam-side down, cover with a damp towel, and let it rest for 30 minutes.
Repeat this stretch-and-fold routine three more times with 2-hour rests between each session. Yes, it’s a commitment—but this is what builds that gorgeous network of gluten strands for the perfect chewy texture!
Shaping and Overnight Proofing
After the final stretch-and-fold, it’s time to shape your soon-to-be beautiful boule. Lightly flour your counter and turn the dough out. Gently stretch and fold the edges toward the center, then flip it seam-side down. Use your floured hands to rotate and tuck the edges underneath, creating surface tension.
Now grab your proofing basket or a bowl lined with a floured tea towel. Gently place the dough seam-side up inside, cover with plastic, and—here’s the game-changer—pop it in the fridge overnight (8-12 hours). This slow fermentation is what gives sourdough its incredible flavor. I usually do this around 8pm so I can bake fresh bread for breakfast!
Baking in a Dutch Oven
Morning time! Preheat your oven to 450°F with the Dutch oven inside—yes, empty. Let it heat for a full hour (perfect time for coffee).
Carefully remove the scorching hot Dutch oven (oven mitts are your friends!). Place parchment paper on the counter and turn your chilled dough onto it—it should hold its shape beautifully. Now the fun part: scoring! Use a razor or sharp knife to make a ¼-inch deep cut—I like a simple X, but get creative.
Lift the parchment “sling” and carefully lower the dough into the Dutch oven. Cover with the lid and bake for 30 minutes. Then remove the lid (hello, gorgeous oven spring!) and bake another 20-30 minutes until deeply golden. That first whiff when you lift the lid? Pure baker’s bliss.
Tips for Perfect Dutch Oven Sourdough Bread
After baking more loaves than I can count, here are my can’t-live-without tips for sourdough success:
- Test your starter by dropping a spoonful in water—if it floats, it’s ready to party! If not, give it another feeding.
- Flour your proofing basket generously—that rustic flour pattern on your baked loaf isn’t just pretty, it prevents sticking.
- Resist the urge to peek while baking! Keeping the Dutch oven lid on the full 30 minutes creates steam for maximum oven spring.
- Let it cool completely before slicing—I know it’s hard, but cutting too soon turns that perfect crumb gummy.
- Use cold dough for scoring—straight from the fridge, it holds crisp lines beautifully when baked.
Remember—every imperfect loaf is just practice for your next masterpiece!
Serving and Storing Dutch Oven Sourdough Bread
That first slice of warm sourdough is pure heaven—but don’t rush this moment! Let your loaf cool completely (about 1 hour) before cutting—I know, the torture! Waiting lets the crumb set so you get those perfect holes instead of gummy bread. When you do slice, use a serrated knife with a gentle sawing motion to preserve that gorgeous crust.
My favorite ways to enjoy this bread:
- Classic – Thick slabs slathered with good butter and flaky sea salt
- Soup’s best friend – Dunked into tomato soup or beef stew (those nooks catch every drop!)
- Breakfast magic – Toasted with avocado or jam—the tangy sourdough cuts through richness perfectly
- Next-level sandwiches – Try grilled cheese with aged cheddar or a BLT with heirloom tomatoes
Storage tips from my trial and error: Leave the loaf cut-side down on your cutting board for the first day (the crust stays crisp!). After that, store in a paper bag for up to 3 days. Plastic bags turn the crust soft—great if you prefer that, but I’m team crackle!
For longer storage, slice and freeze in a ziplock bag. When cravings hit, pop frozen slices straight into the toaster—they’ll taste freshly baked. For whole loaves, wrap tightly in foil and reheat at 350°F for 10 minutes to bring back that just-baked magic.
Dutch Oven Sourdough Bread Nutrition
Let’s talk numbers—but don’t worry, this isn’t diet food math! Here’s the nutritional breakdown per slice (about 50g) of this heavenly sourdough. Keep in mind these are estimates because—as any sourdough baker knows—every loaf has its own personality!
| Calories: | 130 |
| Carbohydrates: | 26g |
| Protein: | 4g |
| Fiber: | 1g |
| Sodium: | 200mg |
| Fat: | 0.5g |
A few nutrition notes from my baking adventures: The fermentation process actually makes sourdough easier to digest than regular bread—it breaks down some of the gluten and phytic acid. And that tangy flavor? It means the good bacteria have been hard at work!
Remember: These numbers can vary based on your exact ingredients (especially if you use whole wheat flour or adjust the salt). But really—when you’re biting into that perfect crust, who’s counting?
FAQs About Dutch Oven Sourdough Bread
Can I skip the overnight proofing?
Technically yes, but you’ll miss out on that incredible depth of flavor! The cold fermentation is what gives Dutch oven sourdough bread its signature tang and chewy texture. If you’re in a rush, you can proof at room temperature for 4-6 hours instead—but trust me, the overnight method is worth the wait.
Why use a Dutch oven for sourdough bread?
That heavy pot works magic! The Dutch oven creates a steamy environment that mimics professional bakery ovens, giving you that crisp, blistered crust we all crave. Plus, it distributes heat evenly so your loaf bakes perfectly without burning. No Dutch oven? Try a heavy pot with a tight-fitting lid—just make sure the handle can handle the heat!
My dough didn’t rise much—what went wrong?
Don’t panic! This usually means your starter wasn’t active enough. Next time, do the float test—drop a bit of starter in water. If it floats, it’s ready. Also check your kitchen temperature—dough loves a cozy 70-75°F spot. Too cold = slow rise, too hot = overproofed dough.
Can I use all-purpose flour instead of bread flour?
Absolutely, though your loaf might be slightly less chewy. Bread flour’s higher protein content creates stronger gluten strands. If using AP flour, you might need slightly less water—the dough should be tacky but not sticky. My trick? Start with 280g water and add more as needed.
How do I know when my sourdough bread is done baking?
The golden color is your first clue, but the real test is the tap! Remove the loaf from the Dutch oven (carefully!) and knock on the bottom—it should sound hollow. An instant-read thermometer should read 200-210°F in the center. If unsure, bake 5 more minutes—better slightly over than under!
Share Your Dutch Oven Sourdough Bread
I’d love to see your beautiful sourdough creations! Tag me on Instagram @[yourhandle] or leave a comment below—let’s celebrate those crackly crusts and airy crumbs together. Every loaf tells a story, and I can’t wait to hear yours!
Print
50-Minute Dutch Oven Sourdough Bread Perfection
- Total Time: 12-16 hours (including proofing)
- Yield: 1 loaf
- Diet: Vegetarian
Description
A classic Dutch oven sourdough bread recipe with overnight proofing for perfect texture and flavor.
Ingredients
- 500 grams organic bread flour
- 300 grams water
- 100 grams sourdough starter
- 10–15 grams sea salt
Instructions
- Combine starter, flour, salt, and water in a large bowl. Knead until a uniform dough ball forms.
- Mist clean countertop and wet hands and dough top with water using a spray bottle. Turn dough onto wet counter, scrape out and rinse bowl leaving it wet.
- Perform stretch and fold: stretch dough top over bottom, sides over top, place seam side down in bowl. Rest 30 minutes.
- Repeat stretch and fold process three more times with resting periods of 2 hours after each fold, wetting hands and dough top each time before folding.
- Clean and dry counter; lightly flour surface and hands. Turn dough seam side up on floured surface.
- Pre-shape dough: gently stretch and fold side over side, top over bottom. Flip dough so seam side down, tuck edges to form a round shape. Cover with tea towel and rest 1 hour.
- Lightly flour dough and counter. Repeat stretching and folding, flipping seam side down, and shaping into a circular loaf.
- Coat a proofing basket or bowl lined with a floured towel with flour and optional bread toppings. Flour hands and flip dough seam side up into basket. Cover and refrigerate overnight for 8-12 hours.
- Preheat oven with Dutch oven and lid at 450°F. Remove Dutch oven carefully; place parchment paper on counter and turn dough seam side down onto parchment.
- Score dough with a sharp knife or scoring tool. Lift parchment corners and transfer dough into Dutch oven. Cover with lid.
- Bake covered at 450°F for 30 minutes. Remove lid and bake uncovered for 20-30 minutes until golden brown.
- Remove bread and cool at least 1 hour before slicing.
Notes
- Use active sourdough starter for best results.
- Adjust water quantity based on flour absorption.
- Dutch oven helps create a crisp crust.
- Overnight proofing enhances flavor.
- Prep Time: 4 hours (active)
- Cook Time: 50-60 minutes
- Category: Bread
- Method: Baking
- Cuisine: European