I have to tell you about the first time I tried to make Crispy Hasselback Potatoes With Butter and Salt. It looked so fancy, like something you’d only get at a steakhouse, but I was terrified of slicing them wrong! I remember almost giving up before I even preheated the oven. But I finally figured out the trick, and wow, the reward is unbelievable—potatoes that fan out perfectly, getting crunchy edges while staying fluffy inside. This isn’t just another side dish; this is the side dish that turns simple dinners into something special without making you sweat.
Trust me, if you can slice a potato, you can master this technique. My goal here is to show you exactly how to get that restaurant-quality crunch at home, even if you’ve never made a hasselback before. We’re going to build your confidence one buttery layer at a time!

Why This Recipe Works for Beginners
This recipe is fantastic for anyone who thinks fancy food is too complicated. Seriously, the ingredient list is tiny: potatoes, butter, salt, and pepper. That’s it! You don’t need any specialized gear either, just a sharp knife and something to keep your knife from going all the way through the potato—which I’ll show you how to use.
We focus on the technique, which is easier than it looks. By starting with simple ingredients, you immediately see how technique affects the final outcome. You’re going to feel like a total kitchen wizard when those potatoes fan out beautifully after the first bake. This method is foolproof, and it builds confidence fast for tackling more difficult potato dishes down the road.
Essential Components for Crispy Hasselback Potatoes With Butter and Salt
When you are working with so few ingredients, the quality of those ingredients really shines through. If you use sad, old potatoes, you’re going to get sad, lackluster results. I learned this the hard way early on—you need sturdy potatoes that can handle the heat and soak up all that delicious butter. That’s why I’m so particular about what goes into this recipe.
This isn’t the time to skimp! Using real, good-quality butter is non-negotiable; it’s what creates that beautiful, salty crust we are aiming for. Remember, these potatoes are the star of the show, not just a background player!
Ingredient List Clarity
When you gather your items, make sure you write them down exactly as I list them here. Being precise about the state of the ingredient is half the battle won. For example, you absolutely need to know if you’re using melted butter or softened butter, and for this recipe, it has to be melted so it can seep into all those little cuts you’re about to make. Don’t eyeball it!
- 4 large russet potatoes scrubbed and dried
- 4 tablespoons unsalted butter melted
- 1 teaspoon kosher salt
- ½ teaspoon black pepper
Necessary Kitchen Tools
The beauty of these Crispy Hasselback Potatoes With Butter and Salt is that you don’t need a mandoline or any fancy gadgets. Seriously, I keep my equipment list super simple so you can make this tonight! You’ll need a sharp knife, of course, and a standard baking sheet. That’s the bare minimum for baking.
The one “special” item I insist on—and this is crucial for beginners—is using two wooden spoons or a couple of chopsticks laid parallel on your cutting board. This little trick is my secret weapon for getting perfect, even slices without accidentally cutting all the way through the bottom. It’s simple physics, really, but it makes all the difference!
Step-by-Step Guide to Crispy Hasselback Potatoes With Butter and Salt
Okay, we’ve got our ingredients lined up, and we’re ready for the main event! Making these stunning Crispy Hasselback Potatoes With Butter and Salt is all about following the steps exactly, especially when it comes to slicing. Don’t rush this part; your patience here pays off huge later on.
Preparing the Potatoes for Maximum Crisp
First things first, crank that oven up to 425°F! Make sure your rack is sitting right in the middle so you get good heat circulation all around the potatoes. Now, for the slicing—this is where most people get nervous, but I promise you, the spoon trick is magic.
Take two wooden spoons—or even chopsticks if you have them—and lay them flat on your cutting board, parallel to each other, with space in between for one potato to rest. Place your scrubbed, dry potato in that gap. Now, grab your sharpest knife. Start slicing across the potato about a quarter-inch apart. As you cut, the knife will naturally hit the wood of the spoon and stop! It’s brilliant! You’ll make all those beautiful accordion cuts without accidentally slicing the bottom off the potato. Repeat this for every single potato, making sure those slices are even.
First Bake and Butter Application
Once they are all sliced up, arrange them directly on an unlined baking sheet. I like to give them a little space so the air can circulate and crisp up those edges. Take about half of your melted butter and just drizzle it right over the tops. Don’t be shy! Use a pastry brush or even the back of a spoon to gently encourage some of that butter down into the cuts. Seriously push it in there!
Next, hit them generously with the kosher salt and pepper. They need that seasoning now to start building flavor. Pop the tray into that hot oven and bake them for a full 30 minutes. When that timer goes off, pull them out carefully. You should see the slices starting to separate just a little bit already.

Achieving Tender Centers and Crisp Edges
Now for the payoff! Take a small knife—a paring knife works great—and gently wiggle it between a few of the slices to fan them out a bit more. This opens up the potato to the heat. Then, brush on the rest of that gorgeous melted butter. Make sure this second coat really sinks down deep; this is crucial for flavor distribution.
Send them back into the oven. They need another 30 to 35 minutes. Keep an eye on them after the 30-minute mark. You know they are done when the edges look deeply golden brown and super crisp, and when you stab the center with your knife, it slides right in without resistance. They should feel tender all the way through. Pull them out, give them one last tiny sprinkle of salt if you want, and serve them immediately while they are piping hot!
Tips for Success with Crispy Hasselback Potatoes With Butter and Salt
Even though this recipe for Crispy Hasselback Potatoes With Butter and Salt is simple, those little details make the difference between a good potato and an amazing one. If you want those bakery-style layers, you have to pay attention to two main things: consistency and butter distribution. Don’t worry if your first batch isn’t perfect; mine certainly weren’t!
These tips are what I learned after burning a few batches and ending up with soggy bottoms. Follow these closely, and you’ll nail that crispy-tender texture every time.
Potato Selection and Uniformity
This is a big one that people often overlook! You absolutely must choose potatoes that are similar in size. If you have one giant potato next to a tiny one, the small one will burn to a crisp before the big one is even tender in the middle. Keeping them uniform ensures that when you pull the tray out, every single potato is cooked perfectly and ready to eat at the same time. It helps achieve those extra crisp edges we are aiming for across the board.
Getting the Butter Deep Into the Slices
It’s not enough just to drizzle the butter on top! That melted butter is your flavor carrier, and you need it deep inside those cuts. After the first 30 minutes of baking, when you fan the slices out, take your time with that second butter application. I like to use my fingers (carefully, it’s hot!) or the back of a small spoon to gently press the butter down between the layers. You want to see the butter start to pool slightly at the bottom of the cuts. This ensures that as they bake the second time, the steam and fat work their magic, separating the layers and crisping them individually.
Common Questions About Crispy Hasselback Potatoes With Butter and Salt
I get so many questions about these potatoes because they look tricky, but they are so versatile! People always ask me about timing and what happens if they mess up the slicing. Don’t stress! These are forgiving baked potatoes, and they make a fantastic side dish even if they aren’t picture-perfect.
Here are the most common things I hear after people try making their first batch of Crispy Hasselback Potatoes With Butter and Salt.
Can I Prepare These Ahead of Time
You can definitely prep them ahead, but you can’t bake them ahead if you want that amazing crispiness! I recommend doing all the slicing and getting the potatoes ready—even brushing them with the first round of butter and seasoning—and then covering them tightly with plastic wrap. Keep them in the fridge for up to 24 hours.
When you are ready to cook, let them sit on the counter for about 30 minutes to lose that fridge chill, then proceed with baking as directed. If you try to bake them straight from the fridge, the cooking time will be way off, and they won’t crisp up as well.
What If I Do Not Have Russet Potatoes
Russets are my absolute favorite because they are starchy and fluffy inside, which gives you that great contrast to the crispy exterior. However, if you’re out of those, Yukon Golds will work in a pinch! They tend to be a bit waxier, so they might not get quite as fluffy on the inside, but they still taste wonderful and brown nicely.
I would avoid tiny new potatoes or sweet potatoes for this specific recipe, as the texture just isn’t right for the hasselback cut. Stick to larger, starchy potatoes for the best results!
How Do I Know When They Are Fully Cooked
The visual cues are important—you want those edges to be dark golden brown and almost crackling—but the real test is tenderness. Remember the knife check we talked about? You need to pierce the thickest part of the potato, right near the bottom, with a sharp knife or even a thin skewer. If the knife glides through with zero resistance, they are done. If you feel any hard spots, pop them back in for 5-minute intervals until they are completely tender.
Ingredient Notes and Simple Variations
Since this recipe is so simple, any changes you make should enhance the buttery, salty profile, not fight against it. I’m a purist when it comes to these Crispy Hasselback Potatoes With Butter and Salt, but I know sometimes you want a little something extra! The good news is that potatoes are sponges for flavor, so adding a little something extra works great.
Just remember to keep the butter and salt the stars of the show. We aren’t trying to turn this into a fully loaded baked potato here; we are just adding a little accent note!
Safe Flavor Swaps
If you want to elevate the herbs beyond plain pepper, stick to things that complement the richness of the butter. About halfway through the baking time, when you are doing that second butter brush, sprinkle on some fresh, finely chopped rosemary. Rosemary and potato are an absolute match made in heaven! If you are looking for other great side dishes, check out our honey glazed roasted carrots.
Another fantastic, easy swap is using garlic powder instead of (or alongside) some of the black pepper. Mix about half a teaspoon of garlic powder into your melted butter before you brush it on for the first bake. It gives a lovely savory depth without overpowering the clean potato flavor. Just make sure you are using powder and not fresh minced garlic, which will burn at this high temperature!
Storing and Reheating Your Baked Potatoes
Nobody wants soggy leftovers, especially when you’ve worked hard for that amazing crisp! If you happen to have any of these wonderful baked potatoes left over—which is rare in my house, I’ll admit—you need to handle them carefully to bring back that fresh-from-the-oven texture.
The microwave is your enemy here; it steams the potato, turning the crust soft instantly. We rely on dry heat to bring back the crunch! If you want more easy side dish ideas, you might enjoy our recipe for caramelized onion mashed potatoes.
Storing Leftovers Properly
Once the potatoes have cooled completely, you need to seal them up tight. Don’t leave them sitting out! Pop them into an airtight container. You can use a good quality zip-top bag or a sealed plastic container. They should be fine in the refrigerator for about three days. Any longer than that, and the texture starts to degrade too much, even when reheating.
Make sure they are totally cool before sealing them, otherwise, condensation will form inside the container, and that moisture is what causes sogginess!
Reheating Guide for Texture Retention
To bring back the crispness in your leftover Hasselbacks, the oven is the only way to go. Forget the microwave entirely!
| Method | Temperature | Time |
|---|---|---|
| Oven Reheating | 400°F (200°C) | 10–15 minutes |
Preheat your oven to 400°F. Place the potatoes directly onto a wire rack set over a baking sheet. The wire rack is key because it lets the air circulate underneath, crisping the bottom too! Bake them for about 10 to 15 minutes until they are heated through and you can hear the edges crackling again. That’s how you know they are revived!
Sharing Your Crispy Hasselback Potatoes With Butter and Salt Experience
I hope you loved making these potatoes as much as I love eating them! They really are the best easy side dish. Now that you’ve tried the technique, I’d love to hear what you thought! Did you manage to get those perfect crispy edges? We love seeing your creations, so feel free to share this recipe on Facebook!
Drop a comment below and let me know how your batch of Crispy Hasselback Potatoes With Butter and Salt turned out. Tell me what you served them with—I’m always looking for new dinner ideas! You can also save this recipe for later on Pinterest.
Print
Amazing 30-Min Crispy Hasselback Potatoes
- Total Time: 1 hour 20 minutes
- Yield: 4 servings
- Diet: Vegetarian
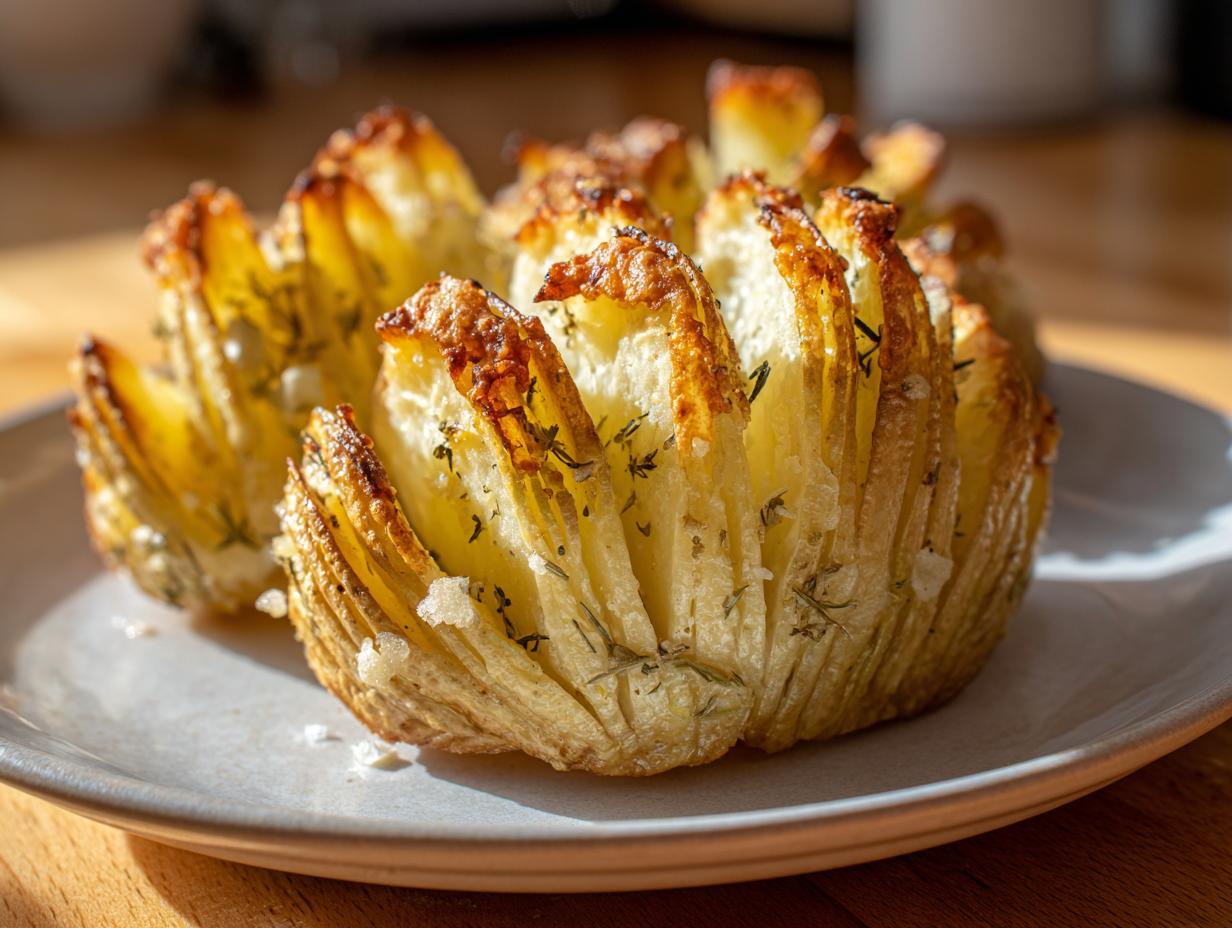
Description
These hasselback potatoes are crispy on the outside and tender inside with buttery layers. This is an easy side dish.
Ingredients
- 4 large russet potatoes scrubbed and dried
- 4 tablespoons unsalted butter melted
- 1 teaspoon kosher salt
- ½ teaspoon black pepper
Instructions
- Preheat the oven to 425°F and place a rack in the center position.
- Place one potato between two wooden spoons or chopsticks to prevent slicing all the way through.
- Cut thin slices across the potato about ⅛ inch apart, stopping when the knife hits the spoons. Repeat with all potatoes.
- Arrange the potatoes on an unlined baking sheet and brush half of the melted butter over the tops, working some into the cuts.
- Season evenly with salt and black pepper.
- Bake for 30 minutes, then carefully fan the slices apart using a knife.
- Brush the remaining butter over the potatoes, making sure it seeps into the slices.
- Return to the oven and bake another 30 to 35 minutes until the edges are crisp and the centers are tender when pierced with a knife.
- Remove from the oven and season lightly with additional salt and pepper before serving.
Notes
- Choose potatoes that are similar in size for extra crisp edges and even cooking.
- Prep Time: 15 minutes
- Cook Time: 1 hour 5 minutes
- Category: Side Dish
- Method: Baking
- Cuisine: American