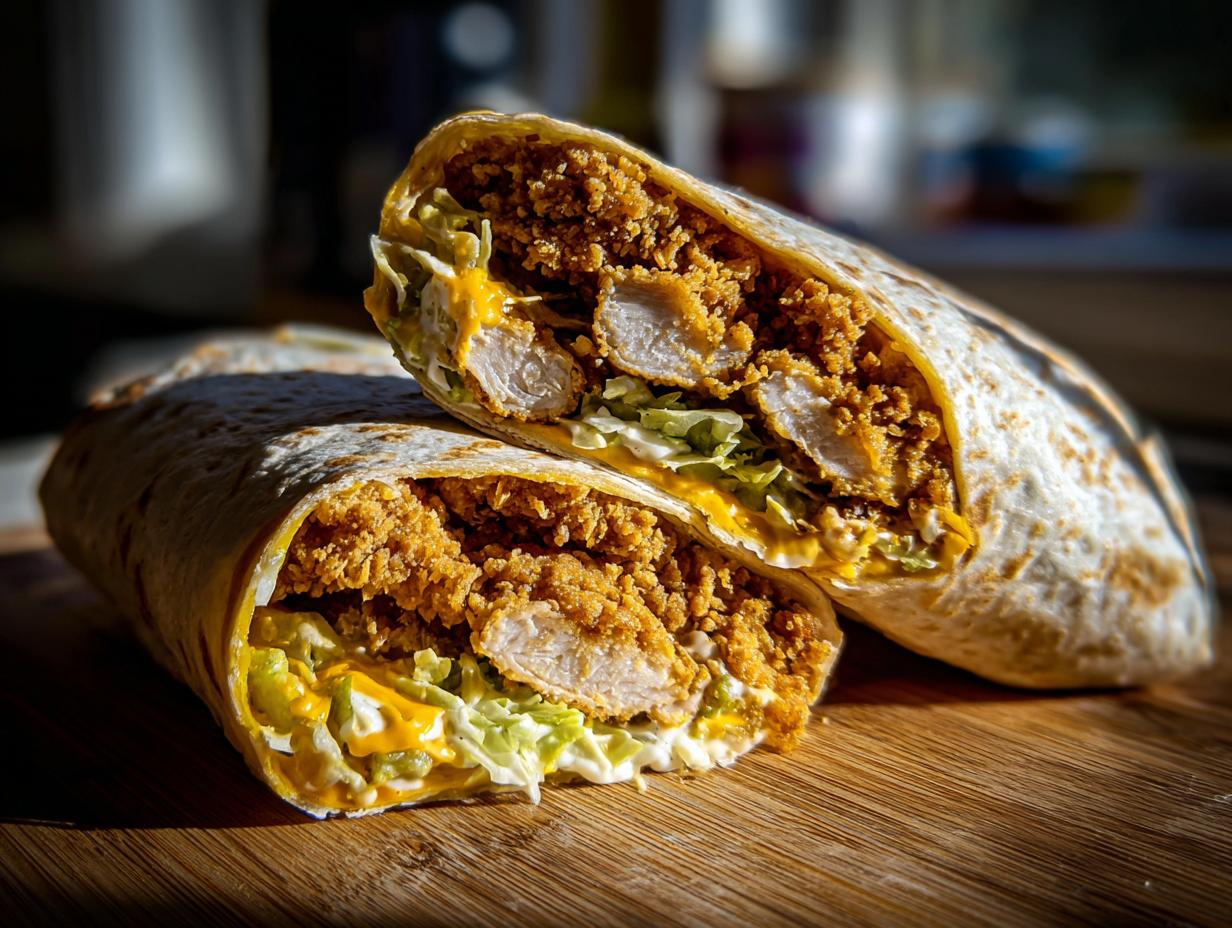
Listen, if your lunch routine is stuck in a sad cycle of leftovers or boring sandwiches, you need to hear about this crispy chicken ranch wrap. Seriously, this is my go-to recipe when I need something that tastes like takeout but takes less than 30 minutes start to finish. I’m not kidding! I developed this out of pure desperation one Tuesday afternoon when I realized I had chicken breasts and zero patience.
The best part, and this is crucial for all you kitchen novices out there, is that it’s incredibly beginner-friendly. You don’t need to be a professional fry cook to nail that incredible crunch. We’re talking perfectly seasoned, juicy chicken strips tucked into a soft tortilla with cool lettuce, sharp cheddar, and that signature creamy ranch dressing. It’s a flavor party in your hands!

When I first started cooking for myself, anything involving frying felt like a guaranteed disaster. But this recipe changed my mind. The simple coating process ensures that even if you’re clumsy like I was, you still get that amazing, satisfying shatter when you bite in. Trust me, once you make this crispy chicken ranch wrap, you won’t look back!
Gather Your Ingredients for the Crispy Chicken Ranch Wrap
Okay, let’s get organized. Having everything measured out before you start is the secret to keeping this whole operation moving fast. Remember, we’re aiming for speed here, so no last-minute rummaging through the pantry! The success of this crispy chicken ranch wrap hinges on having your three breading stations perfectly set up.
Don’t try to eyeball these quantities, especially the flour and panko—too much of one throws off the coating balance. I’ve laid out exactly what you need below. Grab your sharpest knife and let’s get prepping!
Exact Measurements for Your Crispy Chicken Ranch Wrap
This table shows you exactly what you need for four perfect wraps. Make sure your chicken is prepped first, as that sets the stage for everything else.
| Ingredient | Amount Needed | Preparation Note |
|---|---|---|
| Boneless, Skinless Chicken Breasts | 2 | Sliced into strips |
| All-Purpose Flour | 1 cup | For dredging |
| Buttermilk | 1 cup | For soaking |
| Panko Breadcrumbs | 1 cup | For the final coating |
| Seasonings (Garlic Powder, Onion Powder, Paprika, Salt, Pepper) | 1 tsp each (except pepper at 1/2 tsp) | To be mixed together |
| Vegetable Oil | 1/2 inch deep | For frying |
| Large Flour Tortillas | 4 | For wrapping |
| Shredded Lettuce | 1 cup | For layering |
| Diced Tomatoes | 1 cup | For layering |
| Shredded Cheddar Cheese | 1 cup | For melting goodness |
| Ranch Dressing | 1/4 cup | The creamy binder |
| Ripe Avocado | 1 | Sliced, totally optional but highly recommended! |
Essential Equipment for Making Your Crispy Chicken Ranch Wrap
You don’t need a ton of fancy gadgets for this, which is why I love it for weeknights. But having the right dishes ready is key to keeping the assembly line moving smoothly for your crispy chicken ranch wrap.
Make sure you have these things handy before you start seasoning. Trust me, trying to find a skillet while your chicken is waiting in the buttermilk is a recipe for soggy crust!
- One large, heavy-bottomed skillet or frying pan.
- Three shallow dishes or bowls for your dredging station (flour, buttermilk, panko).
- Tongs for safely flipping the chicken in the hot oil.
- Paper towels laid out on a plate for draining the cooked chicken.
Step-by-Step Instructions for the Perfect Crispy Chicken Ranch Wrap
Alright, this is where the magic happens! We’re going to move quickly through the prep so the chicken stays coated nicely before it hits the oil. Think of this as a little production line. Once you get the rhythm down, you’ll be amazed how fast you can whip up four of these incredible crispy chicken ranch wraps.
First things first, let’s get those flavor boosters onto the meat. We want every bite of chicken to sing, not just the ranch! After seasoning, we move straight into the three-step coating process—this is non-negotiable if you want that textbook crunch.
Preparing the Chicken Coating for Your Crispy Chicken Ranch Wrap
Take your chicken strips and grab that little bowl where you mixed your spices earlier—that beautiful blend of garlic, onion, paprika, salt, and pepper. Toss the chicken strips in there until they look evenly dusty. Don’t be shy, but don’t leave clumps of seasoning either.
Now set up your dredging stations in a row: Flour first, then buttermilk, and finally, the panko breadcrumbs. This order is critical! Dip a seasoned strip first into the flour—just a quick coat, shake off the excess. Next, dunk it completely into the buttermilk bath. Let the excess drip off for just a second.
The final step is the panko. Press that wet strip gently into the breadcrumbs, making sure every surface is covered. You need to press lightly so the panko really sticks. Set the fully coated strips onto a clean plate while you heat the oil. If you let them sit too long, the coating can get mushy, so try to move them straight from the panko to the pan.
Achieving Maximum Crispiness When Frying Chicken
Time to heat the oil! Pour about a half-inch of vegetable oil into your skillet and get it over medium heat. You’re aiming for about 350 degrees Fahrenheit, but if you don’t have a thermometer, here’s my trick: drop a tiny pinch of flour into the oil. If it sizzles immediately and floats happily, you’re good to go. If it burns instantly, it’s too hot!
Carefully lay your chicken strips away from you into the hot oil. Don’t crowd the pan; we need that space for the oil to circulate and make things crispy. Fry them for about five to seven minutes total, flipping halfway through. We are looking for a deep, gorgeous golden brown color. Safety reminder: always check that internal temperature with a meat thermometer—it has to hit 165 degrees Fahrenheit to be safe to eat. Once they pass the test, pull them out with tongs and let them drain on paper towels. That oil needs to drip off!

Assembling Your Ultimate Crispy Chicken Ranch Wrap
While the chicken rests for a minute, get your tortillas ready. Cold tortillas tear when you try to roll them, so you need to warm them up. Just 10 seconds in the microwave or a quick flip in a dry, hot skillet makes them soft and pliable. This step makes rolling the final crispy chicken ranch wrap so much easier!
Now, layer strategically! Start by spreading about a tablespoon of ranch dressing right onto the center of the tortilla—this acts as the glue. Next, put down a layer of lettuce first; this keeps the wetter ingredients from making the tortilla soggy too fast. Add your tomatoes, a generous sprinkle of cheese, and those optional avocado slices if you’re using them.
Finally, lay the hot, crispy chicken strips right on top. Fold the sides of the tortilla inward first, creating a nice seal, and then roll it up tightly from the bottom. Slice it diagonally for that professional presentation. Serve these babies immediately while the chicken is still crackling!
Tips for Success When Making a Crispy Chicken Ranch Wrap
I’ve made enough of these crispy chicken ranch wraps to know exactly where things can go wrong. The biggest pitfall is a soggy wrap, and that comes down to two things: moisture control and folding technique. My best pro tip involves the lettuce—don’t use too much, and make sure it’s dry!
Also, resist the urge to overfill the tortilla! When you try to cram in too much chicken, the wrap splits when you roll it. Remember that layering order: ranch, lettuce barrier, toppings, then the hot chicken. This structure is what keeps the wrap tight and delicious until the very last bite. If you follow these small steps, you’ll never have a disappointing wrap again. If you want to see more quick lunch ideas, check out our caramelized onion grilled cheese recipe!
Ingredient Notes and Simple Swaps for Your Wrap
One thing I love about this crispy chicken ranch wrap is how adaptable it is. We all have days where we want indulgence, and days where we want something lighter, right? If you’re trying to cut back on the frying, don’t skip the crunch entirely!
You can easily swap the fried chicken for grilled chicken breast, which saves on fat instantly. When you do this, I highly suggest adding extra veggies to make up for the lost texture—think crisp cucumbers or thinly sliced bell peppers. They add a nice snap! For other quick chicken ideas, take a look at our honey lime chicken recipe.
Also, don’t feel locked into cheddar cheese. Monterey Jack melts beautifully and gives a milder flavor profile. Honestly, the core of the crispy chicken ranch wrap is the seasoning and the ranch, so feel free to play with the supporting cast!
Storing and Reheating Leftover Crispy Chicken Ranch Wrap
Look, the absolute best way to enjoy this crispy chicken ranch wrap is fresh out of the pan, when that chicken is still screaming hot and crunchy. Reheating fried food is always tricky because you risk losing that beautiful texture. If you have leftovers, you need a game plan!
The main issue is the moisture from the ranch and veggies attacking the tortilla and the crispy coating. For the best results, I always separate the components if I know I won’t eat them right away. If you wrap the whole thing up, the tortilla gets gummy overnight.
For storage, keep the cooked chicken separate from the assembled wrap, or at least wrap the whole thing tightly in foil first, and then toss it in a zip-top bag. Here’s a quick guide for what I do:
| Component | Storage Method | Best Practice |
|---|---|---|
| Cooked Chicken Strips | Airtight container in the fridge | Up to 3 days |
| Assembled Wrap | Foil wrap, then plastic bag | Eat within 12 hours for best crispiness |
When it comes time to reheat your crispy chicken ranch wrap, skip the microwave entirely—it turns everything rubbery! Use an oven or an air fryer set to about 375 degrees for about 5 to 7 minutes. That blast of dry heat will wake up the crust on the chicken beautifully. If you want to try another crispy chicken recipe, check out our crispy baked chicken wings.
Frequently Asked Questions About the Crispy Chicken Ranch Wrap
I get so many questions about this recipe, especially from folks worried about the frying part. Here are the top things people always ask me about making the perfect crispy chicken ranch wrap at home. Don’t worry if you have questions—that’s why I’m here!
Can I Prepare the Chicken Ahead of Time for the Crispy Chicken Ranch Wrap?
Yes, you absolutely can prep the chicken ahead of time, but timing is everything! You should season and coat the chicken strips right before you plan to fry them—ideally within 15 minutes. If the coated chicken sits around for hours, the buttermilk soaks too much into the panko, and you lose that beautiful, fluffy crunch we worked so hard to build. Fry them fresh, then assemble the wrap later!
What Temperature Should the Oil Be When Frying?
This is key to avoiding greasy chicken! You want your vegetable oil to be hovering right around 350 degrees Fahrenheit. If it’s too cool, the coating soaks up oil and gets soggy. If it’s too hot, the outside burns before the chicken inside reaches that safe 165 degrees. That little flour pinch test I mentioned earlier is your best friend if you don’t have a thermometer!
Are There Healthy Alternatives to Frying the Chicken?
One hundred percent! If you’re making this for a lighter lunch, skip the frying step in the recipe. Instead, take those seasoned chicken strips and grill them or even bake them on a rack until they are cooked through. To keep the “crispy” element alive, I suggest tossing the cooked grilled chicken with a tablespoon of panko right before assembling the crispy chicken ranch wrap. It gives you a nice textural element without the oil!
Share Your Experience Making This Crispy Chicken Ranch Wrap
I truly hope this recipe brings some excitement back to your busy lunch schedule! Now that you know all my secrets for the perfect crunch, I want to hear from you. Did you try the avocado? Did your family love the quick assembly time? You can share your thoughts with us on Facebook!
Please drop a comment below and let me know how your crispy chicken ranch wrap turned out, or give this post a rating if you think it deserves five stars! Happy cooking, everyone! Don’t forget to save this recipe on Pinterest for later!
Print
Amazing 30-Min Crispy Chicken Ranch Wrap
- Total Time: 50 minutes
- Yield: 4 wraps
- Diet: Omnivore
Description
Crunchy chicken, creamy ranch, and melted cheese wrapped in a soft tortilla. A 30-minute crispy chicken ranch wrap perfect for lunch or dinner.
Ingredients
- 2 boneless, skinless chicken breasts, sliced into strips
- 1 cup all-purpose flour
- 1 cup buttermilk
- 1 cup panko breadcrumbs
- 1 teaspoon garlic powder
- 1 teaspoon onion powder
- 1 teaspoon paprika
- 1 teaspoon salt
- ½ teaspoon black pepper
- Vegetable oil for frying
- 4 large flour tortillas
- 1 cup shredded lettuce
- 1 cup diced tomatoes
- 1 cup shredded cheddar cheese
- ¼ cup ranch dressing
- 1 ripe avocado, sliced (optional)
Instructions
- Combine garlic powder, onion powder, paprika, salt, and black pepper in a small bowl. Sprinkle over chicken strips and toss to coat.
- Place flour in one dish, buttermilk in another, and panko breadcrumbs in a third.
- Dip each chicken strip first into flour, then buttermilk, and finally panko breadcrumbs, pressing gently so the coating adheres.
- Heat ½ inch of vegetable oil in a skillet over medium heat. Fry chicken for 5–7 minutes, turning halfway, until golden brown and cooked through to an internal temperature of 165°F. Drain on paper towels.
- Lightly heat tortillas in a dry skillet or microwave for a few seconds to make them pliable.
- Spread 1 tablespoon ranch dressing over each tortilla. Layer with lettuce, tomatoes, cheese, avocado slices (if using), and crispy chicken strips.
- Fold in the sides, then roll tightly. Slice in half at an angle and serve immediately.
Notes
- For a lighter version, swap fried chicken for grilled chicken and add extra veggies like cucumbers or bell peppers.
- Prep Time: 20 minutes
- Cook Time: 30 minutes
- Category: Lunch/Dinner
- Method: Frying
- Cuisine: American