Chia Pudding with Milk and Fruit. That phrase sounds fancy, right? Like something you’d only see on a fancy café menu, not something a total beginner like me could whip up before my morning alarm even goes off. When I first started NoobRecipes, I promised myself every single recipe had to be something I could teach my least-culinary-inclined friend. And trust me, that meant starting with things that required zero actual cooking.
This pudding is the absolute poster child for my philosophy. You mix four things, wait a bit, and boom—perfect breakfast success. Seriously, if you can whisk two liquids together, you can master this. I remember the first time I tried chia pudding; I ended up with a giant salty blob because I forgot the vanilla. Oops! But after that disaster, I figured out the simple rhythm—the double-stir method—that guarantees creamy perfection every time. This recipe is my proof that you don’t need years of experience to eat well; you just need the right basic steps. It’s foolproof, fiber-rich, and ready when you are.

Gathering Your Ingredients for Chia Pudding with Milk and Fruit
Okay, the best part about making Chia Pudding with Milk and Fruit is that you don’t need to turn on the stove! It’s all about having the right ratios ready to go. Don’t stress about fancy equipment; a simple whisk and a jar are all you need for the base. We are building layers of flavor here, so make sure your pears are ripe—that’s key for the topping!
Essential Components for Your Chia Pudding with Milk and Fruit
For the base, you absolutely need four tablespoons of chia seeds for every cup of milk you choose. I usually go with whole milk because it makes the creamiest Chia Pudding with Milk and Fruit, but any milk works! Whisk in your sweetener—a tablespoon of honey or maple syrup is usually perfect—along with about half a teaspoon of vanilla extract and just a tiny pinch of salt. Don’t skip the salt; it really wakes up the sweetness!
Preparing the Pear Topping
This topping elevates the whole dish, trust me. You’ll want one medium ripe pear, diced nice and small. Toss those little cubes immediately with half a teaspoon of lemon juice—this keeps them bright! Then sprinkle on half a teaspoon of cinnamon and one extra teaspoon of honey. Stir it all up and pop it in the fridge while the pudding sets. That chill time helps the flavors marry perfectly.
Optional Mix-Ins for Texture and Protein
If you’re making this for a serious breakfast where you need staying power, toss in a tablespoon of plain Greek yogurt right into the wet ingredients before adding the seeds. For crunch, I love adding a tablespoon of toasted walnuts or almonds, or maybe some pumpkin seeds. These are totally optional, but they add a wonderful contrast to the soft pudding base.
Step-by-Step Instructions for Perfect Chia Pudding with Milk and Fruit
This is where the magic happens, and I promise you, it’s so simple you’ll feel like you cheated. We are aiming for a smooth, creamy base for our Chia Pudding with Milk and Fruit, and we do that by paying attention to the first two minutes of mixing. Set a timer if you need to—that’s what I do!
Mixing the Base Ingredients
Grab the jar or bowl you plan to chill everything in—less mess is always better! First, whisk your milk, honey, vanilla, and that tiny pinch of salt together until that sweetener is completely dissolved. You don’t want grainy sludge at the bottom later. Now, here’s the important bit: sprinkle in those chia seeds slowly while you whisk constantly for a good 20 to 30 seconds. If you just dump them in, you get those frustrating little chia clumps that never soften. Keep whisking until those seeds look evenly spread out in the liquid.
The Critical Resting and Re-Stirring Process
Once they are mixed in, let the mixture sit on the counter for about 10 minutes. Don’t walk away! This resting time lets the seeds start absorbing liquid. After 10 minutes, you’ll notice the edges are already starting to gel up. Grab your spoon or whisk and give it a really good stir again. This second stir is non-negotiable; it breaks up any seeds that settled at the bottom or stuck together. This step is the secret to preventing dry pockets in your final pudding.
Chilling and Setting the Chia Pudding with Milk and Fruit
Cover your jar now—a simple lid or some plastic wrap works fine. Pop it into the refrigerator for a minimum of two hours, but honestly, overnight is where this shines. When it’s ready the next day, your Chia Pudding with Milk and Fruit should be wonderfully thick. It should look completely set, like a soft, spoonable gel. If you see any dry seeds floating around, you didn’t stir enough the first time, but don’t worry, we fix that in the next step!
Assembling Your Grab-and-Go Breakfast
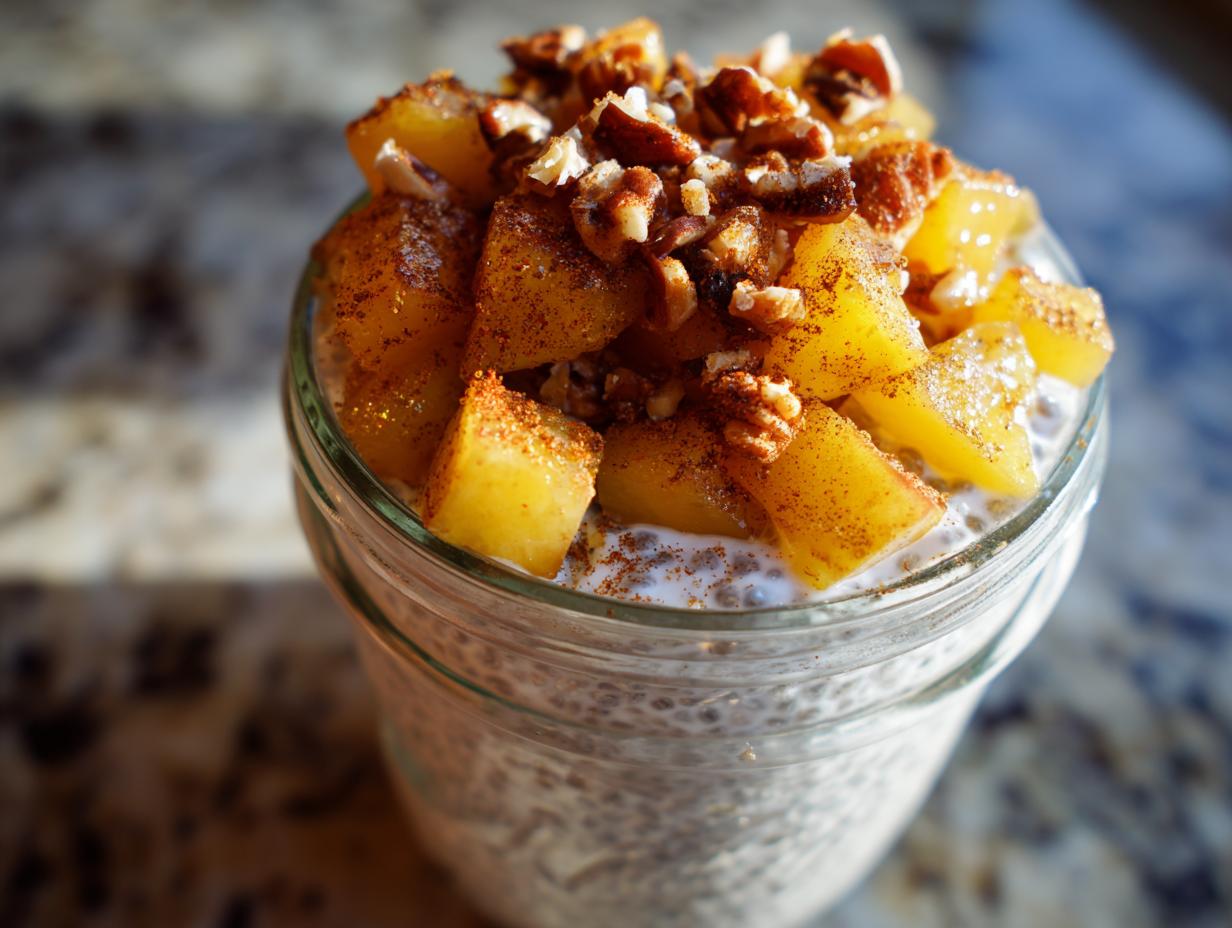
Once chilled, pull out your pudding and give it one last taste test. If it’s too stiff—sometimes the chia seeds get ambitious!—just stir in a splash of milk until it’s the perfect consistency for you. Now, take your chilled, spiced pears and layer them over the top. If you opted for Greek yogurt, dollop that on now, followed by your crunchy nuts or seeds. It’s ready to eat right out of the jar!

Tips for Making the Best Chia Pudding with Milk and Fruit
Even though this recipe is super simple, a couple of tiny tweaks can make your Chia Pudding with Milk and Fruit go from good to absolutely amazing. I learned these little secrets the hard way, so you don’t have to end up with pudding that’s either too bouncy or too liquidy!
Adjusting Thickness and Consistency
Remember, the ratio is usually 4 tablespoons of chia seeds per cup of milk, but chia seeds are moody! If you wake up and your pudding is too thick—like cement—don’t panic. Just stir in a tablespoon or two of milk at a time until you get that creamy texture back. If you accidentally used too much milk and it’s runny, just stir in one more teaspoon of seeds and let it sit for another 30 minutes in the fridge.
Preventing Clumps Expert Advice
I cannot stress this enough: you must stir twice! The first stir after sprinkling in the seeds is crucial to coat everything. But that second stir, 10 minutes later, is what saves your Chia Pudding with Milk and Fruit from having those sad, dry clumps stuck together at the bottom. Give it a really good violent whisk the second time around, and you’ll have the smoothest pudding ever.
Common Questions About Your Chia Pudding with Milk and Fruit
I get so many emails asking the same few things about making Chia Pudding with Milk and Fruit, especially from folks who are just starting out with chia seeds. Don’t worry about making mistakes; these little seeds are pretty forgiving once you know the tricks!
How Long Can I Store My Chia Pudding with Milk and Fruit?
This is such a great make-ahead breakfast! Once your base is set, you can keep the pudding covered tightly in the refrigerator for up to four or five days. That means you can prep on Sunday and have breakfast ready almost all week! Just remember that tip I shared earlier: keep your pear topping separate until you’re ready to eat. The fruit will get soggy if it sits in the pudding too long.
What Milk Works Best for Chia Pudding with Milk and Fruit?
Honestly, any milk you like works for Chia Pudding with Milk and Fruit. If you want that ultra-creamy, decadent texture that tastes almost like dessert, go for whole milk or even a sweetened condensed milk base if you’re feeling indulgent. But if you’re using almond or oat milk, you might want to use that full 4 tablespoons of chia per cup of liquid, or maybe even a tiny bit more. Thicker milks naturally make a creamier final product, which is always nice in the morning!
Can I Sweeten the Chia Pudding with Milk and Fruit Before Chilling?
Yes, you absolutely should sweeten it before chilling! I always mix the honey or maple syrup in right at the beginning with the milk and vanilla. If you wait until the next day to sweeten your Chia Pudding with Milk and Fruit, you’ll likely end up with sticky pockets of sweetener at the bottom because it won’t dissolve properly into the thick gel. Sweetening early ensures that lovely, balanced flavor throughout the whole batch.
Storage and Reheating Instructions
Since this is such a fantastic make-ahead recipe, knowing how to store your Chia Pudding with Milk and Fruit correctly is important so it tastes fresh later in the week. It’s designed to last, but we need to respect the texture!
Storing Covered Chia Pudding with Milk and Fruit
Always use an airtight container—a mason jar with a tight lid is my go-to. Keep the pudding covered in the refrigerator. It holds up great for about five days, which is amazing for busy mornings! Just remember that the longer it sits, the thicker it gets. And always, always keep that pear topping stored completely separate in its own little container.
| Item | Duration | Notes |
|---|---|---|
| Chia Pudding Base | Up to 5 Days | Store covered in the fridge. |
| Pear Topping | 2 Days | Best eaten fresh; lemon juice helps slow browning. |
| Reheating | Not Recommended | This Chia Pudding with Milk and Fruit is best served cold. |
Sharing Your Favorite Chia Pudding with Milk and Fruit Creations
So there you have it—the easiest, most reliable way to make Chia Pudding with Milk and Fruit! I hope this recipe takes the guesswork out of your morning routine. I really want to know how yours turned out! Did you go heavy on the cinnamon pears, or did you add in those crunchy nuts? Drop a comment below and tell me your favorite way to customize this grab-and-go breakfast! You can also follow along for more easy recipes on our Pinterest page or check out our latest posts on Facebook.
Print
Chia Pudding with Milk and Fruit: 1 Creamy Mistake
- Total Time: 10 minutes active, 2–24 hours chilling
- Yield: 2 servings
- Diet: Vegetarian
Description
Creamy chia pudding made with milk and sweetened fruit, perfect for a quick, make-ahead breakfast. It is fiber-rich and ready to grab from the jar.
Ingredients
- 4 tablespoons chia seeds
- 1 cup milk of choice
- 1–2 tablespoons honey or maple syrup
- 1/2 teaspoon vanilla extract
- 1 pinch fine sea salt
- 1 medium ripe pear, diced small (for topping)
- 1/2 teaspoon lemon juice (for topping)
- 1/2 teaspoon ground cinnamon (for topping)
- 1 teaspoon honey or maple syrup (for topping)
- 2 tablespoons plain Greek yogurt (optional add-in)
- 1 tablespoon chopped toasted walnuts or almonds (optional add-in)
- 1 tablespoon pumpkin seeds (optional add-in)
Instructions
- In a jar or bowl, whisk milk, honey, vanilla, and salt until the sweetener dissolves.
- Sprinkle in chia seeds while whisking to prevent clumps, then stir for 20–30 seconds until evenly dispersed.
- Let stand 10 minutes, then stir again to break up any settling and ensure a uniform gel forms.
- Cover and refrigerate at least 2 hours or overnight until thick and pudding-like; it should look set and spoonable with no dry seeds.
- In a small bowl, combine diced pear, lemon juice, cinnamon, and honey; stir and chill until serving.
- In the morning, stir pudding; if too thick, add a splash of milk to loosen. Layer with the cinnamon pears and any yogurt or crunchy toppings.
- Keep cold until ready to eat and return leftovers to the refrigerator promptly.
Notes
- Use 3–4 tablespoons chia per 1 cup milk; start with 4 for thicker pudding.
- Stir twice: once when mixing and again after 10 minutes to prevent clumping.
- Thicker milks yield a creamier texture.
- Store covered in the fridge up to 4–5 days; keep fruit toppings separate for best texture.
- Prep Time: 10 minutes
- Cook Time: 0 minutes
- Category: Breakfast
- Method: No Cook, Chilling
- Cuisine: American