I’m going to let you in on a little secret because, honestly, some recipes are just too good to keep to yourself. Forget those dry, boring dinner rolls you usually serve. We are elevating game night, movie night, and even just Tuesday dinner with this cheesy Hawaiian roll garlic bread. If you’ve seen it floating around online, trust me, it lives up to the hype!
This isn’t just bread; it’s a soft, sweet, buttery cloud dripping with melted mozzarella and punchy garlic. My whole philosophy is making food that looks incredibly impressive but takes almost no effort. I’ve spent years perfecting recipes that deliver maximum flavor payoff for minimal time spent standing over a counter. This garlic bread is the poster child for that approach. It’s gooey, it’s rich, and it disappears faster than anything else on the table. You absolutely need this in your life!

Why You Will Make This Cheesy Hawaiian Roll Garlic Bread Often
I know you’re busy, so I’ll tell you exactly why this recipe is going straight into your weekly rotation. It’s the easiest side dish I’ve ever made, and I’ve never brought it to a potluck without fighting people off!
- It’s ridiculously fast. Seriously, you spend more time preheating the oven than you do mixing the butter.
- It’s the ultimate crowd-pleaser. Sweet rolls meet savory garlic butter and cheese—what’s not to love?
- It’s perfect for beginners. If you can soften butter, you can nail this recipe.
- It pairs with everything! Pasta night, soup night, or just eating it standing over the sink—it works.
Essential Ingredients for the Best Cheesy Hawaiian Roll Garlic Bread
The beauty of this cheesy Hawaiian roll garlic bread is that you probably have most of this stuff tucked away already. We aren’t using any fancy imported cheeses here; we are relying on great, simple components working together perfectly. Quality matters, even in something this easy!
Because the rolls soak up all that glorious butter, you want to make sure you use real, salted butter—don’t skimp on that fat! The fresh garlic and parsley are key for that bright, fresh flavor that cuts through all the richness. Everything here is accessible at your regular grocery store, which means you can whip this up on a whim. You can see more of our easy dinner ideas here.
Ingredient List Table
| Ingredient | Quantity | Preparation Note |
|---|---|---|
| Hawaiian Rolls | 1 package (12–16 count) | Do not separate |
| Salted Butter | ½ cup | Softened |
| Garlic | 2 tablespoons | Minced |
| Fresh Parsley | 1 tablespoon | Chopped |
| Parmesan Cheese | 1 tablespoon | Grated |
| Mozzarella Cheese | 1 ½ cups | Shredded |
Gathering Your Tools for Cheesy Hawaiian Roll Garlic Bread Success
You don’t need a million gadgets for this recipe, thank goodness! We are keeping it simple. Grab your standard mixing bowl—nothing too big, we aren’t making a huge batch of dough here. You’ll need a small bowl too, just for mixing up that amazing butter sauce.
The most important things are a sharp knife for cutting the slits, a sturdy spatula or whisk for mixing, and of course, a 9×13-inch baking dish. That dish is perfect because it lets the rolls snuggle up together while they bake. Easy peasy!
Tips for Perfect Cheesy Hawaiian Roll Garlic Bread Preparation
Okay, let’s talk prep because a few small steps make all the difference here. First, that butter needs to be truly softened—I mean room temperature soft, not microwaved soft. If it’s too hard, you’ll tear the delicate rolls when you try to mix. If it’s melted, it’ll just soak right in instead of coating the tops beautifully.
When you chop that parsley, try for really fine pieces. We want the flavor, not big leafy chunks sticking out. And when you mix the butter, garlic, and parsley, really give it a good mash together with a fork until it’s uniform. You want every single top of that cheesy Hawaiian roll garlic bread to get an even coating of savory goodness! If you want to see another great bread recipe, check out our rosemary garlic bread.
Step-by-Step Instructions for Cheesy Hawaiian Roll Garlic Bread
This is where the magic happens, and it moves fast! Don’t walk away from the counter once you start assembling because these rolls are ready for the oven in minutes. The key here is being gentle when you cut them so you don’t accidentally slice right through the bottom layer. We want pockets for cheese, not bread that falls apart!
Preparing the Rolls and Butter Mixture
First things first, get your oven fired up to 400°F. While that’s heating, grab that 9×13 dish and give it a light layer of butter—this just ensures we have zero sticking drama later. Now, take your package of Hawaiian rolls, keeping them nestled together in their original tray. You need to cut two shallow slits across the top of *each* little roll. I mean shallow! Go halfway down, just enough to create a little pocket, but stop short of cutting through the bottom. Trust me, this takes a little focus.
Next, it’s time to load them up! Take your shredded mozzarella and gently stuff it down into those slits you just made. Try to distribute the cheese evenly across all the rolls. Don’t worry if a little bit spills out; that just means more cheese on the outside later, which is a win!
In your small bowl, combine your softened butter, the minced garlic, and that fresh parsley. Use a fork and just mash everything together until it looks like a fragrant, green-flecked paste. Make sure that garlic is totally incorporated throughout the butter!
Assembly and Baking the Cheesy Hawaiian Roll Garlic Bread
Now for the grand finale of the prep work! Take that glorious garlic butter mixture and spread it generously over the entire top surface of the rolls. Don’t be shy! You want every single sweet, soft peak to be coated in that savory, buttery goodness. Make sure you get some in between the rolls too, if you can reach.
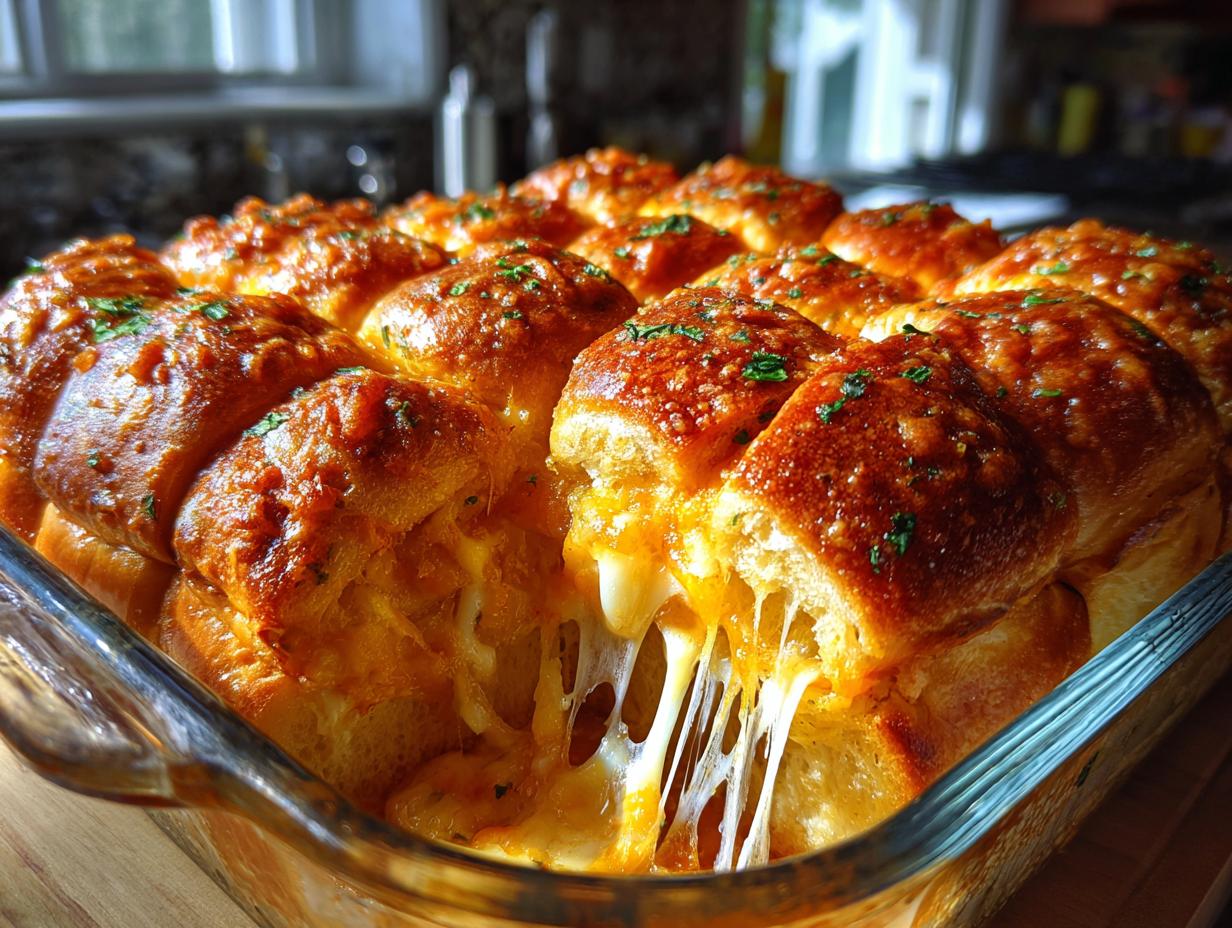
Sprinkle that grated Parmesan right over the top of the buttered surface. Pop the whole dish into your preheated 400°F oven. You’re looking for about 9 to 11 minutes. Keep an eye on them starting around the 8-minute mark. You want the cheese totally melted, bubbly, and the tops should be turning that beautiful, irresistible golden brown color.
When they come out, the house is going to smell amazing! Let them cool for just a minute or two—they’ll be lava hot—and then serve them immediately, pull-apart style, right from the pan!

Tips for Making Your Cheesy Hawaiian Roll Garlic Bread Even Better
So, you’ve mastered the basic cheesy Hawaiian roll garlic bread, and now you want to take it up a notch? I love that energy! We can absolutely jazz this up without making it complicated. Remember those little chili flakes I mentioned? Now is the time to use them!
If you like a tiny bit of heat, sprinkle a pinch of red pepper flakes right over the top along with that Parmesan cheese before it goes into the oven. It adds a wonderful warmth that balances the sweetness of the rolls perfectly. Another great addition is a light dusting of Italian seasoning—thyme, oregano, basil—it just deepens that savory garlic flavor profile.
My biggest tip for preventing burnt edges, especially if your oven runs hot, is to watch that time closely. Those exterior rolls brown much faster than the middle ones. If you see the edges getting too dark around minute 8, but the middle cheese isn’t quite melted, just take a small piece of aluminum foil and loosely tent it over the dish. That shields the edges from direct heat while the center catches up. It’s a simple trick that saves your beautiful golden crust every single time! You can find more great tips on our Medium page.
Storing and Reheating Leftover Cheesy Hawaiian Roll Garlic Bread
It’s rare that we have leftovers of this cheesy Hawaiian roll garlic bread because everyone dives in, but if you do manage to save some, you need to treat them right! You can’t just leave them on the counter; that sweet roll texture will get stale fast. Store them safely in an airtight container at room temperature for maybe a day, but honestly, if you want them to stay soft, the fridge is better for longer storage.
The key to reheating is bringing back that soft interior and that crisp, buttery top without turning the cheese into rubber. The microwave is usually a disaster for bread—it gets chewy—so we are sticking to dry heat. A quick trip back into the oven is the best way to refresh them and get that garlic butter flavor coming back to life. Just a few minutes is all they need to be perfect again! For more easy side dishes, check out our oven roasted potatoes.
Storage and Reheating Guide
| Storage Duration | Reheating Method | Time/Temp |
|---|---|---|
| Room Temperature (Airtight) | Day 1 only | N/A |
| Refrigerator (Airtight Container) | Oven or Toaster Oven | 350°F for 5-7 minutes |
Common Questions About Cheesy Hawaiian Roll Garlic Bread
I get so many questions every time I post this recipe, and I totally get it—you want to make sure it’s perfect for your crowd! Here are a few things people ask most often about making this easy appetizer.
Q1. Can I substitute the Hawaiian rolls with regular slider buns?
You certainly can, but you’ll lose that signature sweetness that balances the sharp garlic and cheese so beautifully. If you must swap, look for brioche rolls, which are also slightly sweet. Just keep in mind that the final flavor profile for your garlic bread will be different!
Q2. Can I make the garlic butter ahead of time?
Absolutely! This is a great prep shortcut. You can mix up the butter, garlic, and parsley and keep it covered in the fridge for up to three days. Just let it sit on the counter for about 30 minutes before you plan to use it so it softens up enough to spread easily over your rolls.
Q3. What’s the best way to serve this party food besides with pasta?
Oh, this cheesy goodness is amazing with almost anything! It’s fantastic dipped into a hearty bowl of tomato soup—the sweet roll soaks up the soup perfectly. It’s also a massive hit alongside chili or even just served alone on game day with some ranch dressing for dipping! If you are looking for a great dip recipe, check out our whipped ricotta dip.
Q4. Do I have to use mozzarella?
While mozzarella gives you that amazing cheese pull we all love, you can mix in some Monterey Jack for extra creaminess or even a little provolone if you want a sharper flavor. Just make sure you keep the volume of cheese the same!
Sharing Your Cheesy Hawaiian Roll Garlic Bread Creation
I really hope you loved making this unbelievably easy, cheesy Hawaiian roll garlic bread as much as I love eating it! It’s such a fast win for any dinner table. Once you try it, you have to come back here and tell me what you thought! Follow us on Facebook for more updates.
Did your family devour it? Did you add chili flakes or try a different cheese? Leave me a star rating below and drop a comment sharing your experience. I can’t wait to see your gooey, golden creations! Don’t forget to save this recipe on Pinterest!
Print
Amazing cheesy Hawaiian roll garlic bread in 15 min
- Total Time: 20 minutes
- Yield: 12 servings
- Diet: Vegetarian
Description
This cheesy Hawaiian roll garlic bread is buttery, gooey, and golden. It is an easy, crowd-pleasing side dish inspired by TikTok, perfect for pasta, soups, or parties.
Ingredients
- 1 package (12–16 count) Hawaiian rolls
- ½ cup salted butter, softened
- 2 tablespoons minced garlic
- 1 tablespoon chopped fresh parsley
- 1 tablespoon grated Parmesan cheese
- 1½ cups shredded mozzarella cheese
Instructions
- Preheat oven to 400°F and lightly butter a 9×13-inch baking dish.
- Cut two shallow slits across the top of each roll, going halfway through but not cutting all the way down.
- Stuff mozzarella and Parmesan into each slit evenly.
- In a small bowl, mix butter, garlic, and parsley until well combined.
- Spread the garlic butter mixture generously over the tops of the rolls.
- Bake for 9–11 minutes until the cheese is melted and the tops are golden brown.
- Serve warm straight from the pan or pull apart for sharing.
Notes
- For extra flavor, sprinkle a pinch of chili flakes or Italian seasoning before baking.
- Prep Time: 10 minutes
- Cook Time: 10 minutes
- Category: Side Dish
- Method: Baking
- Cuisine: American