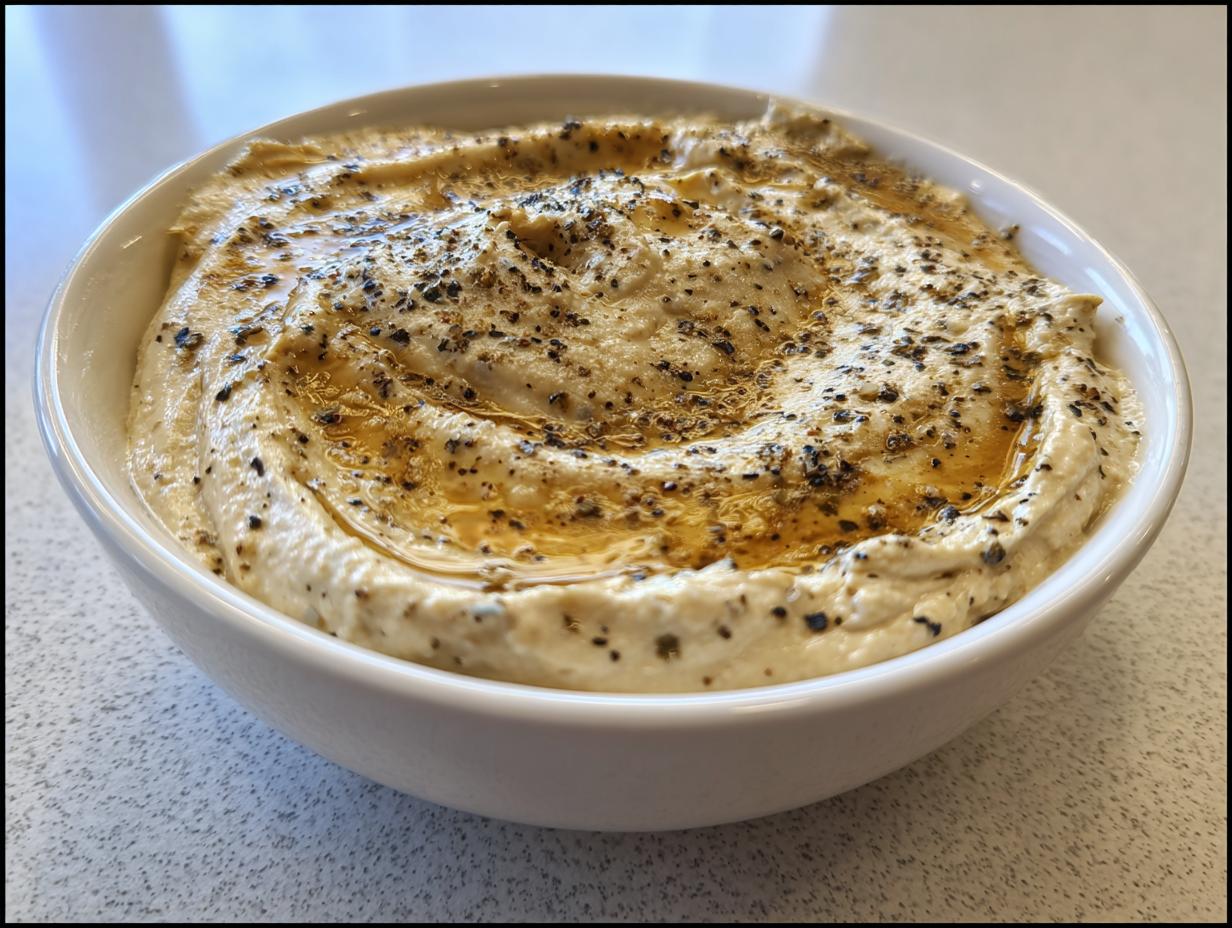
Seriously, if you think making incredible, deeply flavorful dips is only for fancy chefs, you’ve got to stop right there! This recipe for the absolute **best caramelized onion dip** is here to prove you wrong. I remember my first attempt at caramelizing onions; I thought I’d ruined them because they took *forever* to turn brown. I almost threw the whole pan out!
But that’s the secret sauce, isn’t it? Patience! This recipe breaks down that intimidating process into simple, foolproof stages. We’re turning humble yellow onions into sweet, jammy jewels that give this dip its incredible savory depth. It’s rich, it’s creamy, and it tastes like you spent all day lovingly tending the stove, even though the actual hands-on time is minimal.
Because I want everyone to feel confident in the kitchen, I’ve layered in all the hard-won knowledge I’ve collected over the years, focusing heavily on the process that builds flavor—that’s what we call Experience in my book! Trust me, the payoff when you stir those sweet onions into the cool, tangy base is pure magic. Get ready for the best party appetizer you’ve ever made.

Gathering Your Ingredients for Caramelized Onion Dip
Okay, let’s get everything ready before we start cooking. The beauty of this **caramelized onion dip** is that it uses ingredients you probably already have, but their preparation is key. Remember, we’re aiming for deep flavor, so don’t skimp on the onions!
You’ll need three large yellow onions, which we are slicing very thinly—this helps them break down evenly during the long cooking process. For the creamy part, make sure you have one cup of sour cream and four ounces of cream cheese, and please make sure that cream cheese is softened up to room temperature. It makes mixing so much easier!
Essential Components for Your Caramelized Onion Dip
For the onions, we start them off with just two tablespoons of olive oil and one teaspoon of kosher salt, which helps draw out that initial moisture. Once they are soft and jammy, we move onto the seasonings for the base. I use just a half teaspoon of garlic powder and a quarter teaspoon of black pepper. That’s it! Simple seasonings let those sweet, slow-cooked onions really shine through.
Equipment Needed for Perfect Caramelized Onion Dip
You don’t need a ton of fancy gadgets for this, which is why I love it for beginners! The most important thing is a wide skillet. Seriously, use the widest one you own for caramelizing the onions—that surface area helps them brown instead of steam. You’ll also need a solid mixing bowl for combining the creamy base.
Grab a sturdy wooden spoon or spatula for stirring those onions over the long cook time. And of course, you’ll need measuring cups and spoons to keep things accurate. That’s it! No complicated immersion blenders or stand mixers required for this simple, savory dip.
Step-by-Step Instructions for Caramelized Onion Dip
This is where the magic, and the patience, comes in! Follow these steps exactly, and you’ll have the most incredible **caramelized onion dip** you’ve ever tasted. Don’t rush the onions—that’s the biggest mistake people make.
First things first, get your olive oil heating up in that wide skillet over medium heat. We want it shimmering just a bit before we introduce the onions. Once the pan is ready, toss in your thinly sliced onions and the teaspoon of salt. Cook this mixture for about ten minutes, stirring often, until they look soft and translucent. They’ll start smelling amazing right around this point. Don’t stop stirring too much yet, but keep an eye on them!
Mastering the Onion Caramelization Process
Now, we drop the heat down to medium-low. This is the long haul, folks—plan for another 30 to 40 minutes here. The goal is deep golden brown, almost like a jam. You absolutely must stir every few minutes during this stage. If you let them sit too long, they’ll burn instead of caramelize, and that’s a totally different, bitter flavor we don’t want! Keep scraping up those brown bits stuck to the bottom of the pan; that’s pure flavor gold.
Once they are deep golden and look completely jammy, take the skillet completely off the heat. This is crucial: let those beautiful onions cool down for a solid ten minutes. If you dump hot onions into the dairy base, you’ll end up with a runny, weirdly textured mess. Trust me on the cooling time!

Creating the Creamy Dip Base
While the onions are cooling down, we tackle the easy part. Grab your mixing bowl and get that softened cream cheese in there first. It needs to be soft, so it mixes without lumps! Add in the sour cream, the garlic powder, and the black pepper. Whisk this all together until it’s super smooth and creamy. You want no visible streaks of cream cheese remaining.
Combining and Chilling Your Caramelized Onion Dip
Once the onions are cool enough to handle, gently fold them into your smooth cream cheese mixture. Use a rubber spatula for this so you don’t deflate all that wonderful air you just mixed in. Make sure the onions are evenly distributed throughout the base of your **caramelized onion dip**.
Finally, cover the bowl tightly and tuck it into the refrigerator. You need at least 30 minutes in there, but honestly, an hour is even better. This chilling time lets the onion flavors marry up with the tang of the sour cream. When you pull it out, give it one last good stir before serving it up with your favorite chips!
Tips for Success with Your Caramelized Onion Dip
I’ve made this dip dozens of times, and I’ve learned a few tricks to make sure your **caramelized onion dip** turns out perfectly every single time. First, don’t try to rush the onions! If you think they’re done, cook them for five more minutes at that low heat. That extra time develops the sweetness we are looking for.
Second, make sure your cream cheese is truly soft. If it’s cold, you’ll end up wrestling with lumps, and nobody wants a lumpy dip. A quick zap in the microwave for about ten seconds can help if you forget to take it out early.
Also, for extra flavor depth, I sometimes add just a tiny splash of Worcestershire sauce right before I fold the onions in. It’s totally optional, but it adds a tiny savory background note that people always ask about. Finally, always taste the dip once it’s chilled. Sometimes the salt needs a tiny adjustment after the flavors have settled.
Storage and Reheating Instructions for Caramelized Onion Dip
It’s rare that we have leftovers of this amazing **caramelized onion dip**, but if you are lucky enough to, storing it properly keeps it tasting fresh for your next snack session. Since this dip is dairy-heavy, we need to treat it right. I always make sure the container is airtight, especially since those wonderful onion smells tend to travel! If you want to share your kitchen adventures, check out my Facebook page.
Honestly, this dip is at its absolute peak the day after it’s made, after those flavors have really had a chance to mingle in the cold. But it keeps well for a few days. I use glass containers because they don’t hold onto smells.
Storing Leftover Caramelized Onion Dip
Transfer any remaining dip into a clean, airtight container—glass is my preference, but a sturdy plastic container works too. You can safely keep this savory dip in the refrigerator for up to four days. Just make sure it stays well-sealed the whole time.
Reheating or Serving Cold
Here’s my firm rule: **Do not reheat this dip.** Heating up the sour cream and cream cheese base will likely cause it to break or become watery, and we really don’t want to ruin that beautiful creamy texture. This dip is meant to be served cold or just slightly cooler than room temperature. If you are looking for other great appetizer ideas, you might enjoy my post on Million Dollar Dip.
If you pulled it out of the fridge and it seems a little stiff, just let it sit on the counter for about 15 minutes before serving. That little bit of time makes it easier to scoop and brings the flavor forward nicely.
| Storage Method | Duration | Serving Temperature |
|---|---|---|
| Airtight Container (Fridge) | Up to 4 days | Cold or Room Temp |
| Freezing | Not Recommended | N/A |
Frequently Asked Questions About Caramelized Onion Dip
I get so many questions about this recipe because everyone wants their **creamy onion dip** to be just right! Here are a few things folks ask me all the time when they are making their first batch. For more tips, feel free to check out my Medium profile.
Q1. My onions didn’t get brown enough. Can I save them?
Oh, that happens to everyone! If they are just pale yellow, you can put the heat back on very low, add a teaspoon of water to prevent burning, and just keep stirring patiently. If they are already bitter or dark brown, unfortunately, you’ll need to start that part over. The long, slow cook is non-negotiable for that deep flavor in this **savory dip**!
Q2. Can I use dried onion soup mix instead of fresh onions?
You absolutely can, and that’s a great shortcut if you’re totally pressed for time! If you use dried mix, you skip the whole caramelization process. Just mix the dried soup mix directly into the cream cheese and sour cream base. However, you lose that incredible, sweet, complex flavor that comes from slow-cooking fresh onions, so it won’t be quite the same depth of flavor. If you are interested in other savory dips, check out my recipe for Green Goddess Chicken Salad Dip.
Q3. Why is my dip a little watery after chilling?
This usually means one of two things: either the onions weren’t cool enough when you mixed them in, or you used too much sour cream. Always let those onions cool completely! If it’s still a bit thin after chilling, try stirring in an extra ounce of softened cream cheese to firm it up a bit. That usually does the trick for getting that perfect thick texture.
Q4. Can I make this ahead of time for a party?
Yes, please do! This dip actually tastes better the next day. It’s perfect for making a day before your gathering. Just make sure it’s tightly covered in the fridge. It’s the ultimate stress-free party appetizer! You can also find me on Pinterest for more recipe inspiration.
Estimated Nutritional Information for Caramelized Onion Dip
I always tell people that while this dip is utterly divine, it is certainly a rich treat, not a health food! Since the exact values depend on the specific brands of sour cream and cream cheese you use, these numbers are just an estimate based on the main ingredients. Please remember this is a general guide for one serving size.
Nutritional Breakdown Table
| Nutrient | Estimate Per Serving |
|---|---|
| Calories | 140 |
| Total Fat | 12g |
| Protein | 3g |
| Carbohydrates | 6g |
Share Your Homemade Caramelized Onion Dip Experience
I truly hope you loved making this dip as much as I love sharing it with you. Seriously, once you try this flavor, you won’t go back to the packaged stuff! I’m always so excited to hear how it turns out for you. Snap a picture of your chips piled high and tell me what you served it with in the comments below!
Print
Best Caramelized onion dip: 1 secret step
- Total Time: 60 minutes
- Yield: 8 servings
- Diet: Vegetarian
Description
This caramelized onion dip is rich, creamy, and full of deep onion flavor. It is perfect for serving with chips, crackers, or fresh vegetables.
Ingredients
- 3 large yellow onions thinly sliced
- 2 tablespoons olive oil
- 1 teaspoon kosher salt
- 1 cup sour cream
- 4 ounces cream cheese softened
- 1/2 teaspoon garlic powder
- 1/4 teaspoon black pepper
Instructions
- Heat olive oil in a wide skillet over medium heat.
- Add onions and salt and cook 10 minutes, stirring often, until softened.
- Reduce heat to medium low and cook 30 to 40 minutes, stirring every few minutes, until onions are deep golden and jammy.
- Remove onions from heat and let cool for 10 minutes.
- In a bowl, stir together sour cream, cream cheese, garlic powder, and black pepper until smooth.
- Fold cooled caramelized onions evenly into the dip.
- Cover and refrigerate 30 minutes to allow flavors to blend.
- Stir before serving.
Notes
- This dip is ideal for gatherings, snacking, or elevating everyday veggies and chips.
- Make sure onions are fully cooled before mixing them into the sour cream base.
- Prep Time: 15 minutes
- Cook Time: 45 minutes
- Category: Dip
- Method: Stovetop
- Cuisine: American