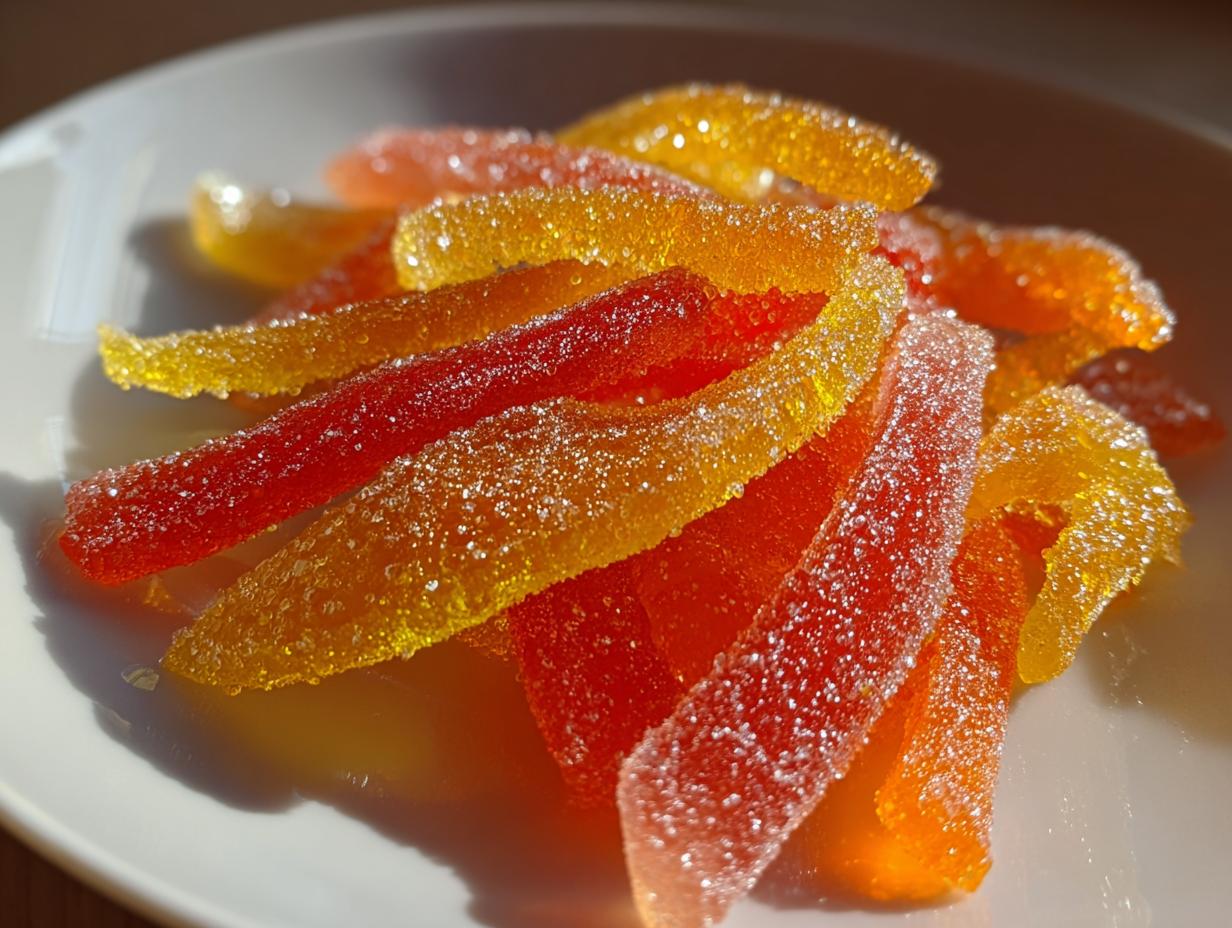
Folks, if you’re looking for that addictive, chewy snack that tastes exactly like a fancy sour gummy but made right in your own kitchen, you have to try this Candied Citrus recipe. Seriously, ditch the neon grocery store bags! I spent ages perfecting this blend because I wanted that perfect balance—sweet, intensely tangy, and just chewy enough. This recipe is built on a foundation of real quality, which is what my mom always taught me about food—it’s all about that EEAT, you know? Trust me, once you master peeling and blanching these beautiful grapefruit, orange, and lemon peels, you’ll be making batches all the time.

Gathering Your Ingredients for Candied Citrus
When I first tried making homemade candied citrus, I thought, “How hard can it be? It’s just peels and sugar!” Oh, boy, was I wrong! The difference between a chewy, tangy delight and a bitter, tough mess lies entirely in the quality and preparation of your starting ingredients. Don’t let the sheer number of citrus fruits scare you off; the process is much simpler than it looks, and it’s a fantastic way to use up everything!
My biggest learning curve was realizing that not all citrus is created equal for this job. You need sturdy rinds that can handle the simmering process without dissolving into mush. That’s why I stick strictly to the grapefruit, oranges, and lemons listed. It’s beginner-friendly once you get past the initial peeling stage, I promise!
Essential Components for Perfect Candied Citrus
Having all your ingredients measured and ready before you even touch a knife makes the whole operation fly by. You want to be focused on those peels, not scrambling for the sugar! Here is exactly what you need to grab before you start washing up:
| Ingredient | Quantity |
|---|---|
| Grapefruits (large) | 2 |
| Navel Oranges | 3 |
| Lemons | 4 |
| Granulated Sugar (divided) | 3 1/2 cups |
| Water | 2 1/4 cups |
| Citric Acid | 1 tablespoon |
| Water for blanching | As needed |
Necessary Equipment for This Candied Citrus Recipe
You don’t need fancy candy-making gear, but a few sharp tools make a huge difference here. The most important thing is a really good, sharp paring knife. You’ll be doing some detailed work removing the pith, and a dull knife just makes you frustrated and less safe!
Make sure you have a sturdy, medium-sized saucepan ready for simmering. You’ll also need a wire cooling rack—this is crucial for letting the peels dry properly so they don’t steam themselves soggy. Finally, grab a slotted spoon for transferring the peels out of that thick syrup, and a medium bowl for the final sour sugar coating!
Step-by-Step Guide to Homemade Candied Citrus
Okay, this is where the magic happens! The process moves in four distinct stages: cleaning, de-bittering, sweetening, and finally, making them delightfully sour. Follow these steps closely, especially the blanching, and you’ll have incredible results. Don’t rush the simmering time—that’s what tenderizes them!
Preparing the Citrus Peels for Candied Citrus
First things first, you have to scrub those fruits like you mean it! We need to get rid of any wax or whatever else is sitting on the outside. After they’re sparkling clean, take off the top and bottom ends of each fruit. Then, stand the fruit up and slice the peel vertically into sections, like you’re peeling an orange for a kid. Try to get the thick skin off in large pieces.
Now comes the detailed bit: the pith. This is the thick, white, spongy stuff underneath the colored zest. It’s the source of all bitterness! Use your sharp paring knife and carefully slice that white pith away until you are left with just the bright colored skin. It takes a little patience, but trust me, removing every bit of pith pays off later. Once they are clean, slice those peels into strips about a quarter-inch wide. Don’t stress too much about perfect uniformity; that’s part of the homemade charm!
Blanching the Peels: The Key to Reducing Bitterness in Candied Citrus
This is the step I almost skipped the first time, and my candied citrus tasted like biting into a bitter lemon rind—yuck! Blanching removes that harsh edge. Put your strips into a saucepan and cover them completely with cold water. Bring that water to a rolling boil and let it bubble away for exactly four minutes. Drain them really well.
But wait, we do it again! That’s right, this is a double-blanch. Return the peels to the pan, cover them with fresh, cold water, bring it back up to a boil, and then drain them immediately. This repeated process really softens the peels and knocks out the last traces of bitterness. Once drained the second time, they are ready for the sweet bath.
Simmering the Peels in Syrup
Time to make the syrup! In the same saucepan (no need to clean it!), combine three cups of your granulated sugar with the two and a quarter cups of water. Set it over medium-high heat and stir constantly until you see every single crystal dissolve. Once it’s totally clear, let it come up to a gentle simmer. Now, use your slotted spoon to carefully transfer those blanched peels into the hot syrup.
Reduce the heat way down to medium-low so the mixture is just maintaining a gentle, lazy simmer—you don’t want a violent boil here. This part requires a little patience. You need to cook them for about 50 to 60 minutes. You’ll know they are done when they start looking almost transparent and feel really tender when you poke one with a fork. Don’t stop early, or they won’t absorb enough sugar!
Drying and Coating Your Finished Candied Citrus
Once they are perfectly translucent, turn off the heat. Carefully lift the peels out of the syrup using the slotted spoon and spread them out onto a wire cooling rack. You want them to dry for about 30 minutes. They should feel tacky to the touch—like they are slightly sticky, but not dripping wet. If they are too wet, the sour sugar coating will just dissolve right off.
While they dry, mix the remaining half cup of sugar with your tablespoon of citric acid in a medium bowl. Whisk that sour sugar mixture well. When the peels are tacky, drop them in batches into the sour sugar. Toss them really gently until every single piece is thoroughly coated. Wow, that smell is amazing!

Tips for Success with Homemade Candied Citrus
Honestly, the difference between an okay batch and the best homemade candied citrus you’ve ever tasted comes down to avoiding two main pitfalls. If you want that true sour gummy experience, you need to pay attention to texture and bitterness control. My years of testing batches taught me exactly where people usually go wrong, and it usually involves rushing the prep or the drying phase. Remember, homemade food tastes better because we put care into it—that’s the EEAT factor shining through! If you want more tips on cooking with care, check out my posts on walnut banana muffins recipe.
Achieving the Right Texture in Your Candied Citrus
The texture goal here is chewy, not hard, and definitely not mushy. When you’re checking the peels after simmering, look for true translucency. If they still look opaque or pale white in the center of the strip, they need more time in that sugar bath. They should feel pliable when you press them—tender but still holding their shape.
The drying step is just as important. If you toss them too soon—when they are still dripping syrup—the sour sugar coating will clump up and dissolve into a sticky mess, not a lovely powdery coat. If you wait too long, they might become too dry and hard. Tacky is the magic word; they should feel slightly sticky when you touch them, but no liquid should transfer to your finger.
Balancing the Tartness: Adjusting Citric Acid for Your Candied Citrus
I call this the “sweet spot” adjustment! The recipe calls for a tablespoon of citric acid, and that gives you a really satisfying, intense tart hit that mimics those popular sour gummy candies. However, citrus fruits vary wildly in their natural sourness. If you used very tart lemons, you might find the full tablespoon a bit overwhelming.
If you’re nervous, start with three-quarters of a tablespoon for your first batch. You can always add more! But a word of warning: you absolutely cannot take it out once it’s coated. So, when in doubt, under-acidify slightly, taste a coated piece, and then toss the rest of the batch in the remaining acid if you think it needs that extra lip-puckering zing! For more sweet and savory ideas, see my cranberry orange scones recipe.
Storing and Serving Your Candied Citrus
Once you’ve managed to coat these beautiful, tangy treats, the next hurdle is keeping them perfect! They are surprisingly resilient, but proper storage is key if you want them to maintain that lovely chewy texture and not get sticky in the humidity. Presentation-wise, these look fantastic piled high in a small glass bowl on the coffee table—they look way too fancy to be homemade! If you want to see how I present other snacks, check out my guide on homemade granola easy recipe.
The main enemy of our finished candied citrus is moisture, so we need to keep them sealed up tight. Also, remember that you’ve coated them in pure sugar and acid, which acts as a natural preservative, so they last for ages if you treat them right!
Best Practices for Storing Homemade Candied Citrus
The best way to store your finished product is definitely in an airtight container. I usually use a sturdy glass jar with a tight-fitting lid. You can layer them between sheets of parchment paper if you’re worried about them sticking together, but usually, if they are dried properly, they won’t have an issue.
If you keep them sealed up and stored in a cool, dark pantry, they should stay perfect for at least three weeks. Honestly, mine never last that long! Here’s a quick rundown of what you need to keep in mind:
| Storage Aspect | Guideline |
|---|---|
| Container Type | Airtight (Glass jar recommended) |
| Environment | Cool and dry pantry |
| Shelf Life | Up to 3 weeks |
| Freezing | Not recommended (can make them sticky) |
Frequently Asked Questions About Candied Citrus
I get so many questions about this recipe, mostly because folks are worried about messing up the blanching or the drying! It’s totally normal when you’re trying to achieve that perfect texture that rivals the best store-bought sour gummy treats. Here are the things I hear most often from people diving into making their own candied citrus peels.
Can I use different citrus fruits for this Candied Citrus recipe?
Yes, absolutely, you can experiment! But you need to know that different citrus fruits behave differently because their rinds have different thicknesses and oil content. Grapefruits and oranges are sturdy and give you a satisfying chew, just like the recipe calls for. If you try something thinner, like limes or mandarins, they might break down much faster during the simmering stage. I’d suggest sticking to the core three for your first time just to nail the timing, and then maybe try substituting one grapefruit for a blood orange next time!
Why are my Candied Citrus peels still bitter?
If your final product still has a sharp, bitter taste, I can tell you right now that you didn’t get all the pith out, or you didn’t blanch long enough. Remember, the pith is that white spongy layer—it’s pure bitterness! You must slice it away until it’s just the colored zest left. If you think you got it all, try the double-blanching step again. Boiling those citrus peels twice, like I showed you, is non-negotiable for a sweet and tart treat!
How long do the peels need to dry before coating?
This is the make-or-break moment for that gorgeous sour coating! You need them tacky, not dripping, and definitely not hard. Give them at least 30 minutes on the wire rack. If you touch one and it feels sticky but no syrup transfers to your finger, they are ready for the citric acid sugar mix. If they are too wet, that coating will turn into a sticky puddle!
Understanding the Nutrition of Candied Citrus
Now, I’m going to level with you—this is candy, right? It’s loaded with sugar because that’s what makes it last and gives it that incredible texture. So, these numbers are just my best guess based on the huge amount of sugar and the small amount of fruit we use. Don’t look at this if you’re watching your sugar intake too closely!
This is just an estimate, remember, since we are working with fresh fruit that varies, but here is the general idea per serving:
- Calories: Around 101
- Sugar: About 26g (Yep, lots of sugar!)
- Carbohydrates: Roughly 26g
- Protein: A tiny bit, around 0.4g
The fat and cholesterol are basically zero, which is great, but the sugar is definitely the star player here. Enjoy them as the special, homemade treat they are!
Share Your Homemade Candied Citrus Creations
I truly hope you loved making this batch of homemade candied citrus as much as I love making mine! When you nail that perfect chewy, tart texture, you feel like you’ve accomplished something huge in the kitchen. It’s such a satisfying snack, and it’s all thanks to those simple citrus peels we rescued!
Once you’ve got your jars filled and your kitchen smelling amazing, I absolutely want to see what you created! Did you manage to get that perfect, slightly wrinkled coating on your sour gummy-style candy? Did you use my trick of using grapefruit for extra chewiness?
Please take a picture and tag me on social media—I live for seeing your creations! You can find me on Facebook or follow my inspiration boards on Pinterest. And if you found this recipe helpful, please do me a huge favor and leave a star rating right here on the page. Your feedback helps other home cooks feel confident enough to try these amazing candied citrus peels. Happy snacking!
Print
Amazing 2-Step Candied Citrus Secret
- Total Time: 1 hour 30 minutes
- Yield: 10 servings
- Diet: Vegetarian
Description
Homemade sour gummy candy made from fresh citrus peels, sugar, and citric acid for a chewy, tart treat. These chewy fruit leather strips mimic the addictive tangy flavor of popular sour gummy candies using all-natural fruit.
Ingredients
- 2 large grapefruits
- 3 navel oranges
- 4 lemons
- 3 1/2 cups granulated sugar, divided
- 2 1/4 cups water
- 1 tablespoon citric acid
- Water for blanching
Instructions
- Wash all the citrus fruits thoroughly under cool running water to remove any wax or surface debris.
- Slice the top and bottom off each fruit, score the skin vertically into sections, and peel the skin away from the flesh.
- Use a sharp paring knife to slice away the thick white pith from the inside of each peel until only the colored skin remains.
- Slice the cleaned peels into quarter inch wide strips.
- Place the strips in a medium saucepan, cover with cold water for blanching, and bring to a boil for 4 minutes.
- Drain the peels, return them to the pan, cover with fresh water for blanching, bring to a boil again, and drain immediately.
- Combine three cups of the granulated sugar and the two and a quarter cups of water in the saucepan over medium-high heat.
- Stir until the sugar dissolves completely and the liquid comes to a simmer.
- Add the blanched peels to the syrup and reduce the heat to medium-low to maintain a gentle simmer.
- Cook for 50 to 60 minutes until the peels look translucent and tender.
- Transfer the peels to a wire cooling rack using a slotted spoon and let them dry for 30 minutes until tacky but not wet.
- Whisk the remaining half cup of granulated sugar and the citric acid together in a medium bowl.
- Toss the tacky peels in the sour sugar mixture until thoroughly coated.
Notes
- Blanching the peels twice helps remove the bitter pith.
- Peels should be translucent and tender before coating.
- Allow peels to dry until tacky before tossing in the sour sugar.
- Prep Time: 20 minutes
- Cook Time: 1 hour 10 minutes
- Category: Candy
- Method: Simmering and Coating
- Cuisine: American