I have to tell you about the easiest, most impressive brunch item I’ve ever made. Forget those complicated laminated doughs that take three days! If you want flaky, buttery perfection that looks like you spent all morning slaving away, you need to hear about my secret weapon: store-bought puff pastry. Seriously, it changes everything.
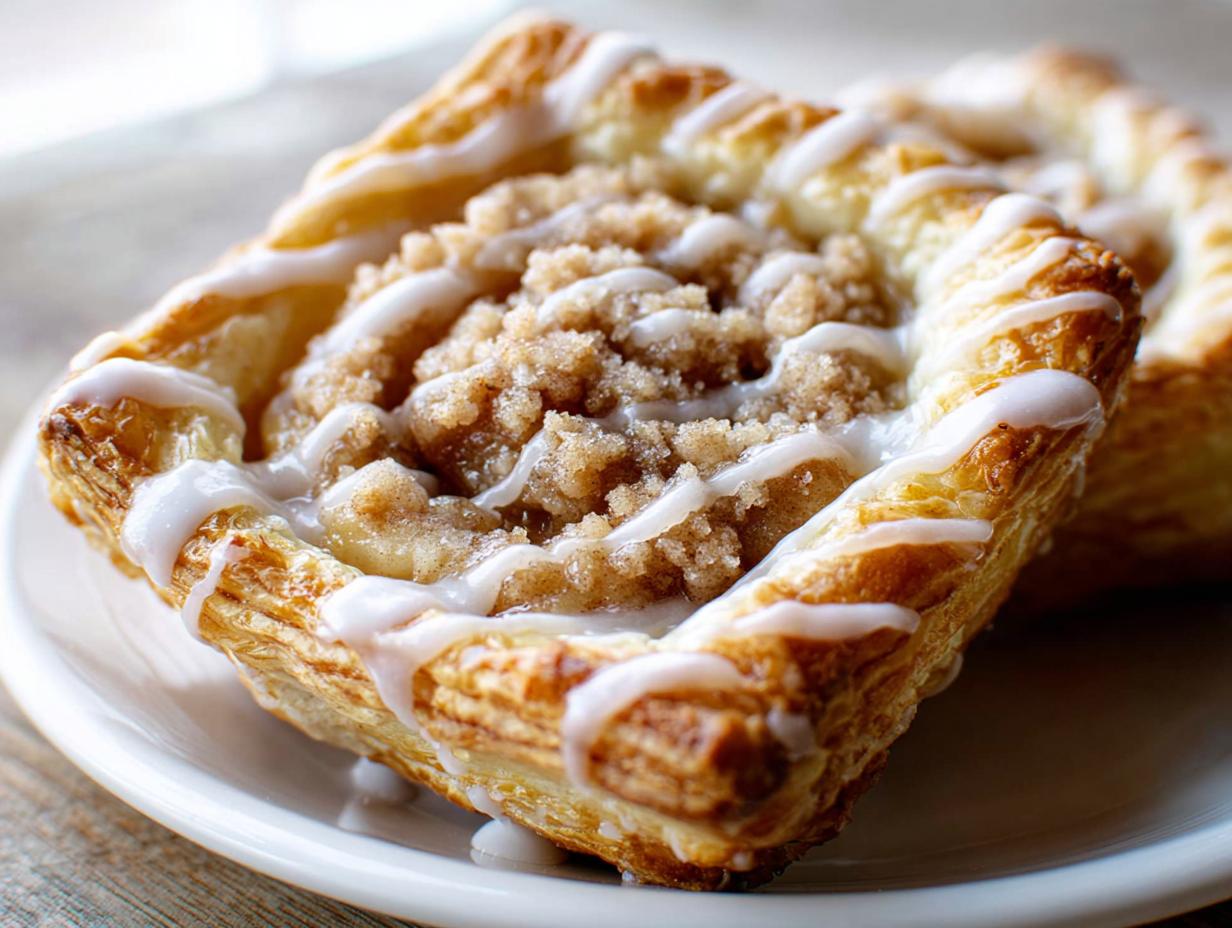
I used to think danishes were only for professional bakeries, but when I had friends popping over unexpectedly last month, I whipped these up in a flash. They smelled absolutely heavenly—like an autumn bakery exploded in my kitchen. The combination of spiced apples and that crunchy topping is just divine. Trust me, these Apple Crumble Danishes With Puff Pastry are about to become your go-to weekend treat.

Why These Apple Crumble Danishes With Puff Pastry Are Perfect For You
If you’re new to baking or just short on time, these are your heroes. The prep time is ridiculously fast—we’re talking under 20 minutes because we’re leaning on that amazing pre-made puff pastry. It gives you guaranteed height and those gorgeous, crispy layers every single time. You don’t have to worry about yeast or folding butter!
The magic here is the contrast: warm, soft apples against the crunchy crumble, all nestled in that light, airy pastry shell. Honestly, these Apple Crumble Danishes With Puff Pastry look like they came from a fancy French café, but you can have them cooling on the rack in less time than it takes to brew a pot of coffee. They are pure, delicious efficiency!
Ingredients For Apple Crumble Danishes With Puff Pastry
Okay, gathering your supplies is half the battle, and honestly, this recipe keeps it so simple because we are cheating with the pastry! We need four main components here: the filling, the pastry itself, the crunchy topping, and the final drizzle. Don’t worry about measuring out weird amounts; everything comes together quickly.
Getting these ingredients ready means you can start assembling in minutes. These Apple Crumble Danishes With Puff Pastry rely on that easy structure to shine. Make sure you have everything prepped before you turn on the oven, especially cooling down that apple mix!
Apple Filling Components
For the filling, you need 5 Granny Smith apples. They must be peeled, cored, and sliced thinly—I mean thin, like matchsticks almost. You’ll mix those with 1 tablespoon of butter, 1/3 cup of packed light brown sugar, 2 tablespoons of cornstarch to thicken things up, and 1 and a half teaspoons of ground cinnamon. That spice blend is everything!
Pastry And Egg Wash Details
This is where we save time: grab one whole box of puff pastry, about 17.3 ounces, and make sure it’s fully thawed—not rock hard, but not sloppy either. For the wash that makes the edges golden, you just need one large egg whisked together with 1 tablespoon of water. Simple but crucial for that bakery look.
Crafting The Perfect Crumble Topping
The crumble topping needs 3 tablespoons of light brown sugar, 1/4 cup of all-purpose flour, and 2 tablespoons of unsalted butter. The absolute key here is that the butter has to be cold and cubed. If your kitchen is warm, pop those cubes in the freezer for five minutes before you mix it up. We want coarse crumbs, not paste!
Simple Glaze Ingredients
For the very last step, you only need a quick glaze: 1/2 cup of powdered sugar and 2 tablespoons of heavy cream. Whisk them together until smooth, and that’s it! That sweet drizzle on top is the perfect counterpoint to the tart apples.
Preparing The Apple Filling For Apple Crumble Danishes With Puff Pastry
This is the only part of the process that actually involves cooking, and it’s so important for texture, so pay attention! First, melt that tablespoon of butter in a skillet over medium heat. Toss in those thinly sliced Granny Smiths. You want them to cook for about five minutes until they just start to get a little soft around the edges, but they shouldn’t turn into mush. We want some structure left!
While those are softening, quickly mix your dry filling ingredients in a separate little bowl: the brown sugar, cornstarch, and cinnamon. Dump that mixture right into the apples and stir it all around. Cook for another two or three minutes. You’ll see it thicken up almost instantly because of that cornstarch—that’s what keeps the pastry from getting soggy when we bake these Apple Crumble Danishes With Puff Pastry later.
Once that filling looks thick and glossy, take it off the heat immediately. This is crucial: you must let it cool down slightly before putting it on the puff pastry. If you put hot filling on cold pastry, the butter in the dough melts before it even hits the oven, and poof, no flakiness! Just set the bowl aside while you handle the dough.
Assembling Your Apple Crumble Danishes With Puff Pastry
Now for the fun part where everything comes together and starts looking like a real pastry! Since we used thawed puff pastry, we need to be gentle but firm with our cuts. Lay out your thawed sheets on a clean surface. Remember, these are going to puff up dramatically, so precision now prevents a traffic jam later.
We are aiming for 12 individual pastries, so cut each sheet into 6 equal rectangles. Lay them all out on that parchment-lined baking sheet. This is where you need your sharpest knife or even a pizza cutter. Be decisive with your cuts!
Cutting And Shaping The Pastry
Once you have your 12 rectangles, you need to score a border. Take a small paring knife and lightly trace a rectangle shape about 3/4 of an inch in from the edge. Don’t cut all the way through! This border is what rises up around your filling. Then, take a fork and gently prick all the center area inside that score line. Pricking stops the middle from puffing up too high, keeping your filling nice and contained.
Filling Placement And Crumble Application
Take your slightly cooled apple mixture and spoon a nice amount right into the center of each pastry—but make sure you keep that filling strictly inside the scored border we just made! If it spills over, it will melt into the edges and stop them from puffing up beautifully. After the apples are nestled in, grab that crumb topping we made earlier and sprinkle it evenly over the apples. Don’t be shy; that crunch is essential for these Apple Crumble Danishes With Puff Pastry.
Applying The Egg Wash
This is the final cosmetic step before baking, and it’s so important for that glossy, golden finish. Take your egg and water mixture—the egg wash—and brush it ONLY onto the pastry borders that are outside the score line. Do not let the wash drip into the center or onto the apples. We want that wash to seal and color the edges, encouraging maximum lift and puff around the filling. It’s a small detail, but it makes all the difference in how these Apple Crumble Danishes With Puff Pastry look!
Baking Tips For Perfect Apple Crumble Danishes With Puff Pastry
Time to get these beauties into the heat! Preheat your oven to 400 degrees Fahrenheit. I know that sounds hot, but it’s what puff pastry needs to really spring up and get those amazing flaky layers we’re after. Make sure you’ve lined your baking sheet with parchment paper first—trust me, you do not want to deal with burnt sugar sticking to the metal later.
Slide them into the hot oven and set your timer for about 18 to 22 minutes. You are looking for two main things: they need to be visibly puffed up around the edges, and the pastry borders should be a deep, rich golden brown. If the centers look a little pale but the edges are done, that’s okay, but generally, you want that deep color everywhere.

Don’t open the oven door too early, or you might shock the dough! If you see the apples bubbling out and threatening to burn before the pastry is fully cooked, you can carefully tent the whole batch loosely with foil. But usually, if you cooked your apples down properly, these Apple Crumble Danishes With Puff Pastry bake up perfectly in that 20-minute window. Pull them out, and the aroma alone will make you so proud!
Finishing Touches And Glazing Instructions
Once those danishes come out of the oven, golden and smelling incredible, you have to practice restraint for just a minute! They are piping hot, and if you try to glaze them right away, the sugar will just melt right off into a sad, thin puddle. You need to let them cool on that baking sheet for about 10 minutes first.
This resting time allows the pastry structure to set up so it doesn’t collapse when you move it, and it lets the apple filling cool down just enough so the glaze can sit nicely on top. While they are resting, whip up the glaze. It’s seriously two ingredients.
In a small bowl, whisk together your 1/2 cup of powdered sugar with the 2 tablespoons of heavy cream. You want to whisk hard until it’s totally smooth—no lumps allowed! If it looks too thick to drizzle, add just a tiny splash more cream, maybe half a teaspoon at a time, until it flows off your whisk in a steady stream. When the 10 minutes are up, take a spoon and drizzle that sweet glaze generously over the tops of the warm danishes. It sets up quickly, and then they are ready to go! If you want to see more sweet treats, check out our recipe for Strawberry Cream Cheese Heart Danishes.
Frequently Asked Questions About Apple Crumble Danishes With Puff Pastry
I get so many questions about these pastries because everyone wants that perfect flaky result, and honestly, I’ve figured out all the little tricks over the years. When you use puff pastry, a couple of details really separate the good ones from the *great* ones. Here are the things folks ask me most often about making these Apple Crumble Danishes With Puff Pastry.
Can I Use Different Apples For This Recipe?
Granny Smith apples are my absolute favorite here because they hold their shape beautifully when cooked and they have that nice tartness that cuts through the sugar. You can certainly try other firm, tart apples like Honeycrisp or Braeburn, but avoid anything too soft, like McIntosh. Soft apples break down too much during cooking, and you’ll end up with applesauce instead of chunks in your filling!
How Do I Keep My Pastry Flaky?
This is the million-dollar question! The biggest enemy of flaky pastry is moisture where it shouldn’t be. You need to make sure your apple filling has cooled down before you spoon it onto the dough—hot filling steams the dough from the inside out. Also, remember that note about excess liquid? Make sure you cook the apples just long enough for the cornstarch to thicken the juices. If you see a puddle of thin liquid in the bottom of your skillet after you take them off the heat, leave that liquid behind and only spread the apple solids onto the pastry. That’s the secret to keeping those edges crisp!
Can Apple Crumble Danishes With Puff Pastry Be Made Ahead?
You have a couple of options here, but I always recommend assembling them right before baking if you can. The pastry is best the day it’s made. However, you can totally make the apple filling a day ahead of time and store it in the fridge. Just make sure it’s completely cold before you use it! You can also assemble the entire danish—pastry, filling, and crumble—and place them, unwashed with egg, on the baking sheet. Cover them tightly with plastic wrap and chill them for up to 12 hours. When you’re ready to bake, brush the edges with the egg wash and add 2-3 minutes to your baking time since they are going in cold.
Storing Your Leftover Apple Crumble Danishes With Puff Pastry
I’m going to be honest—these are best eaten the day you make them when that pastry is practically shattering when you bite into it. But if you happen to have any stragglers (which rarely happens in my house!), you need to store them correctly so they don’t turn into sad, chewy hockey pucks. The key is keeping air away from that beautiful puff pastry. If you want to see more of our baking tips, follow us on Pinterest!
Once the Apple Crumble Danishes With Puff Pastry have cooled completely after glazing, store them in an airtight container at room temperature. Do not put them in the fridge! Cold air dries out puff pastry faster than anything. They should keep well for about two days this way.
If you want to bring back some of that fresh-baked crispness, reheating is the way to go. Skip the microwave entirely—it makes them tough. Instead, pop them on a small baking sheet in a 325°F oven for about 5 to 7 minutes. That little bit of dry heat wakes up the butter in the pastry and crisps up the crumble again. Here’s a quick guide for you:
| Storage Method | Duration | Best Reheating Tip |
|---|---|---|
| Airtight Container (Room Temp) | 1-2 Days | 5-7 minutes at 325°F |
| Freezer (Wrapped Well) | Up to 1 Month | Thaw overnight, then reheat as above |
Nutritional Data Disclaimer
Now, I’m not a nutritionist—I’m just a home cook who loves butter and apples! So, I want to give you a quick heads-up about the numbers listed for these delicious treats. You can also check out our Privacy Policy for more site information.
The nutritional information provided for these Apple Crumble Danishes With Puff Pastry is just an estimate, kind of a guideline for you. I calculate these based on standard product measurements I usually buy, but we all know brands vary, right? For more general cooking insights, feel free to read our posts on Medium.
If you’re using a different brand of puff pastry, or maybe you used a slightly heavier hand with that brown sugar in the filling, your totals will be different. Things like the exact fat content in your butter or the size of your specific Granny Smith apples can swing the numbers a bit.
So please treat that data as a general reference point rather than a precise guarantee. The most important thing is that they taste amazing and make your brunch spectacular. Don’t stress the small stuff when you’re enjoying something this good! We love hearing from our readers, so feel free to connect with us on Facebook.
Print
Amazing 12 Apple Crumble Danishes With Puff Pastry
- Total Time: 40 minutes
- Yield: 12 danishes
- Diet: Vegetarian
Description
These apple crumble danishes are flaky, buttery, and filled with spiced apples and crumb topping. An easy apple danish recipe for brunch using store-bought puff pastry.
Ingredients
- Apple Filling:
- 1 tablespoon unsalted butter
- 5 medium Granny Smith apples peeled cored and thinly sliced
- ⅓ cup light brown sugar packed
- 2 tablespoons cornstarch
- 1½ teaspoons ground cinnamon
- Pastry:
- 1 box puff pastry 17.3 ounces thawed
- 1 large egg
- 1 tablespoon water
- Crumble Topping:
- 3 tablespoons light brown sugar
- ¼ cup all purpose flour
- 2 tablespoons unsalted butter cold and cubed
- Glaze:
- ½ cup powdered sugar
- 2 tablespoons heavy cream
Instructions
- Preheat the oven to 400°F and line a large baking sheet with parchment paper.
- Melt the butter in a skillet over medium heat. Add the sliced apples and cook 5 minutes until slightly softened.
- In a small bowl, mix the brown sugar, cornstarch, and cinnamon. Stir into the apples and cook 2 to 3 minutes until thickened. Remove from heat and cool slightly.
- Unfold the puff pastry sheets and cut each into 6 equal rectangles for a total of 12 pieces. Arrange on the prepared baking sheet.
- Lightly score a border about ¾ inch from the edge of each rectangle. Prick the center area with a fork.
- Spoon the apple filling into the center of each pastry, keeping it inside the scored border.
- In a bowl, combine the brown sugar, flour, and cold butter until crumbly. Sprinkle evenly over the apples.
- Whisk the egg with water and brush only the pastry borders with the egg wash.
- Bake for 18 to 22 minutes until puffed and golden brown.
- Whisk together the powdered sugar and heavy cream. Drizzle over the danishes after cooling 10 minutes.
Notes
- Avoid adding excess liquid from the apples so the pastry stays crisp and flaky.
- Prep Time: 20 minutes
- Cook Time: 20 minutes
- Category: Pastry
- Method: Baking
- Cuisine: American