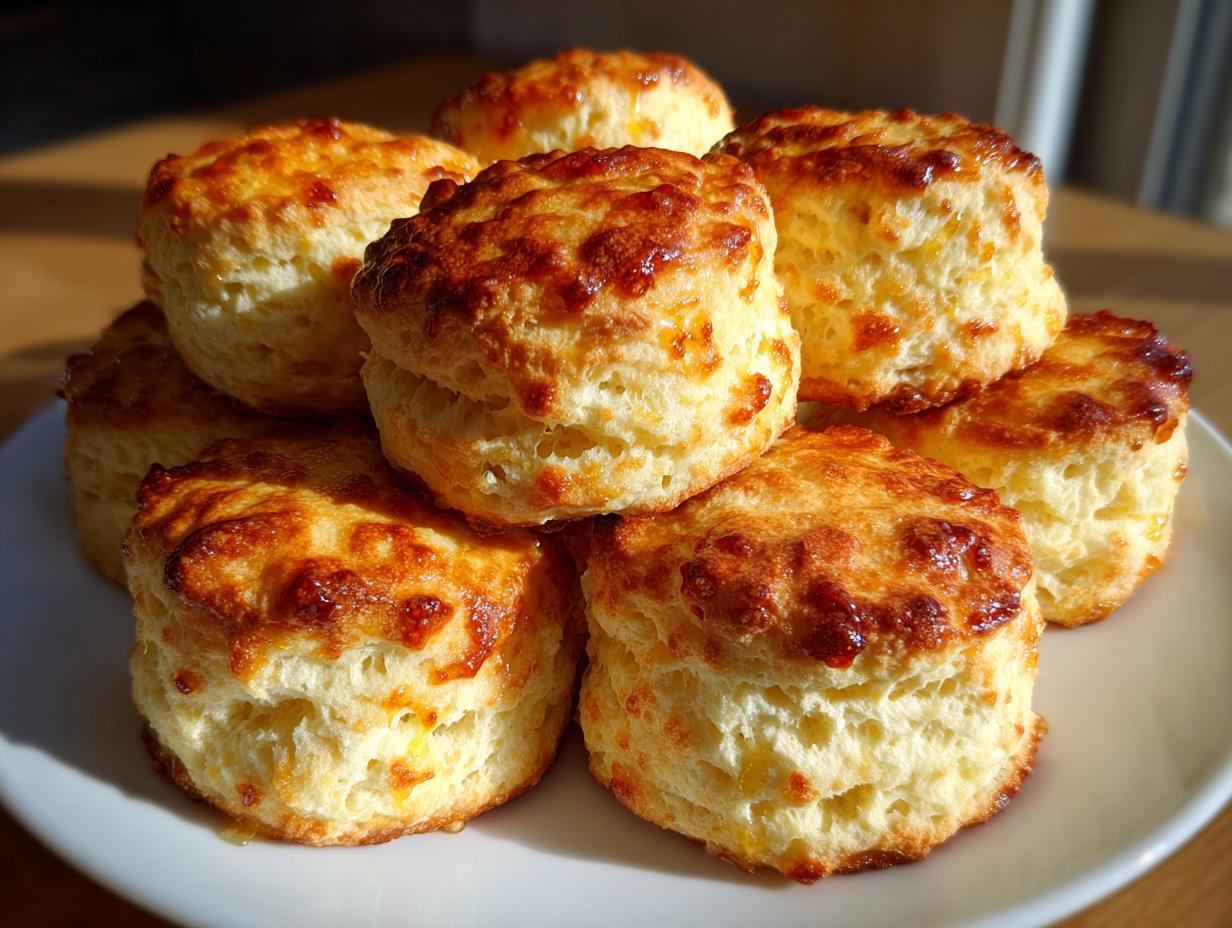
Oh my goodness, if you have ever been intimidated by making homemade biscuits, stop right now and listen to me! I’ve spent years chasing that perfect, cloud-like interior and those gorgeous, flaky layers you see in bakeries. I’ve had flat, sad hockey pucks, and I’ve definitely had biscuits that tasted like dry cardboard. But I finally cracked the code, and I’m sharing the absolute best way to make **Buttermilk Biscuits** that are tender, golden, and practically melt in your mouth.
This recipe is my go-to because it cuts out the fuss. You don’t need fancy equipment, just cold ingredients and a gentle touch. The secret isn’t just the buttermilk, though that helps! It’s all in how you treat that butter and those folds. After countless tries, I promise you, these **Buttermilk Biscuits** are foolproof for beginners. They come together in under an hour, and when that honey glaze hits them warm from the oven? Forget about it. You’ll never buy canned again, trust me on this one.

Gathering What You Need for Buttermilk Biscuits
Before we even think about mixing anything, we need to make sure our kitchen is set up right. Remember, the secret to those amazing flaky biscuits is keeping everything COLD. So, get your ingredients chilled and have your gear ready to go. This whole process moves fast once you start, so preparation is key for perfect **Buttermilk Biscuits**!
Essential Equipment List for Buttermilk Biscuits
- Large mixing bowl
- Pastry cutter or a couple of sturdy forks
- Spatula for gentle mixing
- Baking surface: either a cast iron skillet (my favorite!) or a baking sheet lined with parchment paper
- A 3-inch round biscuit cutter (Don’t use a knife or a glass!)
Ingredient List for Flaky Buttermilk Biscuits
Here is exactly what you need. Pay attention to the cold butter and the cold buttermilk – this is non-negotiable for the best rise!
| Ingredient | Amount |
|---|---|
| All-purpose flour | 2½ cups |
| Baking powder | 2 tablespoons |
| Fine salt | 1 teaspoon |
| Cold unsalted butter, cubed | ½ cup |
| Honey (for dough) | 1 tablespoon |
| Cold buttermilk | 1 cup plus 3 tablespoons |
| Melted butter (for topping) | 2 tablespoons |
| Honey (for topping) | 2 teaspoons |
Step-by-Step Guide to Making Buttermilk Biscuits
Okay, the oven needs to be hot—we’re talking 425°F right now. Get your cast iron skillet ready, or line a baking sheet with parchment. Preheat time is crucial here so the biscuits get that immediate lift when they hit the heat. Now, let’s make some magic happen!
Preparing the Dry Mix and Cold Butter for Buttermilk Biscuits
First things first: the dry ingredients. In your big bowl, whisk together the flour, baking powder, and that teaspoon of salt. You want these evenly distributed so every biscuit rises the same. Don’t skip the whisking, it acts like a mini-sifting!
Next comes the star ingredient for flakiness: the cold butter. It must be cold, and I mean really cold—straight from the fridge, cubed up. Use your pastry cutter or even just two forks to work that butter into the flour mixture. You’re looking for what I call “coarse crumbs.” Seriously, stop when you see pieces ranging from pea-sized to maybe a bit bigger, like small lentils. If you mix it too much and it looks like fine sand, you’ve lost your layers. The pockets of butter create steam that pushes the dough apart while it bakes!
Mixing the Dough and Building Flaky Layers
Time for the wet stuff. Make a little well in the center of your buttery flour. Pour in the tablespoon of honey for a subtle sweetness inside the biscuit, and then dump in that ice-cold buttermilk. Grab a spatula—this is important—and just gently stir until everything barely comes together. I mean shaggy, messy, barely mixed dough. If you start kneading it now, you’ll ruin the whole batch. Remember the note: do not overmix!
Turn that messy blob out onto a lightly floured counter. Pat it gently into a rough 10-inch rectangle. This is where we build structure. Take the left side and fold it over to the middle. Then take the right side and fold it over that middle section, like folding a business letter. Rotate the dough a quarter turn, pat it back into a rectangle, and repeat that folding process two more times. This is called lamination, and it creates those beautiful, distinct layers.
After those folds, pat the dough out one last time until it’s about an inch thick. Don’t press it thin! We want height.
Cutting and Baking Your Homemade Buttermilk Biscuits
Grab that 3-inch cutter. This is one of my biggest tips: when you cut the biscuits, press the cutter straight down into the dough and pull it straight up. Do not, I repeat, DO NOT twist the cutter! Twisting seals the edges shut, and that seals off the steam, resulting in short, squat biscuits instead of tall, flaky ones.
Arrange your 8 cut biscuits close together in that hot skillet. They should be touching slightly; this helps them support each other and rise higher. Pop them into that 425°F oven for about 15 minutes. They should be golden brown and smelling incredible. If you want them a little darker, like I sometimes do, crank the heat up to 450°F for the final 3 to 5 minutes. Watch them closely!

Creating the Sweet Honey Glaze for Buttermilk Biscuits
While they are baking, whisk together your 2 tablespoons of melted butter and the 2 teaspoons of honey for the topping. This is so easy but makes such a difference! You can see more of my favorite sweet additions when you check out my sweet potato pie cookies!
As soon as those beauties come out of the oven, brush that warm honey butter all over the tops. The heat melts it right in, making the crust shiny and adding just that perfect touch of sweetness. Serve them immediately—warm, flaky **Buttermilk Biscuits** are the best way to start any day!
Tips for Guaranteeing Success with Buttermilk Biscuits
I’ve learned a few hard-won lessons over the years trying to perfect these. If you follow the main steps but still end up with biscuits that are a little tough, I can tell you exactly why. Most of the time, it comes down to two things: temperature and handling.
First, the ingredients must be ice cold. If your butter melts before it hits the flour, you lose the steam pockets, and you get a dense slab instead of a flaky biscuit. If your buttermilk is room temperature, it will activate the baking powder too fast. Keep everything chilled! If you want to see another recipe where temperature is key, check out my guide on chocolate sea salt nut bars.
My biggest mistake when I first started was getting impatient during the folding stage. I thought folding twice was enough. Nope! I remember one batch where I only folded once because I was rushing to get breakfast on the table. They came out looking more like thick scones than tall biscuits. You have to do those three full sets of letter folds to build the structure for those tender, layered interiors. Be patient during the folding, and then be quick when you cut them!
Also, remember that cutter rule: straight down, no twisting! That little bit of effort ensures you get the tallest, flakiest **Buttermilk Biscuits** possible every single time. If you want to see more of my baking secrets, follow along on Pinterest!
Frequently Asked Questions About Buttermilk Biscuits
I get so many questions about these biscuits because everyone wants that perfect rise! It’s usually a small detail that trips people up, but once you know the trick, you’ll be turning out beautiful homemade biscuits every week.
Can I substitute the buttermilk in this Buttermilk Biscuits recipe?
Yes, you absolutely can, though nothing beats real buttermilk for that classic tang and tenderness! If you’re in a pinch, you can make a substitute right in your measuring cup. Just take 1 cup of regular milk—whole milk works best—and stir in 1 tablespoon of white vinegar or lemon juice. Let that sit on the counter for about five minutes until it looks slightly curdled. That’s your makeshift buttermilk! Use that mixture just as you would the real thing in the dough.
How do I ensure my Buttermilk Biscuits are extra tall?
This is my favorite question because height means flakiness! There are two major things that guarantee tall **flaky biscuits**. First, make sure your butter is rock solid cold when you cut it into the flour. Second, and this is huge, you must press your biscuit cutter straight down without twisting. Twisting seals the edges and prevents the layers from separating and puffing up. Press firm and straight, and watch them soar!
Storing and Reheating Your Buttermilk Biscuits
These **Buttermilk Biscuits** are undeniably best right out of the oven when that honey butter is still sizzling, but thankfully, they keep really well! You don’t want to store them uncovered because they dry out quickly. If you plan on eating them the same day, just leave them in an airtight container on the counter. If you need them to last a bit longer, the fridge is better, though they might firm up a little.
When it comes time to reheat, don’t even think about the microwave unless you absolutely have to—it makes them chewy! The best way to bring back that fresh-baked texture is definitely the oven. A quick zap warms them through and revives some of that exterior crispness.
| Storage Method | Duration | Reheating Tip |
|---|---|---|
| Airtight Container | Up to 2 days (Counter) | Wrap in foil and heat at 350°F for 5-7 minutes. |
| Airtight Container | Up to 4 days (Fridge) | Brush with a tiny bit of water before warming in the oven for that steam effect. |
Serving Suggestions for Your Buttermilk Biscuits
Honestly, these **Buttermilk Biscuits** are perfect just as they are with that honey glaze, maybe crumbled over some leftover gravy if you’re feeling extra decadent! But if you want to build a real brunch feast, they pair beautifully with simple things. You might also enjoy them with a side of oven roasted potatoes!
Try them alongside scrambled eggs and crispy bacon. They are also fantastic sliced open and used as the base for mini sausage biscuits. A side of fresh fruit like berries really cuts through the richness of the butter perfectly!
Understanding the Nutrition in Your Buttermilk Biscuits
Because we are using real butter and that lovely rich buttermilk, these are definitely a treat! I always tell people that baking from scratch means you know exactly what goes in—no weird preservatives or fillers—but you should still enjoy them in moderation. These figures are just estimates based on the ingredients listed, so take them with a grain of salt, but it gives you a good idea!
| Nutrient | Estimated Value (Per 1 Biscuit) |
|---|---|
| Serving Size | 1 biscuit |
| Calories | 300 calories |
| Fat | 14g |
| Carbohydrates | 38g |
| Protein | 5g |
The honey adds a bit of sugar, of course, but it’s worth it for that incredible topping! Enjoy them warm; that’s when they are at their absolute best. For more sweet treats, check out my easy heart cookies recipe!
Share Your Experience with These Buttermilk Biscuits
I poured my heart into sharing all my secrets for these flaky **Buttermilk Biscuits**, and now I really want to hear from you! Did they rise high? Did your family fight over the last one? Don’t be shy! You can share your results on Facebook too!
Pop down in the comments below and tell me how they turned out. Leave a rating so other bakers know these are worth the effort. Happy baking, friends!
Print
Secret 1 for 8 Flaky Buttermilk Biscuits
- Total Time: 35 minutes
- Yield: 8 biscuits
- Diet: Vegetarian
Description
Bake golden, flaky buttermilk biscuits with a soft, buttery center and sweet honey glaze. This is a simple recipe that yields tender, layered biscuits.
Ingredients
- 2½ cups all-purpose flour
- 2 tablespoons baking powder
- 1 teaspoon fine salt
- ½ cup cold unsalted butter, cubed
- 1 tablespoon honey (for dough)
- 1 cup plus 3 tablespoons cold buttermilk
- 2 tablespoons melted butter (for topping)
- 2 teaspoons honey (for topping)
Instructions
- Preheat oven to 425°F. Lightly grease a cast iron skillet or line a baking sheet with parchment paper.
- In a large bowl, whisk flour, baking powder, and salt.
- Cut cold butter into the flour using a pastry cutter or fork until coarse crumbs form.
- Add honey and cold buttermilk to the center. Gently stir with a spatula until a shaggy dough forms. Do not overmix.
- Turn dough onto a lightly floured surface. Pat into a 10-inch rectangle. Fold the left side into the center, then the right. Rotate, pat out again, and repeat twice to build flaky layers.
- Shape into a 1-inch-thick rectangle. Cut out 8 biscuits using a 3-inch cutter, pressing straight down without twisting.
- Arrange biscuits close together in the prepared skillet.
- Bake for 15 minutes or until golden brown on top. For extra color, bake 3–5 minutes more at 450°F.
- Whisk melted butter and honey, then brush over warm biscuits before serving.
Notes
- Do not overmix the dough.
- Press the biscuit cutter straight down without twisting for higher rise.
- For extra color, increase the temperature to 450°F for the last few minutes of baking.
- Prep Time: 15 minutes
- Cook Time: 20 minutes
- Category: Breakfast/Brunch
- Method: Baking
- Cuisine: American