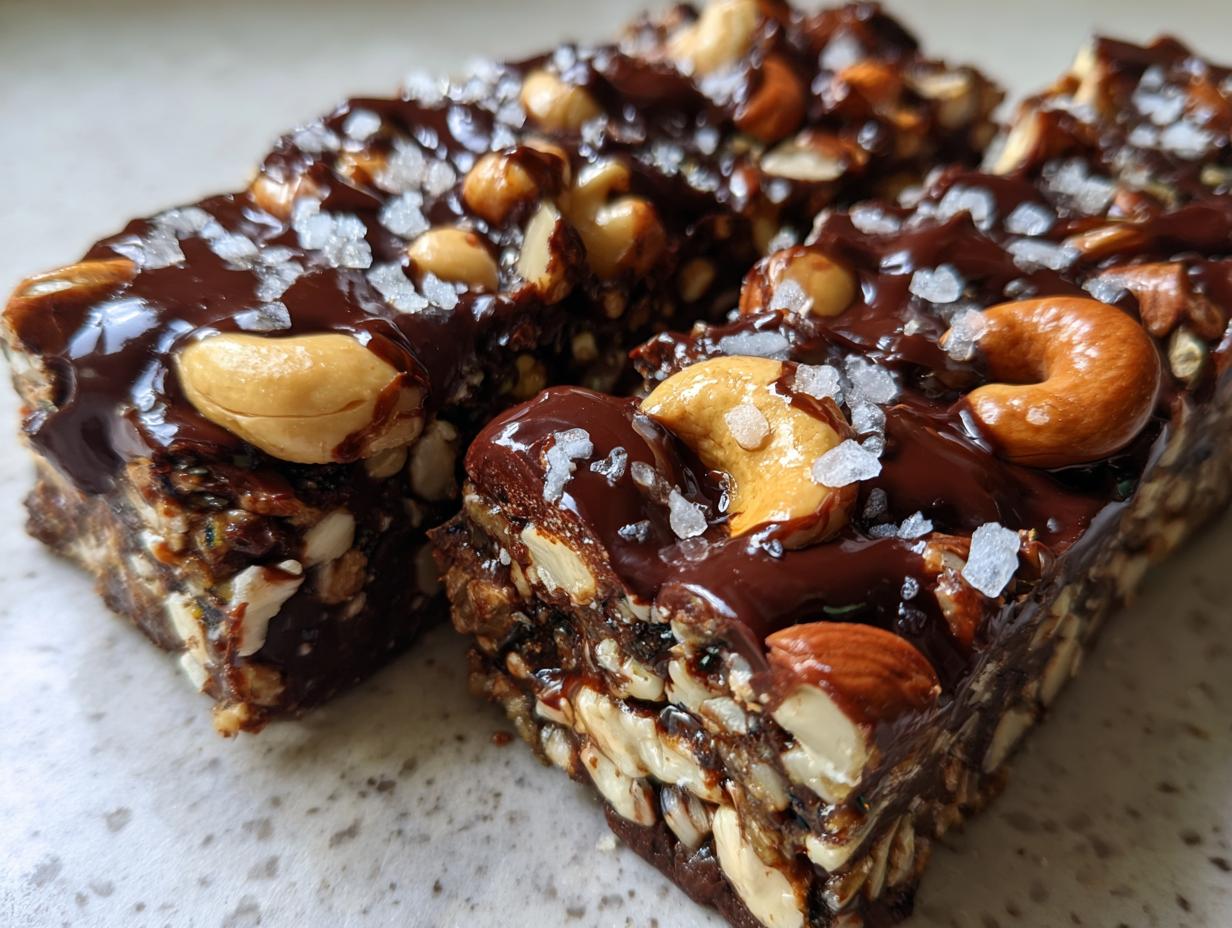
Are you tired of protein bars that taste like chalky cardboard? Me too! That’s why I spent way too long perfecting these Dark Chocolate Sea Salt Nut Protein Bars. Seriously, these are the real deal—rich, decadent, and they taste like a candy bar but are packed with goodness. The best part? They are completely no-bake! You don’t even need to turn on the oven, which means they come together faster than you can run to the grocery store for a packaged snack.
If you’re new to making your own healthy snacks, don’t worry one bit. This recipe is so straightforward; it’s almost impossible to mess up. We are using natural sweeteners, so you control exactly what goes into your energy boost. Trust me, once you try these homemade Dark Chocolate Sea Salt Nut Protein Bars, you’ll never look back. They are perfect for a mid-afternoon slump or a quick pre-workout fuel-up! 
Essential Ingredients for Dark Chocolate Sea Salt Nut Protein Bars
Okay, let’s talk ingredients. For these no-bake wonders, every component plays a critical role in achieving that perfect chewy, salty, chocolatey explosion. Don’t try to substitute the star players, especially the dates—they are the glue holding this whole operation together! Having everything measured out before you start mixing is key, especially since the timeline speeds up once you get going.
Gathering Your Dry Ingredients
For the crunch and texture, we need a good mix of nuts and seeds. I use raw almonds, cashews, and roasted peanuts—the roasted ones give a nice depth of flavor! You need to roughly chop the almonds, cashews, and peanuts yourself. Please don’t buy them pre-chopped; you want those varied sizes for texture. We toss those in with pumpkin seeds and sunflower seeds. Finally, we throw in some brown rice crisp cereal. Yes, cereal! It adds necessary airiness so the bars aren’t rock-solid bricks. Oh, and don’t forget that half teaspoon of regular sea salt to bring out the chocolate later!
Creating the Natural Sweetener Base
This is where the magic happens! You absolutely need Medjool dates, and they must be pitted. If your dates feel hard or dry—and this happens sometimes—just grab a bowl, pour boiling water over them for about ten minutes, and drain them really well. That hot soak softens them right up so they blend perfectly smooth. We mix those dates with pure maple syrup for that specific caramel note, and natural almond butter. Make sure it’s the runny kind, not the stiff stuff, so it mixes easily with the syrup and vanilla extract.
The Chocolate Topping Components
For the drizzle, we keep it simple but impactful. You need good quality dark chocolate chips—the darker, the better to balance the sweetness of the dates. Then, just one tablespoon of coconut oil. This isn’t for flavor; it’s purely structural. The oil helps the chocolate melt down super smooth and gives it a beautiful shine when it sets up. And remember to save your flaky sea salt for the very top—that’s what makes them look and taste gourmet!
Equipment Needed for Perfect Dark Chocolate Sea Salt Nut Protein Bars
You don’t need fancy gadgets for these bars, thank goodness! The most important tool here is a solid food processor. It needs to be strong enough to pulverize those dates and chop the nuts without giving up on you halfway through. You’ll also need a large mixing bowl for combining everything once the processor has done its job.
The pan size matters a lot for thickness and setting time. We are using an 8×8-inch baking pan. Make sure you have a sharp, sturdy knife ready for cutting later on, too—that’s crucial for clean slices!
Preparing Your Pan
Listen, this step saves you so much frustration later, so don’t skip it! You need to line that 8×8 pan with parchment paper, but here’s the trick: leave an overhang on two opposite sides. Think of it like built-in handles. You want that paper sticking up over the edges like little flags. When the bars are totally chilled, you just grab those paper flags and lift the entire slab right out of the pan. Easy peasy!
Seamless Step-by-Step Instructions for Dark Chocolate Sea Salt Nut Protein Bars
Now that we have our ingredients ready and our pan prepped with those handy parchment handles, it’s time to assemble these incredible Dark Chocolate Sea Salt Nut Protein Bars. Remember, there’s no baking here, so we rely completely on good technique for texture and structure. Follow these steps closely, and you’ll have a perfect tray of bars!
Combining the Nut and Seed Base
First up, let’s deal with the dry stuff. Take those almonds, cashews, and peanuts you chopped—you want them chunky, not powdery! Toss those chopped nuts into your large mixing bowl. Add your pumpkin seeds, sunflower seeds, brown rice crisp cereal, and that half teaspoon of sea salt. Give it a really good stir with a strong spoon. We want everything evenly distributed before we introduce the sticky wet stuff. This ensures every bite has that satisfying crunch from the nuts and seeds.
Processing the Binding Mixture
Time for the food processor to shine! Put your pitted dates, maple syrup, almond butter, and vanilla extract right into the machine. Start blending. You’ll need to stop every 30 seconds or so to scrape down the sides with a spatula. Keep going until it looks like a thick, cohesive, slightly glossy paste. It should be very sticky—that’s exactly what we want for binding. If you soaked dry dates, make sure they are well-drained before they go in!
Mixing and Firmly Pressing the Bars
Pour that thick date mixture right over your bowl of chopped nuts and seeds. Now, grab that sturdy spoon and start stirring vigorously. This takes some effort, but you need to make sure every single nut and seed gets coated in that sweet binder. Once it’s all combined—it will look very thick—transfer the whole mixture into your prepared 8×8 pan. Use your hands or the flat bottom of a measuring cup and press down. I mean press down! You have to compact this mixture as firmly as you possibly can to prevent crumbling later on.
Chilling and Cutting the Slab
This waiting part is the hardest, I know! Once it’s packed down tight, pop the pan into the refrigerator for at least two hours, or if you’re impatient like me, freeze it for about 30 minutes until it’s totally firm. You need it solid before you try to cut it. When it’s rock hard, use those parchment paper handles to lift the entire slab right out onto a cutting board. Use a sharp knife to slice it into 12 equal bars. Take your time here! 
Melting and Drizzling the Chocolate Finish
For the grand finale, let’s deal with the chocolate. Put your dark chocolate chips and coconut oil in a microwave-safe bowl. Heat it in 30-second bursts, stirring well after every burst. Don’t try to rush this, or the chocolate will seize up on you! Once it’s perfectly smooth and shiny, drizzle it right over your chilled bars. The absolute key here is to immediately sprinkle that flaky sea salt on top while the chocolate is still wet. Pop them back into the fridge for about 15 minutes just to set that beautiful chocolate shell. Done!
Tips for Success with Dark Chocolate Sea Salt Nut Protein Bars
Making these Dark Chocolate Sea Salt Nut Protein Bars is super easy, but a few little tricks will take them from “good” to “absolutely amazing.” The main thing we are fighting against is crumbling, which happens if the binder doesn’t set right or if we get lazy during the pressing stage. Trust me, putting in that extra effort on the front end pays off when you go to grab a bar later!
Achieving Optimal Texture and Binding
The secret to bars that hold together beautifully lies in two places: the dates and the pressure. If your Medjool dates are even slightly dry, they won’t blend into that super sticky paste we need. If you have any doubt, soak them in hot water first and drain them completely—that moisture is essential for binding everything together. Also, when you press that mixture into the pan, really put your weight into it! I use the bottom of a flat measuring cup and press until my knuckles hurt a little. That extreme compaction stops the nuts from shifting apart when you slice them.
Getting Clean Cuts on Your Bars
Cutting through the nuts and the chocolate topping can be messy if you aren’t prepared. If you try to cut while the bars are only semi-firm, they’ll smear. Once they are totally chilled, grab your sharpest knife. Here’s the pro trick: run the blade under hot water for about ten seconds until it’s hot. Wipe it dry quickly and make your first cut. The hot blade melts through the chocolate and the dense bar easily. For the next cut, repeat the hot water dip. It keeps your knife clean and gives you those perfect, professional-looking edges on your Dark Chocolate Sea Salt Nut Protein Bars.
Ingredient Substitutions for Dark Chocolate Sea Salt Nut Protein Bars
Sometimes you open the pantry and realize you’re missing a key player, or maybe you just have a nut allergy! That’s fine. We can adapt these wonderful Dark Chocolate Sea Salt Nut Protein Bars without losing that clean-eating vibe. The structure relies heavily on the binder, so we need to be smart about what we swap out. Don’t worry, the end result will still be delicious and chewy!
Swapping Nut Butters and Sweeteners
If almond butter isn’t your jam, you have great options. Peanut butter works perfectly fine, giving the bars a slightly different flavor profile, or if you need to go nut-free, sunflower seed butter is a fantastic substitute. Just try to use a natural, runny style for the best binding results. When it comes to sweeteners, if you don’t have maple syrup, honey is a direct swap, though it has a slightly different flavor. Brown rice syrup is another heavy-duty binder that works wonderfully in place of the maple syrup in these bars. Remember, if you swap out the sweetness, you might need to adjust the salt slightly to keep that balance perfect!
Storing Your Homemade Dark Chocolate Sea Salt Nut Protein Bars
The best part about these no-bake bars is how long they keep! Since they don’t have any weird preservatives, we rely on the fridge or freezer to keep them fresh and firm. You want to make sure you store them properly so they don’t stick together or get weird fridge smells. They are sturdy, but we treat them like the treasures they are!
Best Practices for Refrigeration and Freezing
Once you’ve cut your slab of Dark Chocolate Sea Salt Nut Protein Bars, you need to layer them if you’re putting more than one layer in a container. Take small squares of parchment paper—you can even cut up scraps—and place one between each bar. This stops the chocolate tops from sticking to the bottom of the bar above it. Store them in a truly airtight container. They are best kept in the refrigerator, where they stay perfectly chewy for up to two weeks. If you need them to last longer, the freezer is your friend!
Storage and Reheating Guide for Dark Chocolate Sea Salt Nut Protein Bars
| Storage Location | Maximum Duration | Quick Tip |
|---|---|---|
| Refrigerator (Airtight) | Up to 2 Weeks | Keep them chilled for the best texture. |
| Freezer (Airtight) | Up to 3 Months | Thaw on the counter for 10 minutes before eating. |
Frequently Asked Questions About Dark Chocolate Sea Salt Nut Protein Bars
I always get questions when I first share this recipe, so I figured I’d put the most common ones right here. People want to know about flexibility, especially when dealing with allergies or wanting that extra nutritional punch in their Dark Chocolate Sea Salt Nut Protein Bars.
Can I Make These Bars Vegan?
Yes, absolutely! The base of the recipe is already vegan because we use dates and maple syrup—no honey required! The only thing you have to check carefully is your chocolate chips. Most dark chocolate chips are naturally dairy-free, but double-check the label to make sure they don’t contain milk solids. If you use verified vegan dark chocolate, the whole batch is completely plant-based and delicious!
How Can I Increase the Protein Content?
If you want to boost the protein past the 7 grams we get naturally from the nuts and seeds, it’s super easy. You can add about two tablespoons of your favorite vanilla or chocolate protein powder right into the food processor when you blend the date mixture in Step 3. This will thicken the binder a bit, so you might need to add an extra splash of maple syrup to keep it smooth. It’s a great way to turn these into serious post-workout fuel! This recipe is another great protein option.
Are These Bars Gluten-Free?
They are very close, but you have to be mindful of one ingredient: the brown rice crisp cereal. If you buy standard rice crisps, they are usually fine, but always check the packaging to ensure they haven’t been processed on shared equipment or treated with anything that adds gluten. Since the rest of the ingredients—nuts, seeds, dates, maple syrup, and dark chocolate—are naturally gluten-free, using certified gluten-free crisps makes these Dark Chocolate Sea Salt Nut Protein Bars safe for everyone!
Share Your Dark Chocolate Sea Salt Nut Protein Bars Experience
I truly hope you give these a try! They are my go-to healthy indulgence, and I’m always so thrilled when someone else loves them as much as my family does. Once you’ve made a batch of these amazing Dark Chocolate Sea Salt Nut Protein Bars, come right back here and tell me what you thought!
Did you try a substitution? How did the flaky salt hold up? Drop a rating below and let me know how your kitchen adventure went! You can also share your creations with us on Pinterest.
Print
Amazing 12 Dark Chocolate Sea Salt Nut Protein Bars
- Total Time: 2 hours 20 minutes
- Yield: 12 bars
- Diet: Vegetarian
Description
Homemade dark chocolate sea salt protein bars packed with nuts and seeds. These no-bake bars are naturally sweetened and ready fast for healthy snacking.
Ingredients
- 1 cup raw almonds
- ½ cup raw cashews
- ½ cup roasted peanuts
- ¼ cup pumpkin seeds
- ¼ cup sunflower seeds
- ½ cup brown rice crisp cereal
- ½ teaspoon sea salt
- 1 cup pitted Medjool dates, packed
- ⅓ cup pure maple syrup
- ¼ cup natural almond butter
- 1 teaspoon vanilla extract
- ¾ cup dark chocolate chips
- 1 tablespoon coconut oil
- Flaky sea salt for topping
Instructions
- Line an 8×8-inch baking pan with parchment paper, leaving overhang on two sides for easy removal. Set the pan aside.
- Roughly chop almonds, cashews, and peanuts into smaller pieces, keeping some chunks for texture. Combine chopped nuts with pumpkin seeds, sunflower seeds, rice crisps, and sea salt in a large bowl.
- Add pitted dates, maple syrup, almond butter, and vanilla extract to a food processor. Blend until the mixture is smooth and sticky, stopping to scrape down the sides as needed.
- Pour the date mixture over the nut and seed mixture. Stir vigorously with a sturdy spoon until everything is evenly coated and well combined.
- Transfer the mixture to the prepared pan. Press down very firmly using your hands or the bottom of a measuring cup to compact it into an even layer.
- Refrigerate the pan for at least 2 hours or freeze for 30 minutes until the bars are completely firm and hold their shape.
- Once firm, lift the bars out using the parchment overhang. Cut the slab into 12 equal bars using a sharp knife.
- Melt dark chocolate chips and coconut oil together in a microwave-safe bowl using 30-second intervals, stirring between each, until completely smooth.
- Drizzle the melted chocolate over the bars using a spoon or piping bag. Immediately sprinkle with flaky sea salt while the chocolate is still wet.
- Return the bars to the refrigerator for 15 minutes to set the chocolate. Store in an airtight container in the refrigerator for up to 2 weeks or freeze for up to 3 months.
Notes
- Soak dates in hot water for 10 minutes if they are dry or hard. Drain well before blending for a smoother mixture.
- Press the mixture extremely firmly into the pan to stop bars from crumbling when cut.
- Use a hot knife, running it under warm water and wiping dry between cuts, for cleaner slices through the chocolate.
- Toast the nuts in a dry skillet for 5 minutes before use to improve flavor and crunch.
- Store bars between layers of parchment paper to stop them sticking together in storage containers.
- Replace almond butter with peanut butter, cashew butter, or sunflower seed butter for variations.
- Swap maple syrup for honey or brown rice syrup.
- Add 2 tablespoons of vanilla or chocolate protein powder to boost protein to 10 grams per bar.
- Prep Time: 20 minutes
- Cook Time: 0 minutes
- Category: Snack Bar
- Method: No-Bake
- Cuisine: American