Listen, I get it. Some nights you want that deep, slow-simmered chili flavor, but you only have about thirty minutes before everyone starts hovering around the stove looking hungry. That’s exactly why I developed this absolute lifesaver: the **no chop chili with salsa** recipe. Seriously, this is the fastest, most flavorful chili you will ever make without touching a cutting board.
Forget dicing onions or mincing garlic! We are leaning hard into the magic of good quality store-bought ingredients here. I’ve made this dish hundreds of times after long days—it’s my secret weapon for feeding a crowd fast. It relies on pantry staples and one fantastic shortcut: using your favorite jar of salsa as the flavor base. Trust me, when you taste how rich and smoky this **no chop chili with salsa** turns out, you’ll wonder why you ever bothered with all that chopping in the first place.
It comes together quicker than ordering takeout, and the flavor is seriously impressive for something that took less than 25 minutes total!

Why This No Chop Chili with Salsa Is Your New Weeknight Hero
If you’re new to cooking or just completely exhausted after work, this recipe is tailor-made for you. The philosophy here is maximum flavor payoff for minimum effort. You don’t need fancy equipment or hours of simmering time to get a really satisfying bowl of chili.
This **no chop chili with salsa** proves that shortcuts don’t mean sacrificing taste. It’s incredibly beginner-friendly because the hardest part—the vegetable prep—is completely eliminated. It’s hearty, warming, and ready before the kids even finish their homework.
Quick Prep Meets Deep Flavor
The absolute genius of this stovetop chili is how we use salsa. That jar of store-bought salsa isn’t just liquid; it’s already packed with cooked tomatoes, onions, peppers, and spices! When we just dump it right into the pot, we are instantly importing hours of flavor development.
We brown the meat, add the spice blend, and then everything else—salsa, beans, tomatoes—goes in. Because the salsa base is already seasoned and cooked down, you skip the necessary sauté time for aromatics. It’s instant depth! You just need that 15-minute simmer to let the chili powder and cumin really bloom with the meat.
Gathering Your No Chop Chili with Salsa Ingredients
Okay, let’s talk about what you need for this amazing **no chop chili with salsa**. Since we aren’t chopping anything, gathering these ingredients is honestly the longest part of the prep, and it takes maybe five minutes max! We’re relying on canned goods and spices you probably already have hiding in the pantry.
The exact measurements are listed out below in the table, but make sure you grab those beans ready to be rinsed! That little step makes a big difference in avoiding starchy runoff.
Ingredient List for No Chop Chili with Salsa
| Amount | Ingredient | Preparation Notes |
|---|---|---|
| 1 tablespoon | Neutral oil (canola or vegetable) | For browning the meat |
| 1 pound | Ground beef or ground turkey | Your choice of protein |
| 1 jar 16 ounces | Store bought salsa (mild, medium, or hot) | The flavor powerhouse! |
| 1 can 14 to 15 ounces | Diced tomatoes with juices | Do not drain these |
| 2 cans 15 ounces each | Kidney beans | Must be drained and rinsed well |
| 2 tablespoons | Chili powder | |
| 1 teaspoon | Ground cumin | |
| 0.5 teaspoon | Garlic powder | |
| 0.5 teaspoon | Onion powder | |
| 0.5 teaspoon | Salt | Plus more to taste later |
| 0.25 teaspoon | Black pepper | |
| 0.5 cup | Beef broth or water | Optional, only if you want it thinner |
Selecting the Right Store Bought Salsa
This is important! Since the salsa is doing so much heavy lifting, you want to pick one you actually like eating on its own. I always go for a chunky, thick style of salsa. If you use one that’s too watery, your chili might not thicken up as nicely during the short simmer time.
The texture of the salsa really dictates the final texture of the chili, so choose wisely! Medium heat is my go-to, but use whatever spice level makes you happy.
Step-by-Step Instructions for No Chop Chili with Salsa
Alright, let’s get cooking! This is where the magic happens so fast. Remember, we are moving quickly because there’s no chopping involved in this **no chop chili with salsa**. Get your large pot or Dutch oven ready on the stovetop before you even start grabbing ingredients. Speed is key here!
Browning the Meat and Toasting Spices
First thing, heat up that tablespoon of neutral oil in your pot over medium-high heat. You want it shimmering slightly—that means it’s hot enough to sear the meat nicely. Toss in your pound of ground beef or turkey. Grab a wooden spoon and just break that meat apart into little crumbles as it cooks. You need to cook this for about 5 to 7 minutes until you see absolutely no pink left anywhere. Make sure it’s nicely browned!
Once the meat is cooked through, it’s time for the flavor bomb. Sprinkle in all your dry spices: the chili powder, cumin, garlic powder, onion powder, salt, and pepper right over the hot meat. Stir this mixture constantly for just about 30 seconds. You aren’t trying to cook anything; you are just trying to toast those spices on the hot meat. When you can really smell that incredible aroma rising up—that’s how you know you’ve done it right!
Combining Wet Ingredients and Simmering
Now, dump everything else in! Pour in that entire jar of store-bought salsa, the can of diced tomatoes (yes, juice and all!), and those two cans of kidney beans you already drained and rinsed. Give it a good, thorough stir, making sure you scrape up any little browned bits stuck to the bottom of the pot—that’s flavor gold! If you are looking for more quick dinner ideas, check out our Italian Chicken Skillet Recipe.
If you prefer a slightly looser consistency, this is your moment to add that optional half cup of beef broth or water. Stir it in well. Next, turn the heat up just until the whole pot starts to bubble gently. As soon as it bubbles, immediately drop the heat way down to medium-low. We need a steady, gentle simmer now. Let this **no chop chili with salsa** bubble away uncovered for 15 to 20 minutes. This time is crucial because it lets the salsa marry with the spices and thickens the whole pot up nicely.
Final Adjustments and Resting
After 20 minutes, give it a good taste test. This is where you make it yours! Does it need more salt? Do you want a little more kick? Maybe add a splash of hot sauce right now if you’re feeling bold. Adjust those seasonings until you’re happy with the flavor profile.
Finally, turn the heat completely off. Don’t skip this last part! Let the chili rest there on the warm burner for about 5 minutes. This resting period is essential because it allows the chili to thicken up just a bit more before you ladle it out. Then, you’re ready to serve your super fast, incredibly flavorful **no chop chili with salsa** topped with whatever goodies you like!

Tips for Perfect No Chop Chili with Salsa Results
Even though this **no chop chili with salsa** is designed to be foolproof, I always have a couple of little tricks up my sleeve to ensure it tastes like you spent all afternoon tending the pot. Remember, using quality ingredients, even the jarred ones, makes all the difference here. We want maximum flavor without any extra work!
Also, don’t stress about making it perfect the first time—chili is always better the next day anyway! But these little tips will get you close to perfection right out of the gate. If you want to see more of our quick dinner ideas, follow us on Facebook.
Managing Chili Thickness
I mentioned the beef broth or water as optional, and this is entirely based on how thick you like your chili. If you use a really chunky salsa, you might find you don’t need any extra liquid at all, and it will thicken up beautifully just from the beans breaking down during the simmer.
If, after that 20-minute simmer, you look in the pot and think, “This looks a little too soupy for my taste,” don’t panic! Just leave the heat on low and let it simmer uncovered for another 5 to 10 minutes. The extra time will evaporate some of that liquid and concentrate those wonderful salsa flavors. If you accidentally made it too thick—oops!—just stir in a splash of broth or water right at the end until it loosens up.
Flavor Boosting Techniques
The base recipe is solid, but sometimes you just need that extra little *oomph*. Since we aren’t adding fresh onions or peppers, we have to rely on concentrated flavor additions at the end. Always taste before serving! For more inspiration on quick, flavorful meals, check out our Copycat Chicken Parmesan recipe.
If the chili tastes a little flat, try adding just a tiny splash—maybe half a teaspoon—of apple cider vinegar right before you turn off the heat. The acidity brightens up the heavy spice and tomato flavors wonderfully. You can also easily boost the heat by stirring in a pinch more cumin or chili powder during the tasting phase. For richness, a tiny dab of unsweetened cocoa powder dissolves right in and adds a depth that mimics slow cooking!
Serving Suggestions for Your Easy No Chop Chili with Salsa
Now that you’ve made the easiest, most flavorful **no chop chili with salsa** known to humankind, it’s time for the fun part: loading it up with toppings! Chili is really just a delicious vehicle for whatever creamy, crunchy, or fresh things you love to pile on top. Don’t hold back here; the toppings add texture and cooling contrasts to the warm spices.
You can keep it simple or go absolutely wild. The best part about this quick chili is that it tastes amazing even with just a little sprinkle of cheese, but I encourage you to go all out. Below is a list of the must-haves that always make an appearance at my table when I serve this up.
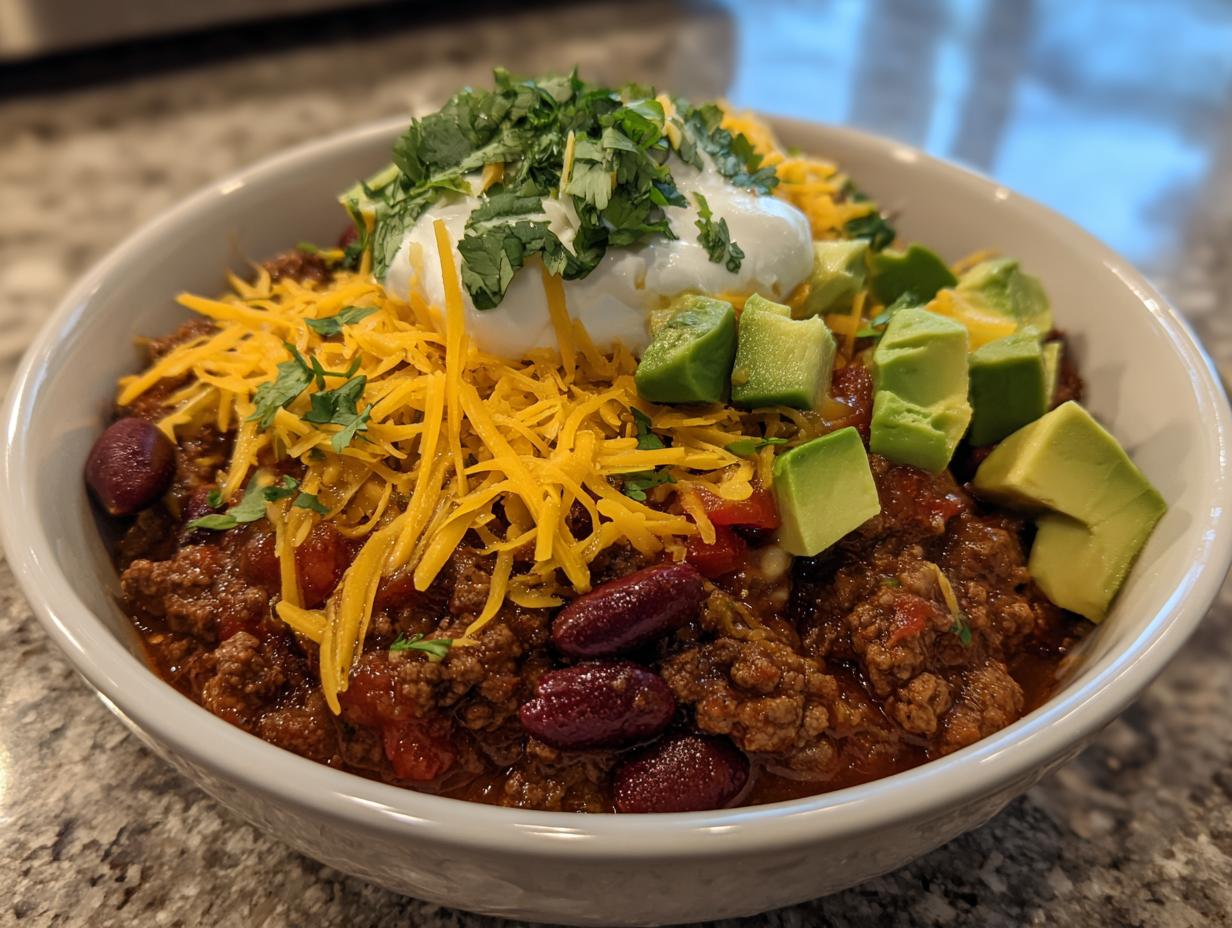
Topping Ideas and Presentation
Presentation matters, even for a quick weeknight meal! I usually serve the chili hot in big bowls and set all the toppings out on the counter buffet-style so everyone can customize their perfect bowl. Shredded cheddar is non-negotiable, but the creamy yogurt or sour cream is what really cuts through the richness of the beef. If you enjoy quick, satisfying recipes, you might also like our Cozy Chicken Parmesan Bake.
Take a look at the table below for the exact components I always keep ready!
Topping Components Table
| Topping | Purpose |
|---|---|
| Shredded cheddar cheese | Melty, salty richness |
| Plain yogurt or creamy topping | Cooling contrast and creaminess |
| Chopped cilantro or sliced green onions | Freshness and color |
| Crushed tortilla chips or crackers | Essential crunch factor |
| Diced avocado | Buttery texture |
Storing and Reheating Your No Chop Chili with Salsa
One of the best things about making this **no chop chili with salsa** is that you are almost guaranteed to have leftovers! This chili actually gets better overnight as those spices continue to mingle and deepen. Storing it properly is super easy, and you’ll be thanking yourself later when you have a ready-made lunch or dinner! For more great recipe ideas, be sure to check out our Pinterest page.
Just make sure you let the chili cool down a bit before sealing it up tight. Hot food creates steam in the container, which can affect quality. Always use an airtight container for the best results.
Reheating for Best Flavor
If you are reheating a single serving, the microwave works fine, but for larger batches, I strongly recommend using the stovetop. Place the chili in a saucepan over medium heat and stir frequently. It usually only takes about 8 to 10 minutes to get it perfectly hot throughout, and this gentle heat helps redistribute the flavors better than microwaving.
If it seems a little thicker than you remember from the night before—which happens because the beans soak up liquid—just stir in a tiny splash of water or broth while it heats up. Check out the table below for how long you can safely keep these delicious leftovers!
Storage and Reheating Table
| Storage Location | Maximum Duration | Reheating Method |
|---|---|---|
| Refrigerator | Up to 4 days | Stovetop (preferred) or microwave |
| Freezer | Up to 3 months | Thaw overnight in the fridge, then reheat on stovetop |
Frequently Asked Questions About Quick Chili Dishes
I get so many questions about this fast chili method, which is great! It shows people are looking for ways to get dinner on the table without the fuss. Since we are relying on shortcuts like canned goods, people often wonder about substitutions. I always say, use what you have, but keep these few pointers in mind for the best texture and safety!
Can I Substitute the Canned Beans in This Recipe?
You absolutely can swap out the kidney beans, but stick to other canned beans if you want to keep this recipe truly “no chop.” Black beans work wonderfully, as do pinto beans. Just remember the cardinal rule: rinse them thoroughly under cold water first! This washes away the starchy liquid that comes in the can, which can otherwise make your chili cloudy or overly thick.
If you decide to use dried beans, you’ll need to soak and cook them ahead of time, which completely defeats the purpose of our quick method here, so I recommend sticking to canned for weeknight miracles! You can read more about our recipe philosophy on Medium.
What If I Want to Make This Recipe Spicy?
This is the easiest adjustment to make! You have two main routes. First, simply choose a jar of salsa that is labeled “Hot” instead of mild or medium. That’s the easiest flavor boost without adding anything else.
If you only have mild salsa on hand, you can easily crank up the heat during the final taste-testing phase. A dash of cayenne pepper or a few shakes of your favorite bottled hot sauce right before serving works perfectly. Remember, you can always add heat, but you can’t easily take it away, so start small!
How Long Does This Chili Need to Simmer?
For safety, the meat needs to be fully browned, which takes about 7 minutes. But for true flavor development, you need that simmer time. I insist on at least 15 minutes, uncovered, on low heat. If you rush it and turn off the heat after 5 minutes, the spices won’t have time to bloom and meld with the tomato and salsa base.
Those 15 to 20 minutes allow the liquid to reduce slightly, concentrating all those wonderful, quick flavors we built into the pot. It’s the difference between just mixed ingredients and actual, cohesive chili!
Print
Amazing 20 min no chop chili with salsa
- Total Time: 25 minutes
- Yield: 4 to 6 servings
- Diet: Omnivore
Description
Make no chop chili using store bought salsa and canned beans. This shortcut recipe delivers easy, flavorful weeknight chili fast with almost zero vegetable prep.
Ingredients
- 1 tablespoon neutral oil such as canola or vegetable
- 1 pound ground beef or ground turkey
- 1 jar 16 ounces store bought salsa mild, medium, or hot
- 1 can 14 to 15 ounces diced tomatoes with juices
- 2 cans 15 ounces each kidney beans drained and rinsed
- 2 tablespoons chili powder
- 1 teaspoon ground cumin
- 0.5 teaspoon garlic powder
- 0.5 teaspoon onion powder
- 0.5 teaspoon salt plus more to taste
- 0.25 teaspoon black pepper
- 0.5 cup beef broth or water optional for thinner chili
- Shredded cheddar cheese
- Plain yogurt or creamy topping
- Chopped cilantro or sliced green onions
- Crushed tortilla chips or crackers
- Diced avocado
Instructions
- Warm the oil in a large pot or Dutch oven over medium high heat until it shimmers slightly.
- Add the ground beef or turkey and use a wooden spoon to break it into small crumbles. Cook for 5 to 7 minutes, stirring often, until the meat is browned all over and no pink pieces remain.
- Sprinkle the chili powder, cumin, garlic powder, onion powder, salt, and black pepper over the cooked meat. Stir for about 30 seconds until the spices coat the meat and smell fragrant.
- Pour in the entire jar of salsa, the can of diced tomatoes with juices, and the two cans of drained and rinsed kidney beans. Stir well, scraping the bottom of the pot so nothing sticks.
- If you like a thinner chili, add the beef broth or water and stir to combine.
- Bring the chili up to a gentle bubble, then reduce the heat to medium low so it simmers steadily. Cook uncovered for 15 to 20 minutes, stirring occasionally, until the chili thickens slightly and the flavors blend together.
- Taste the chili and add a little more salt, chili powder, or a splash of hot sauce if you want bolder flavor.
- Turn off the heat and let the chili rest for 5 minutes to thicken. Ladle into bowls and top with desired toppings.
Notes
- Choose a chunky, thick salsa for the best texture and flavor.
- Rinse canned beans under cold water before adding to reduce excess salt and starch.
- Let the chili simmer for at least 15 minutes for deeper flavor melding.
- Cook ground meat until internal temperature reaches 160 degrees F.
- Store leftovers in the refrigerator for up to 4 days or freeze for up to 3 months.
- Prep Time: 5 minutes
- Cook Time: 20 minutes
- Category: Main Dish
- Method: Stovetop
- Cuisine: American