Forget those complicated weekend breakfasts that leave you scrubbing whisks for an hour! I’m so excited to share my absolute favorite, fastest, and healthiest breakfast hack: these banana oat pancakes no sugar. Seriously, these are magic in a blender. I developed this recipe years ago when I was trying to eat cleaner but still needed something that felt like a real treat to start the day. If you’ve ever messed up traditional pancakes, don’t worry—this recipe is nearly foolproof because the blender does all the heavy lifting!
The best part? We use only naturally sweet, spotty bananas. That means zero white sugar, zero maple syrup needed *in* the batter, just pure wholesome goodness. My experience teaching hesitant cooks shows me that anything requiring a blender instantly feels less intimidating. We’re talking about mixing up the batter in under ten minutes total. Trust me, these banana oat pancakes no sugar are about to become your new morning staple for busy weekdays.

Why These Banana Oat Pancakes No Sugar Are Your New Go-To
When I say these banana oat pancakes no sugar are a game-changer, I mean it! They tick every box for a busy morning without sacrificing that satisfying pancake flavor. You get all the comfort of a classic breakfast delivered in a genuinely healthy and incredibly simple package. It’s hard to beat a recipe that tastes indulgent but is actually fueling you up for the day!
Quick Wins for Your Morning Routine
- Zero Added Sugar: We rely completely on those sweet, brown-spotted bananas. It’s breakfast you can feel great about serving!
- Blender Only: Nope, no messy bowls or whisks required here. Everything goes into the blender, making cleanup ridiculously fast.
- Ready in Under 20 Minutes: From pulling out the ingredients to flipping the last pancake, you’re looking at less than twenty minutes total time.
- Whole Food Ingredients: Made with simple oats and eggs, these pancakes offer fiber and protein to keep you full until lunch.
Essential Ingredients for Perfect Banana Oat Pancakes No Sugar
Okay, let’s talk about the stars of the show. Because we are intentionally skipping refined sugar, the quality and ripeness of these few ingredients really matter for the final flavor of these banana oat pancakes no sugar. If you’ve got the right stuff ready, the rest is smooth sailing. We aren’t using any fancy flours here, which simplifies things immensely!
My biggest tip when prepping for this recipe is focusing on the bananas—they are acting as our sweetener, binder, and moisture source all in one. Don’t even think about using those firm, yellow ones; we need the ones that look slightly sad and covered in brown speckles. That’s where the natural sugar is concentrated, guaranteeing these pancakes taste sweet without needing anything extra added!
Ingredient Checklist and Preparation Clarity
Gathering these items is half the battle. Make sure your oats are labeled “Old Fashioned Rolled”—quick oats behave differently, and we need that texture when we blend them into flour. Everything else is pretty standard pantry fare. Having these ready means you can go straight into the blender!
Ingredient Table
| Ingredient | Amount | Necessary Prep Note |
|---|---|---|
| Old Fashioned Rolled Oats | 1 ½ cups | Must be blended into a fine flour first |
| Ripe Bananas | 2 medium | Must have lots of brown spots for sweetness |
| Large Eggs | 2 | Room temperature is nice, but not essential |
| Unsweetened Almond Milk | ½ cup | Or any milk you prefer, just ensure it’s unsweetened |
| Baking Powder | 2 teaspoons | For the lift! Make sure it’s fresh. |
| Vanilla Extract | 1 teaspoon | Adds depth of flavor |
| Ground Cinnamon | ½ teaspoon | Don’t skip this; it makes them taste cozy! |
| Salt | ¼ teaspoon | Balances the sweetness perfectly |
Mastering the Blender Technique for Banana Oat Pancakes No Sugar
This is where the magic happens, and honestly, it’s why these banana oat pancakes no sugar are so easy. We are using a high-speed blender to create both our flour and our batter, which cuts down on dishes immensely. Don’t worry if your blender isn’t the fanciest model; just make sure it can handle grinding grains!
Step 1: Creating Your Oat Flour Base
First things first, we need flour, but we aren’t buying it! Pour your 1 ½ cups of old-fashioned rolled oats right into the clean blender jar. Put the lid on tight—trust me, you don’t want oat dust flying everywhere! Blend this on high speed for about 30 to 60 seconds. You are looking for a fine powder, just like regular flour. Stop and check it after 30 seconds; if you still see big oat flakes, blend a little longer. Once it looks like flour, you’re good to go!
Step 2: Blending the Smooth, Sweet Batter
Now we add the flavor and the lift! Toss in those two very ripe bananas (peel them first, please!), the eggs, the almond milk, the baking powder, vanilla, cinnamon, and salt right on top of your fresh oat flour. Put that lid back on and blend everything on high again for about 45 to 60 seconds. You want this batter to look completely uniform—no chunks of banana or streaks of dry oat flour should be visible. It should be smooth, pourable, but slightly thicker than traditional milk-based pancake batter.
The Crucial Resting Period
This step is non-negotiable if you want fluffy results! Once blended, pour the batter into a bowl or leave it right in the blender pitcher if you’re in a huge rush. Let it rest on the counter for a solid 5 to 10 minutes. Why? This resting time allows the oat flour to fully absorb the liquid, thickening the batter perfectly. More importantly, it gives that baking powder time to start doing its job, creating tiny air bubbles that make these sugar-free pancakes surprisingly light!
Cooking Your Banana Oat Pancakes No Sugar to Golden Perfection
Once your batter has had its crucial rest—you’ll notice it’s thicker now, which is fantastic—it’s time to get cooking! Achieving that perfect golden-brown exterior on these banana oat pancakes no sugar is all about managing your heat. If the pan is too hot, the outside will burn before the inside sets, leaving you with a gooey middle. We are aiming for patience here, not speed!
I learned the hard way that these delicate, sugar-free pancakes need a slightly gentler approach than your standard flour stack. Always preheat your skillet or griddle properly before adding the fat. A little coconut oil or butter goes a long way, but make sure it shimmers slightly before you start pouring. You want them to cook evenly and develop that beautiful, slightly crisp edge that signals success.

Heating the Pan and Portioning Batter
Set your heat to medium to medium-low. Seriously, don’t crank it up! Medium-low is your best friend for these. Once the pan is warm, drop about a tablespoon of coconut oil or butter onto the surface. Wait just a moment for it to melt and coat the pan evenly. For portioning, grab a standard ¼ cup measure. Pour that batter right into the center of the hot spot. If your batter is very thick, you might need to use the back of a spoon to gently coax it into a nice round shape. Don’t worry too much about perfect circles; rustic is charming!
Knowing When to Flip
This is the most exciting part because it tells you exactly when your patience has paid off. Watch the edges of the pancake first. When they start looking dry and set—not wet, but firm—that’s your first clue. Next, look at the surface. You will see small bubbles forming across the top, and these bubbles should start to pop and stay open rather than immediately collapsing back down. Once you see those visual cues, slide your spatula underneath carefully. If it releases easily without tearing, flip it! The second side only needs 1 to 2 minutes more until it’s beautifully golden brown. Voila, perfect banana oat pancakes no sugar!
Tips for Success with Your Banana Oat Pancakes No Sugar
I’ve made these banana oat pancakes no sugar more times than I can count, and I’ve learned that success really boils down to two things you have total control over: the ripeness of your fruit and the heat of your skillet. If you follow these two expert tips derived from my own trial-and-error sessions, you’ll get beautiful, perfectly cooked, naturally sweet pancakes every single time. Don’t rush these steps; they are what separates a good pancake from a great one!
Selecting the Right Bananas
I cannot stress this enough: you need bananas that are borderline embarrassing to put in a fruit bowl. We are talking about bananas that are almost entirely brown or black. When the banana skin gets that dark, the starches inside have converted almost entirely to sugar, meaning you get maximum natural sweetness without adding anything else. If you use a yellow banana, your banana oat pancakes no sugar will taste bland and you’ll be tempted to reach for the maple syrup, defeating the purpose!
Temperature Control for Even Cooking
The second most common mistake I see people make is using heat that’s too high. Because these pancakes are denser than white flour ones and rely on gentle heat to cook through, high heat is the enemy. Keep that burner set to medium-low. Yes, it takes slightly longer, but I promise you, it’s worth the extra minute or two per side. If the bottom starts browning too quickly—say, in under two minutes—your heat is too high, and you risk burning the outside before the center is baked through. Adjust down immediately!
Serving Suggestions and Storing Your Banana Oat Pancakes No Sugar
Once you have a stack of these wonderful, naturally sweet banana oat pancakes no sugar ready, the fun really begins! Since we kept the batter simple and sugar-free, you have a perfect blank canvas for toppings. My philosophy is to keep it clean, but feel free to indulge a little if you need that extra boost of sweetness!
Simple Topping Ideas
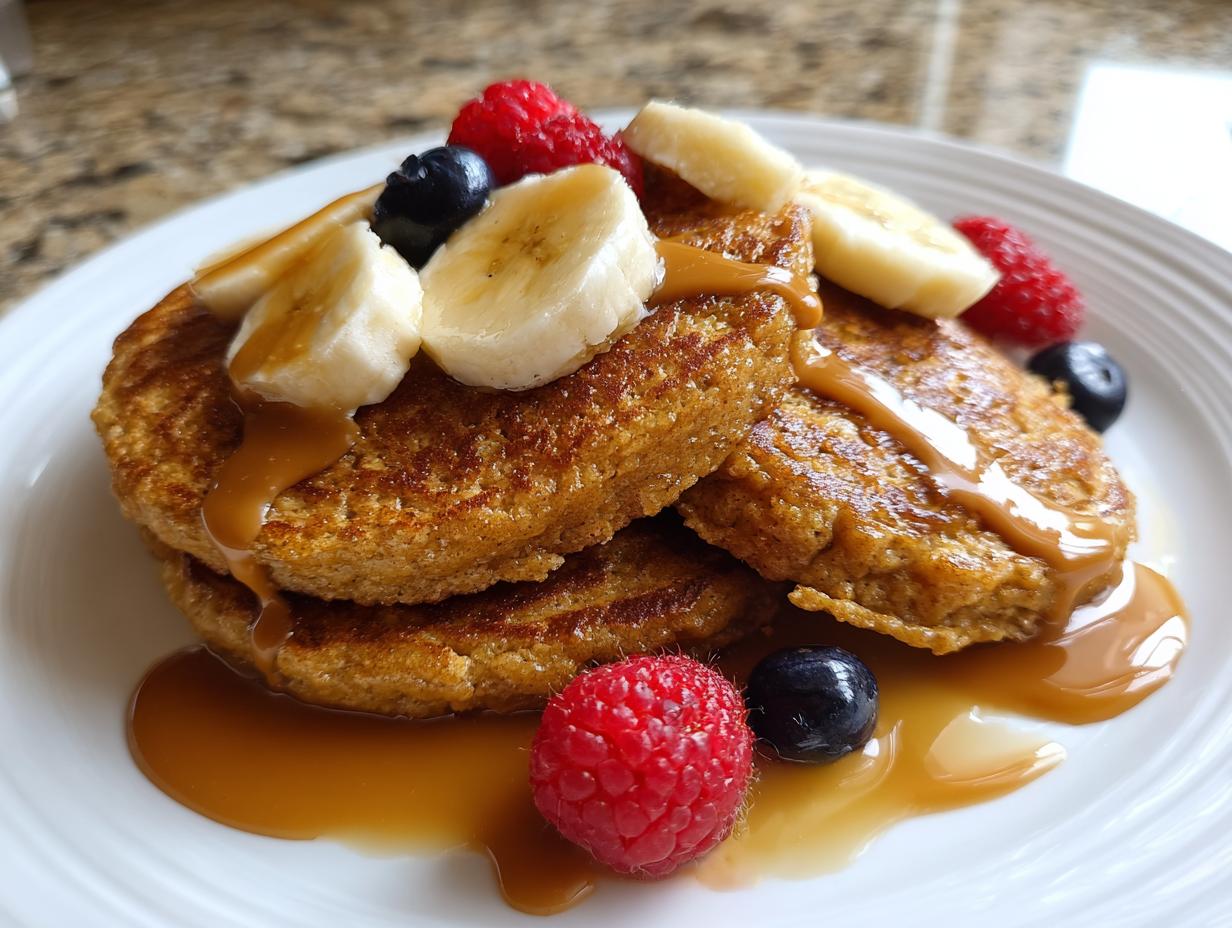
Remember, the goal here is wholesome fuel, so I keep my toppings natural. Fresh fruit is the absolute best way to dress these up. They pair wonderfully with the banana flavor already present:
- Fresh sliced bananas (because, why not double up!)
- A handful of mixed fresh berries—blueberries or raspberries are excellent.
- A generous dollop of your favorite natural nut butter, like almond or peanut butter.
- If you must have syrup, use just a light drizzle of pure maple syrup. A little goes a long way!
Storage and Reheating Guidelines
If you’re making a big batch of these banana oat pancakes no sugar—and you should be—storage is super easy. They reheat beautifully, making them perfect for grabbing on your way out the door later in the week. Never put them straight into the fridge hot; let them cool completely first!
Storage and Reheating Table
| Storage Method | Duration | Reheating Tip |
|---|---|---|
| Refrigerator | Up to 4 days | Microwave for 20-30 seconds until warm. |
| Freezer | Up to 3 months | Toast straight from frozen or microwave briefly. |
For the freezer, I like to stack them with a small piece of parchment paper between each pancake. This stops them from sticking together in a giant oat brick. They reheat wonderfully in a toaster oven too, giving you that slightly crisp exterior back!
Frequently Asked Questions About Banana Oat Pancakes No Sugar
Whenever I share my favorite recipes, a few questions always pop up! These banana oat pancakes no sugar are simple, but people often wonder about minor tweaks or how to handle batch cooking. I’ve gathered the most common things folks ask me about to make sure your first attempt is perfect.
Can I Make These Ahead of Time?
Absolutely! I often make a double batch on Sunday just so I have breakfast ready for busy mornings. As I mentioned in the storage section, they keep really well in the fridge for about four days. They reheat fast in the microwave or toaster, so you still get that warm pancake feeling without the blending and cooking time!
What If My Batter Seems Too Thin?
If you blend everything and it looks watery, don’t panic! First, give it the full 10-minute rest; sometimes the oats just need a little more time to soak up the almond milk. If, after resting, it still seems too runny to hold its shape on the pan, you can blend in just one extra tablespoon of dry rolled oats. Be careful not to add too much, or they might turn out gritty instead of smooth!
Are These Pancakes Suitable for Meal Prepping?
They are fantastic for meal prepping! Because they are so wholesome, they hold up really well in the freezer. Just make sure they are completely cooled before stacking them with parchment paper dividers and popping them into a freezer-safe bag. They are great for those weeks when you know mornings are going to be chaotic. You get a healthy, no-added-sugar breakfast ready in minutes!
Share Your Banana Oat Pancakes No Sugar Creation
I truly hope you loved making these incredibly easy banana oat pancakes no sugar as much as I love eating them! They’re such a quick win for a healthy start to the day. When you make them, please come back and leave a star rating below so others know how great they are! I absolutely adore seeing your stacks on Instagram—tag me so I can celebrate your success! Check out our Facebook for more community fun!
Print
Amazing 1 banana oat pancakes no sugar
- Total Time: 20 minutes
- Yield: 4 servings (approximately 8 pancakes)
- Diet: Vegetarian
Description
These wholesome banana oat pancakes use only ripe bananas for natural sweetness, containing zero added sugar. They are simple to make in a blender, perfect for a healthy breakfast.
Ingredients
- 1 ½ cups old fashioned rolled oats
- 2 medium ripe bananas with lots of brown spots
- 2 large eggs
- ½ cup unsweetened almond milk
- 2 teaspoons baking powder
- 1 teaspoon vanilla extract
- ½ teaspoon ground cinnamon
- ¼ teaspoon salt
- Coconut oil or butter for cooking
Instructions
- Add rolled oats to a high-speed blender and blend on high for 30 to 60 seconds until you create a fine flour.
- Add the ripe bananas, eggs, almond milk, baking powder, vanilla extract, cinnamon, and salt to the blender with the oat flour.
- Blend on high speed for 45 to 60 seconds until the batter is completely smooth and well combined.
- Let the batter rest for 5 to 10 minutes to thicken slightly and allow the baking powder to activate for extra fluffiness.
- Heat a large nonstick skillet over medium to medium-low heat and add a tablespoon of coconut oil or butter.
- Pour ¼ cup of batter onto the hot skillet for each pancake, using the back of a spoon to spread it slightly if needed.
- Cook for 2 to 3 minutes on the first side until the edges are set and small bubbles form across the surface.
- Flip the pancakes carefully and cook for an additional 1 to 2 minutes on the opposite side until golden brown.
- Transfer cooked pancakes to a plate and keep warm while finishing the remaining batter.
- Serve the warm pancakes immediately topped with fresh banana slices, berries, a drizzle of nut butter, or a light touch of maple syrup if desired.
Notes
- Use very ripe bananas with lots of brown spots for maximum natural sweetness.
- Cook the pancakes over medium to medium-low heat to prevent burning.
- Let the batter rest for 5 to 10 minutes for fluffier results.
- Store leftovers in the refrigerator for up to 4 days or freeze for up to 3 months.
- For serving suggestions, use fresh sliced bananas, fresh berries, natural nut butter, or pure maple syrup.
- Prep Time: 10 minutes
- Cook Time: 10 minutes
- Category: Breakfast
- Method: Blender, Griddle
- Cuisine: American