Hey there, bakers! Adam here from NoobRecipes, and today we’re diving into something truly special: Homemade Fig Bars. If you’re new to the kitchen or just looking for a seriously delicious, no-fuss treat, you’ve hit the jackpot. I remember wanting to make something like the classic fig bars from the store, but, honestly, they always seemed a bit too complicated. So, I set out to create a version that’s totally doable, even if you’re just starting out. These bars have this amazing chewy oatmeal crust and a sweet, gooey fig filling that’s just heavenly. Trust me, making them from scratch is way easier than you think and so rewarding!
Why You’ll Love These Homemade Fig Bars
Seriously, these fig bars are a game-changer! They’re:
- Super easy to whip up, even if you’ve never baked before.
- Packed with that perfect chewy, buttery oat goodness.
- Bursting with a sweet, homemade fig jam filling.
- Fantastic for lunchboxes, after-school snacks, or just because!
You’ll be amazed at how quickly you can make these delicious treats from scratch.
Gather Your Ingredients for Homemade Fig Bars
Alright, let’s get our mise en place ready for these amazing Homemade Fig Bars! It’s always easier when everything is measured out and prepped. You’ll need a few things for our sweet fig filling:
- 24 small to medium fresh figs, all stemmed and quartered.
- 1/3 cup of packed brown sugar – this gives it that lovely caramel note.
- 1 tablespoon of lemon zest. This really brightens up the fig flavor!
- 1/4 teaspoon of kosher salt. Just a pinch to balance the sweetness.
- 1 teaspoon of vanilla extract. Because, well, vanilla makes everything better!
And for that fantastic oat crust and crumble topping:
- 1 cup of melted butter. No substitutes here if you can help it!
- 2 cups of all-purpose flour. Your basic baking staple.
- 2 cups of old-fashioned rolled oats. These give us that perfect chew.
- 1 cup of packed brown sugar. Yes, more brown sugar, it’s key!
- 1/2 teaspoon of salt. Again, for flavor balance.
- 3/4 teaspoon of baking powder. To give our bars just a little lift.
- 2 teaspoons of vanilla extract. Can’t have too much vanilla, right?
Step-by-Step Guide to Making Homemade Fig Bars
Alright, let’s get these Homemade Fig Bars into the oven! Don’t worry, I’m going to walk you through every single step. It’s really not as daunting as it sounds, I promise!
Crafting the Sweet Fig Filling
First things first, we need to get that fig filling going. Grab a saucepan and toss in your quartered fresh figs, that lovely packed brown sugar, the lemon zest (it adds such a bright kick!), a pinch of kosher salt, and our vanilla extract. Give it a good stir, and then let it cook over medium heat. You want it to get all juicy and bubbly. Once it starts bubbling, turn the heat down to low and let it simmer for about 45 minutes. Now, here’s the fun part: as it simmers, stir it occasionally and mash those figs with your spoon. This helps them break down and create a thicker, jam-like consistency. If you like your filling super smooth, you can totally blend it with an immersion blender or a regular blender once it’s cooled down a bit. Let it cool completely before we use it!
Preparing the Oat Crust and Topping
While our fig filling is doing its thing and cooling, let’s get the crust and topping ready. First, preheat your oven to 350°F (that’s 175°C for my friends who use Celsius). Now, grab your 9×13-inch baking pan and line it with aluminum foil. Make sure you leave a little bit of foil hanging over the sides – this makes it SO much easier to lift the bars out later. Give that foil a light coating of cooking spray. In a big bowl, combine the melted butter, all-purpose flour, those wonderful rolled oats, the brown sugar, salt, baking powder, and the vanilla extract. This is where it gets a little messy, but in the best way! The easiest way to mix this is with your hands. Just get in there and make sure everything is combined and there are no dry spots left. Once it’s all mixed, take about 1 1/2 cups of this mixture and set it aside for our topping. The rest goes into the pan for the crust.

Assembling Your Delicious Homemade Fig Bars
Okay, assembly time! We’ve got our cooled fig filling and our oat mixture. Take that main portion of the oat mixture and press it down evenly into the bottom of your prepared baking pan. You want a nice, solid crust. Don’t be shy with pressing it down! Then, spread that beautiful, thick fig filling right over the top of the crust. Try to get it as even as you can. Finally, take that reserved oat mixture and crumble it evenly all over the fig filling. This is going to give us that lovely texture on top.

Baking and Cooling Your Homemade Fig Bars to Perfection
Now for the best part – baking! Pop your pan into that preheated 350°F oven and bake for about 30 to 35 minutes. You’re looking for the bars to be golden brown around the edges and for the fig filling to be nice and bubbly. Once they’re out of the oven, the hardest part is waiting for them to cool completely in the pan. Seriously, resist the urge to cut into them while they’re hot! Using those foil overhangs, carefully lift the whole thing out of the pan. Then, just slice them into individual bars, and voilà! You’ve got yourself some amazing Homemade Fig Bars.

Tips for Perfect Homemade Fig Bars
Making these Homemade Fig Bars is pretty straightforward, but here are a few little things I’ve learned that make them even better. Using good quality ingredients really does make a difference, especially those fresh figs – they have so much more flavor! When you’re mixing that oat crust, don’t be afraid to get your hands in there; it really helps ensure everything is incorporated perfectly. You want that mixture to be crumbly but also hold together when you press it into the pan. And remember, letting them cool completely is key for clean slicing. Patience is a baker’s best friend!
Ingredient Notes and Substitutions for Homemade Fig Bars
So, about those figs! While fresh figs are amazing, if you can’t find them, don’t sweat it. You can totally use good quality store-bought fig jam or preserves. It honestly saves a good chunk of time and still gives you that delicious figgy flavor. Just measure out about 1.5 to 2 cups of jam and spread it over the crust. It’s a fantastic shortcut that still lands you with incredible homemade bars!
Variations to Try with Your Homemade Fig Bars
Once you’ve mastered the basic Homemade Fig Bars, why not have some fun with them? For a little extra warmth, try adding about half a teaspoon of cinnamon or a pinch of nutmeg to the oat mixture. You could also toss in about half a cup of chopped pecans or walnuts into the topping for a nice crunch. It’s amazing how a few small additions can totally change up the flavor profile!
Serving and Storing Your Homemade Fig Bars
These Homemade Fig Bars are fantastic just as they are, but you can totally warm them up slightly in the microwave for about 10-15 seconds if you like them gooey and warm. They’re perfect with a cup of coffee or tea! They’re perfect with a cup of coffee or tea!
Storing them is a breeze:
- Keep them on the counter in an airtight container for up to 3 days.
- For longer storage, pop them in the refrigerator for up to 5 days.
- You can even freeze them for up to 3 months! Just wrap them well.
Frequently Asked Questions about Homemade Fig Bars
Got questions about these delicious Homemade Fig Bars? I totally get it! Here are some of the things people ask me most often.
Q: Can I use dried figs instead of fresh ones?
You absolutely can! If you use dried figs, you’ll want to rehydrate them first. Just cover about 1.5 cups of chopped dried figs with hot water and let them sit for about 15-20 minutes until they’re plump. Then drain them well and proceed with the recipe as written. It works great!
Q: How long do these bars really last?
They’re pretty sturdy! On the counter, in an airtight container, they’re good for about 3 days. If you pop them in the fridge, they’ll last even longer, up to 5 days. And if you want to make a big batch for later, just wrap them up well and freeze them for up to 3 months. They thaw out perfectly!
Q: Are these bars good for packing in lunches?
Oh, 100%! They’re one of my go-to lunchbox treats. They hold their shape really well and don’t get too crumbly, plus that fig filling is just so satisfying. They’re way better than those store-bought ones, in my humble opinion!
Q: Can I make the fig filling ahead of time?
Yep, you sure can! I often make the fig filling the day before. Just make sure it’s completely cooled before you cover it and store it in the fridge. It saves you a step on baking day!
Estimated Nutritional Information for Homemade Fig Bars
While I’m Adam from NoobRecipes and love getting practical in the kitchen, I’m not a registered dietitian! So, keep in mind that the nutritional info for these Homemade Fig Bars is an estimate. It can vary a bit depending on the exact brands of ingredients you use, the size of your figs, and how you slice your bars. Generally, one bar might have around [Insert Estimated Calories Here] calories, [Insert Estimated Fat Here]g of fat, [Insert Estimated Carbs Here]g of carbohydrates, and [Insert Estimated Protein Here]g of protein. Always best to use your own judgment for precise counts!
Print
Homemade Fig Bars: 1 Amazing Treat
- Total Time: 1 hour 30 minutes
- Yield: 16 bars
- Diet: Vegetarian
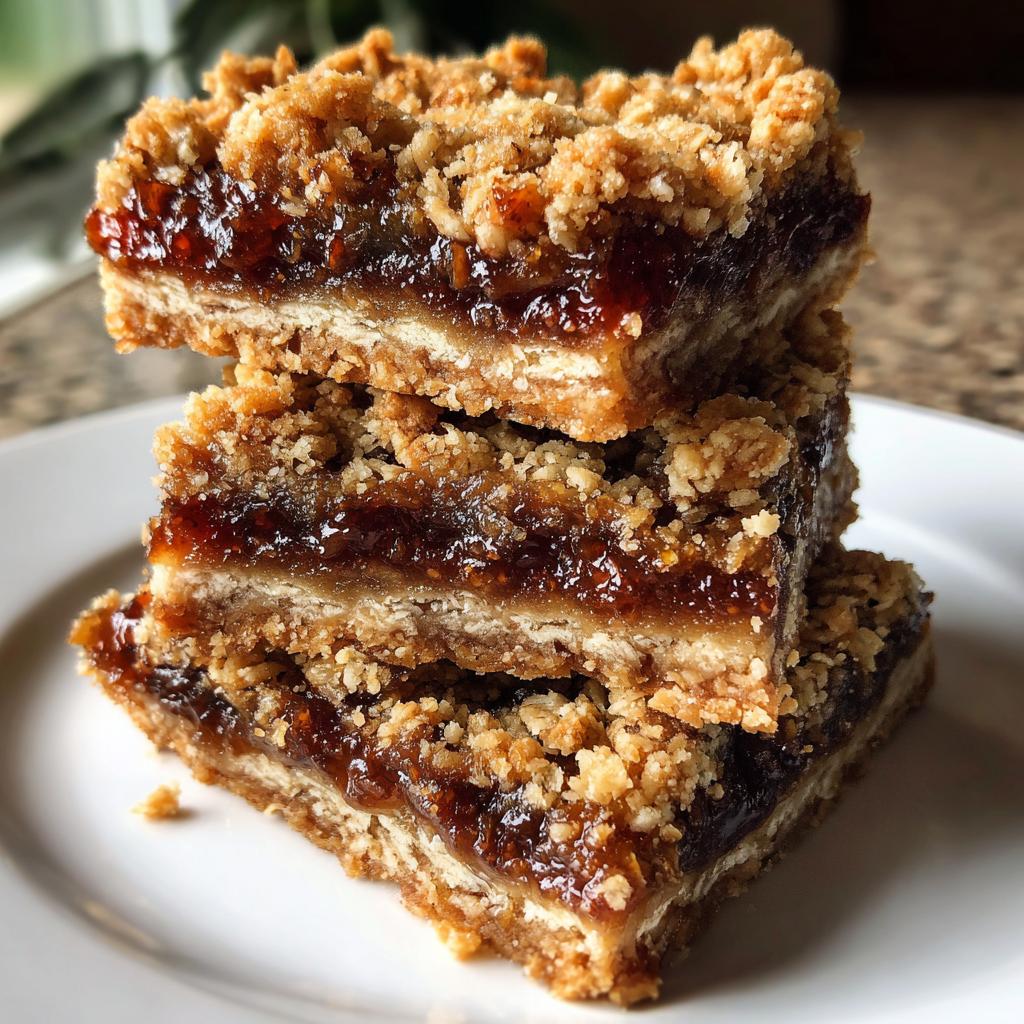
Description
Welcome to NoobRecipes! I’m Adam, your guide to simple and stress-free cooking. These Homemade Fig Bars are a perfect example of how easy and delicious cooking can be, even for beginners. We’re making chewy oatmeal fig bars that taste even better than the store-bought ones. A sweet fig jam filling is nestled between a buttery oat crust and a crumble topping. Let’s get baking!
Ingredients
- For the Fig Filling:
- 24 fresh figs (small/medium), quartered
- 1/3 cup packed brown sugar
- 1 tbsp lemon zest
- 1/4 tsp kosher salt
- 1 tsp vanilla extract
- For the Crust & Topping:
- 1 cup melted butter
- 2 cups all-purpose flour
- 2 cups old-fashioned rolled oats
- 1 cup packed brown sugar
- 1/2 tsp salt
- 3/4 tsp baking powder
- 2 tsp vanilla extract
Instructions
- Make the fig filling: In a saucepan, stir together the quartered figs, brown sugar, lemon zest, kosher salt, and vanilla extract. Cook over medium heat until the mixture is juicy and bubbling. Reduce the heat to low and simmer for 45 minutes, stirring and mashing the figs as they cook. Once cooked, cool the filling completely. For a smoother texture, you can blend the jam until creamy.
- Prepare the crust: Preheat your oven to 350°F. Line a 9×13-inch baking pan with aluminum foil, ensuring there’s some overhang on the sides. Lightly coat the foil with cooking spray. In a large bowl, combine the melted butter, all-purpose flour, rolled oats, brown sugar, salt, baking powder, and vanilla extract. Mix until no dry spots remain. You might find it easiest to use your hands to ensure everything is well combined.
- Assemble the bars: Reserve about 1 1/2 cups of the oat mixture for the topping. Press the remaining oat mixture evenly into the prepared baking pan. Spread the cooled fig filling over the pressed crust. Crumble the reserved oat mixture evenly over the fig filling.
- Bake the bars: Bake for 30–35 minutes, or until the bars are golden brown and the filling is bubbly. Allow the bars to cool completely in the pan. Once cooled, use the foil overhang to lift the bars out of the pan. Slice them into individual bars and enjoy!
Notes
- You can use store-bought fig jam to save time.
- These bars store well. Keep them on the counter for up to 3 days, refrigerate them for up to 5 days, or freeze them for up to 3 months.
- These are perfect for lunchbox treats or afternoon snacks.
- Prep Time: 1 hour
- Cook Time: 30 minutes
- Category: Dessert
- Method: Baking
- Cuisine: American