I’m telling you, forget every soggy, limp chicken sandwich you’ve ever sadly eaten. I cracked the code to achieving the ultimate crunch with this Ultra Crispy Dill Chicken Sandwich with Creamy Garlic Dill Sauce. Last week, my husband was complaining about sad takeout chicken, and I promised him I could fix it, proving you absolutely don’t need an industrial deep fryer to get that satisfying crackle.
The secret lies in the double dip of the marinade—trust me on this one! This sandwich hits every texture note: that insane crunch, the tender chicken inside, and that bright, fresh, herby sauce that ties everything together. It’s seriously my new go-to weeknight meal, and I can’t wait for you to see just how easy it is to nail this recipe every single time.

Why You Need This Ultra Crispy Dill Chicken Sandwich with Creamy Garlic Dill Sauce
Seriously, the crispiness lasts! You won’t believe these came out of my home frying pan; it’s all about getting that perfect coating locked in before it hits the hot oil.
You are going to want to make this because it delivers that fast-food-level crunch right in your own kitchen without needing a huge production. I’ve listed out some of the biggest reasons this sandwich is about to become famous at your house:
- The Crunch Factor: We use cornstarch mixed with the flour here, and when you double-coat it, you are basically creating armor around that chicken breast. It’s unbeatable!
- Bright, Fresh Flavor: That pickle juice in the marinade tenderizes the meat beautifully, and then the fresh dill in the sauce just pops against the richness of the mayo. So refreshing!
- Sauce Perfection: The creamy garlic dill sauce is so easy to whisk up while the chicken marinates, and it’s the secret weapon that makes this sandwich taste gourmet.
- Easy Weeknight Meal: Once the chicken is done marinating, you are looking at less than 20 minutes of hands-on cooking time. Perfect for those nights when you need something impressive fast. Check out my favorite quick dinner guide for more ideas like this here!
Gathering Ingredients for Your Ultra Crispy Dill Chicken Sandwich with Creamy Garlic Dill Sauce
Don’t stress about having everything perfectly measured—cooking is an approximation, after all—but for the dredging process, having your bowls set up side-by-side seriously cuts down on mess and confusion later on!
When you’re getting ready for this, think of it in three parts: the wet soak, the dry armor, and the zesty finale. Getting everything measured out beforehand means the assembly line process goes super smoothly, ensuring you get that professional, even coating on the chicken. For more tips on getting your chicken ready, check out my guide to juicy chicken marinades.
For the Chicken Marinade
- 2 boneless skinless chicken fillets
- 1 cup buttermilk (This is what gives the meat that subtle tang!)
- 2 tablespoons pickle juice (Don’t skip this; it helps tenderize it!)
- 1 egg
- 1 teaspoon salt
- 1 half teaspoon black pepper
- 1 half teaspoon garlic powder
- 1 quarter teaspoon paprika
For the Crispy Dill Coating
- 1 cup all purpose flour
- 1 quarter cup cornstarch (This is your secret weapon for serious crunch!)
- 1 teaspoon dried dill
- 1 half teaspoon baking powder
- 1 half teaspoon salt
- 1 quarter teaspoon black pepper
For the Creamy Garlic Dill Sauce and Assembly
- 1 half cup mayonnaise
- 2 tablespoons fresh dill chopped
- 1 tablespoon lemon juice
- 1 garlic clove minced (Make sure it’s truly minced, not just crushed!)
- 1 teaspoon Dijon mustard
- Salt and black pepper to taste
- 4 sandwich buns
- 4 slices cheddar cheese (Sharp cheddar melts the best here)
- 1 cup shredded lettuce
- 1 half cup pickle slices (Use your thick-cut dills here!)
- 2 tablespoons butter (For toasting the buns—yum)
- Vegetable oil for frying
Step-by-Step Instructions for the Ultra Crispy Dill Chicken Sandwich with Creamy Garlic Dill Sauce
I like to make the sauce first and let it chill while the chicken is marinating, which really lets those dill and garlic flavors deepen. It’s a time-saver, really!
Step 1: You need to get that chicken soaking up flavor first! Whisk together the buttermilk, pickle juice, egg, salt, pepper, garlic powder, and paprika in a bowl until everything is just combined. Add your two chicken fillets, making sure they are completely submerged. Cover this up and stick it in the fridge for at least two hours, but honestly, overnight is where the magic happens for maximum juiciness.
Step 2: While that’s sitting, get your dry dredge ready. In a separate, wide bowl, thoroughly mix your all-purpose flour, cornstarch (don’t forget the cornstarch!), dried dill, baking powder, salt, and pepper. I like to use a fork to break up any lumps so the coating mixes evenly.
Step 3: Now for the secret weapon for crunch! Pull the chicken out of the marinade. You don’t need to shake off *everything*, just let the real excess drip back into the bowl. Dip the chicken completely into the flour mixture, pressing the flour onto the surface. Then, dip it right back into the wet buttermilk marinade for just a second, and immediately back into the flour mixture. Press that coating on again—that double dip is why this chicken is truly ultra crispy. Don’t worry if you see little crunchy flakes forming on the outside; those are your friends!
Step 4: Time to fry! Fill a deep, heavy-bottomed pot or Dutch oven with about 2 inches of vegetable oil. Heat it up slowly until your thermometer reads exactly 350°F. If you don’t have a thermometer, toss a tiny pinch of flour in; if it bubbles immediately and floats, you’re good! Carefully lower the coated chicken breasts into the oil, leaving plenty of space between them—crowding the pan drops the oil temperature, and that leads to greasy chicken, which we absolutely hate.
Step 5: Fry the chicken for about 6 to 8 minutes per side. Since chicken breast thickness varies, you might need an extra minute or two, but you are looking for that deep golden brown color and an internal temperature of 165°F. When it looks perfect, use tongs to gently lift it out and immediately place it on a wire rack set over a baking sheet. This lets the air circulate so the bottom doesn’t steam. For more frying tips, check out my guide to getting the best fried chicken.
Step 6: While the chicken rests and cools slightly, make the sauce. Just stir together the mayonnaise, fresh dill, lemon juice, minced garlic, and Dijon mustard. Taste it—if it needs a little zip, add a pinch more salt and pepper. Cover it and let it chill in the fridge for at least 15 minutes while the chicken finishes draining.
Step 7: Melt the butter in a skillet over medium heat. Lay your buns butter-side-down and toast them until they are perfectly golden brown and slightly crisp—this keeps them from getting soggy when the sauce goes on. Never skip toasting the bun, I’m serious!
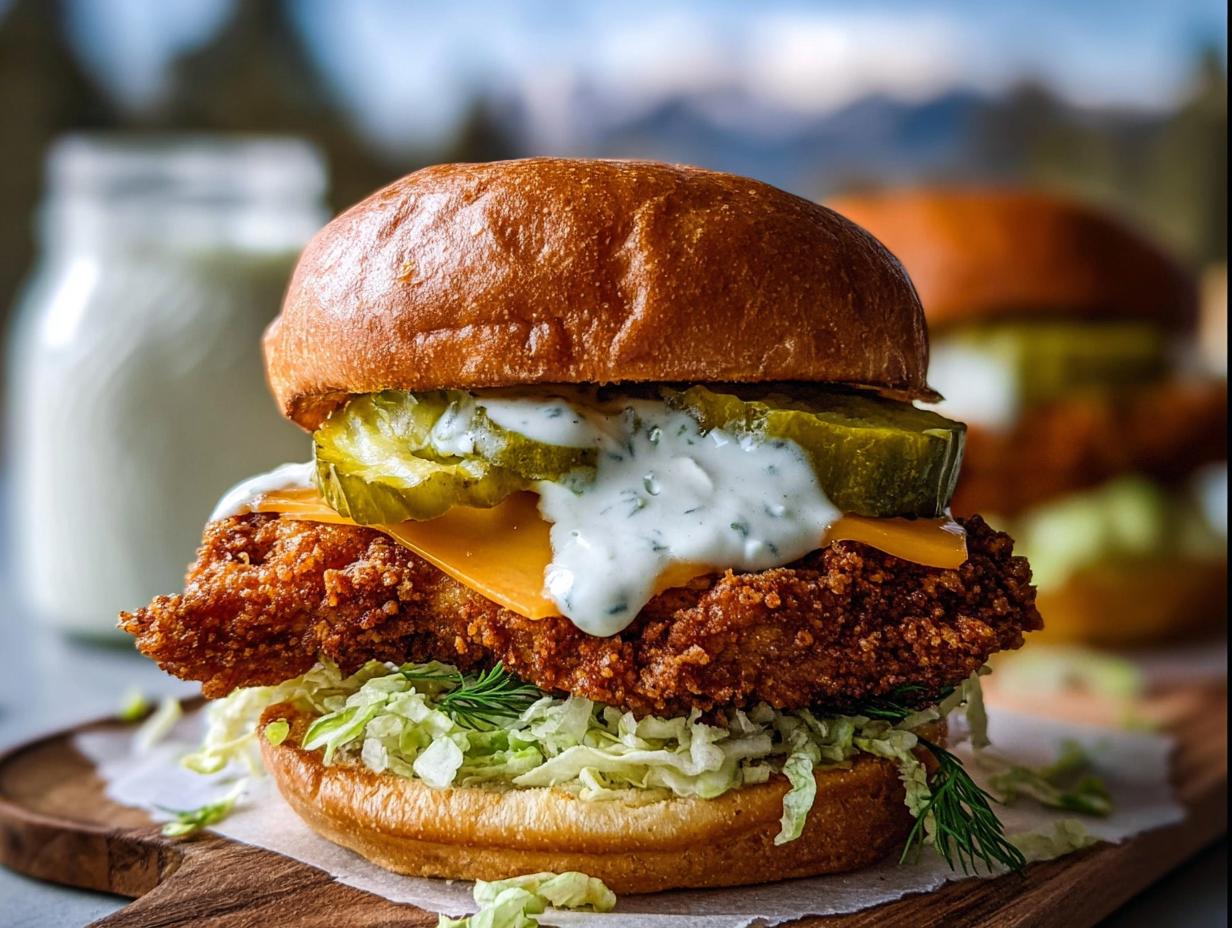
Step 8: Time to build! Spread a generous amount of that chilled creamy garlic dill sauce on both the top and bottom toasted buns. Lay down your shredded lettuce, place the piping hot, crispy chicken fillet on top, add your cheese so it starts to melt from the residual heat, pile on the pickle slices, and crown it with the top bun. Serve this masterpiece immediately before that crispiness fades!

Expert Tips for the Perfect Ultra Crispy Dill Chicken Sandwich with Creamy Garlic Dill Sauce
I know frying feels intimidating, but honestly, once you get your oil temperature consistent, the rest is pure muscle memory. It’s worth the tiny bit of mess!
The absolute most vital thing you can do is watch that oil temperature. If it drops below 325°F when you put the chicken in, you’re just soaking the crust in fat, and that leads to sogginess fast. If you can swing it, using an air fryer instead of deep frying is a slightly lighter but equally crunchy option—just make sure you spray the coating well with oil first. For another great marinade trick, you should definitely look at this guide to juicy chicken marinades.
Also, don’t rush the sauce chill time. While 15 minutes seems short, cooling down the mayo base helps it firm up just enough so it doesn’t immediately run off the toasted bun when you take that first bite. That contrast between the hot fried meat and the cool, herby sauce is what makes the flavor profile sing!
Serving Suggestions for Your Ultra Crispy Dill Chicken Sandwich with Creamy Garlic Dill Sauce
Even though this sandwich is huge on its own, sometimes you need a little something fresh on the side to balance out all that glorious crunch and creaminess!
When I’m serving up the Ultra Crispy Dill Chicken Sandwich with Creamy Garlic Dill Sauce, I try to add something bright to cut through the richness. Here are a few things that always win over my family:
- Tangy Coleslaw: Forget the gloopy mayo slaw; I use a vinegar-based dressing with a little less sugar. It adds a cool, acidic crunch right next to the hot sandwich.
- Sweet Potato Fries: The sweetness of the potatoes is a wonderful contrast to the tangy dill and garlic flavor profile we’ve got going on here.
- Simple Green Salad: If you need something lighter, just a handful of greens tossed with olive oil and lemon feels perfect. You can find some great inspiration in my fresh salad ideas section.
- Extra Pickles: I know, I know, but seriously, having a small bowl of extra cold, crunchy kosher dill slices on the side is non-negotiable for me!
Storing Leftovers of Your Ultra Crispy Dill Chicken Sandwich with Creamy Garlic Dill Sauce
If you happen to have leftovers—which I doubt, because this sandwich disappears instantly—storage is key to keeping that crunch alive until the next day. Don’t try to leave it assembled!
Leftovers are tricky with fried food, but we can manage! To keep your Ultra Crispy Dill Chicken Sandwich with Creamy Garlic Dill Sauce tasting almost as good as new, you have to separate everything completely before putting it away. You can store the cooled, crispy chicken in an airtight container in the fridge for about three days max. I also put the sauce in its own tiny container; it stays good for up to a week, which is handy.
Here’s the crucial part about reheating the chicken: please, for the love of crunch, do not try to use the microwave! That just turns the glorious crust into a sad, rubbery mess. You want to bring back that crispiness by heating the chicken in a 400°F oven or, even better, an air fryer for about 6 to 10 minutes. Reassemble the sandwich with fresh, toasted buns only once the chicken is hot and crispy again. I keep all my favorite make-ahead strategies over on my guide to healthy busy night dinners if you want more prep hacks!
FAQ About the Ultra Crispy Dill Chicken Sandwich with Creamy Garlic Dill Sauce
I get so many messages about substitutions, so I figured I’d answer the top three questions right here. Ask me anything else in the comments below!
Can I bake the chicken instead of frying it if I’m trying to cut down on oil?
You totally can, but you won’t get that same “ultra crispy” result we’re aiming for with this specific coating. If you bake it, make sure to spray the dredged chicken heavily with cooking spray before putting it in a 400°F oven for about 20 minutes, flipping halfway. It’ll be tasty, but not quite the same texture!
What if I don’t have pickle juice for the marinade?
If you’re making this dill chicken and realize you forgot the pickle juice, don’t panic! Just substitute it with an equal amount of fresh lemon juice or even white vinegar mixed with a tiny pinch of salt. The acidity is important for tenderizing the meat!
Can I make that garlic dill sauce ahead of time and skip chilling it?
You really shouldn’t skip chilling the garlic dill sauce. Letting it rest for at least 15 minutes allows the fresh dill flavor to truly bloom and it helps the sauce firm up just a bit so it doesn’t run right off the sandwich when you assemble it. For more great chicken prep ideas, check out my tips on healthy chicken salad recipes.
Enjoy Making This Sandwich
I truly hope this recipe brings the crunch factor back to your dinner table! Seriously, you have to try building this Ultra Crispy Dill Chicken Sandwich with Creamy Garlic Dill Sauce this week. Let me know in the comments below how crispy your crust got and what sides you served!
Print
Ultra Crispy Dill Chicken Sandwich with Creamy Garlic Dill Sauce
- Total Time: 40 min
- Yield: 4 servings
- Diet: Vegetarian
Description
Golden crispy chicken sandwich with tangy dill flavor, crunchy coating, and creamy garlic dill sauce on a toasted bun.
Ingredients
- 2 boneless skinless chicken fillets
- 1 cup buttermilk
- 2 tablespoons pickle juice
- 1 egg
- 1 teaspoon salt
- 1 half teaspoon black pepper
- 1 half teaspoon garlic powder
- 1 quarter teaspoon paprika
- 1 cup all purpose flour
- 1 quarter cup cornstarch
- 1 teaspoon dried dill
- 1 half teaspoon baking powder
- 1 half teaspoon salt
- 1 quarter teaspoon black pepper
- 1 half cup mayonnaise
- 2 tablespoons fresh dill chopped
- 1 tablespoon lemon juice
- 1 garlic clove minced
- 1 teaspoon Dijon mustard
- Salt and black pepper to taste
- 4 sandwich buns
- 4 slices cheddar cheese
- 1 cup shredded lettuce
- 1 half cup pickle slices
- 2 tablespoons butter
- Vegetable oil for frying
Instructions
- Whisk buttermilk, pickle juice, egg, salt, pepper, garlic powder, and paprika in a bowl. Add the chicken and marinate for at least 2 hours or overnight.
- Mix flour, cornstarch, dried dill, baking powder, salt, and pepper in another bowl.
- Remove the chicken from the marinade, letting excess drip off. Coat the chicken thoroughly in the flour mixture. Dip the chicken back into the marinade and coat again for extra crispiness.
- Heat oil in a deep pan to 350°F. Carefully fry the chicken for 6 to 8 minutes per side until golden brown and fully cooked.
- Transfer the chicken to a wire rack to drain excess oil and keep the crust crisp.
- Mix mayonnaise, fresh dill, lemon juice, garlic, and Dijon mustard in a small bowl. Season to taste and chill for 15 minutes.
- Butter the buns and toast them in a pan until golden.
- Assemble the sandwich by spreading the dill sauce on both buns. Add lettuce, crispy chicken, cheese, and pickles. Top with the bun and serve immediately.
Notes
- Double coating the chicken creates an extra crunchy crust that holds up well with the creamy sauce.
- Prep Time: 20 min
- Cook Time: 20 min
- Category: Dinner
- Method: Frying
- Cuisine: American