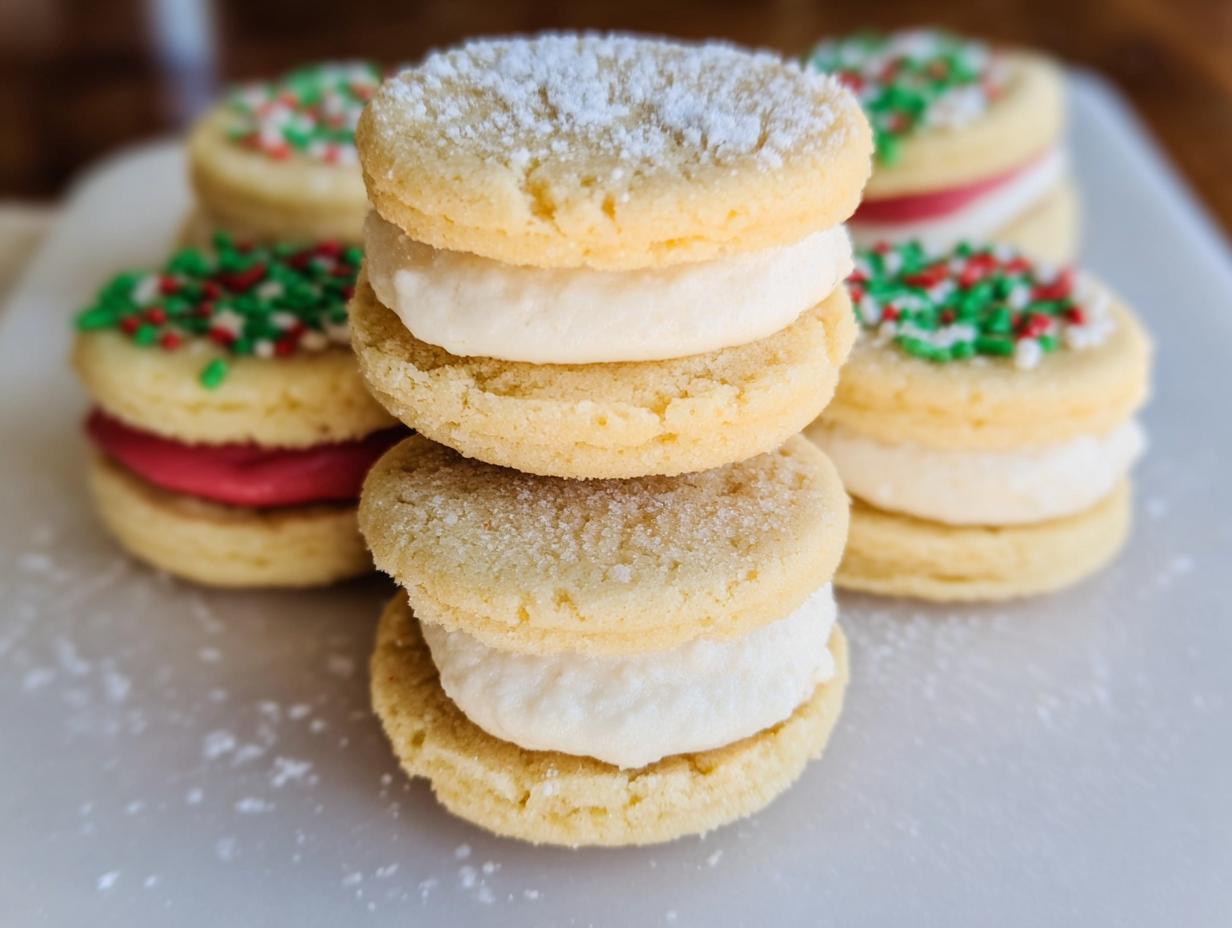
Oh my goodness, you guys! I have been holding onto a secret recipe that is just pure nostalgia wrapped up in the most delicate crunch you can imagine. Forget those store-bought ones that crumble into dust the second you look at them wrong. We are making Cream Wafer Sandwich Cookies With Buttercream Filling, and I promise, if you can chill dough and press a fork into something, you can master this!
When I first started baking, I thought anything “vintage” or “wafer” meant I needed a pastry degree. Not true! This recipe changed that for me. It’s so straightforward—just a few simple ingredients come together to make these impossibly light cookies. I remember making these for my first ever tea party when I was maybe ten, and everyone raved. They thought I bought them from some fancy bakery!
The beauty of this recipe is its simplicity; it teaches you the importance of chilling dough, which is a game-changer for any cookie baker. These aren’t thick, chewy cookies; they are crisp, melt-in-your-mouth treasures, perfect for stacking high next to a cup of tea.

Gather Your Ingredients for Cream Wafer Sandwich Cookies With Buttercream Filling
Okay, before we even think about turning on the oven, we need our players lined up! This recipe is so simple, but precision matters, especially when you’re dealing with something as delicate as a wafer. Don’t stress about the chilling time; that’s the hard part—the measuring is easy!
Getting your ingredients ready beforehand (mise en place, as the fancy people say) means that when the dough is chilled, you can whip up the filling while the oven preheats. Trust me, it keeps the process smooth when making these Cream Wafer Sandwich Cookies With Buttercream Filling.
Components for the Delicate Cream Wafer Cookies
For the cookies themselves, we need the base ingredients that give them that signature snap. Make sure your butter is softened—not melted! That’s a key detail we’ll talk more about later.
| Ingredient | Amount |
| Unsalted Butter (softened) | \u00bd cup |
| All Purpose Flour | 1 cup |
| Heavy Cream | 3 tablespoons |
| Granulated Sugar (for sprinkling) | \u00bc cup |
Creating the Smooth Buttercream Filling
The filling is where we get that fluffy, sweet contrast to the crisp wafer. It’s a very basic American buttercream, but the ratios are perfect for this sandwich cookie.
| Ingredient | Amount |
| Unsalted Butter (softened) | \u00bc cup |
| Powdered Sugar | \u00be cup |
| Vanilla Extract | \u00bd teaspoon |
| Heavy Cream | 1\u00bd teaspoons |
Essential Tools for Making Cream Wafer Sandwich Cookies With Buttercream Filling
You don’t need a ton of fancy gadgets for these Cream Wafer Sandwich Cookies With Buttercream Filling, which is why I love them for new bakers! It’s mostly standard kitchen gear. Having the right tools just makes the delicate shaping process much less stressful, believe me.
Preparing Your Baking Station
The most important thing here is your baking surface. We need parchment paper—don’t even think about skipping it! It stops these thin cookies from sticking and breaking when you try to move them.
- Two sturdy baking sheets
- Parchment paper
- Oven (preheated to 375\u00b0F)
Mixing and Shaping Equipment
For mixing the dough and making the filling, your mixer will be your best friend. For cutting, anything small and sharp works!
- Electric mixer (handheld or stand mixer)
- Mixing bowls
- Small, floured cookie cutter (or even the rim of a small glass!)
- A fork (for pricking)
- A wire cooling rack

Step-by-Step Instructions for Cream Wafer Sandwich Cookies With Buttercream Filling
This is where the magic happens! The key to perfect Cream Wafer Sandwich Cookies With Buttercream Filling is patience, especially during the chilling and cooling phases. Don’t rush these steps, or you’ll end up with sad, broken wafers. I learned that the hard way!
Making and Chilling the Cream Wafer Dough
First things first, we build the dough. Grab your mixer and beat that softened butter until it’s nice and smooth. Then, slowly mix in the flour and the heavy cream. You’re looking for a soft, pliable dough—not a stiff, crumbly mess. If it seems too dry, add just a tiny splash more cream, but be careful; too much liquid means no crisp snap later!
Once it comes together, wrap that dough up TIGHTLY in plastic wrap. It needs a good hour in the fridge. This chilling time is non-negotiable! It firms up the butter, which keeps the wafers from spreading into giant puddles when they hit the heat. It’s vital for that classic thin, crisp texture.
Baking the Crisp Cookie Wafers
Time to preheat that oven to 375\u00b0F. While it heats up, dust your counter lightly with flour. Roll the chilled dough out until it’s about a quarter-inch thick. You want them thin! Use a small, floured cutter—remember, these are sandwich cookies, so small is perfect. If you don’t have a cutter, use the rim of a shot glass or a tiny round cookie mold.
Place them about an inch apart on your parchment-lined sheets. Now for the fun, traditional part: sprinkle them lightly with your granulated sugar. Then, take a fork and prick each cookie three times. This stops them from puffing up too much! Bake them for just 7 to 8 minutes. Seriously, watch them! They should be set but still very pale. If they start turning golden brown, you’ve gone too far, and they won’t be wafers.
Let them sit right on the pan for three minutes after they come out. They are fragile when hot! Then, very carefully, use a thin spatula to move them to a wire rack to cool completely. Cool means cool—if they are even slightly warm when you try to fill them, the buttercream will melt everywhere!
Whipping the Fluffy Buttercream Filling
While those wafers are cooling down, let’s make the filling. This is quick, so make it right before you plan to assemble. Beat that soft butter until it’s light and fluffy—you want air in there! Then, gradually add your powdered sugar, vanilla, and the heavy cream. Beat it on medium speed until it’s smooth, creamy, and easily spreadable. If it’s too stiff, add a few more drops of cream; if it’s too loose, add a tablespoon more powdered sugar.
Assembling Your Cream Wafer Sandwich Cookies With Buttercream Filling
This is the moment that requires the most TLC. Take a cooled wafer and place it flat side up. Spread a tiny, thin layer of that gorgeous buttercream onto it. A little goes a long way here because we want the cookie flavor to shine!
Take a second cooled wafer and gently place it on top, pressing down just enough to secure the filling without cracking the delicate wafer underneath. Remember, these Cream Wafer Sandwich Cookies With Buttercream Filling are delicate! If you press too hard, you’ll shatter your beautiful work. Just a gentle seal is all you need. Set them aside and try not to eat them all at once!
Why You Will Love This Cream Wafer Sandwich Cookies With Buttercream Filling Recipe
Seriously, if you need a showstopper that’s secretly super easy, this is it. I keep coming back to this recipe over and over because it hits all the right notes. They look fancy, but the process is so manageable, even if you’re usually nervous about delicate cookies. Once you try these, you’ll see why they’ve stuck around for generations!
Here’s why these Cream Wafer Sandwich Cookies With Buttercream Filling are about to become your new favorite:
- They are incredibly light and crisp—the perfect texture contrast to that smooth filling.
- The recipe is surprisingly beginner-friendly, relying on simple mixing and chilling techniques.
- They hold up beautifully for tea parties or special gatherings, looking elegant on any platter.
- The flavor is pure, sweet nostalgia—not overly complicated, just buttery goodness.
- Since they are small, you can enjoy one or two without feeling guilty!
Tips for Success with Your Cream Wafer Sandwich Cookies With Buttercream Filling
I want you to have a perfect batch of Cream Wafer Sandwich Cookies With Buttercream Filling on your first try, so let’s talk about where things can go wrong. Most issues come down to temperature or handling. These wafers are thin, which is what makes them amazing, but it also makes them fragile!
The chilling time for the dough is crucial, but the cooling time after baking is even more important. If you try to move them too soon, they will bend, crack, or just fall apart in your hands. Take a deep breath and let the cooling rack do its job! If you want to see more of my baking tips, check out my banana bread recipe for more insights on chilling dough!
Handling the Delicate Baked Wafers
When you take those cookies out of the oven, they are super soft. Don’t rush that three-minute rest on the baking sheet—that little bit of residual heat sets the structure. When you transfer them, use the thinnest offset spatula you own, slide it way under, and lift them gently to the rack. If a few break, don’t panic! We can use the broken pieces as the bottom layer of a sandwich cookie; no one will ever know once they are filled!
Achieving the Right Buttercream Consistency
For the filling of your Cream Wafer Sandwich Cookies With Buttercream Filling, you want it perfectly spreadable. If your kitchen is warm, your butter might get too soft while you’re beating it, making the filling runny. If that happens, pop the bowl (just the bowl!) into the fridge for about 10 minutes, then give it another quick beat before assembling. If it’s too stiff, it will tear the delicate wafers when you try to spread it, so softness is key for easy assembly.
Storage and Keeping Your Cream Wafer Sandwich Cookies With Buttercream Filling Fresh
Now that you’ve made these gorgeous Cream Wafer Sandwich Cookies With Buttercream Filling, you need to know how to keep them perfect! The good news is that because the filling is a simple buttercream, they store really well. They are best eaten within a few days, but you can definitely keep them longer if you store them right.
The number one rule is keeping them away from moisture. If they sit in a humid container, those lovely crisp wafers will start to soften up instantly, and we absolutely cannot have that! I usually stack them in a single layer if I can, but if you must stack them, use a piece of parchment paper between the layers.
I wouldn’t recommend freezing these, honestly. The moisture change when thawing usually makes the wafer soggy. Here is my quick guide for keeping your sandwich cookies at their best:
| Storage Location | Duration | Notes |
| Airtight Container (Room Temp) | Up to 4 days | Keep away from heat or sunlight. |
| Airtight Container (Refrigerator) | Up to 1 week | Let them sit out for 20 minutes before serving to soften the buttercream slightly. |
Common Questions About Making Cream Wafer Sandwich Cookies With Buttercream Filling
I know you might have a few little questions rattling around because these Cream Wafer Sandwich Cookies With Buttercream Filling are just a little different from your standard chocolate chip cookie! I’ve gathered the most frequent concerns I hear from bakers trying this vintage recipe for the first time. Don’t worry, we’ll sort it all out!
Can I make the dough ahead of time
Yes, absolutely! In fact, I highly recommend it. The dough needs at least an hour of chilling time anyway, so making it the day before is perfect. Just wrap it really tightly in plastic wrap so it doesn’t dry out in the fridge. When you’re ready to bake, let it sit on the counter for just 5 to 10 minutes so it’s easier to roll out, but don’t let it get warm!
What is the best way to cut uniform cookie shapes
Uniformity is key for sandwich cookies so they match up nicely! If you have a small, round cookie cutter, use that! Make sure you dust the cutter with flour *every time* you cut a few shapes. If you don’t have a cutter, use the rim of a very small glass or even a large piping tip. Just dust the rim with flour before pressing down into the dough. This ensures your Cream Wafer Sandwich Cookies With Buttercream Filling look professionally made!
Can I substitute the heavy cream
This is tricky, and it’s where Grandma’s original recipe comes into play. The heavy cream in the wafer dough is small, but it helps create that specific tenderness. I have had success substituting it with whole milk in a pinch, but you might need to chill the dough an extra 15 minutes. For the buttercream filling, heavy cream adds richness; you can substitute it with regular milk, but the filling will be slightly softer and less stable, so use less milk at first until the consistency is right.
Sharing Your Homemade Cream Wafer Sandwich Cookies With Buttercream Filling
Now that you have your stack of perfect Cream Wafer Sandwich Cookies With Buttercream Filling, you have to tell me how they turned out! Did you use tiny heart cutters? Did they disappear in five minutes flat?
Snap a picture and tag me on social media! I absolutely love seeing your creations. Don’t forget to come back here and leave a star rating—it helps other bakers know this vintage recipe is worth the effort! You can also find more inspiration on my Pinterest page.
Print
Amazing 7 Cream Wafer Sandwich Cookies
- Total Time: 1 hour 23 minutes
- Yield: 24 sandwich cookies
- Diet: Vegetarian
Description
Light, flaky cream wafer sandwich cookies with a smooth buttercream filling. This is a classic vintage cookie recipe.
Ingredients
- Cream Wafer Cookies: ½ cup unsalted butter softened
- 1 cup all purpose flour
- 3 tablespoons heavy cream
- ¼ cup granulated sugar for sprinkling
- Buttercream Filling: ¼ cup unsalted butter softened
- ¾ cup powdered sugar
- ½ teaspoon vanilla extract
- 1½ teaspoons heavy cream
Instructions
- Beat the softened butter, flour, and heavy cream in a medium bowl until a soft dough forms.
- Cover the dough tightly and refrigerate for 1 hour to firm.
- Preheat the oven to 375°F and line two baking sheets with parchment paper.
- Roll the dough on a lightly floured surface to about ¼ inch thickness.
- Cut into small shapes using a floured cutter.
- Place cookies 1 inch apart on the baking sheets.
- Sprinkle lightly with granulated sugar and prick each cookie 3 times with a fork.
- Bake for 7 to 8 minutes until set but still pale.
- Let cookies cool on the pan for 3 minutes, then transfer carefully to a wire rack to cool completely.
- Beat the butter until creamy in a bowl.
- Add powdered sugar, vanilla extract, and heavy cream and beat until smooth and spreadable for the filling.
- Spread a small amount of frosting onto the flat side of half of the cookies.
- Top with remaining cookies to form sandwich cookies.
Notes
- Handle the cookies gently after baking since they are very delicate.
- Prep Time: 15 minutes
- Cook Time: 8 minutes
- Category: Dessert
- Method: Baking
- Cuisine: American