Okay, stop what you are doing right now, because I have created the most gloriously over-the-top, absolutely necessary dessert you will ever bake. Forget everything you thought you knew about simple sweets. We are diving headfirst into making the ultimate Monster Cookie Cheesecake With Peanut Butter Crust. Yes, I said peanut butter crust! And yes, it’s loaded with chocolate candies.
When I first decided to tackle this beast, I thought it would be a total disaster. I mean, combining a chewy monster cookie base with a rich, creamy baked cheesecake? Sounds intense, right? But trust me, this recipe is surprisingly straightforward. Even if you’ve never baked a cheesecake before, you’re going to nail this. The secret is focusing on the temperature of your ingredients, which I’ll get to in a minute.

This isn’t just dessert; it’s a statement. It’s what you bring when you want everyone to remember your party for weeks. The combination of that salty, dense peanut butter crust fighting against the sweet, creamy filling—packed with chips and candies—is pure magic. Get your mixer ready; we’re making something legendary!
Why You Will Love This Monster Cookie Cheesecake With Peanut Butter Crust
Honestly, I make this dessert whenever I need a guaranteed showstopper. It looks like it took days of complicated layering, but you’ll be shocked how quickly it comes together, especially since we are using quick oats in the crust.
- The flavor combination is just unreal: salty peanut butter meets sweet chocolate candies and tangy cream cheese.
- You get the best of both worlds—the chewy, slightly crisp texture of a baked cookie and the smooth silkiness of cheesecake.
- Despite all the components, the actual hands-on time isn’t bad at all!
Quick Preparation and Flavor Impact of Monster Cookie Cheesecake With Peanut Butter Crust
Seriously, don’t let the name scare you off. The ‘wow’ factor here is huge, but the complexity is low. We’re mixing up a cookie dough, pressing it in, baking it for ten minutes, and then pouring the filling right over the top. That initial short bake sets the peanut butter crust so it doesn’t get soggy under the weight of that rich filling.
Every scoop delivers that perfect crunch from the oats and candies against the smooth, cool cream cheese. It’s the ultimate texture contrast, and it all happens without needing any fancy pastry skills. You just need a good mixer and a willingness to go big!
Essential Equipment for Your Monster Cookie Cheesecake With Peanut Butter Crust
You don’t need a million fancy gadgets for this masterpiece, but you absolutely need the right foundation. The most important player here is your 10-inch springform pan. Don’t try to squeeze this into a standard pie plate; you need those high sides to contain all that glorious filling!
You’ll want a sturdy electric mixer, either a stand mixer or a good hand mixer, because creaming all that peanut butter and sugar for the crust takes some muscle. Also, make sure you have a large mixing bowl ready for the filling. Peanut butter is a key ingredient here!
Oh, and grab a rubber spatula. You’ll use it constantly for scraping down the sides so you don’t waste a speck of that batter!
Gathering Ingredients for the Monster Cookie Cheesecake With Peanut Butter Crust
Alright, time to hit the grocery store! Because this recipe has three distinct layers—the crust, the filling, and the topping—it looks like a long list. But don’t panic! Once you see everything laid out, you’ll realize most of it is just variations on a theme. We need lots of chocolate, lots of peanut butter, and, of course, a mountain of cream cheese.
The key to success here, especially with cheesecake, is making sure your dairy items are ready to go *before* you start mixing. That’s the real secret to a smooth batter, which we’ll talk about in the notes below.
Ingredients Breakdown for the Monster Cookie Cheesecake With Peanut Butter Crust
Here is exactly what you need for this beautiful beast:
| Component | Ingredient | Amount |
|---|---|---|
| Crust | Unsalted butter, softened | ⅓ cup |
| Crust | Granulated sugar | ⅔ cup |
| Crust | Light brown sugar, packed | ⅔ cup |
| Crust | Creamy peanut butter | 1 cup |
| Crust | Large eggs | 2 |
| Crust | Vanilla extract | ½ teaspoon |
| Crust | Baking soda | 1¼ teaspoons |
| Crust | Quick cooking oats | 3 cups |
| Crust | Mini chocolate candies | ⅔ cup |
| Crust | Mini chocolate chips | ⅔ cup |
| Filling | Cream cheese, softened | 40 ounces |
| Filling | Granulated sugar | 1 cup |
| Filling | All purpose flour | 3 tablespoons |
| Filling | Vanilla extract | 1 tablespoon |
| Filling | Sour cream | 1 cup |
| Filling | Large eggs | 4 |
| Filling | Mini chocolate candies | ½ cup |
| Filling | Mini chocolate chips | ½ cup |
| Topping | Heavy whipping cream | ½ cup |
| Topping | Semi sweet chocolate chips | 1½ cups |
Ingredient Notes and Substitutions for Monster Cookie Cheesecake With Peanut Butter Crust
Listen up, because this is crucial for that silky texture. Your 40 ounces of cream cheese? It absolutely must be softened to room temperature. If it’s cold, you’ll end up with lumps, and we are aiming for smooth perfection here. Do not try to microwave it quickly unless you want melted edges; just leave it out for a couple of hours.
For the chocolate inclusions, I insist on using the *mini* versions for both the candies and the chips. The regular size ones tend to sink to the bottom of the filling or make the crust too chunky to press evenly. Mini melts right into the batter beautifully.
Also, use creamy peanut butter, not the natural kind that separates. We need that stabilizer power for the crust to hold up against the wet filling. Trust me on the creamy stuff!
Step-by-Step Instructions for Your Monster Cookie Cheesecake With Peanut Butter Crust
This is where the magic happens! Don’t rush these steps, especially the temperature changes. We are building layers here, and each one needs a moment to get ready for the next. Grab your 10-inch springform pan and let’s get that oven preheated to 350°F. Remember to grease that pan lightly before we start!
The whole process moves fairly quickly once you have your ingredients ready. We bake the crust first just to give it some structure, then drop the temperature for the long, slow bake of the cheesecake itself. Keep an eye on the clock!
Preparing and Baking the Peanut Butter Crust
For the crust, we start by creaming the softened butter, both sugars, and that cup of creamy peanut butter until it’s nice and smooth. Then, we beat in the eggs and the vanilla. Don’t overmix here, we just want it combined.
Next, gently mix in the baking soda and the quick oats. This dough will be thick and stiff—that’s exactly what you want! Finally, fold in those mini candies and chips. We need about two cups of this dough to form the crust. Press it firmly and evenly into the bottom of your prepared pan. I like to push it slightly up the sides, maybe an inch or so, just to give the filling something to cling to.
Pop that into the 350°F oven for exactly 10 minutes. It’s just a quick set. Once that’s done, pull it out. Now, this is important: reduce your oven temperature down to 325°F. It needs that lower temperature for the long bake ahead.

Creating the Creamy Cheesecake Filling
While the crust is setting up, whip up the filling. Start with the 40 ounces of softened cream cheese. Beat it until it is perfectly smooth—I mean absolutely no lumps. Then, add the sugar, flour, vanilla, and sour cream, mixing until it’s creamy again.
Now for the eggs. Add them one at a time, mixing just until each egg is blended in. Overmixing the eggs adds too much air, which leads to cracking later! Once those are just incorporated, gently fold in the final ½ cup of mini candies and ½ cup of mini chips. We fold these in so we don’t deflate all the air we just worked so hard to keep out!
Pour that rich filling right over your warm, pre-baked crust and smooth out the top with your spatula.
Final Bake, Cooling, and Setting the Monster Cookie Cheesecake With Peanut Butter Crust
Place the cheesecake into the slightly cooler 325°F oven. It needs to bake for about 1 hour and 10 minutes. You are looking for the edges to be set—firm to the touch—but the very center should still have a slight jiggle, like firm Jell-O. It will set completely as it cools.
When it’s done, turn the oven off, crack the door open just a little, and let it sit in the residual heat for about an hour. This slow cooling prevents shock! Once it’s closer to room temperature, run a thin knife gently around the edge of the pan—this keeps it from sticking as it shrinks. Then, cover it loosely and chill it for a minimum of 4 hours, but honestly, overnight is best for those super clean slices!
Before serving, just make the simple ganache topping: heat the heavy cream until it’s steaming hot but not boiling, pour it over the chips, let it sit for five minutes, and stir until smooth. Spread that luscious chocolate over your cold cheesecake!
| Step | Action | Oven Temp | Time |
|---|---|---|---|
| 1 | Prepare pan and mix crust dough | Preheat to 350°F | N/A |
| 2 | Bake crust | 350°F | 10 minutes |
| 3 | Reduce oven temp and mix filling | Reduce to 325°F | N/A |
| 4 | Bake cheesecake | 325°F | 1 hour 10 minutes |
| 5 | Cool slowly and chill | Oven Off (Door cracked) | 1 hour + 4 hours minimum |
| 6 | Top and serve | Chilled | N/A |
Tips for Achieving the Perfect Monster Cookie Cheesecake With Peanut Butter Crust
Listen, this dessert is huge, and we want it to look as good as it tastes. The biggest fears people have are cracking and sinking, and they both usually come down to temperature and mixing technique. Remember how I stressed room temperature cream cheese? That’s step one for a smooth, crack-free surface.
When you are mixing anything into the cream cheese, go slow. You’re trying to incorporate ingredients, not whip air into the batter. Too much air expands rapidly in the oven and then collapses dramatically when it cools, causing those awful fissures. Use the lowest speed possible once the eggs go in.
The cooling process is just as important as the baking time. Never take a hot cheesecake straight from the oven to the counter. That rapid temperature drop is a shock to the structure. That slow, one-hour cool-down in the turned-off oven with the door cracked is non-negotiable if you want a flat, gorgeous top. If you follow those temperature rules, your Monster Cookie Cheesecake With Peanut Butter Crust will look professional! You can see more tips on our Facebook page.
Common Questions About Monster Cookie Cheesecake With Peanut Butter Crust
I get so many questions about this recipe because it seems so intimidating, but honestly, once you understand the chilling and cooling rules, it’s a breeze. People always ask about making it ahead of time, or how to get those perfect, non-messy slices for serving.
Don’t worry about any of those tricky parts. I’ve got the answers right here to make sure your Monster Cookie Cheesecake With Peanut Butter Crust turns out perfectly every time you bake it.
Can I make the Monster Cookie Cheesecake With Peanut Butter Crust ahead of time
Yes, absolutely! In fact, I highly recommend it. As the note says, this cheesecake slices so much cleaner when it’s completely cold. If you have a big event, bake it a day ahead, chill it as directed, and then make the chocolate topping the next morning. It keeps beautifully covered in the fridge for up to four days. The flavors actually seem to deepen overnight, which is great for a dessert this rich.
How do I prevent my cheesecake filling from cracking
Cracking is almost always due to temperature shock. First, make sure you cool it slowly in the oven with the door cracked for an hour after baking. Second, once it’s cooled to room temperature, run a thin, sharp knife around the edge where the cheesecake meets the pan. This releases the tension as it shrinks during chilling, so it pulls away from the sides cleanly instead of tearing the middle.
What is the best way to slice the finished Monster Cookie Cheesecake With Peanut Butter Crust
This is where the overnight chill really pays off, especially with that thick peanut butter crust! You need the cheesecake to be ice cold for clean cuts. The trick I use is to dip a long, sharp knife in hot water, wipe it completely dry, and then slice. Wipe the knife clean and re-heat it between every single slice. This keeps the chocolate chips and the crust from dragging and smashing your beautiful slice. Check out our Pinterest for visual guides!
Storing and Serving Your Monster Cookie Cheesecake With Peanut Butter Crust
Now that you’ve conquered this amazing dessert, we have to talk about keeping it perfect until it’s time to serve. Since this Monster Cookie Cheesecake With Peanut Butter Crust is so rich, you definitely don’t want to leave leftovers sitting out. It needs to stay cold to keep that filling firm and that crust sturdy.
Serving is almost as important as baking! Because we have so many amazing textures happening—the chewy crust, the creamy center, the hard chocolate topping—we want to keep accompaniments simple so the cheesecake remains the star of the show.
Serving Suggestions for Your Monster Cookie Cheesecake With Peanut Butter Crust
I usually serve this straight from the fridge. It’s already perfectly chilled, and the cold temperature really makes the peanut butter crust pop against the sweetness. If you want to dress it up just a tiny bit, a sprinkle of flaky sea salt right on top of the chocolate ganache before serving enhances the salty peanut butter flavor beautifully. You could also serve a small dollop of plain whipped cream on the side, but honestly, this monster doesn’t need anything else! For more dessert inspiration, see our Medium articles.
Storing Leftover Monster Cookie Cheesecake With Peanut Butter Crust
If, by some miracle, you have leftovers (which I doubt!), you need to handle storage carefully. Make sure you only slice what you plan to eat, leaving the rest of the cake whole until serving. Cover the remaining cheesecake tightly with plastic wrap, making sure the wrap doesn’t touch the chocolate topping if you can help it.
It should stay happy in the refrigerator for about four days. Remember, it gets better after that overnight chill, so don’t worry if you have to wait a day to eat the rest!
| Storage Aspect | Guidance | Duration |
|---|---|---|
| Best Practice | Keep covered tightly in the refrigerator | Up to 4 days |
| Serving Temp | Serve directly from the refrigerator | N/A |
| Prep Ahead | Best if chilled overnight after topping | Minimum 4 hours |
Share Your Monster Cookie Cheesecake With Peanut Butter Crust Experience
Now that you’ve made this incredible, over-the-top Monster Cookie Cheesecake With Peanut Butter Crust, I absolutely need to hear about it! Did you manage to get those clean slices? Did the peanut butter crust hold up like a champ?
Please drop a star rating below—even if you changed something major, let me know how it worked for you. Leaving a comment helps me know what everyone loves most about this amazing bake!
Print
Monster Cookie Cheesecake With Peanut Butter Crust Wow
- Total Time: 6 hours 10 minutes
- Yield: 14 servings
- Diet: Vegetarian
Description
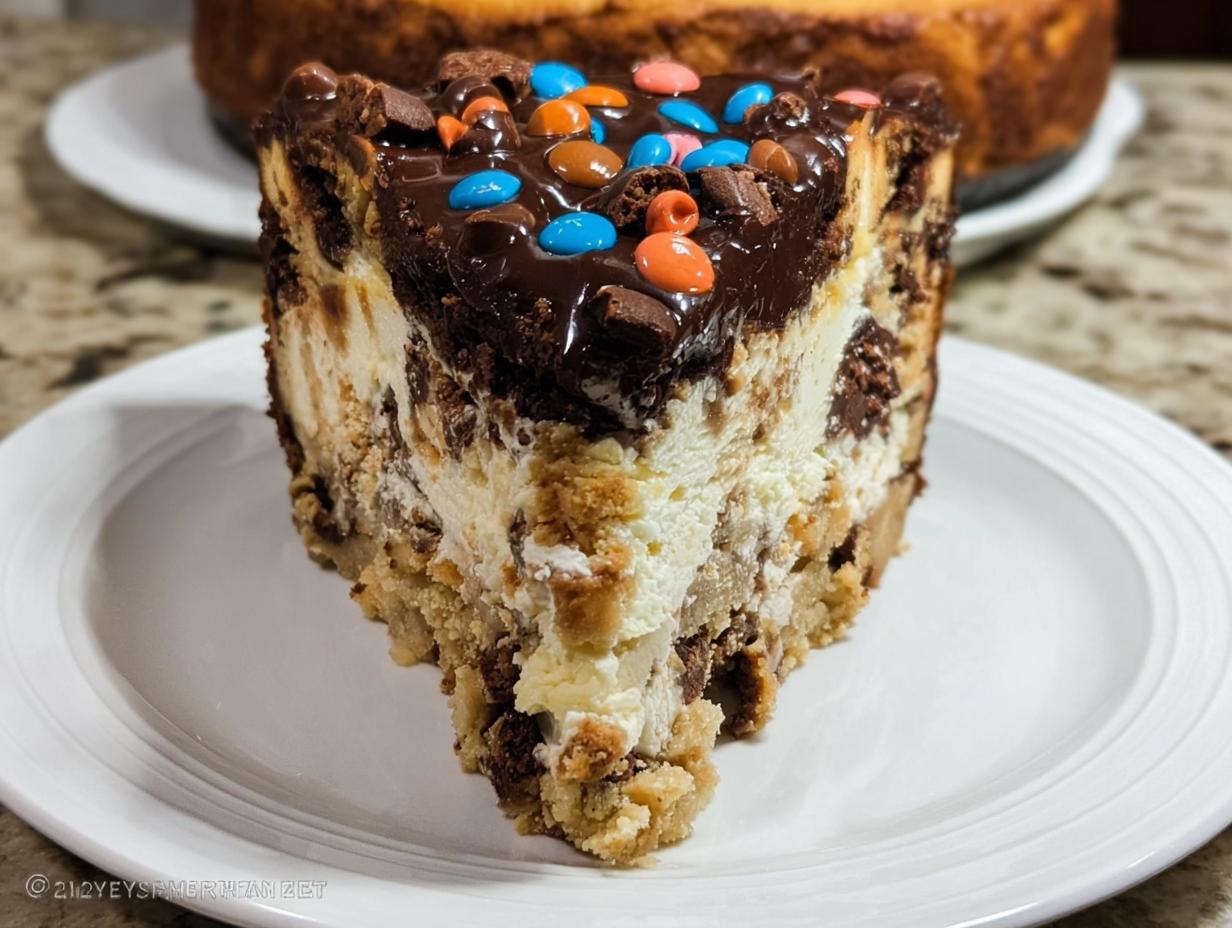
This monster cookie cheesecake features a peanut butter cookie crust, a creamy filling loaded with chocolate and candy, and a rich chocolate topping. It is an over-the-top dessert.
Ingredients
- Monster Cookie Crust: ⅓ cup unsalted butter softened
- Monster Cookie Crust: ⅔ cup granulated sugar
- Monster Cookie Crust: ⅔ cup light brown sugar packed
- Monster Cookie Crust: 1 cup creamy peanut butter
- Monster Cookie Crust: 2 large eggs
- Monster Cookie Crust: ½ teaspoon vanilla extract
- Monster Cookie Crust: 1¼ teaspoons baking soda
- Monster Cookie Crust: 3 cups quick cooking oats
- Monster Cookie Crust: ⅔ cup mini chocolate candies
- Monster Cookie Crust: ⅔ cup mini chocolate chips
- Cheesecake Filling: 40 ounces cream cheese softened
- Cheesecake Filling: 1 cup granulated sugar
- Cheesecake Filling: 3 tablespoons all purpose flour
- Cheesecake Filling: 1 tablespoon vanilla extract
- Cheesecake Filling: 1 cup sour cream
- Cheesecake Filling: 4 large eggs
- Cheesecake Filling: ½ cup mini chocolate candies
- Cheesecake Filling: ½ cup mini chocolate chips
- Chocolate Topping: ½ cup heavy whipping cream
- Chocolate Topping: 1½ cups semi sweet chocolate chips
Instructions
- Preheat the oven to 350°F. Lightly grease a 10 inch springform pan.
- Cream the butter, granulated sugar, brown sugar, and peanut butter until smooth. Beat in the eggs and vanilla.
- Mix in the baking soda and oats, then fold in the chocolate candies and chocolate chips for the crust.
- Press about two cups of the cookie dough evenly into the bottom and slightly up the sides of the prepared pan to form the crust.
- Bake the crust for 10 minutes, then remove and reduce the oven temperature to 325°F.
- Beat the cream cheese until smooth. Add the sugar, flour, vanilla, and sour cream and mix until creamy.
- Add the eggs one at a time, mixing just until blended. Gently fold in the chocolate candies and chocolate chips for the filling.
- Pour the filling over the baked crust and smooth the top.
- Bake for 1 hour 10 minutes until the edges are set and the center is slightly jiggly.
- Remove from the oven, run a knife around the edge, and cool to room temperature. Refrigerate at least 4 hours.
- Heat the cream until very hot but not boiling, then pour over the chocolate chips for the topping. Stir until smooth.
- Spread the chocolate topping over the chilled cheesecake and refrigerate until ready to serve.
Notes
- This cheesecake slices best after chilling overnight.
- Prep Time: 1 hour
- Cook Time: 1 hour 10 minutes
- Category: Dessert
- Method: Baking
- Cuisine: American