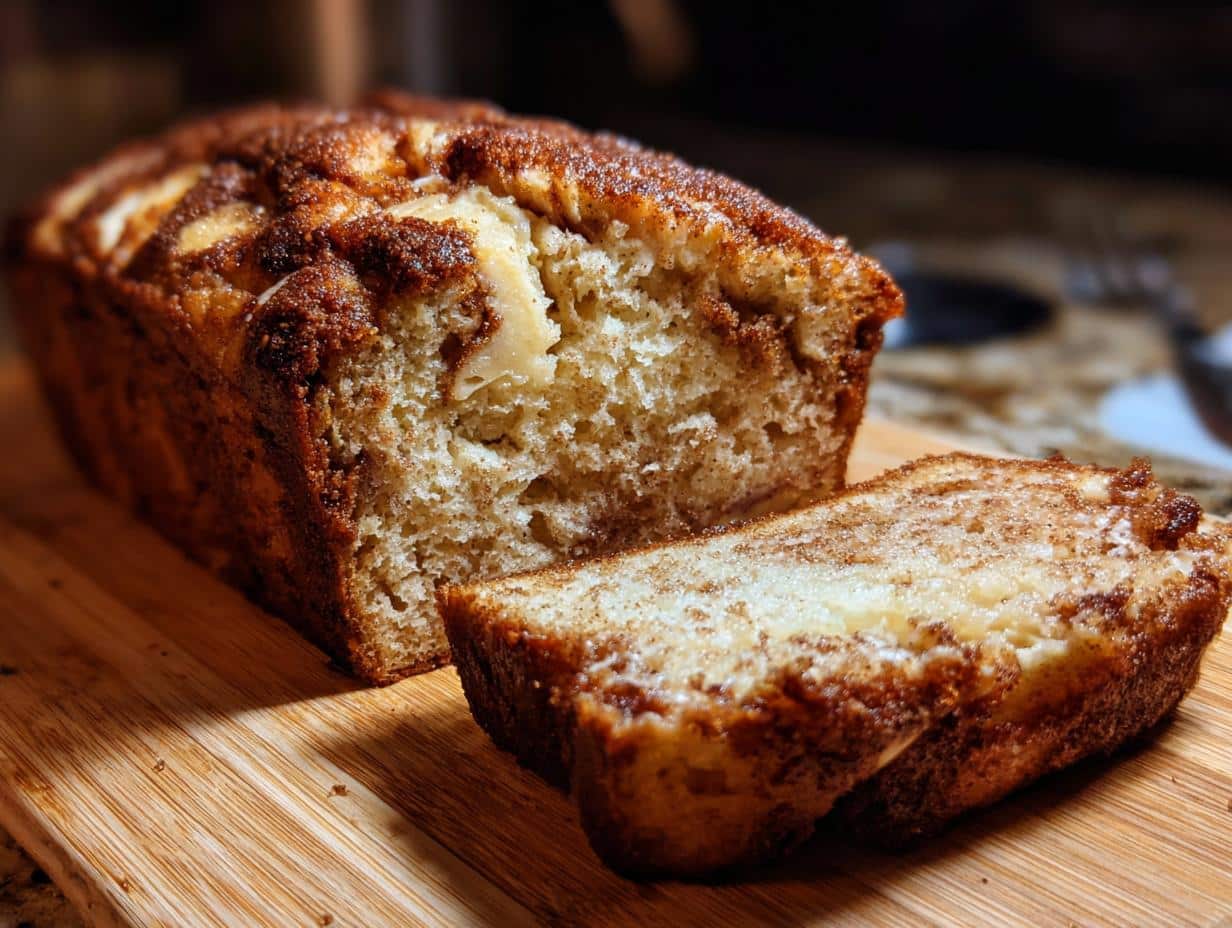
Oh my gosh, forget flipping pancakes! If you want the ultimate brunch experience—that magical combination of a shatteringly crisp exterior hugging a fluffy, cinnamon-spiced interior—you absolutely need to meet the waffle iron halfway. We are talking about making French Toast Waffles Crispy Outside Soft Inside, and trust me, it’s a total game-changer for weekend mornings.
My first attempt at this was a disaster, I won’t lie. I tried using fresh, soft white bread, and what I ended up with was essentially soggy, hot French toast that just steamed itself in those little waffle pockets. Yuck! My friends were polite, but I knew I had failed them.
But I learned the secret very quickly, and it’s all about the bread choice, which I’ll share in a minute. Once I figured out how to get that perfect structure, I realized this recipe is actually incredibly beginner-friendly. Seriously, if you can whisk three things together and own a waffle iron, you can nail these French Toast Waffles Crispy Outside Soft Inside every single time. Get ready for the best brunch ever!

Key Ingredients for Perfect French Toast Waffles Crispy Outside Soft Inside
Honestly, the ingredients list here is super short, which is why I love it for busy mornings. But don’t let the simplicity fool you! Every single item plays a starring role in making sure you get those beautiful French Toast Waffles Crispy Outside Soft Inside. We aren’t using any weird extracts or complicated steps here; it’s all about quality basics treated right.
The real magic, though, starts before you even mix anything. You have to treat the bread like the star it is. If you skip the right bread, you’ll end up with a mushy mess, no matter how well you whisk the custard. I’ve broken down what you need below so you can gather your supplies.
| Ingredient | Amount Needed |
| Challah Bread (1 inch thick slices) | 1 loaf |
| Whole Milk | 1 cup |
| Large Eggs | 6 |
| Ground Cinnamon | 2 teaspoons |
| Vanilla Extract | 1 teaspoon |
| Granulated Sugar | 3 tablespoons |
Selecting the Right Bread
This is the single most important tip for achieving that coveted crispy outside! You absolutely must use day-old bread, like stale challah or even thick-cut brioche if you can’t find challah. Fresh bread is too soft; it just soaks up the liquid like a sponge and turns into mush when it hits the heat. Day-old bread has slightly dried out, which lets it absorb the custard perfectly without falling apart. That slight firmness is what guarantees those amazing crunchy edges we are aiming for in our French Toast Waffles Crispy Outside Soft Inside.
The Custard Base Components
The custard is where all the flavor lives! The whole milk and six eggs create a rich base that sets up beautifully when cooked. Don’t skimp on the cinnamon—that’s the classic French toast aroma we all crave. The vanilla extract just brightens everything up, and that small amount of granulated sugar helps the outside caramelize beautifully instead of just burning.
Essential Equipment for Your French Toast Waffles Crispy Outside Soft Inside
You don’t need a ton of fancy gadgets for this recipe, which is another reason I love whipping up French Toast Waffles Crispy Outside Soft Inside for a crowd. The real hero here is your waffle iron—it does all the heavy lifting, giving you those deep pockets for syrup and creating that amazing texture that frying just can’t replicate.
Besides the iron, you’ll need a whisk and a wide, shallow bowl. The shallow part is important so you can dip those thick pieces of bread without making a huge mess or tearing them apart. Trust me on the bowl size; it saves cleanup time later!
Waffle Iron Preparation
Okay, listen up, because this is where the crispness starts! You have to preheat that waffle iron properly. I usually give it a good five minutes on medium-high heat before I even think about dipping the first piece of bread. If the iron isn’t hot enough, the bread will steam instead of searing, and you’ll end up with that soggy texture we are desperately trying to avoid!
If your waffle iron isn’t non-stick, or even if it is, give it a quick brush with butter or a spritz of cooking spray right before you put the first piece of soaked bread in. That little bit of extra fat helps ensure the batter pulls away cleanly and develops that gorgeous golden, crispy exterior on your French Toast Waffles Crispy Outside Soft Inside.

Step-by-Step Guide to French Toast Waffles Crispy Outside Soft Inside
Now that we have the right bread and a screaming hot waffle iron, it’s time to put it all together. This process moves fast, so make sure everything is within arm’s reach before you start dipping! We are aiming for that textbook result: French Toast Waffles Crispy Outside Soft Inside, and timing is everything.
Preparing the Flavorful Custard Mix
Grab that wide, shallow bowl we talked about earlier. We’re going to combine all the wet ingredients and spices right here. Pour in your whole milk, crack in those six eggs, and then add the cinnamon, vanilla extract, and sugar. Now, take your whisk and go to town! You need to whisk this mixture until it’s completely smooth. I mean it—no streaks of egg white hanging around, and the sugar should be fully dissolved. A smooth custard base means your bread absorbs the flavor evenly, which is key for success.
Soaking Technique for Optimal Texture
This is where people often mess up by soaking too long! Remember, we are using day-old bread, so it absorbs liquid faster than you think. Take one slice of your challah and lay it right into that custard. Let it sit for maybe ten seconds on the first side, flip it quickly, and let the second side soak for another ten seconds. It’s a quick dip, not a bath!
Once you lift the bread out, hold it over the bowl for a moment. You need to let that excess, drippy custard drip right back in. If you put dripping bread onto your hot iron, you’ll have a huge mess, and worse, the excess liquid will steam the waffle instead of crisping it up. We want the bread saturated, not swimming.
Cooking for Golden Perfection
Gently place your soaked slice onto the hot, greased waffle iron and close the lid, but don’t press down hard—let the machine do the work. Now, set your timer! For that perfect balance of French Toast Waffles Crispy Outside Soft Inside, you are looking at 4 to 6 minutes. It depends on your iron, but you’ll see steam slowing down when it’s almost done.
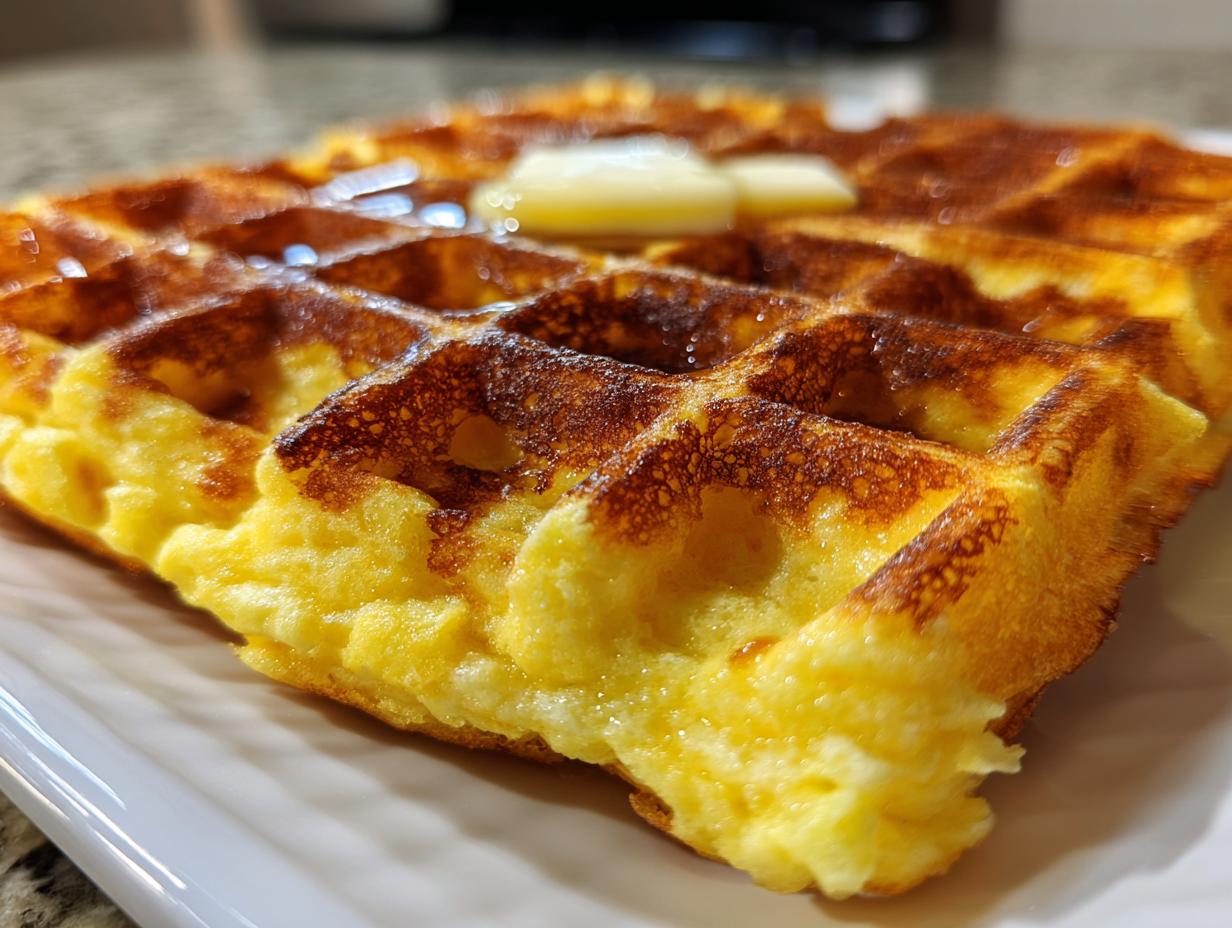
When the timer goes off, open it up and check for that deep, golden-brown color. If it looks pale, give it another minute. The crucial final step? As soon as you take the waffle off the iron, don’t stack it on a plate! Transfer it immediately to a wire cooling rack set over a baking sheet. Stacking traps steam, and steam equals soggy bottoms. Keeping them on the rack lets air circulate, locking in that amazing crispness until you are ready to serve the entire batch.
Tips for Success with French Toast Waffles Crispy Outside Soft Inside
You’ve made it through the cooking process, but a few little habits can make the difference between good French toast waffles and truly spectacular French Toast Waffles Crispy Outside Soft Inside. These are the tricks I learned after that first soggy failure, and they are non-negotiable if you want that perfect texture every single time.
It’s all about managing moisture, both going in and coming out of the waffle iron. Keep these small points in mind, and your brunch game will be legendary. You can follow more of our easy recipes by checking out our Facebook page.
Preventing Soggy Waffles
Seriously, I can’t stress this enough: the bread choice dictates everything. If you absolutely cannot find day-old challah, buy fresh, slice it thick (at least an inch!), and then spread the slices out on a baking sheet and let them sit on the counter for a few hours before you start. You want them to feel dry to the touch, not soft and pillowy. Also, when you pull the bread out of the custard, really let it drip! Hold it up and count to three before placing it in the iron. That excess liquid is your enemy when you are aiming for crispness.
Achieving Even Browning
If your waffle iron has temperature settings, you’ll want to run it on medium-high, maybe even a little higher than you think you need for standard pancakes. The heat needs to be intense enough to evaporate the moisture quickly, creating that crispy shell. If you notice one side is browning faster than the other, it usually means your iron isn’t heating evenly, or maybe you’re crowding it. Don’t try to squeeze in an extra piece; give each piece of bread the full space it needs to cook evenly and achieve that beautiful, uniform golden color for your French Toast Waffles Crispy Outside Soft Inside.
Serving Suggestions for Your French Toast Waffles Crispy Outside Soft Inside
The best part about making these incredible French Toast Waffles Crispy Outside Soft Inside is what you drizzle on top! Since the waffles themselves are already rich and packed with cinnamon flavor, you don’t need a ton of fussy extras. Keep it simple, keep it sweet, and let that perfect texture shine through. I always try to serve these immediately so everyone gets that fresh-off-the-rack crispness! If you are looking for other sweet ideas, check out our strawberry lemonade cookies.
We are sticking to the classics here because they just work perfectly with the buttery, eggy flavor profile of the waffle.
Classic and Simple Toppings
You simply cannot beat good quality butter and pure maple syrup. For the butter, I like to keep a small dish of softened, salted butter right next to the syrup pitcher. When the hot waffle hits that cold pat of butter, it melts into all those little pockets—it’s just heavenly. Make sure you’re using real maple syrup, too; none of that pancake syrup substitute stuff! The real stuff has a depth of flavor that complements the cinnamon and vanilla perfectly. For more baking inspiration, see our Pinterest page.
If you want to dress it up slightly without making it complicated, a light dusting of powdered sugar is lovely. It looks pretty, and it adds just a touch more sweetness without weighing down that beautiful crust you worked so hard to achieve on your French Toast Waffles Crispy Outside Soft Inside.
Storing and Reheating Leftover French Toast Waffles
Sometimes you just make too much, or maybe you want an easy breakfast ready for later in the week. That’s okay! But storing these babies requires a little care because moisture is the enemy of crispness. If you stack them warm, they will steam and turn soft fast. You must let them cool completely on the wire rack first. Once they are totally room temperature, you can store them away. If you’re interested in bread recipes, check out our guide on easy no-knead peasant bread.
For the best texture retention, I always recommend flash-freezing them first. This keeps the exterior from sticking to itself. Then, you can reheat them later to bring back that glorious French Toast Waffles Crispy Outside Soft Inside texture we love so much.
| Storage Method | Duration |
| Airtight Container (Fridge) | Up to 3 days |
| Freezer Bag (Freezer) | Up to 1 month |
When it’s time to eat the leftovers, skip the microwave completely—it turns them rubbery! Pop those waffles straight into a toaster oven or a conventional oven preheated to 350 degrees Fahrenheit for about 5 to 8 minutes. That dry heat will wick away any residual moisture and crisp up the outside beautifully again. They come out tasting almost as good as fresh! For more insights, read our Medium blog.
Frequently Asked Questions About Making French Toast Waffles
I get so many questions about this recipe, mostly because everyone is chasing that perfect texture! Since these French Toast Waffles Crispy Outside Soft Inside are so fast to make, people often ask about timing and substitutions. Here are the things I hear most often when people are trying this for the first time.
Can I use regular sandwich bread instead of challah?
You can, but you absolutely must follow the day-old bread rule! Regular sandwich bread is much thinner than the one-inch challah slices I recommend, so it won’t soak up as much custard. If you use thin white bread, your dipping time needs to be even shorter—maybe just 5 seconds per side. If you soak it too long, it will definitely fall apart in the iron. For the best results, stick to thick cuts of bread, whatever type you choose.
How do I keep the waffles warm while cooking the whole batch?
This is the trickiest part when you’re cooking for a crowd! The absolute best way to keep your batch warm while you finish the rest is to use a wire rack set over a baking sheet, just like I mentioned in the cooking steps. Pop that sheet into a very low oven, maybe 200 degrees Fahrenheit. The low, dry heat keeps them warm and stops any steam from building up underneath them, which means they stay crispy while you finish making the rest of your French Toast Waffles Crispy Outside Soft Inside.
Nutritional Overview of French Toast Waffles
Now, I’m a cook, not a certified nutritionist, so take these numbers with a grain of salt! The exact calorie count for these delicious French Toast Waffles Crispy Outside Soft Inside depends a lot on the brand of milk you use and how much syrup you drown them in afterward. The estimate below is just for one waffle, plain. Always remember that using day-old challah versus fresh brioche can slightly change the final figures!
Print
French Toast Waffles 6 Minute Joy
- Total Time: 20 minutes
- Yield: 10 waffles
- Diet: Vegetarian
Description
These french toast waffles are golden, crisp, and fluffy with classic french toast flavor cooked in a waffle iron. Easy brunch favorite.
Ingredients
- 1 loaf challah bread sliced 1 inch thick
- 1 cup whole milk
- 6 large eggs
- 2 teaspoons ground cinnamon
- 1 teaspoon vanilla extract
- 3 tablespoons granulated sugar
- Butter for serving
- Maple syrup for serving
Instructions
- Preheat the waffle iron according to the manufacturer instructions and lightly grease if needed.
- Whisk together the milk, eggs, cinnamon, vanilla extract, and sugar in a wide shallow bowl until smooth.
- Dip each slice of bread into the egg mixture, turning to coat and allowing it to soak briefly.
- Lift the bread and let excess custard drip off.
- Place the soaked bread onto the hot waffle iron and close the lid gently.
- Cook for 4 to 6 minutes until the waffle is golden brown and crisp.
- Remove and place on a wire rack to keep crisp while cooking remaining slices.
- Serve warm with butter and maple syrup.
Notes
- Day old bread absorbs the custard best and creates crisp edges.
- Prep Time: 10 minutes
- Cook Time: 10 minutes
- Category: Breakfast
- Method: Waffle Iron
- Cuisine: American