Red Velvet Cookies are one of those recipes that look super fancy but absolutely aren’t! When I first started NoobRecipes, I remember trying to make a red velvet cake and ending up with something that looked more like a pink swamp monster. It was honestly embarrassing. I learned then that the secret to that deep color and perfect texture isn’t some complicated technique; it’s about using the right ingredients—like gel coloring, not the runny stuff from the grocery aisle—and knowing how to cream your fats properly.
That failure taught me everything I needed to know about translating big dessert flavors into simple, reliable cookies. These Red Velvet Cookies are my proof that anyone, even if you’ve only ever made toast successfully, can nail this. We’re talking soft centers, chewy edges, and those gorgeous pockets of melted white chocolate. I’ve tested this batch so many times, tweaking the cocoa and the baking powder, so you can trust that this version is foolproof. Seriously, you only need about 15 minutes of prep time before these go into the 350-degree oven!

Why You’ll Love These Red Velvet Cookies
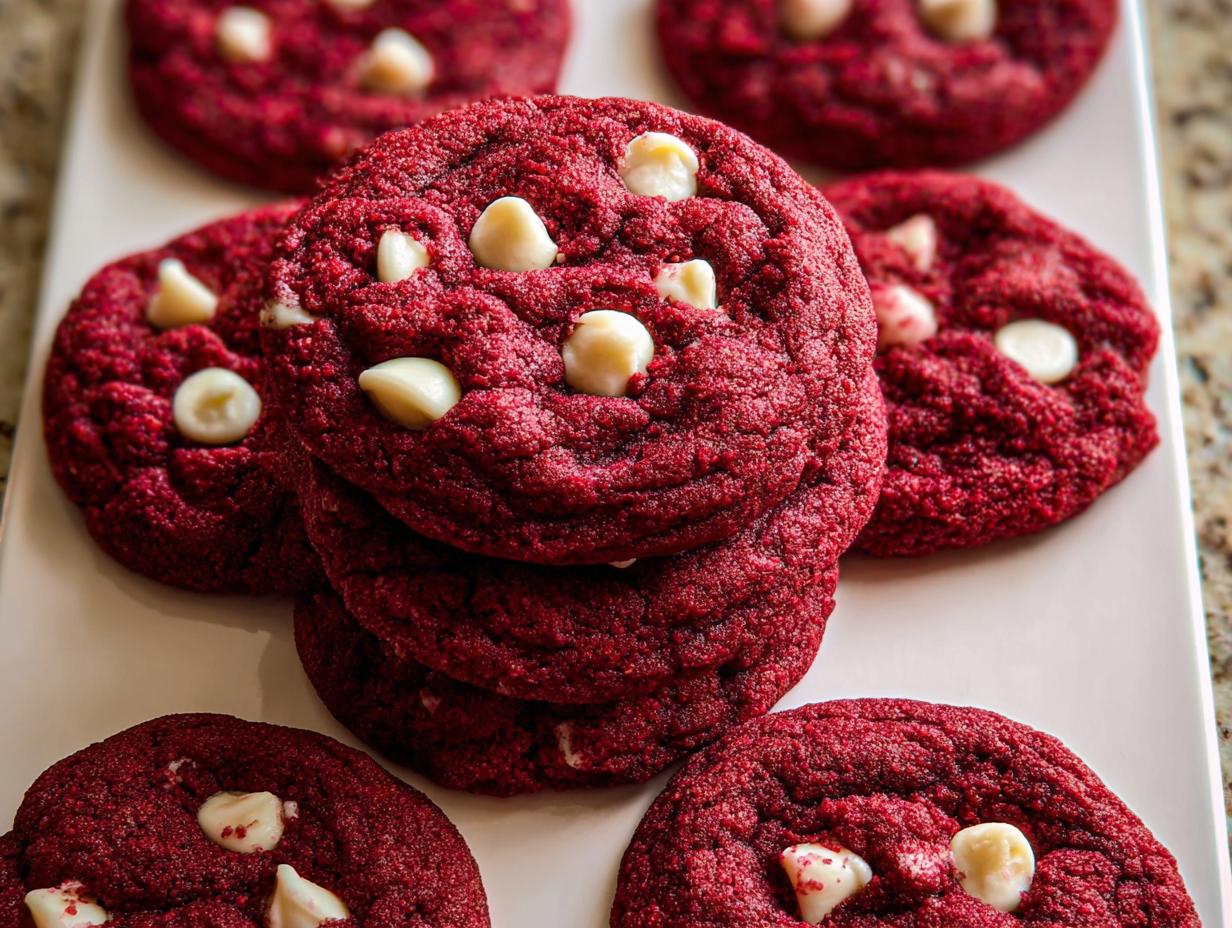
These aren’t just cookies; they are little bites of cake magic without needing to mess with layering or frosting. The texture is exactly what you want—that perfect balance between soft and chewy that makes you close your eyes after the first bite. Because we use a little bit of cocoa, you get that signature, subtle chocolate tang that makes red velvet famous, but it’s not heavy at all.
The color is fantastic, right? That vibrant red really pops, especially when studded with those creamy chunks of white chocolate. And honestly, this recipe is built for us beginners. There’s no chilling required, no fancy folding techniques—just mix it, scoop it, and bake it. I promise you, the aroma filling your kitchen while these are baking is going to make you feel like a baking pro!
Quick Prep Time for Busy Bakers
One of the best parts about these Red Velvet Cookies is how fast they come together. We’re talking only 15 minutes of active prep time before they hit the oven. That means if you get a sudden craving for something sweet after work, you could be pulling these beautiful cookies out of the oven in under 30 minutes total. That speed is exactly why this recipe belongs on the NoobRecipes lineup—maximum deliciousness for minimum fuss!
Equipment Needed for Perfect Red Velvet Cookies
Okay, let’s talk tools! You don’t need a fancy commercial kitchen to whip up these gorgeous cookies—I promise. Since we’re aiming for that perfect soft texture, having the right setup helps keep things consistent. Remember, consistency is the backbone of beginner baking success. You want to make sure your butter gets creamed properly, and that means having a reliable mixer on hand. Don’t stress if you only have a hand mixer; it works just fine, you might just need to scrape the bowl a little more often!
Essential Baking Tools
Here are the things you’ll definitely want ready before you start measuring out that flour. Having these things out first means you won’t have to frantically search for a spatula while your butter is melting!
- A sturdy electric mixer (handheld or stand mixer) for creaming the butter and sugar until fluffy.
- Two large mixing bowls—one for your dry stuff and one for the wet ingredients.
- A small whisk or spoon just for combining the flour, cocoa, and leaveners.
- A rubber spatula for scraping down the sides of the bowl—this is crucial!
- A cookie scoop or two spoons for portioning out the dough into 18 even balls.
- Two large baking sheets lined with parchment paper. Seriously, don’t skip the parchment paper; it makes cleanup a breeze and helps the bottoms bake evenly.
- A wire cooling rack for the two-step cooling process we’ll talk about later.
Gathering Your Red Velvet Cookies Ingredients
Getting the ingredients right is where the ‘expert’ part of the recipe comes in, even though you’re a beginner baker! For these Red Velvet Cookies, we are building flavor layers, and precision matters, especially with the flour. Trust me, measuring flour correctly is the number one thing that separates a flat, dense cookie from one that’s perfectly soft. We need to make sure we get that signature color too, which means choosing the right kind of dye. It’s all about setting ourselves up for success before we even turn on the mixer!
Dry Components Clarity
When you measure your flour, don’t just scoop it out of the bag with your measuring cup—that packs it in and you end up with way too much! Instead, gently spoon the flour into your measuring cup until it overflows, and then use the back of a flat knife to level it off. We also add our cocoa powder, baking soda, baking powder, and salt in here. Give those dry things a quick whisk together so everything is evenly distributed. That small step ensures the leavening agents (the baking soda and powder) are spread out, so you don’t end up with one cookie that puffs up huge and another that stays flat.
Wet Ingredients and Coloring Technique
For the wet ingredients, the temperature of your eggs is important. Make sure they are at room temperature! Cold eggs can cause your creamed butter mixture to seize up and look curdled, and we don’t want that texture disaster. When it comes to the red color, you absolutely must use a high-quality red gel food coloring. The liquid drops you find in the baking aisle just won’t cut it here; they water down the batter and you end up needing a whole bottle just to get a pale pink. We want that deep, beautiful red velvet look, so use a teaspoon and a half, or maybe even a little more if you like it really dramatic!
White Chocolate Integration
Finally, the best part: the white chocolate. I highly recommend using chopped white chocolate chunks rather than standard chips if you can find them. Why? Because chunks melt into those beautiful, gooey pockets in the finished cookie, whereas chips sometimes hold their shape a bit too much. You’ll need about three-quarters of a cup. If you’re using a bar, just give it a rough chop with a big knife. You want a mix of sizes—some big chunks and some smaller bits—so you get white chocolate goodness in every single bite of your Red Velvet Cookies!
Step-by-Step Instructions for Soft Red Velvet Cookies
Here is where the magic happens, and I promise it’s so straightforward. Before you even touch your mixer, make sure your oven is preheated to 350 degrees Fahrenheit. That’s important! Also, get those two baking sheets ready by lining them with parchment paper. If you skip the parchment, cleanup takes forever, and we are trying to keep this beginner-friendly, remember? Once that’s done, we move on to the batter itself.
Mixing the Dry and Wet Bases
Grab your dry ingredients bowl—the one with the flour, cocoa, baking soda, baking powder, and salt—and give it a good whisk. Set that aside for a moment. Now for the wet side! In your big mixing bowl, beat together your softened salted butter, the light brown sugar, and the white granulated sugar. You need to cream these together for a full two minutes with your electric mixer. The goal here is light and fluffy—you’ll see it lighten in color. Once that’s happy, drop in those room-temperature egg yolks, the vanilla, and that vibrant red gel coloring. Mix it again on medium speed for another two minutes until everything is beautifully uniform and bright red. It should look like fluffy, slightly reddish frosting base.
Forming and Baking Your Red Velvet Cookies
Now, gently add that dry mixture into your wet ingredients. Mix this only until you see the last streaks of flour disappear. Do not overmix! Overmixing develops the gluten, and we want soft cookies, not tough ones. Once the flour is just incorporated, toss in your chopped white chocolate chunks and mix for just a few more seconds until they are evenly spread throughout the dough. Scoop the dough into 18 evenly sized balls—a medium cookie scoop works perfectly for this. Place them about two inches apart on your prepared sheets. Time to bake! For the absolute softest center, pull them out right at 10 minutes. If you prefer a slightly crispier edge that still has chew, go for 12 minutes. Don’t walk away; cookies bake fast!
Cooling for Ideal Texture
This cooling step is non-negotiable if you want that perfect chewy texture we talked about. When the timer goes off, pull those trays out of the oven. Leave the Red Velvet Cookies right there on the hot baking sheet for five minutes. This allows them to set up a little so they don’t fall apart when you move them. After those five minutes, gently transfer them over to a wire cooling rack to cool for another five minutes before you try one. Seriously, resist the urge to eat them immediately off the sheet pan; that little bit of extra cooling time makes all the difference in achieving that bakery-style chewiness!

Pro Tips for Achieving Expert Red Velvet Cookies
Even though these Red Velvet Cookies are super easy, a couple of little tricks can take them from great to absolutely show-stopping. I learned these little secrets through trial and error—mostly error when I was first starting out! These tips are all about getting that professional look and that perfect, melt-in-your-mouth texture that makes everyone ask for the recipe.
Mastering the Red Color Intensity
So, we talked about using gel coloring, but I want to emphasize why that matters for the color intensity. If you look at the notes, you’ll see I mentioned using the higher amount of coloring for a more dramatic effect. Red velvet is supposed to be bold, right? If you use less coloring, especially if you’re using a recipe that calls for a little bit of cocoa powder like ours, the color can look a bit dull or muddy once it bakes. Don’t be shy! If you’re making these for a party or just want that truly iconic look, add that full teaspoon and a half, or even a tiny bit more. The gel is so concentrated that it won’t affect the wet-to-dry ratio, so you get amazing color without ruining the structure of your cookie.
Texture Control: Soft vs. Crispy Edges
This is my favorite part because it lets you customize the cookie exactly how you like it! Remember how I said you could bake for 10 minutes or 12 minutes? That small two-minute window does a lot of work. If you like that gooey, slightly underbaked center that just melts in your mouth—pull them out at 10 minutes sharp. They will still be warm and slightly puffy on the tray, but as they cool, they settle into that perfect soft chew. If you’re someone who likes a bit of snap when you bite into the edge, let them go the full 12 minutes. Just watch them closely after the ten-minute mark. You want the edges to look set, but the center should still look a tiny bit soft and shiny. That’s your signal that you’ve nailed the texture balance for these amazing Red Velvet Cookies.
Storing and Keeping Your Red Velvet Cookies Fresh
The hardest part about these Red Velvet Cookies is actually saving any to store, am I right? But if you manage to keep some leftovers—or if you’re a good planner and bake them the day before—you need to know how to keep that soft, chewy texture locked in. These cookies are definitely best eaten the day they are made, but they are still really good for a few days after if you treat them right. The main enemy here is air exposure, which dries them out fast!
My biggest tip is to make sure they are completely cooled before you put them anywhere near a container. If you seal them up while they’re still warm, the trapped steam will make them soggy, and that defeats the whole purpose of getting that perfect chewiness!
Storage and Reheating Guide for Red Velvet Cookies
I put together this little chart so you can see the best way to keep your cookies fresh, depending on how long you need to stash them. For short-term storage, just an airtight container on the counter is perfect. If you need them to last a bit longer, the freezer is your friend!
| Storage Method | Duration | Reheating Instructions |
|---|---|---|
| Airtight Container (Counter) | Up to 3 days | None needed, or a quick 5-second zap in the microwave for meltier chocolate. |
| Airtight Container (Refrigerator) | Up to 5 days | Let them come to room temp for 15 minutes, or microwave briefly. |
| Freezer (Airtight Bag/Container) | Up to 3 months | Thaw on the counter for 30 minutes. For best results, warm for 8-10 seconds in the microwave. |
If you do freeze them, make sure they are wrapped tightly! I usually stack them between small squares of wax paper to stop them from sticking together. When you pull them out to thaw, you’ll find they taste almost as fresh as the day you baked them. Enjoy those glorious Red Velvet Cookies!
Frequently Asked Questions About Red Velvet Cookies
I know you might have a few questions floating around, especially if you’re new to the red velvet game or trying to make a quick swap in your pantry. That’s totally normal! The goal of NoobRecipes is to iron out all those little confusion points so you get perfect Red Velvet Cookies every time, no sweat. Here are a few things I hear a lot after people try this recipe.
Can I Substitute the White Chocolate in These Red Velvet Cookies
Yes, you absolutely can, but you need to be thoughtful about it! The white chocolate is key because it balances the slight bitterness from the cocoa powder and adds that creamy texture. If you don’t have white chocolate chips or chunks, the next best thing would be milk chocolate chips, although that will change the classic flavor profile a bit. You could also use butterscotch chips for a sweeter, different flavor. What I would strongly advise against substituting is the ratio of chocolate to dough. Stick to that three-quarter cup measurement, no matter what kind of chip you use, to keep the texture right!
Why Are My Cookies Not Bright Red
This is almost always down to the type of food coloring you used. If your Red Velvet Cookies came out looking more pink or brownish-red, you probably used standard liquid food coloring from the grocery store dye set. Those liquid drops are mostly water, and you end up needing so much of them that you water down your batter, which messes up the baking chemistry. For that truly vibrant, deep red velvet color, you need a concentrated gel food coloring. You can find these near the sprinkles or specialty baking supplies. Use the amount I recommended, and you should get that intense color, even with the small amount of cocoa powder in the mix!
Estimated Nutritional Data for Red Velvet Cookies
I always like to give a rough idea of what’s in these treats, even though my focus here at NoobRecipes is more on mastering the *how* than the *what*! Since we are using real butter and good quality sugar, these aren’t exactly a diet food, but they are certainly worth every delicious bite. Remember, these numbers are estimates based on the ingredients listed, and if you make swaps—like using different chocolate—the totals will change a bit!
Estimated Nutrition Information Per Serving
| Nutrient | Amount (Estimate) |
|---|---|
| Serving Size | 1 cookie |
| Calories | 180-200 |
| Fat (Total) | 10g |
| Saturated Fat | 6g |
| Carbohydrates | 22g |
| Sugar | 15g |
| Protein | 2g |
That’s a pretty standard cookie profile, I think! The fat content comes mostly from that rich butter and the white chocolate, which is what gives these Red Velvet Cookies their wonderful melt-in-your-mouth quality. Enjoy them guilt-free, knowing you made them yourself from scratch!
Share Your Baking Success
Alright, baker buddies, that’s the whole journey for making what I think are the best, easiest Red Velvet Cookies out there! We took a classic flavor and made it totally approachable for anyone who’s just starting out. I really hope you loved seeing how simple it is to get that perfect soft, chewy texture without any complicated steps.
Now it’s your turn to give these a try! I want to see what you made. Did you go for the 10-minute soft center or the 12-minute crispy edge? Did you add extra white chocolate chunks on top like I suggested? Don’t keep all that success to yourself! You can follow our latest creations on Facebook or save this recipe on Pinterest!
Please leave a rating below—even a simple five-star rating helps other new bakers feel confident trying this recipe. And if you have any questions, or if you found a little trick of your own while making these, drop a comment! Hearing about your baking adventures is honestly the best part of running NoobRecipes. Happy baking, everyone!
Print
18 Amazing, Foolproof Red Velvet Cookies
- Total Time: 27 minutes
- Yield: 18 cookies
- Diet: Vegetarian
Description
Red Velvet Cookies offer a soft, chewy texture with the classic, lightly chocolatey flavor of red velvet cake. These cookies feature vibrant red color and chunks of sweet white chocolate. They are simple enough for beginner bakers.
Ingredients
- 1 1/2 cups + 2 tbsps (204 g) all-purpose flour, spooned and leveled
- 2 tbsps (10 g) Dutch process cocoa powder
- 1/2 tsp baking soda
- 1/2 tsp baking powder
- 1/2 tsp salt
- 3/4 cup (168 g) salted butter, softened
- 3/4 cup (165 g) light brown sugar
- 1/4 cup (50 g) granulated white sugar
- 2 egg yolks, at room temperature
- 1 tbsp vanilla
- 1-1 1/2 tsp red gel food coloring
- 3/4 cup (150 g) chopped white chocolate or white chocolate chips
Instructions
- Preheat your oven to 350 degrees. Line two baking sheets with parchment paper and set them aside.
- In a small bowl, add the flour, cocoa powder, baking soda, baking powder, and salt. Whisk these dry ingredients to combine, then set the bowl aside.
- Add the softened, salted butter, light brown sugar, and granulated white sugar to a large bowl. Cream the butter and sugars using an electric mixer for two minutes, or until the mixture looks light and fluffy.
- Add the egg yolks, vanilla, and red food coloring. Mix on medium speed for two minutes, or until the mixture is fluffy.
- Add the dry ingredients mixture to the wet ingredients. Mix until just combined.
- Add the white chocolate pieces and mix only until they are incorporated into the dough.
- Scoop the dough into 18 balls. Arrange these dough balls two inches apart on the prepared baking sheets.
- Bake the cookies for 10-12 minutes. Use 10 minutes for a softer center, or 12 minutes for a crispier edge.
- Remove the cookies from the oven. Let them cool on the baking sheet for 5 minutes. Then, transfer them to a cooling rack to cool for another 5 minutes before you eat them.
- Store any leftovers in an airtight container for up to three days.
Notes
- Measure your flour properly; 1 cup of flour equals 125 grams.
- For a more intense red color, use the higher amount of food coloring recommended.
- You can add extra white chocolate chunks on top right after baking for a better visual appeal.
- Prep Time: 15 minutes
- Cook Time: 12 minutes
- Category: Dessert
- Method: Baking
- Cuisine: American