Oh, there is nothing, and I mean *nothing*, that smells better than a truly classic, homemade apple pie baking in the oven. That warmth, that sweet-spicy cloud of cinnamon and nutmeg that just fills every corner of the house? It screams comfort, right?
This recipe for my Homemade Apple Pie With Cinnamon and Nutmeg isn’t just any pie, though. Trust me, I’ve made my share of disasters—soggy bottoms and crusts that shatter like glass! But this version? It’s the one that finally clicked for me. The secret is two-fold: we pre-cook the filling slightly so the apples are tender, and we focus relentlessly on that flaky, buttery crust.
When I first tried making pie years ago, I was so intimidated by the dough. I thought it had to be perfect right out of the gate. But once I stopped rushing the filling and realized how much that little bit of lemon juice brightens the spice, everything changed. This Homemade Apple Pie With Cinnamon and Nutmeg is the result of a few happy accidents and a lot of tasting! It’s cozy, it’s classic, and honestly, it’s easier than you think once you follow these steps.

Essential Ingredients for Homemade Apple Pie With Cinnamon and Nutmeg
When you’re making something this classic, the ingredients really have to sing. Quality matters here, especially since we aren’t hiding anything under a mountain of frosting. For this Homemade Apple Pie With Cinnamon and Nutmeg, you need reliable basics that are treated well. I’m a firm believer that you can’t fake a great pie flavor! If you are looking for other great baking ideas, check out my recipe for cinnamon swirl banana bread with vanilla icing.
Selecting the Best Apples
My absolute go-to apples are Granny Smith. Why? Because they hold their shape beautifully when cooked, and they bring that necessary tartness that stops the pie from tasting like pure sugar. If you want a little more complexity, try blending half Granny Smith with half Honeycrisp or Jonagold. That mix gives you structure from the Smith and just a touch more sweetness from the other variety. Either way, slice them thinly, about an eighth of an inch—this helps them cook evenly in that short window we have.
Crust Components and Spices
The crust is where we build the foundation. You need that cold, unsalted butter. Seriously, cold! That’s what creates the steam pockets that make the crust flaky. The flour is just standard all-purpose, nothing fancy needed there. But the spices—cinnamon and nutmeg—they need to be fresh. Old nutmeg smells dusty, and it ruins the warm perfume of the filling. A little lemon juice cuts through the richness and keeps the apples from going brown too fast.
Ingredient Overview Table
Here is exactly what you need ready to go before you even think about turning on the stove. I keep this list taped right next to my mixer!
| Ingredient | Amount | Preparation State |
|---|---|---|
| Granny Smith Apples | 8 large | Peeled, cored, and thinly sliced |
| Granulated Sugar | \u00bc cup | Measured |
| All Purpose Flour | \u00bc cup | Measured |
| Ground Cinnamon | 2 teaspoons | Measured |
| Ground Nutmeg | \u00bc teaspoon | Measured |
| Fresh Lemon Juice | 1 tablespoon | Freshly squeezed |
| Unsalted Butter (for filling) | 2 tablespoons | Cubed |
| Pie Dough | 1 double crust | Homemade or refrigerated |
| Whole Milk (for wash) | 2 tablespoons | Measured |
| Coarse Sugar (for topping) | 2 tablespoons | Measured |
Equipment Needed for Your Homemade Apple Pie With Cinnamon and Nutmeg
You don’t need a professional kitchen for this pie, but having the right tools makes the process so much smoother. Seriously, preparing your station beforehand saves so much stress when the apples are hot and ready to go into the crust. We want efficiency, not chaos, when assembling this beauty!
Baking Tools Checklist
- Large saucepan (for cooking the filling)
- 9-inch pie dish (deep dish works great)
- Rolling pin
- Measuring cups and spoons
- Baking sheet (rimmed, to catch drips!)
- Pastry brush (for the milk wash)
Step-by-Step Instructions for Homemade Apple Pie With Cinnamon and Nutmeg
Okay, deep breath. This is where the magic happens! We are building layers of flavor, starting with the filling so it’s perfectly tender before it even sees the oven. Remember, we are not just dumping raw apples in the crust; we are pre-cooking them to avoid that dreaded gap between the crust and the filling later on. Follow these steps closely, and you’ll have the best Homemade Apple Pie With Cinnamon and Nutmeg ever!
Preparing the Apple Filling
First things first, get your oven preheated to 425°F. And this is important: put a sturdy, rimmed baking sheet on the center rack while it heats up. That preheated sheet is going to give the bottom crust a blast of heat, which is crucial for avoiding a soggy bottom! If you’re interested in other baking techniques, you might enjoy learning about easy no-knead peasant bread.
Grab that large saucepan. Over medium-low heat, toss in all your sliced apples, the sugar, the flour, your cinnamon, nutmeg, and that tablespoon of lemon juice. You need to stir this often, maybe every minute or two, for about 10 to 15 minutes. What you are looking for is for the apples to soften up nicely—they shouldn’t be mushy, just yielding—and for the liquid to turn into a thick, glossy syrup. Once it looks like that, pull it off the heat immediately. We don’t want them totally cooked, just halfway there!
Assembling the Double Crust
Now for the dough. Take one round of your pie dough and roll it out until it’s about 12 inches across. Carefully drape this over your 9-inch pie dish. Don’t fight it; gently press it into the corners without stretching it too much. If it rips, don’t panic—just patch it up! Spoon that warm apple filling right into the crust. I like to press down lightly with the back of my spoon to make sure it’s settled evenly.
Next, take those two tablespoons of cold butter and cut them into tiny little dots. Scatter those dots right over the top of the apple mixture. This butter melts down into the filling and adds richness. Now, roll out your second dough round and gently lay it over the top. Trim off any huge overhangs, tuck the edges under the bottom crust, and crimp them together for a tight seal. You want that filling locked in!
Finishing and Baking the Homemade Apple Pie With Cinnamon and Nutmeg
Before it goes anywhere near the oven, you need to vent the steam. Cut several slits in the top crust—three or four good, long slits work best. Then, take your two tablespoons of milk and brush it evenly over the entire top crust. This wash helps it brown beautifully. Finish it off with a generous sprinkle of coarse sugar across the top. That crunch is non-negotiable for a perfect Homemade Apple Pie With Cinnamon and Nutmeg!
Carefully slide the whole pie onto that hot baking sheet that’s been waiting in the oven. Bake it for 40 to 45 minutes. You’ll know it’s done when the crust is deep golden brown and you can see the filling bubbling thick through those vent holes. If you notice the edges getting too dark halfway through—say, around the 30-minute mark—just loosely wrap strips of aluminum foil around the edges. That protects the crust while the center finishes cooking.
Crucial Cooling Instructions
This is the hardest part, but you absolutely must listen to me on this! Once the pie is out of the oven, you have to let it cool for a minimum of two hours. I know, I know, it smells amazing, and you want a slice immediately! But if you cut it hot, all that gorgeous, thick syrup will run out onto your plate, and you’ll have a soupy mess. Letting it cool lets the starches in the flour set up, ensuring that every slice holds its shape cleanly. Patience pays off here! You can find more helpful tips on our Medium page.
Tips for Achieving a Flaky Crust and Flavorful Homemade Apple Pie With Cinnamon and Nutmeg
Getting that perfect slice of Homemade Apple Pie With Cinnamon and Nutmeg—one with a non-soggy bottom and spices that sing—takes just a couple of tricks up your sleeve. Don’t stress if your first attempt isn’t perfect; pie making is all about learning how your oven behaves and respecting the temperature of your dough!
Maintaining Cold Ingredients
The number one rule for a flaky crust that separates into beautiful layers? Keep everything cold! I mean ice cold. If your butter gets warm while you’re cutting it into the flour, you’re basically making a shortbread crust, not a flaky one. If your kitchen is hot, pop your dough disks into the freezer for 10 minutes before you roll them out. And when you dot the filling with butter? Make sure those cubes are straight from the fridge, not sitting on the counter getting soft. Cold fat hitting that hot oven is what creates steam and lift!
Achieving Perfect Spice Balance
The beauty of this Homemade Apple Pie With Cinnamon and Nutmeg is how warm and inviting those spices are. We start with 2 teaspoons of cinnamon and only a quarter teaspoon of nutmeg. If you find you love a deeper, earthier flavor, you can push that nutmeg up to a half teaspoon, but be careful! Nutmeg can quickly become overpowering. On the other hand, if you like a brighter, warmer spice note, add a tiny pinch of ground cloves—just a whisper—to boost the cinnamon. Always taste your filling before you put the top crust on; that’s your last chance to adjust the flavor profile!

Frequently Asked Questions About Homemade Apple Pie With Cinnamon and Nutmeg
I get so many questions about this recipe, especially from folks trying to master their first double crust! It’s totally normal to have questions, and I’ve collected the most common ones right here to help you nail that perfect slice of Homemade Apple Pie With Cinnamon and Nutmeg.
Can I use pre-made apples for this Homemade Apple Pie With Cinnamon and Nutmeg
That’s a big “no” from me, sorry! While I love a good shortcut, using pre-sliced or canned apples just won’t cut it for this recipe. Pre-sliced apples are often too uniform and don’t release their starch and liquid correctly when cooked, leading to a mushy filling or gaps. For that perfect texture and flavor balance with the cinnamon and nutmeg, you really need to peel, core, and slice your own, preferably Granny Smiths. It’s worth the extra 10 minutes of elbow grease, trust me!
How long does the pie need to cool before slicing
I cannot stress this enough: you must let your pie cool for at least two hours! If you cut it sooner, the hot, syrupy filling—even after being cooked down—will just ooze out everywhere, and you’ll end up with a puddle instead of a beautiful slice. The cooling time allows the starches to set up and reabsorb the liquid, giving you that clean, structured slice you see in bakeries. It’s torture waiting, but it’s essential!
What is the best way to store leftover pie
Leftover pie is the best breakfast, isn’t it? For short-term storage, you can actually leave your Homemade Apple Pie With Cinnamon and Nutmeg right on the counter, covered loosely, for about a day. If you have more than that, or if your kitchen is really warm, it’s best to pop it in the fridge. I’ll tell you exactly how long it lasts and how to reheat it in the next section! For more great recipe ideas, follow us on Pinterest.
Storing and Reheating Your Classic Dessert
Don’t you just love having a slice of pie left over? It’s the best kind of simple breakfast or late-night treat. Because this pie has a double crust and a cooked filling, it’s actually pretty resilient, but we still need to treat it right so the crust doesn’t go soft.
If you have leftovers from your perfect Homemade Apple Pie With Cinnamon and Nutmeg, you have a couple of options depending on how soon you plan to eat it. Keeping it covered loosely is key so it doesn’t dry out, but you also need some airflow so the bottom doesn’t get damp.
Storage Guidelines Table
| Storage Location | Maximum Duration | Reheating Method |
|---|---|---|
| Countertop (covered loosely) | Up to 24 hours | Room temperature or quick microwave zap |
| Refrigerator (tightly wrapped) | Up to 4 days | Oven or toaster oven for 10 minutes at 350°F |
Understanding the Nutrition in Your Homemade Apple Pie With Cinnamon and Nutmeg
Now, I know we aren’t making this pie for health reasons—it’s pure, cozy indulgence! But sometimes folks ask about what’s in a slice of this classic dessert, especially after all that butter and sugar go into making the crust perfect. I tracked down the general estimates for you, but remember, since we are using homemade dough and fresh apples, these numbers are just a friendly guideline, not a strict lab result! If you want to see some healthier options, check out my honey glazed roasted carrots.
If you use a store-bought crust or different apple varieties, the final counts will change, of course. This breakdown is based on dividing the whole pie into 8 generous servings, right after it has cooled completely, which helps keep the structure firm for accurate division.
Estimated Nutritional Breakdown Table
Here is a quick look at what you can expect in one slice of this wonderful Homemade Apple Pie With Cinnamon and Nutmeg:
| Nutrient | Quantity Per Slice (Estimate) |
|---|---|
| Calories | 480 |
| Total Fat | 18 g |
| Carbohydrates | 72 g |
| Protein | 4 g |
| Sugar | Unknown |
| Sodium | Unknown |

Amazing 8-Slice Homemade Apple Pie With Cinnamon and Nutmeg
- Total Time: 1 hour 10 minutes
- Yield: 8 servings
- Diet: Vegetarian
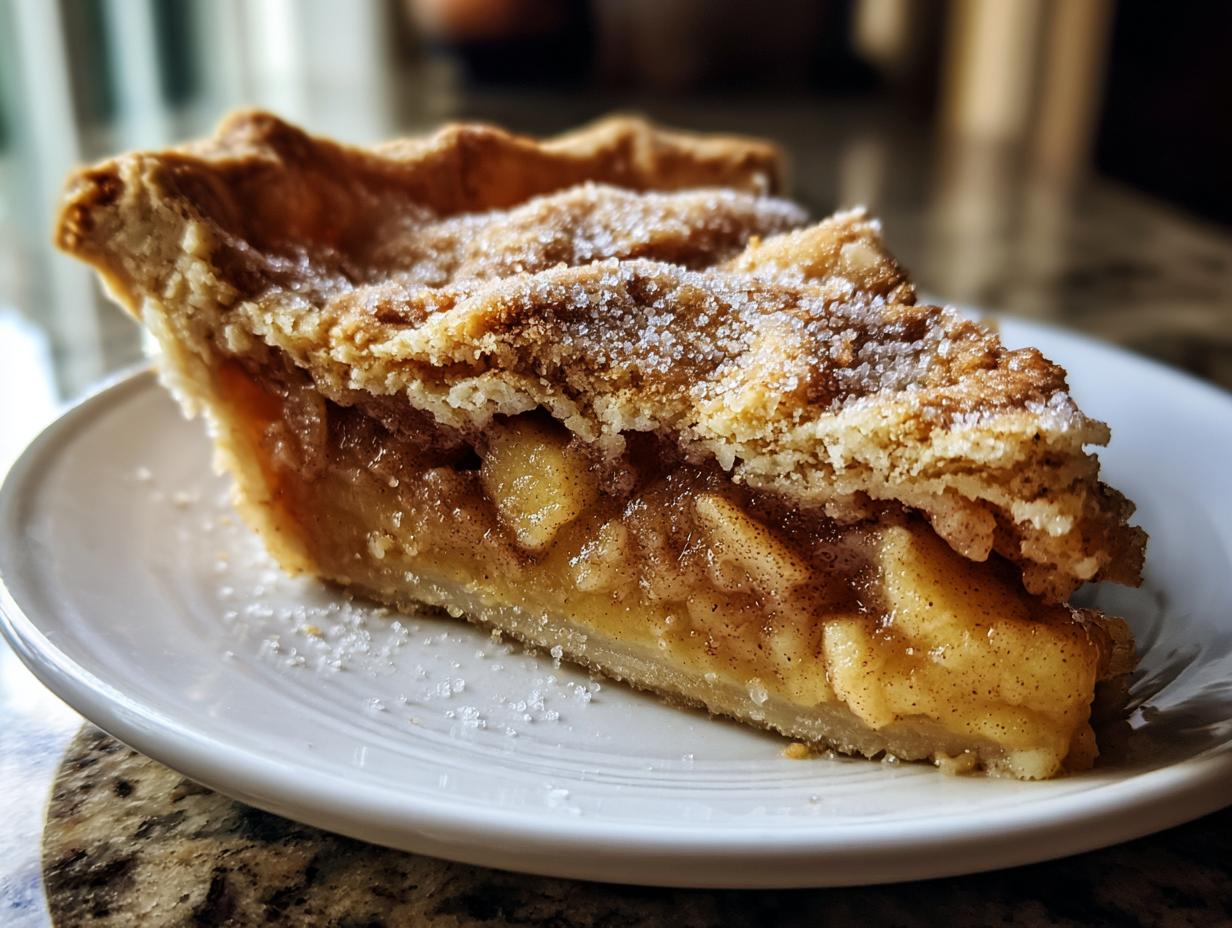
Description
This homemade apple pie features tender apples spiced with cinnamon and nutmeg inside a flaky double crust. It is a classic, cozy dessert.
Ingredients
- 8 large Granny Smith apples peeled cored and thinly sliced
- ¼ cup granulated sugar
- ¼ cup all purpose flour
- 2 teaspoons ground cinnamon
- ¼ teaspoon ground nutmeg
- 1 tablespoon fresh lemon juice
- 2 tablespoons unsalted butter
- 1 double crust pie dough homemade or refrigerated
- 2 tablespoons whole milk
- 2 tablespoons coarse sugar
Instructions
- Preheat the oven to 425°F. Place a rimmed baking sheet on the center rack.
- In a large saucepan over medium low heat, combine the sliced apples, sugar, flour, cinnamon, nutmeg, and lemon juice.
- Cook for 10 to 15 minutes, stirring often, until the apples soften and release thick syrup. Remove from heat.
- Roll one pie dough round into a 12 inch circle. Place it into a 9 inch pie dish, pressing it into the corners.
- Spoon the warm apple filling into the crust. Press lightly for even distribution. Dot the top with butter.
- Roll out the second dough round and place it over the filling. Trim excess dough, tuck the edges under, and crimp to seal.
- Cut several slits in the top crust to vent steam. Brush the crust with milk and sprinkle evenly with coarse sugar.
- Place the pie on the preheated baking sheet. Bake for 40 to 45 minutes until the crust is golden brown and the filling is bubbling.
- If the crust browns fast, loosely cover the edges with foil during the last 10 minutes.
- Remove from the oven and cool at least 2 hours before slicing.
Notes
- Cooling fully before slicing helps the filling hold together cleanly.
- Prep Time: 25 minutes
- Cook Time: 45 minutes
- Category: Dessert
- Method: Baking
- Cuisine: American