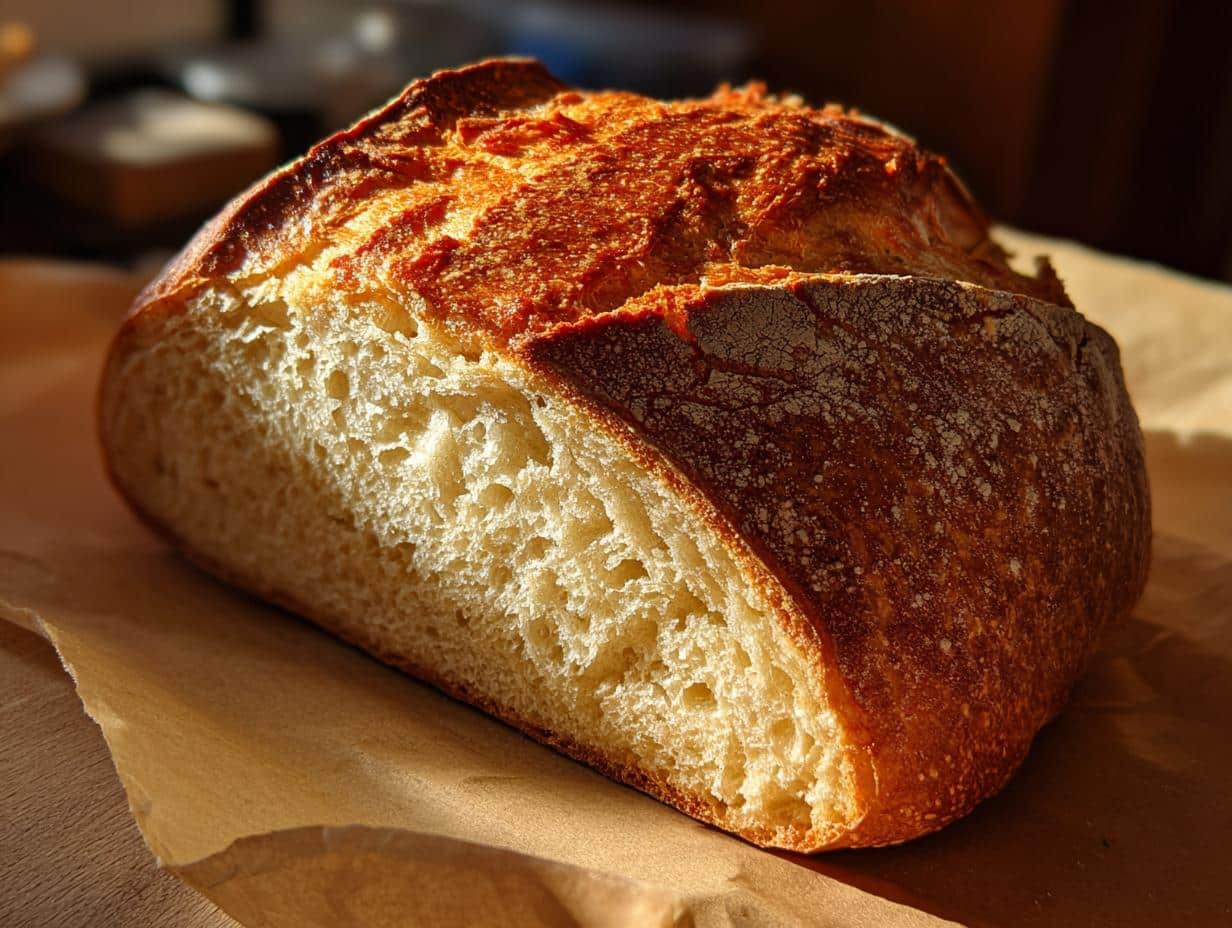
Okay, let’s talk about making amazing Crusty Italian Bread right in your own kitchen! I know, the thought of baking artisan bread can seem a little… intimidating, right? But trust me, this recipe is totally foolproof and designed to be super fun and stress-free. I still remember the first time I pulled a golden, crackly loaf out of the oven – the smell alone was heavenly! It’s that satisfying crunch when you slice into it, followed by that soft, chewy inside. It’s seriously the best feeling, and I can’t wait for you to experience it too. Let’s get baking!
Why You’ll Love This Crusty Italian Bread Recipe
Seriously, this homemade Italian bread recipe is a game-changer! It’s honestly so simple, even if you’ve never baked bread before, you’re going to nail it. We designed it to be totally stress-free, so you can just enjoy the process and the amazing results. Imagine pulling a perfectly golden, crusty loaf out of your oven – it’s so satisfying!
- Super Beginner-Friendly: No fancy equipment or tricky techniques needed. Just follow along, and you’ll have a beautiful loaf.
- Incredible Flavor & Texture: You get that amazing, satisfying crunch from the crust and a soft, chewy center that’s just perfect.
- Versatile & Delicious: This traditional bread is fantastic for everything – dipping in olive oil, making sandwiches, or just enjoying plain.
- Smells AMAZING: Your kitchen will smell like a real Italian bakery! It’s seriously the best aroma.
Essential Ingredients for Your Crusty Italian Bread
Alright, let’s gather our troops for this adventure! You don’t need a whole pantry of fancy stuff for this crusty Italian bread. We’re keeping it simple and classic. You’ll need 3 ½ cups of good old all-purpose flour – it’s the backbone of our loaf. Then, 1 ½ teaspoons of salt for flavor, and just 1 teaspoon of sugar to help wake up our yeast. Speaking of yeast, grab 1 packet (that’s 2 ¼ teaspoons) of active dry yeast. Make sure your water is warm, about 110°F – think comfy bathwater, not hot tub! We need 1 ¼ cups of that. And finally, 2 tablespoons of olive oil for a little richness and to help with that lovely crust.
Ingredient Notes and Substitutions
Each ingredient plays a role, and they’re pretty straightforward! The active dry yeast is what makes our bread puff up and get that lovely airy texture. If yours doesn’t get foamy when you mix it with warm water and sugar, it might be old, so grab a fresh packet. Flour is key, of course! While all-purpose works beautifully, you *could* use bread flour if you want an even chewier crumb. Just a heads-up, bread flour has a bit more protein, which can make the dough a tad stiffer, so you might need a splash more water. But honestly, all-purpose flour is my go-to for this recipe because it’s so accessible and reliable.
Step-by-Step Guide to Making Crusty Italian Bread
Alright, let’s get down to business! Making this crusty Italian bread is really just a series of simple steps. Don’t worry about perfection here; just enjoy the process. We’ll start by getting our yeast all happy, then mix everything up, let it do its magic rising thing, and then bake it to golden perfection. Trust me, the hardest part is waiting for it to bake because your whole house will smell incredible!
Preparing the Dough for Your Crusty Italian Bread
First things first, grab a big bowl. Dump in your warm water, that little bit of sugar, and the yeast. Give it a gentle stir and let it hang out for about 5 minutes. You’ll see it get all foamy and bubbly – that’s the yeast waking up and saying hello! Now, toss in your flour, salt, and that lovely olive oil. Stir it all together until it looks like a shaggy dough. It won’t be pretty yet, and that’s totally okay!
The Crucial Rising Process for Crusty Italian Bread
Turn that shaggy dough out onto a lightly floured surface. Now comes the kneading part! It might feel a bit sticky at first, but keep going. Push, fold, turn, repeat for about 8-10 minutes. You’re looking for a dough that’s smooth and elastic, kind of like Play-Doh. Once it feels good, lightly grease another bowl, pop the dough in, turn it to coat, cover it with a clean towel, and find a cozy, warm spot. Let it rise for about an hour to an hour and a half, until it’s doubled in size. It’s like magic happening right in your kitchen!
Shaping and Second Rise for Your Crusty Loaf
Once your dough has doubled, punch it down gently – it’s so satisfying! Now, shape it into a nice round loaf. You can place it on a piece of parchment paper, which makes transferring it later a breeze. Cover it back up with that towel and let it have another little rest and rise for about 30 minutes. While it’s doing its second rise, it’s time to get that oven super hot! Preheat it to 450°F and pop in your baking stone or an upside-down baking sheet. This is key for that amazing crust.
Baking Your Perfect Crusty Italian Bread
When your loaf has had its second rise, it’s time for the grand finale! Use a really sharp knife or a razor blade to make a few shallow slashes on the top. This helps the bread expand evenly. Carefully slide the loaf, parchment and all, onto your preheated baking stone or sheet. Bake it for about 25-30 minutes. You’ll know it’s ready when it’s a gorgeous golden brown and sounds hollow when you tap the bottom. Let it cool on a wire rack – it’s so tempting to slice right away, but letting it cool helps the inside set up properly!

Tips for Baking the Best Crusty Italian Bread Every Time
Okay, so you’ve got the basic steps down, but let’s chat about a few little secrets that really make this crusty Italian bread sing! First off, that oven temperature is super important. Make sure it’s fully preheated to 450°F. That initial blast of heat is what gives us that amazing crust. Don’t peek too early! Oh, and for an extra-crispy crust, try this trick: toss a few ice cubes into a separate, empty metal pan on the rack below your bread right when you put the loaf in. It creates steam, which is pure gold for crust development. Just be careful, it might splatter a bit! Also, letting the bread cool completely on a wire rack is non-negotiable. It allows the steam inside to escape, keeping that crust perfectly crisp.
Achieving the Ideal Crusty Texture
Want that super satisfying crunch? It really comes down to a few things. That hot oven is your best friend, so no peeking! The steam we talked about? That’s HUGE for a crackly crust. It keeps the surface moist initially, allowing the bread to expand fully before the crust hardens. Then, as the steam dissipates, the crust dries out and gets wonderfully crisp. Don’t slice it while it’s hot, either – resist the urge! Letting it cool lets the crust firm up perfectly.
Troubleshooting Common Baking Issues
So, what if your dough doesn’t seem to rise much? First, check your yeast expiration date! If it’s old, it might not be active enough. Also, make sure your water was warm, not too hot or too cold. If your loaf comes out a bit flat, don’t sweat it! It might have needed a little more kneading, or perhaps the second rise was a bit rushed. Just pop it in the oven anyway – it’ll still taste delicious! Sometimes, if the kitchen is really cold, the dough might take a bit longer to rise, so just be patient and let it do its thing.
Serving Suggestions for Your Homemade Italian Bread
Okay, so you’ve got this gorgeous, crusty Italian bread, and now what? Well, get ready to enjoy it in SO many ways! This isn’t just bread; it’s a vehicle for pure deliciousness. It’s honestly perfect on its own, but dipping it into some good quality olive oil with a sprinkle of herbs? Chef’s kiss! It’s also the absolute best for soaking up all the goodness from your favorite soups or stews. And sandwiches? Forget about it – this bread makes them next-level amazing.
Here are a few of my favorite ways to serve it up:
| Dipping Delight: Good olive oil with fresh rosemary, basil, or a pinch of red pepper flakes. |
| Soup Buddy: Perfect for dunking into minestrone, tomato soup, or French onion soup. |
| Sandwich Star: Use it for Italian subs, paninis, or even just a simple ham and cheese. |
| Bruschetta Base: Toast slices, rub with garlic, and top with tomatoes and basil. So good! |
Storing and Reheating Your Crusty Italian Bread
Now, you’ll want to store this beautiful crusty Italian bread so it stays as amazing as possible. Once it’s completely cool, I like to wrap it loosely in a clean kitchen towel or a paper bag. Avoid plastic wrap if you can, because that traps moisture and can make the crust soft. If you need to store it for more than a day or two, then a plastic bag with the end left slightly open is okay. To reheat, just pop slices into a preheated oven (around 375°F) for a few minutes until the crust is crisp again. Magic!
Frequently Asked Questions About Crusty Italian Bread
Got questions about making this amazing homemade Italian bread? I’ve got you covered! It’s totally normal to have a few queries when you’re diving into bread baking, especially when you’re aiming for that perfect crusty loaf.
Q1: My yeast didn’t get foamy. Is my bread ruined?
Don’t panic! If your yeast didn’t get foamy when you mixed it with warm water and sugar, it might be old or the water wasn’t quite the right temperature. Try using a fresh packet of active dry yeast. Also, make sure your water was around 110°F – too hot kills yeast, too cold doesn’t wake it up. It’s a common hiccup, but easily fixed!
Q2: Can I use bread flour instead of all-purpose for my crusty Italian bread?
Absolutely! Bread flour has a higher protein content, which will give you an even chewier texture in your crusty loaf. Just be aware that it might absorb a little more water, so you might need to add an extra tablespoon or two of water if the dough feels too stiff. It’s a great way to experiment with your artisan bread recipe!
Q3: Why does my dough take longer to rise sometimes?
Rising times can change depending on your kitchen’s temperature. If it’s a bit chilly, the yeast will work more slowly. Find the warmest spot you can – maybe near a pilot light, or in a slightly warmed (then turned off) oven. Patience is key with traditional bread making; just give it a little extra time if needed until it’s nicely doubled.
Q4: How do I get that really crispy crust?
That amazing crust comes from a combination of things! Preheating your oven really hot (450°F) is step one. Then, creating steam in the oven is a game-changer. Toss some ice cubes into an empty metal pan on the rack below your bread right when you put it in. This helps the dough expand before the crust sets, giving you that perfect crackle. And remember to let it cool completely on a wire rack!
Estimated Nutritional Information for Crusty Italian Bread
It’s tough to give exact numbers because every loaf can turn out a *little* different, you know? But generally, a slice of this crusty Italian bread is estimated to have around 120-150 calories, about 2-3 grams of fat, 4-5 grams of protein, and 20-25 grams of carbohydrates. Remember, this is just an estimate, and factors like exact ingredient amounts and serving size can change things up! It’s a pretty wholesome slice of homemade goodness, though!
Print
Crusty Italian Bread: 1 Glorious Loaf
- Total Time: 2 hours 50 minutes
- Yield: 1 loaf
- Diet: Vegetarian
Description
Bake perfect crusty Italian bread every time with this simple, stress-free recipe. Designed for beginners, this guide makes creating artisan bread fun and rewarding. Enjoy a delicious, homemade loaf with a satisfyingly crisp crust.
Ingredients
- 3 ½ cups all-purpose flour
- 1 ½ teaspoons salt
- 1 teaspoon sugar
- 1 packet (2 ¼ teaspoons) active dry yeast
- 1 ¼ cups warm water (about 110°F)
- 2 tablespoons olive oil
Instructions
- In a large mixing bowl, combine the warm water, sugar, and yeast. Let it sit for about 5 minutes until it becomes frothy.
- Add the flour, salt, and olive oil to the yeast mixture. Stir until a rough dough forms.
- Turn the dough out onto a floured surface and knead for about 8–10 minutes until smooth and elastic.
- Place the dough in a greased bowl, cover it with a clean kitchen towel, and let it rise in a warm place for about 1 to 1.5 hours, or until doubled in size.
- Preheat your oven to 450°F. Place a baking stone or an inverted baking sheet in the oven to heat.
- Punch down the risen dough and shape it into a round loaf. Place it on a piece of parchment paper.
- Cover the loaf with the kitchen towel and let it rise for another 30 minutes.
- Using a sharp knife, make a few slashes on the top of the loaf. Carefully transfer the loaf (with the parchment paper) onto the hot baking stone or sheet.
- Bake for 25–30 minutes until the bread is golden brown and sounds hollow when tapped on the bottom.
- Remove from the oven and let it cool on a wire rack before slicing.
- Prep Time: 20 minutes
- Cook Time: 30 minutes
- Category: Bread
- Method: Baking
- Cuisine: Italian