Okay, confession time: I’m absolutely obsessed with potatoes in every form, and finding these Crispy Potato Stacks with Garlic Herb Butter felt like striking gold! This recipe popped into my head on a chilly evening when I was craving something comforting but also a little fancy, and let me tell you, it delivered. Forget boring baked potatoes; these little towers of deliciousness are next level!

These aren’t just pretty; they’re ridiculously flavorful. The outside gets perfectly crispy, and the inside stays tender, all thanks to that amazing garlic herb butter. They’re so easy to whip up, making them perfect for a weeknight treat or even to impress guests at your next gathering. Get ready to fall in love with potatoes all over again!
Why You’ll Love These Crispy Potato Stacks with Garlic Herb Butter
- Super Easy to Make: Seriously, you only need about 20 minutes of prep, and the muffin tin does most of the work for you. Perfect for when you’re busy but still want something impressive!
- Incredible Flavor Combo: That garlic herb butter is pure magic! It infuses every single potato slice with so much deliciousness, and the Parmesan on top is just the cherry on top.
- Amazing Texture: You get that satisfying crunch on the edges from baking, while the inside stays perfectly tender and melt-in-your-mouth. It’s the best of both worlds!
- So Versatile: These stacks are fantastic as an appetizer, a side dish for dinner, or even a fancy snack. They go with pretty much anything!
Gather Your Ingredients for Crispy Potato Stacks
- 2 pounds Yukon Gold potatoes, *very* thinly sliced (I swear by my mandoline for this!)
- 4 tablespoons unsalted butter, melted (make sure it’s not too hot!)
- 2 tablespoons olive oil
- 3 cloves garlic, minced (fresh is best here! Don’t skimp!)
- 1 teaspoon sea salt
- 1/2 teaspoon black pepper
- 1 teaspoon dried thyme
- 1 teaspoon dried parsley
- 1/2 teaspoon onion powder
- 1/2 cup grated Parmesan cheese
- 1 tablespoon chopped fresh chives (for that pop of green and fresh flavor!)
Step-by-Step Instructions for Crispy Potato Stacks
Step 1: First things first, preheat your oven to 400°F. And grab a 12-cup muffin tin – this is seriously the secret to getting those perfect stack shapes! Lightly grease the cups so your beautiful potato creations don’t stick.
Step 2: Now, let’s talk potatoes. You want them sliced super thin, like paper thin. I find that using a mandoline ensures the most even slices, which is key for consistent crispiness, but a really sharp knife works too if you’re careful!
Step 3: In a big bowl, whisk together the melted butter, olive oil, minced garlic, sea salt, black pepper, dried thyme, dried parsley, and onion powder. This is where all that amazing flavor starts to build, so make sure it’s all good and combined! If you love garlic butter flavors, you might also enjoy my recipe for Garlic Butter Steak and Potatoes.
Step 4: Toss those thinly sliced potatoes into the bowl with the butter mixture. Gently mix them up until every single slice is coated. It’s like giving each potato a little flavor bath – they’ll thank you later!
Step 5: Time to build those stacks! Carefully tuck the coated potato slices into your greased muffin cups. Fill them up, mounding them a little over the top because, trust me, they shrink down while baking, much like how ingredients shrink down when making loaded potato skins. It’s like magic watching them transform!
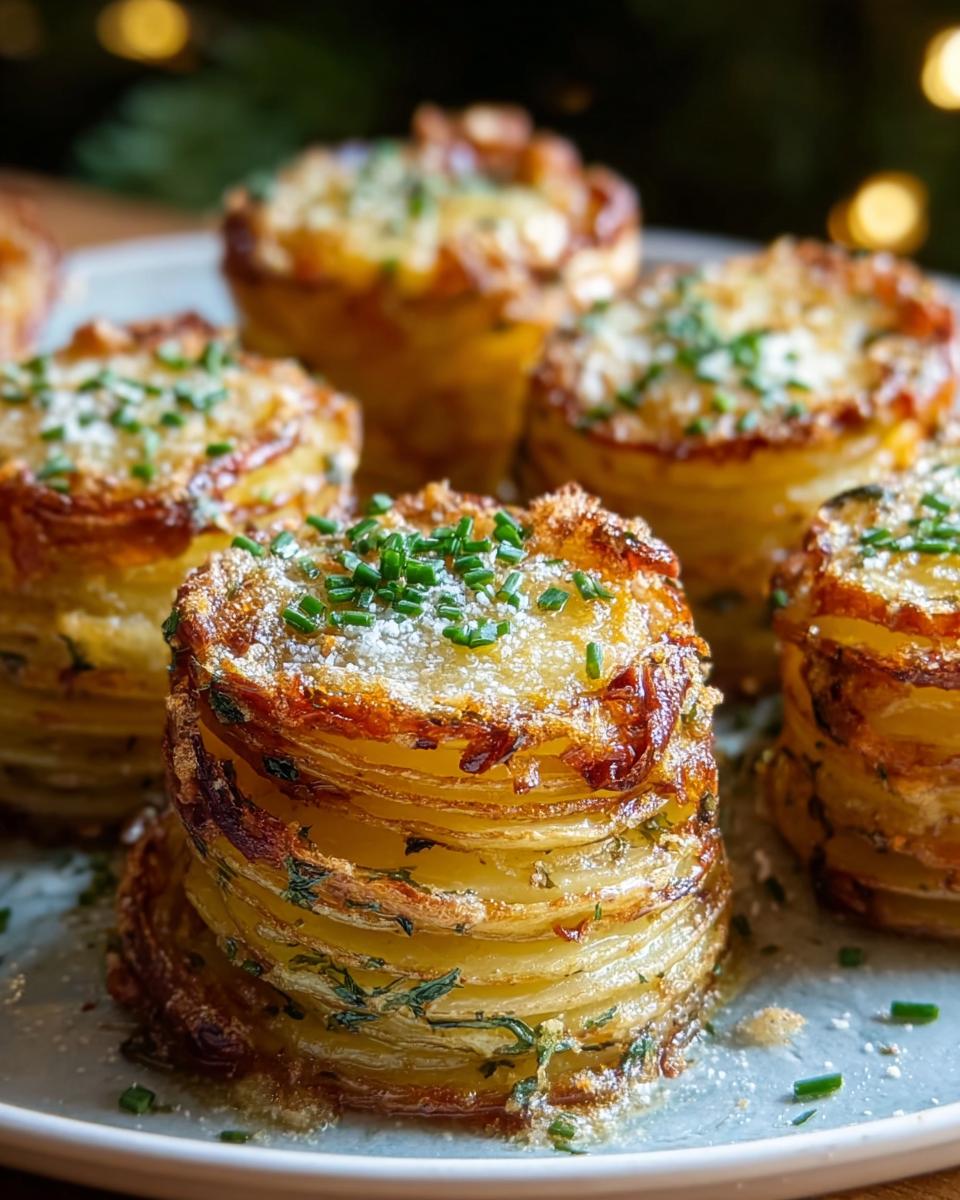
Step 6: Sprinkle the grated Parmesan cheese evenly over the tops of each potato stack. This is going to get golden and delicious, giving you that extra savory crunch that we all love. It’s a step I never skip for that perfect finish!
Step 7: Cover the muffin tin loosely with foil. Pop it into your preheated oven and bake for 30 minutes. The foil helps them steam and cook through evenly before we get them nice and crispy, a technique similar to what helps make smashed potatoes tender inside before crisping.
Step 8: After 30 minutes, carefully remove the foil. Keep baking for another 20 to 25 minutes. You’re looking for those beautiful golden-brown crispy edges and centers that are tender and cooked through. Watch them closely; they can go from perfect to… well, less perfect pretty fast!
Step 9: Once they’re done, let those amazing potato stacks cool in the muffin tin for about 5 minutes. This helps them set up so you can get them out without them falling apart. Gently run a small spatula or knife around the edges if needed, then carefully lift them out.
Step 10: The final touch! Sprinkle your gorgeous crispy potato stacks with the fresh chopped chives. It adds a lovely bit of color and a fresh, oniony bite that just finishes them off perfectly. Serve them up warm and watch people devour them!

What to Serve with Your Crispy Potato Stacks
These potato stacks are pretty amazing on their own, but pairing them with the right sides just takes the whole meal to the next level! Here are a few of my favorite ideas:
Easy Guacamole: You can never go wrong with a simple, fresh guacamole! The cool, creamy avocado is the perfect counterpoint to the warm, crispy potatoes, and it adds those healthy fats we all need. My recipe for Easy Guacamole is super simple to whip up!
Peach Caprese Salad: Okay, hear me out! This is a *little* different, but the sweet peaches, creamy mozzarella, and fresh basil from my Peach Caprese Salad recipe are surprisingly fantastic with the savory potatoes. It’s a refreshing twist!
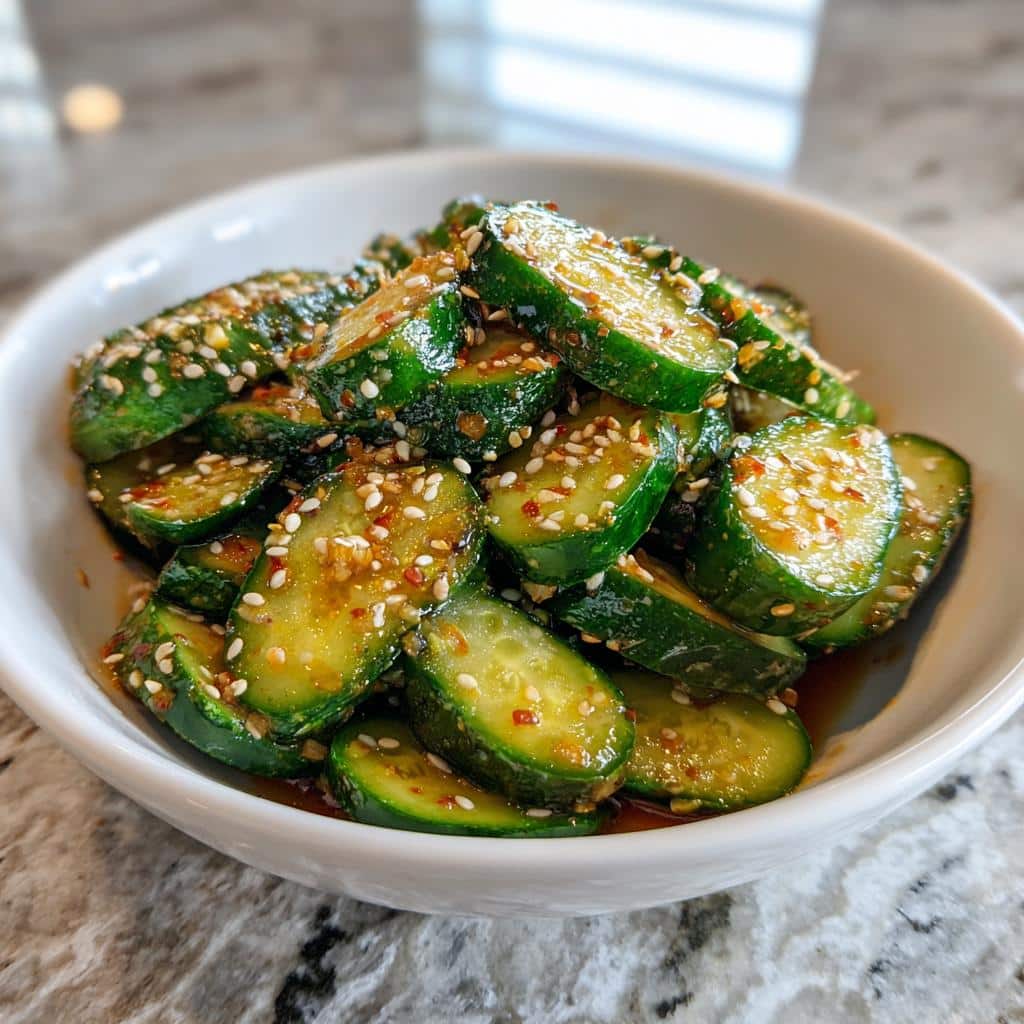
Cucumber Tomato Avocado Salad: For something light and super refreshing, you can’t beat this combo. The crunch of the cucumber, the juicy tomatoes, and the creamy avocado from this Cucumber Tomato Avocado Salad really balance out the richness of the potato stacks. It’s a winner!
Storing and Reheating Your Crispy Potato Stacks
Alright, so you’ve got some leftover Crispy Potato Stacks (lucky you!) or you’re planning ahead because you’re a meal prep genius. Don’t worry, these guys reheat beautifully, and storing them is super simple.
You can keep these potato stacks in the fridge for about 3 to 4 days. I like to store them in an airtight container. If you have any extra fresh chives, it’s best to store them separately to keep them bright and green.
Now, for reheating – this is KEY to getting that crispiness back! Don’t even *think* about the microwave; it’ll just make them soggy and sad. Instead, pop them back into a preheated oven at around 375°F (190°C) for about 8-10 minutes. This is the magic trick to reviving that glorious crunch! If you’re reheating a bunch, you can even use a baking sheet, maybe pop them back in their muffin tin if you have space, just to get that even heat distribution.
Frequently Asked Questions about Crispy Potato Stacks
Can I use different types of potatoes for these stacks?
While Yukon Golds are my absolute favorite for these Crispy Potato Stacks because they hold their shape so well and get wonderfully tender, you *can* try other waxy potatoes like red potatoes. Starchy potatoes like Russets tend to fall apart more, so I’d stick to waxy varieties for the best results and that beautiful stacked look!
How can I make these potato stacks even crispier?
Great question! To get them extra crispy, make sure your potato slices are as thin as possible and evenly coated in the garlic herb butter. Don’t overcrowd the muffin tin – give them a little breathing room! Also, removing the foil for the second baking stage is crucial for that final crispy finish, just like when we’re making crispy potato skins!
Can I prepare these ahead of time?
You can definitely get a lot of the prep done ahead! Slice your potatoes and whisk up the garlic herb butter mixture a day in advance and store them separately in the fridge. However, I really recommend assembling and baking them right before you want to serve them for the absolute best crispy texture. They’re just not quite the same once they’ve sat too long after baking, though reheating works well!
Enjoy Your Delicious Crispy Potato Stacks!
So there you have it! These Crispy Potato Stacks with Garlic Herb Butter are truly a little bit of magic on a plate and I really hope you give them a try. If you do, please let me know what you think – I’d absolutely love to hear from you in the comments below! You can also share your creations with me over on Facebook or Pinterest!
Print
Crispy Potato Stacks with Garlic Herb Butter
- Total Time: 1 hour 15 minutes
- Yield: 6 servings
- Diet: Vegetarian
Description
Layered thinly sliced potatoes brushed in rich garlic herb butter and baked until golden and crunchy. These potato stacks deliver incredible flavor and texture.
Ingredients
- 2 pounds Yukon Gold potatoes thinly sliced
- 4 tablespoons unsalted butter melted
- 2 tablespoons olive oil
- 3 cloves garlic minced
- 1 teaspoon sea salt
- 1/2 teaspoon black pepper
- 1 teaspoon dried thyme
- 1 teaspoon dried parsley
- 1/2 teaspoon onion powder
- 1/2 cup grated Parmesan cheese
- 1 tablespoon chopped fresh chives
Instructions
- Preheat your oven to 400°F. Lightly grease a 12 cup muffin pan.
- Slice the potatoes very thinly using a sharp knife or mandoline.
- In a large bowl, whisk together the melted butter, olive oil, garlic, sea salt, black pepper, thyme, parsley, and onion powder.
- Add the potato slices to the bowl and toss until evenly coated.
- Stack the potato slices into the prepared muffin cups, filling each cup slightly above the top as the potatoes will shrink while baking.
- Sprinkle the Parmesan cheese evenly over the tops of the stacks.
- Cover the pan loosely with foil and bake for 30 minutes.
- Remove the foil and continue baking for 20 to 25 minutes until the edges are crispy and golden brown and the centers are tender.
- Let the potato stacks cool in the pan for 5 minutes before carefully removing them.
- Garnish with fresh chives before serving.
Notes
- For the crispiest texture, use evenly thin potato slices and avoid overcrowding the muffin pan.
- Prep Time: 20 minutes
- Cook Time: 55 minutes
- Category: Side Dish
- Method: Baking
- Cuisine: American