Best Homemade Chili. Oh man, just saying those words brings back memories! When I first started cooking, chili felt like this mystical dish that only seasoned pros could nail. I remember trying recipes that called for a million ingredients and steps that made my head spin. I wanted something hearty, something that tasted amazing, but something I wouldn’t mess up. That’s exactly why I created *this* recipe. It’s the best homemade chili for beginners because it uses simple stuff you can find anywhere, tastes incredible, and honestly, it’s pretty foolproof. It became my go-to when I was just starting out, and now I get to share it with you guys!

Why This Best Homemade Chili Recipe is Perfect for Beginners
Seriously, if you’ve ever felt intimidated by cooking, this is your starting point. We’re talking basic chopping, easy seasoning, and just letting it simmer away on the stovetop. There are no fancy techniques here, just good, honest ingredients coming together to make something truly comforting. You don’t need a giant pot or a special tool; a regular dutch oven or even a big soup pot will do the trick. The directions are super straightforward, and the result is a rich, flavorful chili that tastes like it simmered for hours, even though it doesn’t have to. It’s the kind of meal that makes you feel like a kitchen rockstar, even if you’ve only ever made toast before!
Gathering Your Best Homemade Chili Ingredients
Okay, let’s get down to business! To make this amazing chili, you’ll need a few things. Don’t worry, it’s all pretty standard stuff you can grab at any grocery store. We’ve got ground meat – I usually go for ground beef or turkey, whatever you prefer. Then some veggies to give it a nice base: green peppers and a yellow onion. For the tomato goodness, we’re using diced tomatoes, tomato sauce, and tomato paste. And of course, beans! Kidney beans are my favorite here, but you could switch them up. The spice blend is where the magic happens, don’t be scared by the list, it’s mostly powders that just add flavor. And just a little note, that baking soda? It’s optional but it really helps make the meat tender and the sauce nice and thick. Trust me on this one!
| 2 pounds ground beef or turkey | 2 small green peppers, diced |
| 1 small yellow onion, diced | 2 cans diced tomatoes (15-ounce cans) |
| 15 ounce can tomato sauce | 6 ounce can tomato paste |
| 15 ounces water | 2 cans kidney beans, drained and rinsed (15-ounce cans) |
| 3 tablespoons chili powder | 2 tablespoons garlic powder |
| 2 tablespoons onion powder | 3 tablespoons cumin |
| 1 tablespoon paprika | 1 teaspoon chipotle powder |
| ½ teaspoon cayenne pepper | ½ tablespoon salt |
| 1 teaspoon white pepper | ½ teaspoon baking soda (optional) |
Ingredient Clarifications and Notes
Let’s chat about a couple of these ingredients, just to make sure we’re all on the same page. For the ground meat, feel free to use whatever you like best – 80/20 ground beef gives a great flavor, but lean turkey works wonderfully too. When you dice the onions and peppers, try to get them around the same size; it helps them cook evenly. If you can’t find chipotle powder, or you’re not a huge fan of smoky heat, you can skip it or use a little extra paprika. The cayenne pepper is your main heat control, so add more or less depending on how spicy you like things. And about that baking soda – it sounds weird, right? But it really does work wonders to tenderize the meat and give the sauce a nice, thick consistency without needing a cornstarch slurry or anything complicated. Just make sure to stir it in well until the bubbling stops!
Crafting Your Best Homemade Chili: Step-by-Step Instructions
Alright, let’s get this chili party started! It’s really not complicated, I promise. First things first, grab a big pot – a dutch oven is ideal, but any large, heavy-bottomed pot will work great. We’re going to start by sautéing those diced green peppers and yellow onion in there. Just cook ’em over medium heat until they get soft and start to smell sweet, you know, a little caramelized. That usually takes about 5-7 minutes. Once they’re looking good, toss in all your spices – the chili powder, garlic powder, onion powder, cumin, paprika, chipotle powder, cayenne pepper, salt, and white pepper. Give that a good stir and let it cook for just a minute or two. You’ll smell how amazing those spices get when they hit the heat! Be careful they don’t burn, though!
Next up, the star of the show: the ground meat! Add your ground beef or turkey to the pot. Break it up with your spoon and cook it until it’s mostly browned. Don’t worry if there’s still a tiny bit of pink; it’ll finish cooking later. Now, pour in the tomato sauce, the can of diced tomatoes (undrained!), the water, and that little can of tomato paste. Give it all a good stir to combine everything. Bring this whole mixture up to a simmer, then turn the heat down to medium-low, cover it, and let it bubble away gently for about 15 minutes. This lets all those flavors start melding together. After that, it’s time for the beans! Stir in those drained and rinsed kidney beans. And here’s that little trick I mentioned: stir in the baking soda. You’ll see it start to bubble up like crazy! That’s totally normal. Just keep stirring it over medium heat until those bubbles calm down and disappear. It really does make a difference in the texture. And that’s it! Remove it from the heat and your best homemade chili is ready to go!
Pro Tips for Perfect Best Homemade Chili Every Time
You know, even with an easy recipe, a few little tricks can make your chili truly spectacular. First off, don’t be afraid to really let those onions and peppers soften up at the beginning. That sweetness they develop is key! Also, tasting is crucial. Once everything is simmering, give it a little taste and see if it needs more salt, a bit more heat from the cayenne, or maybe another pinch of cumin. You’re the chef here! If you like your chili a little thicker, you can always simmer it uncovered for an extra 10-15 minutes at the end to let some of the liquid evaporate. And don’t forget the toppings! They really elevate the whole experience. Cheese, sour cream, a dollop of Greek yogurt, some chopped cilantro, or even some crushed tortilla chips can make this chili go from great to absolutely legendary. Trust me, these little touches make a big difference!
Serving and Enjoying Your Best Homemade Chili
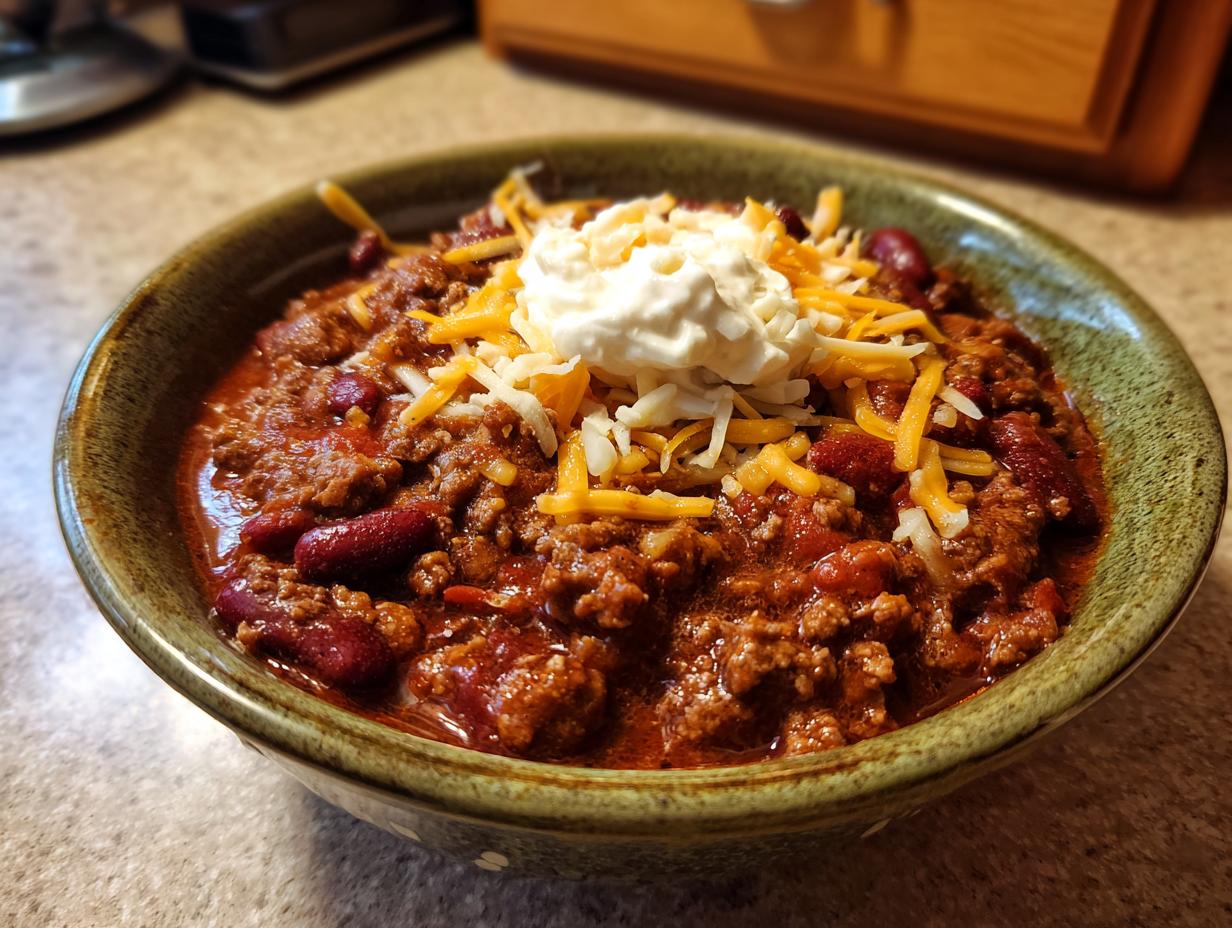
Now for the best part – eating your amazing homemade chili! This stuff is fantastic all on its own, but serving it up right can take it to the next level. My absolute favorite way to serve it is with a generous sprinkle of shredded cheddar cheese. It gets all melty and delicious! A big dollop of sour cream or plain Greek yogurt is also a must for me; it adds that perfect cooling creaminess to balance the spice. Some fresh chopped green onions or cilantro add a nice pop of color and freshness. And you absolutely cannot go wrong with a side of warm, fluffy cornbread for dipping. Seriously, cornbread and chili are a match made in heaven!
Frequently Asked Questions About Best Homemade Chili
Got questions about this easy chili recipe? I’ve got you covered! Here are a few things people often ask me:
Q: Can I make this chili vegetarian?
Absolutely! You can easily swap out the ground meat for extra beans, like black beans or pinto beans, or even add some chunks of firm tofu or plant-based crumbles. You might want to add a little extra vegetable broth for moisture.
Q: How spicy is this chili? Can I make it milder or hotter?
This recipe has a moderate amount of spice thanks to the chili powder and a touch of cayenne and chipotle. If you like it milder, just cut back on the cayenne and chipotle powder. For more heat, add more cayenne or a pinch of ghost pepper powder if you’re brave!
Q: How long does this chili last in the fridge?
This best homemade chili will stay good in an airtight container in the refrigerator for about 3-4 days. It actually tastes even better the next day as the flavors really meld together!
Q: Can I freeze this chili?
Yes, you totally can! Let it cool completely, then portion it into freezer-safe containers or bags. It should keep well in the freezer for up to 3 months. Just thaw it overnight in the fridge before reheating.
Understanding the Nutrition of Your Best Homemade Chili
Just so you know, the nutritional info below is an estimate per serving and can change based on the exact ingredients you use and how much you eat. It’s always good to have a general idea, though!
| Serving Size | 1 serving |
| Calories | 450 |
| Sugar | 10g |
| Sodium | 900mg |
| Fat | 25g |
| Saturated Fat | 10g |
| Unsaturated Fat | 15g |
| Trans Fat | 0g |
| Carbohydrates | 25g |
| Fiber | 8g |
| Protein | 30g |
| Cholesterol | 90mg |
Storing and Reheating Your Delicious Best Homemade Chili
The best part about making a big batch of this chili? Leftovers! Seriously, it tastes even better the next day. Once it’s cooled down a bit, you can pop it into an airtight container and keep it in the fridge for about 3 to 4 days. It’s perfect for quick lunches or dinners later in the week. If you want to freeze some for later, that works great too! Just make sure it’s completely cooled, then portion it into freezer-safe containers. It’ll keep well for up to 3 months.
When you’re ready to reheat, just pop it on the stovetop over medium-low heat, stirring occasionally until it’s warmed through. You can also microwave it in a bowl. If it seems a little thick after being stored, just add a splash of water or broth to loosen it up. Easy peasy!
| Storage Method | Duration | Reheating Tips |
| Refrigerator (Airtight Container) | 3-4 days | Stovetop (medium-low heat, stirring) or Microwave |
| Freezer (Freezer-Safe Container) | Up to 3 months | Thaw in fridge overnight, then reheat on stovetop or microwave. Add liquid if needed. |

Best Homemade Chili: 1 Foolproof Recipe
- Total Time: 1 hour 5 minutes
- Yield: 8 servings
- Diet: Vegetarian
Description
This is the best homemade chili recipe for beginners. It’s easy to make and packed with flavor. You can make this chili on your stovetop with simple ingredients.
Ingredients
- 2 pounds ground beef or turkey
- 2 small green peppers, diced
- 1 small yellow onion, diced
- 2 cans diced tomatoes (15-ounce cans)
- 15 ounce can tomato sauce
- 6 ounce can tomato paste
- 15 ounces water
- 2 cans kidney beans, drained and rinsed (15-ounce cans)
- 3 tablespoons chili powder
- 2 tablespoons garlic powder
- 2 tablespoons onion powder
- 3 tablespoons cumin
- 1 tablespoon paprika
- 1 teaspoon chipotle powder
- ½ teaspoon cayenne pepper
- ½ tablespoon salt
- 1 teaspoon white pepper
- ½ teaspoon baking soda (optional)
Instructions
- In a large dutch oven, saute diced peppers and onions until translucent and they start to caramelize.
- Add seasonings (minus the baking soda) and cook for 1 to 2 minutes, stirring continuously. Make sure they don’t burn.
- Add ground meat and brown until just done. It’s okay if it still has some pink in it before you add the rest of the ingredients.
- Pour in the tomato sauce, diced tomatoes, water, and tomato paste.
- Bring to a simmer over medium low heat and cook for about 15 minutes. Then add the drained beans.
- Stir in the baking soda. The sauce will start to bubble up. Stir over medium heat until the bubbles have gone away.
- Remove from heat and serve.
Notes
- The baking soda helps to tenderize the meat and thicken the sauce.
- Adjust the spice level by adding more or less cayenne pepper and chipotle powder.
- Serve with your favorite toppings like cheese, sour cream, or cornbread.
- Prep Time: 20 minutes
- Cook Time: 45 minutes
- Category: Main Course
- Method: Stovetop
- Cuisine: American