If you’ve been scrolling through social media wondering how everyone is making these unbelievably creamy, high-protein desserts that taste like actual ice cream, then welcome! You are in the right place. Today, we are tackling the king of healthy-ish treats: Moose Tracks protein ice cream made right in your Ninja Creami. Seriously, I was skeptical at first. I thought, “There’s no way protein powder can taste this rich.” But trust me, after about five failed batches trying to get the liquid ratio just right, I cracked the code.
This recipe is designed to be totally foolproof, even if you just unboxed your Creami yesterday. We’re using high-protein milk and just a tiny bit of sweetener to keep the sugar low, but the flavor explosion from the chocolate swirls and peanut butter cups is pure indulgence. It’s my go-to after a tough workout—it feels like cheating, but it’s packed with good stuff. Get your pint ready; the magic starts now!

Essential Ingredients for Perfect Moose Tracks Protein Ice Cream
Okay, listen up, because ingredient choice is where most people mess up their Creami recipes. We aren’t just throwing random things in a container; we need specific stuff to trick that machine into thinking it’s churning real, full-fat ice cream. Don’t worry, the list looks long, but it breaks down super easily into two parts: the creamy base and the decadent mix-ins.
Base Components for Your Moose Tracks Protein Ice Cream
For the actual ice cream structure, we need liquid and powder. You absolutely must use Fairlife skim milk or another high-protein milk—it makes a HUGE difference in texture, trust me! Mix that with about three-quarters of a cup of unsweetened almond milk to thin it just enough. Then, one scoop of vanilla protein powder goes in, along with a tablespoon of sugar-free vanilla pudding mix. That pudding mix is my secret weapon for creaminess; if you don’t have it, you can use a tiny pinch of xanthan gum instead, but the pudding mix is easier!
Flavor and Mix-In Components for Moose Tracks Protein Ice Cream
To make sure this tastes like a treat and not like diet food, we need a touch of sweetness. I use just one tablespoon of maple syrup or monk fruit sweetener—you decide which fits your lifestyle. A tiny pinch of salt wakes everything up, which is non-negotiable! For the actual “Moose Tracks,” you need two tablespoons of dark chocolate chips (melted later, of course) and three tablespoons of chopped mini peanut butter cups. Those cups are the best part, so don’t skimp!
Equipment Needed for Making Moose Tracks Protein Ice Cream
You don’t need a complicated setup for this, which is what I love! Since this is a Ninja Creami recipe, that machine is the star of the show. You’ll definitely need the official Ninja Creami pint container to freeze your base properly.
- Ninja Creami Machine
- Ninja Creami Pint Container
- Whisk or immersion blender
- Microwave-safe bowl (for melting chocolate)
That’s it! If you have a good whisk, you can skip the immersion blender, but make sure you get those powders totally incorporated so you don’t end up with clumps later.
Step-by-Step Instructions for Moose Tracks Protein Ice Cream
This is where the patience pays off! The machine does most of the heavy lifting, but you have to set it up right. Remember, if you rush the freezing part, you are going to be sad later when you have to re-spin it three times. We want maximum creaminess on the first try!
Preparing and Freezing the Moose Tracks Protein Ice Cream Base
Grab your Creami pint container—this is your mold for perfection. Into that container, dump in your Fairlife milk, almond milk, vanilla protein powder, the sugar-free pudding mix (or xanthan gum if you opted for that), your maple syrup or sweetener, and just a little pinch of salt. Now, grab a whisk! You need to whisk this like crazy until everything is totally dissolved. Seriously, you don’t want dry pockets of protein powder hiding out; they turn into rock-hard bits later. Whisk until it looks like smooth, slightly thick milk. Check the fill line; don’t go over it! If you’re a little under, that’s fine, but overfilling is a recipe for disaster.
Once it’s perfectly smooth, slap the lid on securely and put it in your freezer. And here’s the biggie: it needs to freeze flat and undisturbed for a full 24 hours. Don’t try to rush this by putting it in the back corner where it’s colder; just let it sit level for a whole day. This solid freeze is essential for the Creami process to work its magic!
Churning and Achieving Creamy Moose Tracks Protein Ice Cream Texture
When the 24 hours are up, pull that pint out. Don’t just jam it straight into the machine! Let it sit on the counter for just one minute. This tiny bit of warming helps the initial spin. Put the pint into the machine, lock the lid, and select the Lite Ice Cream cycle. Watch it go! When it’s done, open it up. If it looks powdery, crumbly, or like dry sand, don’t panic—that’s totally normal sometimes. Just add one tablespoon of milk (any kind works) and immediately run the Re-spin cycle. Keep doing that one tablespoon and Re-spin until it looks like soft-serve ice cream. That’s the texture we’re chasing!

Incorporating Mix-Ins for True Moose Tracks Protein Ice Cream
Now for the fun part! Take your dark chocolate chips and melt them. I do this in thirty-second bursts in the microwave, stirring really well in between each burst so they don’t burn. You want them smooth and shiny. Next, take your freshly churned base and use a spoon to make a little well right down the center, stopping just above the bottom. Pour that melted chocolate right into that well. Then, scatter those chopped mini peanut butter cups over the top. Pop the whole thing back into the machine, but this time, use the Mix-in function. This gently swirls everything together without over-mixing the base. It only takes a few seconds!
Tips for Success with Your Moose Tracks Protein Ice Cream
I learned these tricks the hard way, so you don’t have to! The biggest mistake people make with protein ice cream in the Creami is thinking they can skip the freezing time or not using enough liquid when re-spinning. If you want that scoopable, dreamy texture, you have to respect the machine’s requirements. Always use quality protein powder; cheap stuff tends to freeze rock hard or stay powdery, no matter what you do.
Another thing I always do is make sure the pint is completely level when it goes into the freezer. If one side is lower than the other, that side freezes harder, and you end up with an uneven churn. It sounds fussy, but trust me, a level base means a perfect, creamy result every single time, especially since we are dealing with sugar-free ingredients that freeze differently than traditional ice cream.
Troubleshooting Texture Issues in Your Moose Tracks Protein Ice Cream
If your first churn results in something that looks like a crumbly blizzard, don’t throw it out! That’s exactly what the Re-spin function is for. Add just one tablespoon of milk—and I mean *just* one—and run it again. If it’s still too hard or icy after the second spin, add another tablespoon and spin again. It might take two or three spins to get it perfect, but don’t add too much liquid, or you’ll end up with soup!
If you freeze the final mixed product for too long (say, a few days), it might get rock solid. No problem! Just let it sit on the counter for about 10 minutes before trying to spin it again, or use the ‘Defrost’ setting if your machine has one, followed by a Re-spin.
Ingredient Notes and Smart Substitutions for Moose Tracks Protein Ice Cream
We are aiming for low sugar here, so we need to be smart about our swaps. When it comes to the protein powder, I prefer vanilla whey/casein blends because they offer the best texture, but isolate powders work too—just be aware you might need an extra splash of milk during the re-spin because isolates absorb more liquid.
For the sweetener, if you hate monk fruit, erythritol works great, or even stevia drops if you’re careful not to overdo it. My biggest non-negotiable is the sugar-free pudding mix; it acts like a stabilizer that keeps the ice cream from turning into a block of ice. If you absolutely can’t find it, use a quarter teaspoon of xanthan gum instead, but use that sparingly—it thickens fast!
Serving Suggestions for Your Homemade Moose Tracks Protein Ice Cream
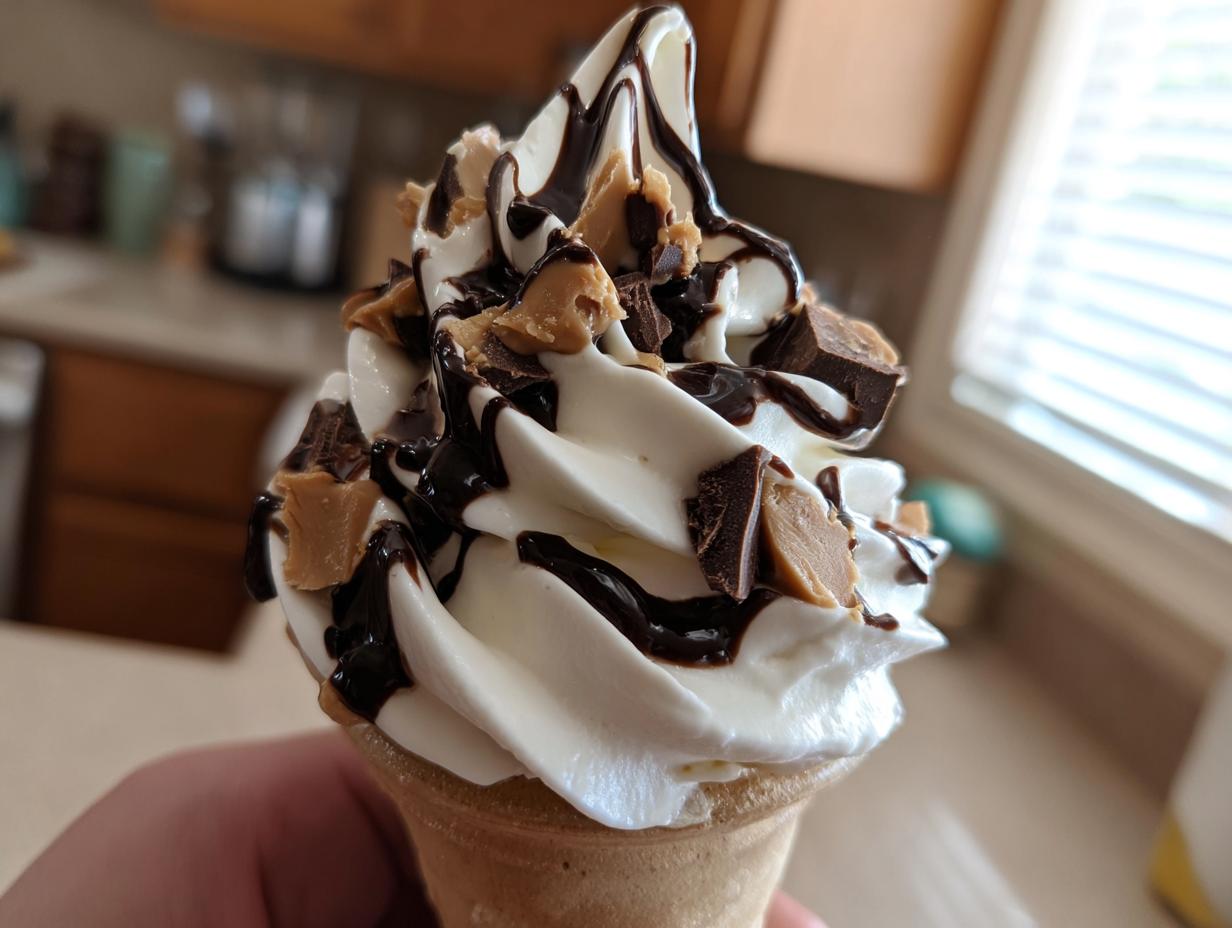
The best time to eat this is right after that final Mix-in cycle. It comes out perfectly soft and ready to eat, like premium soft-serve ice cream from a shop. You can eat it right away and enjoy those gooey, warm chocolate swirls mixing with the cold peanut butter cups. It is heavenly!
However, if you prefer a firmer, more traditional scoopable ice cream texture, just pop the lid back on and place the pint in the freezer for about 15 to 20 minutes before digging in. Don’t forget to give it a quick stir after those 20 minutes if you freeze it longer than that, just to break up any hard edges!
Storing and Keeping Your Moose Tracks Protein Ice Cream Fresh
Since this recipe uses high-protein milk and no commercial stabilizers, it’s best enjoyed within the first week, though honestly, it rarely lasts that long in my house! Always keep leftovers in the Creami pint with the lid sealed tight. If you leave it in the freezer for several days and it gets too hard to spin, don’t worry about re-spinning it right away.
If you want to eat it straight from the freezer without using the machine again, just pull it out about 15 minutes before you plan to serve it, and let it soften on the counter. That’s usually enough time for it to become perfectly dippable with a spoon.
Table: Storage Guidelines for Moose Tracks Protein Ice Cream
| Storage Time | Method |
|---|---|
| 1-3 Days | Store in the sealed Creami pint in the freezer. Ready to eat after 5 minutes on the counter. |
| 4-7 Days | Store tightly sealed. May require a 1-minute Re-spin cycle to regain optimal texture. |
Understanding the Profile of Moose Tracks Protein Ice Cream
The best part about making your own Moose Tracks protein ice cream is knowing exactly what you’re putting into your body. We’ve managed to pack in a solid 20 grams of protein per serving while keeping the sugar really low, thanks to the protein powder and sugar-free mix-ins. It truly feels like a high-calorie dessert, but it fits right into a healthy eating plan. If you are looking for more high-protein dessert ideas, check out our chocolate protein pudding recipe.
Keep in mind that these numbers are estimates based on the standard ingredients listed above. If you swap out Fairlife milk for regular milk, or use real sugar instead of monk fruit, those macros will definitely change, so always adjust your tracking based on the specific brands you use! For more ideas on healthy swaps, you can check out our 2-ingredient protein bagels.
Estimated Nutrition for Moose Tracks Protein Ice Cream
| Nutrient | Per Serving (Approx. ½ Pint) |
|---|---|
| Calories | 235 |
| Protein | 20 g |
| Total Fat | 8 g |
| Carbohydrates | 19 g |
Sharing Your Thoughts on This Moose Tracks Protein Ice Cream
I hope you are as obsessed with this recipe as I am! It’s taken me weeks to nail down the perfect liquid-to-powder ratio for this high-protein base. Seriously, let me know what you think! Drop a comment below and tell me if you tried the pudding mix trick or if you went straight for the xanthan gum. And please, if you love it, give it a five-star rating so others can find this amazing, guilt-free dessert! You can also follow our latest recipes on Pinterest.
Tips for Success with Your Moose Tracks Protein Ice Cream
I learned these tricks the hard way, so you don’t have to! The biggest mistake people make with protein ice cream in the Creami is thinking they can skip the freezing time or not using enough liquid when re-spinning. If you want that scoopable, dreamy texture, you have to respect the machine’s requirements. Always use quality protein powder; cheap stuff tends to freeze rock hard or stay powdery, no matter what you do.
Another thing I always do is make sure the pint is completely level when it goes into the freezer. If one side is lower than the other, that side freezes harder, and you end up with an uneven churn. It sounds fussy, but trust me, a level base means a perfect, creamy result every single time, especially since we are dealing with sugar-free ingredients that freeze differently than traditional ice cream.
Troubleshooting Texture Issues in Your Moose Tracks Protein Ice Cream
If your first churn results in something that looks like a crumbly blizzard, don’t throw it out! That’s exactly what the Re-spin function is for. Add just one tablespoon of milk—and I mean *just* one—and run it again. If it’s still too hard or icy after the second spin, add another tablespoon and spin again. It might take two or three spins to get it perfect, but don’t add too much liquid, or you’ll end up with soup!
If you freeze the final mixed product for too long (say, a few days), it might get rock solid. No problem! Just let it sit on the counter for about 10 minutes before trying to spin it again, or use the ‘Defrost’ setting if your machine has one, followed by a Re-spin.
Ingredient Notes and Smart Substitutions for Moose Tracks Protein Ice Cream
We are aiming for low sugar here, so we need to be smart about our swaps. When it comes to the protein powder, I prefer vanilla whey/casein blends because they offer the best texture, but isolate powders work too—just be aware you might need an extra splash of milk during the re-spin because isolates absorb more liquid.
For the sweetener, if you hate monk fruit, erythritol works great, or even stevia drops if you’re careful not to overdo it. My biggest non-negotiable is the sugar-free pudding mix; it acts like a stabilizer that keeps the ice cream from turning into a block of ice. If you absolutely can’t find it, use a quarter teaspoon of xanthan gum instead, but use that sparingly—it thickens fast!
Serving Suggestions for Your Homemade Moose Tracks Protein Ice Cream
The best time to eat this is right after that final Mix-in cycle. It comes out perfectly soft and ready to eat, like premium soft-serve ice cream from a shop. You can eat it right away and enjoy those gooey, warm chocolate swirls mixing with the cold peanut butter cups. It is heavenly!
However, if you prefer a firmer, more traditional scoopable ice cream texture, just pop the lid back on and place the pint in the freezer for about 15 to 20 minutes before digging in. Don’t forget to give it a quick stir after those 20 minutes if you freeze it longer than that, just to break up any hard edges!
Storing and Keeping Your Moose Tracks Protein Ice Cream Fresh
Since this recipe uses high-protein milk and no commercial stabilizers, it’s best enjoyed within the first week, though honestly, it rarely lasts that long in my house! Always keep leftovers in the Creami pint with the lid sealed tight. If you leave it in the freezer for several days and it gets too hard to spin, don’t worry about re-spinning it right away.
If you want to eat it straight from the freezer without using the machine again, just pull it out about 15 minutes before you plan to serve it, and let it soften on the counter. That’s usually enough time for it to become perfectly dippable with a spoon.
Table: Storage Guidelines for Moose Tracks Protein Ice Cream
| Storage Time | Method |
|---|---|
| 1-3 Days | Store in the sealed Creami pint in the freezer. Ready to eat after 5 minutes on the counter. |
| 4-7 Days | Store tightly sealed. May require a 1-minute Re-spin cycle to regain optimal texture. |
Understanding the Profile of Moose Tracks Protein Ice Cream
The best part about making your own Moose Tracks protein ice cream is knowing exactly what you’re putting into your body. We’ve managed to pack in a solid 20 grams of protein per serving while keeping the sugar really low, thanks to the protein powder and sugar-free mix-ins. It truly feels like a high-calorie dessert, but it fits right into a healthy eating plan. If you want to see more of our content, check out our Medium page.
Keep in mind that these numbers are estimates based on the standard ingredients listed above. If you swap out Fairlife milk for regular milk, or use real sugar instead of monk fruit, those macros will definitely change, so always adjust your tracking based on the specific brands you use!
Estimated Nutrition for Moose Tracks Protein Ice Cream
| Nutrient | Per Serving (Approx. ½ Pint) |
|---|---|
| Calories | 235 |
| Protein | 20 g |
| Total Fat | 8 g |
| Carbohydrates | 19 g |
Sharing Your Thoughts on This Moose Tracks Protein Ice Cream
I hope you are as obsessed with this recipe as I am! It’s taken me weeks to nail down the perfect liquid-to-powder ratio for this high-protein base. Seriously, let me know what you think! Drop a comment below and tell me if you tried the pudding mix trick or if you went straight for the xanthan gum. And please, if you love it, give it a five-star rating so others can find this amazing, guilt-free dessert! You can also find us on Facebook.
Tips for Success with Your Moose Tracks Protein Ice Cream
I learned these tricks the hard way, so you don’t have to! The biggest mistake people make with protein ice cream in the Creami is thinking they can skip the freezing time or not using enough liquid when re-spinning. If you want that scoopable, dreamy texture, you have to respect the machine’s requirements. Always use quality protein powder; cheap stuff tends to freeze rock hard or stay powdery, no matter what you do.
Another thing I always do is make sure the pint is completely level when it goes into the freezer. If one side is lower than the other, that side freezes harder, and you end up with an uneven churn. It sounds fussy, but trust me, a level base means a perfect, creamy result every single time, especially since we are dealing with sugar-free ingredients that freeze differently than traditional ice cream.
Troubleshooting Texture Issues in Your Moose Tracks Protein Ice Cream
If your first churn results in something that looks like a crumbly blizzard, don’t throw it out! That’s exactly what the Re-spin function is for. Add just one tablespoon of milk—and I mean *just* one—and run it again. If it’s still too hard or icy after the second spin, add another tablespoon and spin again. It might take two or three spins to get it perfect, but don’t add too much liquid, or you’ll end up with soup!
If you freeze the final mixed product for too long (say, a few days), it might get rock solid. No problem! Just let it sit on the counter for about 10 minutes before trying to spin it again, or use the ‘Defrost’ setting if your machine has one, followed by a Re-spin.
Ingredient Notes and Smart Substitutions for Moose Tracks Protein Ice Cream
We are aiming for low sugar here, so we need to be smart about our swaps. When it comes to the protein powder, I prefer vanilla whey/casein blends because they offer the best texture, but isolate powders work too—just be aware you might need an extra splash of milk during the re-spin because isolates absorb more liquid.
For the sweetener, if you hate monk fruit, erythritol works great, or even stevia drops if you’re careful not to overdo it. My biggest non-negotiable is the sugar-free pudding mix; it acts like a stabilizer that keeps the ice cream from turning into a block of ice. If you absolutely can’t find it, use a quarter teaspoon of xanthan gum instead, but use that sparingly—it thickens fast!
Serving Suggestions for Your Homemade Moose Tracks Protein Ice Cream
The best time to eat this is right after that final Mix-in cycle. It comes out perfectly soft and ready to eat, like premium soft-serve ice cream from a shop. You can eat it right away and enjoy those gooey, warm chocolate swirls mixing with the cold peanut butter cups. It is heavenly!
However, if you prefer a firmer, more traditional scoopable ice cream texture, just pop the lid back on and place the pint in the freezer for about 15 to 20 minutes before digging in. Don’t forget to give it a quick stir after those 20 minutes if you freeze it longer than that, just to break up any hard edges!
Storing and Keeping Your Moose Tracks Protein Ice Cream Fresh
Since this recipe uses high-protein milk and no commercial stabilizers, it’s best enjoyed within the first week, though honestly, it rarely lasts that long in my house! Always keep leftovers in the Creami pint with the lid sealed tight. If you leave it in the freezer for several days and it gets too hard to spin, don’t worry about re-spinning it right away.
If you want to eat it straight from the freezer without using the machine again, just pull it out about 15 minutes before you plan to serve it, and let it soften on the counter. That’s usually enough time for it to become perfectly dippable with a spoon.
Table: Storage Guidelines for Moose Tracks Protein Ice Cream
| Storage Time | Method |
|---|---|
| 1-3 Days | Store in the sealed Creami pint in the freezer. Ready to eat after 5 minutes on the counter. |
| 4-7 Days | Store tightly sealed. May require a 1-minute Re-spin cycle to regain optimal texture. |
Understanding the Profile of Moose Tracks Protein Ice Cream
The best part about making your own Moose Tracks protein ice cream is knowing exactly what you’re putting into your body. We’ve managed to pack in a solid 20 grams of protein per serving while keeping the sugar really low, thanks to the protein powder and sugar-free mix-ins. It truly feels like a high-calorie dessert, but it fits right into a healthy eating plan. If you are looking for other low-calorie sweet treats, check out our recipe for chocolate greek yogurt.
Keep in mind that these numbers are estimates based on the standard ingredients listed above. If you swap out Fairlife milk for regular milk, or use real sugar instead of monk fruit, those macros will definitely change, so always adjust your tracking based on the specific brands you use!
Estimated Nutrition for Moose Tracks Protein Ice Cream
| Nutrient | Per Serving (Approx. ½ Pint) |
|---|---|
| Calories | 235 |
| Protein | 20 g |
| Total Fat | 8 g |
| Carbohydrates | 19 g |
Sharing Your Thoughts on This Moose Tracks Protein Ice Cream
I hope you are as obsessed with this recipe as I am! It’s taken me weeks to nail down the perfect liquid-to-powder ratio for this high-protein base. Seriously, let me know what you think! Drop a comment below and tell me if you tried the pudding mix trick or if you went straight for the xanthan gum. And please, if you love it, give it a five-star rating so others can find this amazing, guilt-free dessert!
Print
Moose Tracks protein ice cream: 1 foolproof trick
- Total Time: 24 hours 5 minutes
- Yield: 1 pint (about 2 servings)
- Diet: Low Calorie
Description
This creamy Moose Tracks protein ice cream made in the Ninja Creami combines rich fudge and peanut butter cups for a high-protein, low-sugar treat. It offers the classic indulgent flavor with a nutritious profile.
Ingredients
- 1 cup Fairlife skim milk or high-protein milk
- ¾ cup unsweetened almond milk
- 1 scoop vanilla protein powder
- 1 tablespoon sugar-free vanilla pudding mix or ¼ teaspoon xanthan gum
- 1 tablespoon maple syrup or monk fruit sweetener
- Pinch of salt
- 2 tablespoons dark chocolate chips
- 3 tablespoons mini peanut butter cups, chopped
Instructions
- In a Ninja Creami pint container, whisk together Fairlife milk, almond milk, protein powder, pudding mix, maple syrup, and salt until smooth. Fill to the max line if needed.
- Freeze the pint container for 24 hours, making sure the surface is level before freezing.
- When ready to churn, remove the pint from the freezer and let sit at room temperature for 1 minute.
- Install the pint into the Ninja Creami and run the Lite Ice Cream cycle.
- If the mixture is powdery, add 1 tablespoon milk and use the Re-spin setting until smooth and creamy.
- Melt the chocolate chips in a microwave-safe bowl in 30-second bursts, stirring between each, until smooth and glossy.
- Make a small well in the center of the ice cream, pour in the melted chocolate, and add the chopped peanut butter cups.
- Use the Mix-in function to swirl everything together.
- Serve immediately for soft-serve texture or freeze 15–20 minutes for a firmer scoop.
Notes
- Freeze the base mixture for a full 24 hours before processing.
- Use the Re-spin setting if the initial churning results in a powdery texture.
- Let the pint sit for 1 minute before placing it in the machine.
- Prep Time: 5 minutes
- Cook Time: 0 minutes
- Category: Dessert
- Method: Ninja Creami
- Cuisine: American