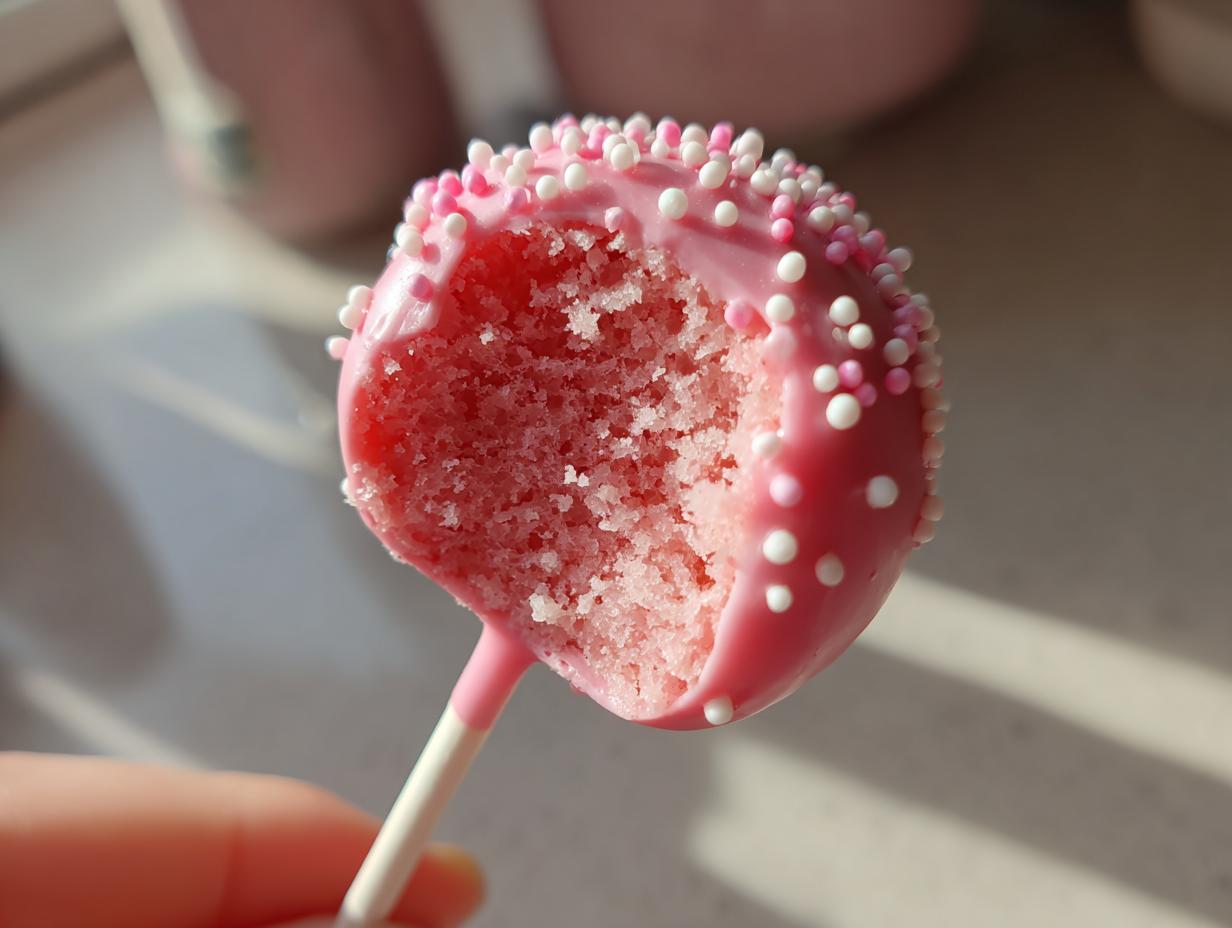
Oh my gosh, you absolutely HAVE to try making these copycat Starbucks cake pops at home! Seriously, these bite-sized treats look fancy, but they are shockingly easy—perfect for when you want that cute dessert without spending a fortune at the coffee shop. I remember when I first tried making them; I thought dipping them would be a nightmare, but this recipe is so foolproof, even my ten-year-old can handle the crumbling part.
The magic here is taking a simple box of vanilla cake mix and turning it into this dense, fudgy little delight. Forget those dry, crumbly versions you might have tried before! These copycat Starbucks cake pops end up perfectly moist because we use just the right amount of frosting to bind everything. If you’ve ever felt intimidated by candy melts, don’t worry; I’m going to show you my secret little trick to get that smooth, flawless pink shell every single time. Trust me, once you see how simple it is, you’ll never buy them again!

Essential Ingredients for Your Starbucks Cake Pops
Okay, let’s talk supplies! Just like Grandma always said, the quality of your raw materials really makes or breaks the final product, even when you’re keeping things budget-friendly with a box mix. Getting these exact items ready first is half the battle won for making amazing copycat Starbucks cake pops.
We’re keeping the cake super simple, which is why this recipe is so fast. But the binding agent and the coating? Those are where we need to be precise to get that signature texture and shell.
Cake Base Components
For the actual cake part, we are relying on speed and simplicity. You’ll need one standard box of vanilla cake mix—yes, the boxed kind works perfectly here! The package directions usually call for water, oil, and eggs, so follow that for the wet ingredients too. Specifically, we use the three large eggs, half a cup of vegetable oil, and one full cup of water. Mix it up according to the box, bake it off, and then, most importantly, let it cool completely! Don’t rush this part, or it turns into a sticky, sad mess later.
Binding and Coating Ingredients for Starbucks Cake Pops
Once the cake is cool, we need the binder. You’ll need about a third of a cup of vanilla frosting—not cream cheese frosting, just regular yummy vanilla! We add this bit by bit until it feels like playdough. For the coating, this is crucial: grab 12 ounces of pink or white candy melts. I prefer the white ones because I can color them myself, but either works great for our Starbucks cake pops goal. And here’s the big secret for dipping: one tablespoon of coconut oil. This oil thins the melts just enough so you get a thin, smooth coat instead of a thick, bumpy shell that cracks when you try to eat it. Don’t forget your lollipop sticks and some white sprinkles for decoration!
Equipment Needed for Success
Having the right tools ready before you start crumbling that cake saves so much headache! You’ll need that 9×13-inch baking pan, of course, plus a couple of sturdy mixing bowls—one for the cake crumbs and one for melting your coating. Parchment paper is a must for lining your sheet pan later! And finally, grab a block of styrofoam or a dedicated cake pop stand. Seriously, don’t skip the styrofoam!
Why Equipment Matters for Your Starbucks Cake Pops
The right gear stops disaster! If your pan isn’t greased well, the cake sticks, and you lose half your volume trying to scrape it out. But the most important tool is that styrofoam block. If you try to lay the dipped pops on a flat surface, the coating will puddle up on the bottom, making them look messy and uneven. Standing them up lets that excess coating drip off cleanly before it sets hard.

Step-by-Step Instructions for Delicious Starbucks Cake Pops
Alright, now for the fun part! Follow these steps exactly, and you’ll have a tray full of beautiful, professional-looking copycat Starbucks cake pops ready to go. I always put on some good music before I start this part because it’s very hands-on!
Baking and Crumb Preparation
First things first, crank that oven up to 350 degrees Fahrenheit. Get your 9×13-inch pan greased up really well. Now, mix up that vanilla cake according to the box instructions using your eggs, oil, and water. Don’t overmix it while you’re combining; we want it light! Bake it for about 28 to 32 minutes. You’ll know it’s done when a toothpick stuck right in the center comes out totally clean—no wet batter allowed!
This next part is non-negotiable: you have to let that cake cool down completely. I usually bake it in the morning and leave it alone until after lunch. Once it’s cool, take a big bowl and just start crumbling it. You want it as fine as sand, really. Get rid of any big chunks, or they’ll make your finished balls lumpy.
Forming and Chilling the Cake Balls
This is where the magic binding happens! Take your vanilla frosting—start with about a third of a cup—and begin working it into those cake crumbs with your hands. Yes, your hands! You need to feel the texture. Keep mixing and squeezing until it forms a dough that holds together perfectly when you squeeze a piece, but it shouldn’t feel sticky or wet at all. If it’s too dry, add frosting a tiny bit at a time. If it’s too sticky, add a few more dry crumbs.
Once you have the right dough, scoop out portions and roll them into balls about an inch and a half wide. Try to make them all the same size so they look uniform! Line a baking sheet with parchment paper and place all your little balls on it. Pop that entire sheet into the freezer for a solid 20 to 30 minutes. This hard freeze is essential!
Dipping Technique for Perfect Starbucks Cake Pops
While they are freezing, melt your candy melts. Put the 12 ounces of candy melts and your tablespoon of coconut oil into a microwave-safe bowl. Heat it in 30-second bursts, stirring well after every single burst. You want it silky smooth, not scorching hot. That coconut oil makes all the difference for a thin dip!
Take the frozen balls out. Dip the tip of a lollipop stick about half an inch into the melted candy first, then gently push that coated stick about halfway into a frozen cake ball. This acts as glue! Put them back in the freezer for another 10 minutes so the sticks are locked in place. Now, take a ball, dip it straight down into the melted coating, making sure it’s fully submerged. Pull it out slowly, and then gently tap the stick against the side of the bowl to let the excess coating drip away. Quickly add your sprinkles before it sets, and stand the whole thing up in your styrofoam block to dry. Ta-da! Perfect Starbucks cake pops!
Tips for Making the Best Starbucks Cake Pops
You’ve baked, you’ve rolled, and now you’re ready to dip! Even with the best recipe, sometimes the coating fights back. Don’t get frustrated if your first few attempts look a little messy. That’s why we have these little tricks up our sleeve to ensure your homemade Starbucks cake pops look professionally dipped every time.
Troubleshooting Coating Consistency
The number one problem people have is that the coating is too thick. If you pull your cake pop out and the coating looks gloppy or immediately starts cracking as it dries, it’s too thick! That’s when you go back to that secret ingredient: the coconut oil. Add just another half teaspoon of oil, stir it really well, and test it again. You want it thin enough to run off the pop easily when you tap it, but thick enough to coat completely in one dip. Don’t add too much oil, or the coating won’t set properly!
Ensuring Cake Balls Stay Together
If your cake ball falls apart the second you push the stick in, you probably didn’t cool the cake long enough, or you didn’t use enough frosting binder. Remember, the cake needs to be room temperature or colder! If it’s even slightly warm, the frosting melts right away, and you lose that doughy structure we worked so hard to create. The freezing steps are not optional, either. That first freeze firms up the ball, and the second freeze locks the stick in place—it’s the best insurance against disaster for your beautiful Starbucks cake pops.
Storage and Handling of Homemade Starbucks Cake Pops
Once you’ve managed the dipping magic, you need to know how to keep these beauties fresh! Since these copycat Starbucks cake pops don’t have any fresh cream or dairy in the coating, they are actually pretty sturdy. How long they last depends entirely on where you keep them. If you’re planning a party for the next day, you can leave them out, but for longer storage, the fridge is your friend.
The key is using a very airtight container. If air gets to them, the cake inside can get a little stale, or the coating might start to sweat, especially if you move them from cold to warm.
How Long Do Starbucks Cake Pops Last?
For the absolute best texture and flavor, I recommend keeping them at room temperature in an airtight container for up to three days. The cake stays softest this way. If you need them to last longer, you can move them to the refrigerator. They should be good for up to five days in the fridge, but make sure they are in a sealed container so they don’t absorb any funny smells! If you chill them, remember to let them sit on the counter for about 20 minutes before serving so the coating isn’t rock hard.
Frequently Asked Questions About Starbucks Cake Pops
I get so many messages asking about tweaks and troubleshooting after people try this recipe for the first time! It’s totally normal to have questions when dealing with melting chocolate and cake crumbs. Here are a few things I hear most often about making these fantastic copycat Starbucks cake pops.
Can I Use Different Flavors for These Starbucks Cake Pops?
Absolutely! While the vanilla cake mix is the easiest route and gives you that classic look, you can swap it out. If you want a chocolate version, just use a box of chocolate cake mix instead of vanilla. You’ll still use the same amount of frosting binder and the same coating. If you use a darker cake, I sometimes switch to using white candy melts instead of pink so the color contrast looks nice. Just remember, whatever flavor cake you choose, make sure it’s 100% cooled before you crumble it!
What is the Best Way to Keep Cake Pops from Falling Off the Stick?
This is the trickiest part for beginners, but it’s all about creating a good anchor! You can’t just push the plain stick into the cold cake ball; it’ll wiggle loose once the coating sets. The absolute best way to keep your Starbucks cake pops secure is to dip the very tip of the lollipop stick—maybe half an inch—into the melted candy coating *before* you insert it into the cake ball. Then, freeze them for that second 10-minute chill session. That melted candy acts like superglue, locking the stick firmly in place so your cake ball doesn’t take an unexpected dive into the bowl!
Understanding the Estimated Nutritional Profile
While these copycat Starbucks cake pops are definitely a treat and not an everyday health food, it’s smart to have a general idea of what you’re enjoying! Since we are using a box mix and candy melts, the exact numbers can vary a little depending on the brand of melts you buy. But based on the recipe amounts, here is a good estimate for one single, glorious cake pop. I always tell people to look at the fat and sugar content and just enjoy it as a special indulgence!
Nutritional Estimate Table
Here is a quick breakdown of the estimated nutrition facts for one serving (one cake pop):
| Component | Estimate Per Cake Pop |
|---|---|
| Serving Size | 1 cake pop |
| Calories | 240 |
| Fat | 11 g |
| Carbohydrates | 34 g |
| Protein | 2 g |
Share Your Homemade Starbucks Cake Pops Creation
I truly hope you loved making these copycat Starbucks cake pops as much as I love sharing them with you! Once they are all set and looking gorgeous, please come back down below and leave me a comment telling me how they turned out. Did you try pink or white coating? I’d love to see pictures of your beautiful creations, so don’t be shy about sharing your success! Follow us on Facebook for more fun updates!
Print
Super Simple 240 Calorie Starbucks Cake Pops
- Total Time: 1 hour 35 minutes
- Yield: 15–18 cake pops
- Diet: N/A
Description
Make these easy copycat Starbucks cake pops at home! Soft vanilla cake, creamy frosting, and a pink candy coating for a fun, budget-friendly treat. These bite-sized desserts are perfect for parties or an afternoon snack.
Ingredients
- 1 box vanilla cake mix
- 3 large eggs
- ½ cup vegetable oil
- 1 cup water
- ⅓ cup vanilla frosting
- 12 ounces pink or white candy melts
- 1 tablespoon coconut oil (for thinning the coating)
- White sprinkles for decoration
- 15–18 lollipop sticks
Instructions
- Preheat your oven to 350°F. Grease a 9×13-inch baking pan.
- Prepare the cake mix following package directions using the eggs, oil, and water. Bake for 28–32 minutes or until a toothpick inserted in the center comes out clean.
- Allow the cake to cool completely. Crumble the cooled cake finely into a large mixing bowl.
- Add the vanilla frosting 1 tablespoon at a time. Mix with your hands until the texture forms a dough that holds its shape but is not sticky.
- Scoop and roll the mixture into 1½-inch balls. Place these balls on a parchment-lined baking sheet. Freeze them for 20–30 minutes until firm.
- Melt the candy melts with coconut oil in a microwave-safe bowl using 30-second intervals. Stir until the coating is smooth.
- Dip one end of a lollipop stick into the melted candy. Insert this stick halfway into a cake ball. Repeat this process for all cake balls. Freeze again for 10 minutes to secure the sticks.
- Dip each cake pop into the melted coating, rotating it to coat completely. Gently tap off any excess coating.
- Add sprinkles to the coating before it sets. Place the cake pops upright in a styrofoam block to harden.
- Once the coating is set, store the cake pops in an airtight container at room temperature for up to 3 days or refrigerate them for up to 5 days.
Notes
- Use your hands to mix the cake crumbles and frosting for the best texture.
- Freezing the balls before dipping prevents them from falling apart.
- Coconut oil helps the candy coating achieve a smoother dipping consistency.
- Prep Time: 1 hour
- Cook Time: 35 minutes
- Category: Dessert
- Method: Baking and Dipping
- Cuisine: American