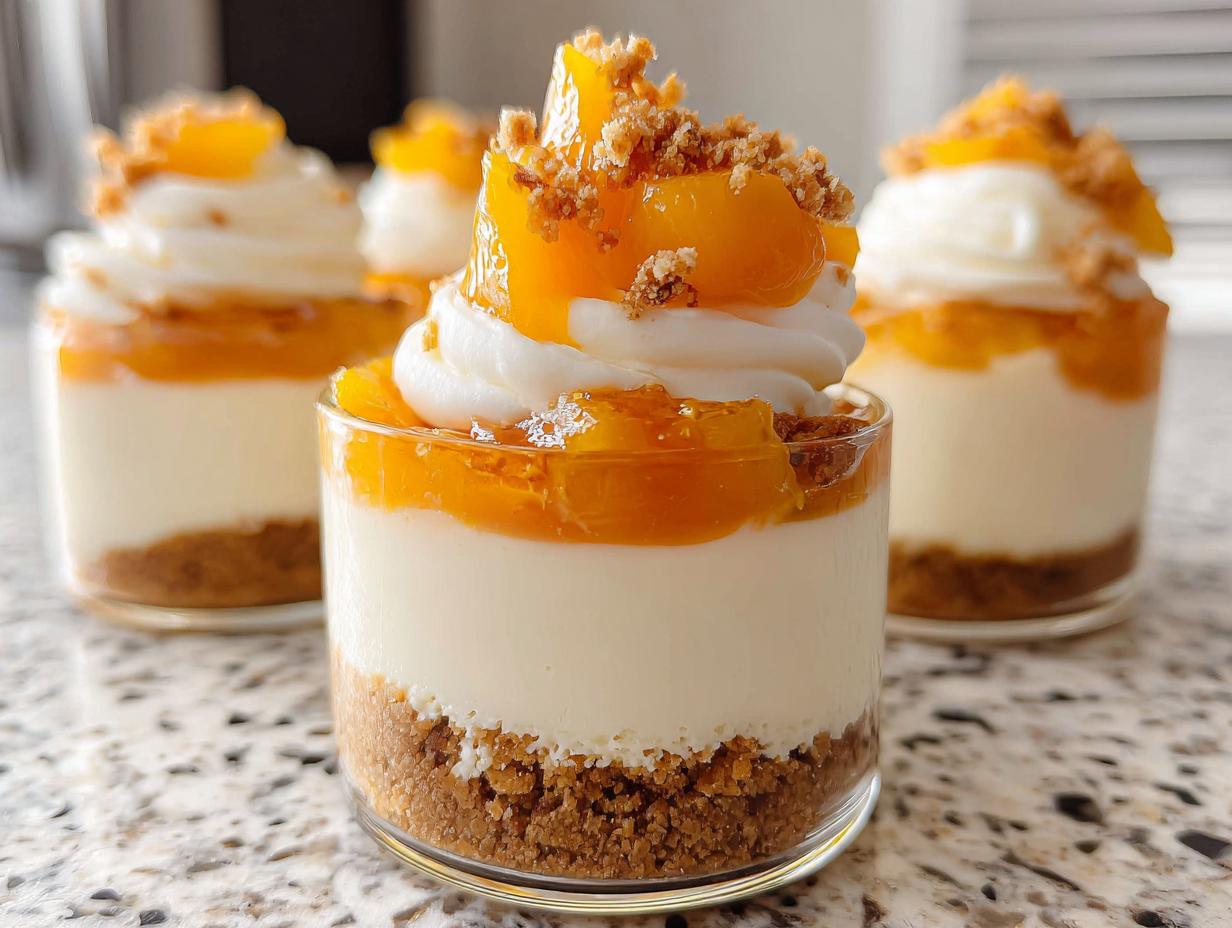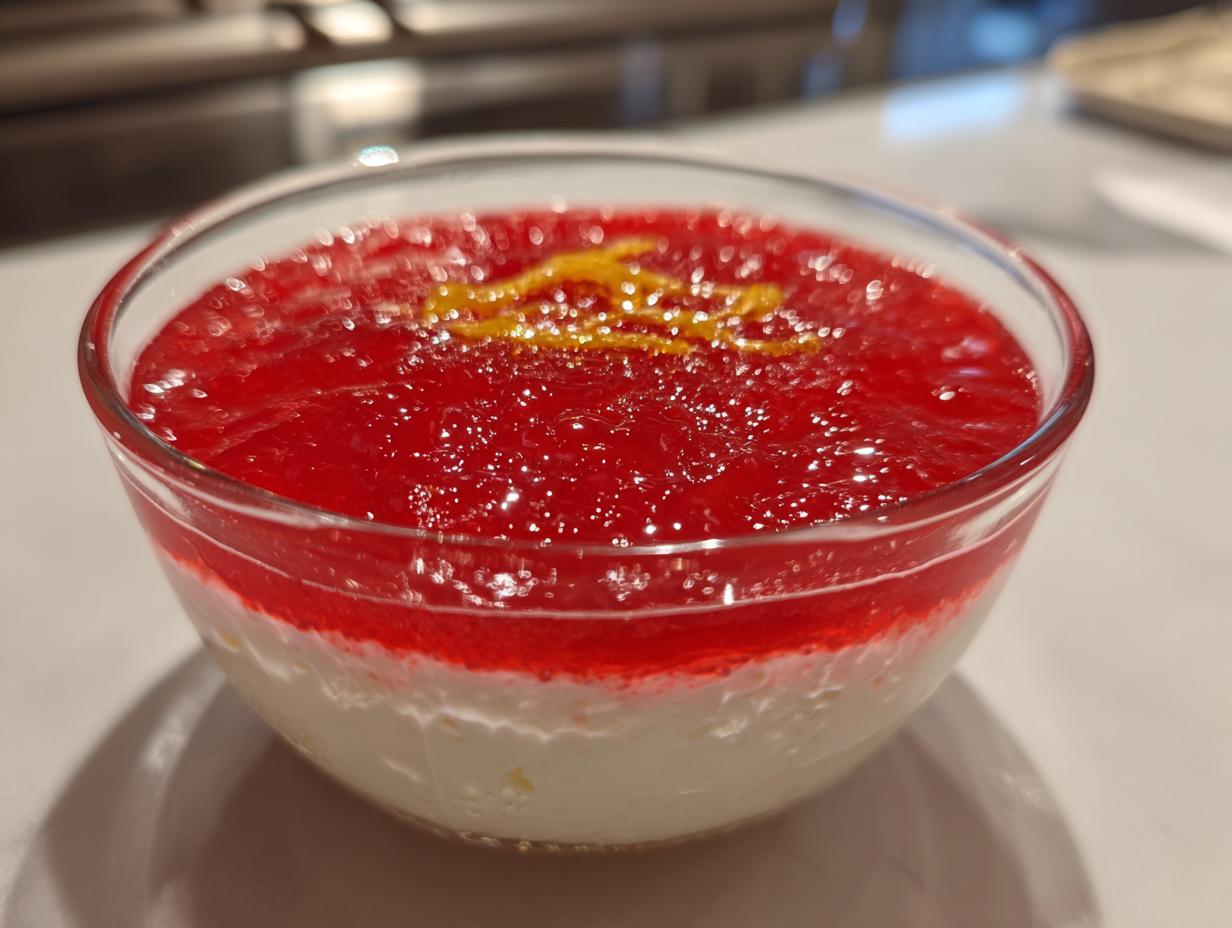
Listen, I know what you might be thinking. Gelatin recipes? They sound fussy, right? Like something your aunt made in the 1960s that wobbled suspiciously. I used to think that too! But let me tell you, this yogurt jello fluff completely changed my mind. It’s unbelievably light, it bursts with fruity flavor, and it packs a serious protein punch because we’re using that glorious Greek yogurt.
This dessert comes together in practically no time—seriously, it’s faster than making a bowl of cereal sometimes! It’s my go-to when I need something sweet but don’t want to turn on the oven, especially when I’m trying to keep my snacks high in protein. Trust me on this one; once you see how simple it is to get that dreamy texture, you’ll be hooked.

Gather Your Simple Ingredients for Yogurt Jello Fluff
I always keep a few packets of sugar-free gelatin tucked away in my pantry for emergency dessert situations. That’s what I call this recipe—an emergency dessert solution! The beauty of this whole operation is how few things you actually need. You probably have most of this stuff already sitting in your fridge or cupboard. There’s no scrambling for specialty items, which is exactly how I like my weeknight treats to go.
We aren’t making anything complicated here. We’re using boiling water to bloom the gelatin, which is the key to getting that smooth, non-grainy result. Then we chill it down fast so we can mix in the yogurt without melting it into soup. It’s quick chemistry, folks! Don’t stress if you’re new to no-bake recipes; this one is foolproof because the ingredients do most of the heavy lifting.
Essential Components for Perfect Yogurt Jello Fluff
Here is exactly what you need to grab before you start your ten-minute prep time. I like to measure everything out first, just like a real baker. It makes the mixing process so much smoother when everything is ready to go!
The list is small, but every item plays a critical role in getting that perfect creamy, light texture:
- Plain Greek yogurt—this is the powerhouse that gives us the body and the protein.
- One package of sugar-free gelatin mix—I used cherry this time, but feel free to experiment!
- One cup of boiling water—you need that heat to properly dissolve the powder.
- Half a cup of cold water—this helps bring the temperature down quickly.
- Half a cup of ice cubes—the fast chiller!
- One tablespoon of honey—just a touch for sweetness since we used the sugar-free gelatin.
To make it super clear, I put it all into a little chart. See? Easy peasy! If you want to see more of my quick recipes, check out my posts on Medium.
| Ingredient | Amount | Purpose |
|---|---|---|
| Plain Greek Yogurt | 1 cup | Creaminess and Protein |
| Sugar-Free Gelatin | 1 package | Flavor and Structure |
| Boiling Water | 1 cup | Dissolving Gelatin |
| Cold Water | ½ cup | Cooling Agent |
| Ice Cubes | ½ cup | Rapid Temperature Drop |
| Honey | 1 tablespoon | Light Sweetness |
Why You Will Love This Yogurt Jello Fluff
Seriously, this recipe is a winner for anyone who needs a quick fix. I’ve made this when I was starving and needed something healthy *right now*. It’s the ultimate low-effort, high-reward dessert. You just mix, chill, and enjoy!
It’s hard to beat the combination of convenience and nutrition packed into these little bowls. When you’re looking for a satisfying treat that won’t derail your goals, this is the answer. Here’s the quick rundown on why it landed in my permanent rotation:
- It’s super fast to prep—we are talking less than 15 minutes from start to finish before it heads to the fridge.
- It’s a fantastic source of protein thanks to that Greek yogurt base. Hello, guilt-free snacking!
- Absolutely no baking required, which means no heating up the kitchen during the summer months.
- The texture is just divine—light, airy, and perfectly set without being rubbery.
Step-by-Step Instructions for Yogurt Jello Fluff
Okay, this is where the magic happens, but don’t panic—it’s all about timing! If you rush the cooling process, your yogurt will melt into the hot gelatin, and we won’t get that wonderful fluff. We need to treat the gelatin mixture gently so it can properly form the structure for our creamy dessert.
The whole process is broken down into two main phases: creating the liquid base and then incorporating the thick, cooling yogurt. Follow these steps closely, and you’ll have four perfect servings ready for the fridge!
Preparing the Gelatin Base for Your Yogurt Jello Fluff
First things first: get your water boiling. You need a full cup of water actively boiling. Once it’s ready, take it off the heat immediately. We don’t want to cook the gelatin, just dissolve it! Pour that boiling water into a medium bowl and sprinkle in your entire package of sugar-free gelatin mix. Start whisking right away. You have to whisk until that powder is completely gone. If you see any little grains sticking to the bottom, keep stirring! That gritty texture ruins the smooth mouthfeel we are aiming for.
Once it’s perfectly clear, time to cool it down fast. Add in your half-cup of cold tap water. Then, toss in your half-cup of ice cubes. Keep stirring gently until all the ice has melted completely. This is crucial! If you skip this step and add the yogurt while it’s still hot, you’ll end up with thin, runny yogurt jello, not fluff. Once the ice is gone, scoop out any leftover ice chunks and discard them. The mixture should now be cool to the touch, maybe slightly syrupy—that’s perfect.
Mixing and Setting the Final Yogurt Jello Fluff
Now for the creamy part! Grab your Greek yogurt and your honey. Add both of those right into your cooled gelatin mixture. Now, you need to whisk this vigorously! I mean it—whisk until everything is completely incorporated and smooth. You want zero streaks of yogurt remaining. It should look like a pale pink, slightly thicker liquid. This is the moment where you are building the structure for your high protein snack.
Pour this beautiful mixture evenly into your four serving bowls or whatever little dish you decided on. Don’t worry about making it look pretty yet; that comes later. Now, they need a good long rest. Cover them loosely with plastic wrap—don’t let the wrap touch the surface, or it will create weird bumps. Slide them into the refrigerator. They need a minimum of two hours, but I always aim for closer to three hours just to be safe. Patience pays off here!
Pro Tips for Achieving the Fluffiest Yogurt Jello Fluff
I learned this trick the hard way: when you pull the yogurt jello fluff out of the fridge right before serving, it might look a little too firm or dense, depending on how cold your fridge runs. Here’s my secret weapon for that perfect airy texture: give it one final, gentle stir right before you hand it out! Don’t beat it like you did before, just use a spoon to gently break up the structure a couple of times. This reintroduces little air bubbles that settle during chilling, making it instantly fluffier and lighter on the tongue. It’s the difference between good and absolutely perfect!

Equipment Needed for Your Yogurt Jello Fluff
You don’t need any fancy gadgets for this recipe, which is why I love pulling it out on busy evenings. If you have basic pots and bowls, you are already set! Forget about mixers or electric whisks; your arm strength is all we require here.
Make sure you have these few simple items ready to go:
- A small saucepan to boil your water.
- A medium mixing bowl—this is where the gelatin will dissolve and cool down.
- A sturdy whisk. You’ll use this a lot, especially when adding the yogurt!
- Your serving dishes, whether they are small ramekins or just a small glass dish.
That’s it! See how simple that is? No electric mixers means less cleanup later, which is always a win in my book. For more easy dessert ideas, follow me on Pinterest.
Ingredient Notes and Flavor Swaps for Yogurt Jello Fluff
Let’s talk about the yogurt choice because it’s not just random! We absolutely must use Greek yogurt here. Why? Because regular yogurt is too thin; it doesn’t have the body to hold up when mixed with the liquid gelatin. Greek yogurt gives us that thick, creamy texture we need right away, and of course, it’s what gives this snack its fantastic protein boost. Don’t try to substitute it with a thinner yogurt unless you want a runny mess!
As for the star of the show—the flavor—you are totally free to switch things up! I used cherry because I love that classic tartness, but feel free to use any sugar-free gelatin flavor you find. Strawberry, lime, or even grape would be amazing. Just remember, since we are sticking to the original formula for the best texture, keep the gelatin sugar-free. If you use the regular, sweetened kind, you’ll need to skip the honey entirely, and it might change how firmly the fluff sets up.
Also, if you happen to run out of honey, a tiny drizzle of maple syrup works in a pinch, but keep it minimal. We want sweet, but we want light!
Frequently Asked Questions About Yogurt Jello Fluff
I get so many questions about this simple recipe because people are always amazed at how easy it is to make a high protein dessert that tastes this good. Here are the things I hear most often when people are making their first batch of this creamy dessert.
How long does the Yogurt Jello Fluff take to set?
The recipe calls for chilling for at least two to three hours. I always tell people to set their timer for three hours, just to be safe. The time it takes to set really depends on how cold your refrigerator is! If your kitchen is warm, say, you just baked a big batch of cookies, the gelatin will take longer to firm up because the base mixture won’t chill down as fast. If it still seems a little jiggly after three hours, just give it another 30 minutes. It needs to be firm before you fluff it up!
Can I use regular gelatin instead of sugar-free in this Yogurt Jello Fluff?
You absolutely *can* use the regular, sweetened gelatin package, but you need to make a small adjustment. Since the regular kind has quite a bit of sugar already, you should skip adding the tablespoon of honey completely. Also, be aware that the texture might be slightly different. The sugar-free version seems to set just a touch lighter, leaning more toward that “fluff” texture we love. The regular kind might end up slightly denser, almost like a firm pudding, but it will still taste delicious as a fruity treat!
Storing Leftover Yogurt Jello Fluff
It’s rare that I have leftovers because my family devours this creamy dessert so fast, but if you manage to save some of this high protein snack, storage is super easy. You want to keep it covered tightly in the refrigerator. Because it has yogurt in it, it doesn’t last as long as plain Jello. I find that it’s best eaten within two days for the absolute freshest flavor and texture.
If you pull it out after it’s been chilling for a full day, it might look a little compacted. Don’t worry! Remember that final gentle stir I told you about? Do that again right before serving leftovers. That little bit of agitation will bring back the airy texture you love, making it taste almost freshly made. It doesn’t need reheating at all; it should be served cold! You can also find us on Facebook for more updates.
| Storage Method | Duration | Notes |
|---|---|---|
| Airtight Container (Fridge) | Up to 2 Days | Best texture within 24 hours. |
| Covered Serving Dish | Up to 1 Day | Stir gently before serving if texture seems dense. |
Share Your Success Making Yogurt Jello Fluff
I really hope you enjoyed making this incredibly simple yogurt jello fluff. It’s one of those recipes that just makes you feel good about what you’re eating, knowing it’s light, fruity, and packed with protein without all the fuss.
Did you try it with lime gelatin? Or maybe you stuck with cherry? I want to hear all about it! Please leave a rating below and let me know in the comments how it turned out for you. Happy fluff-making!
Print
Amazing Yogurt Jello Fluff in 4 Steps
- Total Time: 3 hours 15 minutes
- Yield: 4 servings
- Diet: Low Fat
Description
Make this creamy yogurt jello fluff in minutes for a light, fruity treat packed with protein. This no-bake dessert sets in the fridge, making it an ideal snack for busy days.
Ingredients
- 1 cup plain Greek yogurt
- 1 package sugar-free cherry gelatin mix
- 1 cup boiling water
- ½ cup cold water
- ½ cup ice cubes
- 1 tablespoon honey
Instructions
- Boil 1 cup water in a small saucepan.
- Remove water from heat and stir in gelatin mix until fully dissolved.
- Add cold water and ice cubes, stirring until ice melts and mixture cools.
- Discard any unmelted ice.
- Whisk in Greek yogurt and honey until smooth.
- Pour mixture into serving bowls or a dish.
- Refrigerate 2 to 3 hours until firm.
- Stir gently before serving for fluffier texture.
Notes
- This recipe uses sugar-free gelatin for lower sugar content.
- Use any flavor of gelatin you prefer.
- Greek yogurt provides the creamy texture and protein boost.
- Prep Time: 10 minutes
- Cook Time: 5 minutes
- Category: Dessert
- Method: No Bake
- Cuisine: American