Oh my goodness, stop what you are doing right now because I have found the absolute pinnacle of celebration baking! If you think making an elegant, multi-layered cake is too scary, you have to trust me on this white chocolate raspberry cake. It looks like it belongs in a fancy patisserie window, but honestly, it’s surprisingly straightforward and beginner-friendly.
I spent ages perfecting this recipe so that you get that incredible moist vanilla crumb, pockets of rich white chocolate, and that bright, tangy raspberry layer. That combination is just heavenly, I promise! We achieve that real ‘wow’ factor through quality ingredients and clear steps, which is what matters most for baking success—that’s my commitment to you here.
The fluffy whipped cream frosting seals the deal, making it light and perfect for spring parties or just because it’s Tuesday. Seriously, this cake is a showstopper, and you’re going to feel like a baking hero when you pull it off!

Essential Components for Your White Chocolate Raspberry Cake
Look, every great cake starts in the pantry, right? For this stunning white chocolate raspberry cake, we can’t just toss things in willy-nilly. My goal here is to give you a cake that tastes like it took three days, even though it won’t! That means we respect the ingredients. Using high-quality components—especially the white chocolate and the fruit—is my biggest secret to delivering on that rich flavor profile you expect from a celebration dessert.
I’ve broken down exactly what you need below. Pay close attention to the required states for a few items; that’s where people usually trip up, but not you! You’re going to nail this because you’re prepared.
Gathering Ingredients for the White Chocolate Raspberry Cake
Before you even think about preheating the oven, get everything measured and ready to go. This is called mise en place, but I just call it “not scrambling halfway through mixing.” I need you to be super specific when you pull these items out. For example, we aren’t using just any butter; we need it softened to the perfect point so it creams up beautifully later. And those eggs? They must be large!
The white chocolate is crucial. You need to melt it down first, but listen closely: it has to cool off before it hits the batter, or you’ll end up with scrambled eggs in your cake. Trust me on that one; I learned the hard way.
Cake Batter Ingredients
Make sure you have all-purpose flour, baking powder, baking soda, and salt measured precisely. Then, grab that unsalted butter—it absolutely must be softened—and your granulated sugar. We need four large eggs, a splash of vanilla extract, whole milk, and sour cream for tang. Finally, the star: 6 ounces of white chocolate, which must be melted and cooled down before use.
Tangy Raspberry Filling Components
For the filling, we are keeping it bright! You’ll need about a cup and a half of fresh raspberries—no frozen ones allowed here for the mashing step—and half a cup of good quality raspberry jam to bind it all together. The jam adds sweetness and stability.
Fluffy Whipped Cream Frosting Needs
For the frosting, you need heavy whipping cream—the cold kind!—two tablespoons of powdered sugar for just a touch of sweetness, and one teaspoon of vanilla extract. That’s it! Simple, light, and it holds its shape perfectly.
Equipment Needed for This White Chocolate Raspberry Cake
You don’t need a professional kitchen setup for this, thankfully! We are keeping the tools list simple so you can focus on the batter. Grab your standard mixing bowls—a big one for the mixer and a couple of smaller ones for separating things out. You absolutely need two 9-inch round cake pans, properly greased, of course. Also, make sure you have whisks, spatulas, and measuring cups ready to go.
The electric mixer (stand or hand-held) is a must for getting that butter fluffy, which is key for a great white chocolate raspberry cake. And finally, grab a wire rack so those layers can breathe once they come out of the oven. That’s really all you need!
Step-by-Step Preparation of the White Chocolate Raspberry Cake
Okay, deep breath! This is where the magic happens, and trust me, if you follow these steps, you are going to end up with the most gorgeous white chocolate raspberry cake imaginable. We break this down into four manageable chunks so nothing gets overwhelming. Get your station ready, because once you start mixing, things move pretty fast!
Preparing the Cake Layers
First things first: get that oven preheating up to 350 degrees Fahrenheit. While it’s warming up, be generous when you grease and flour those two 9-inch round pans. A little extra insurance against sticking never hurt anyone! Now, let’s handle the dry stuff. In one bowl, whisk together the flour, baking powder, baking soda, and salt. Set that aside.
In your big mixing bowl, beat that softened butter and the sugar until it’s visibly light and fluffy—that takes about three minutes if you’re using a mixer. Don’t rush this creaming step! Then, add your four eggs, one at a time, making sure each one is fully incorporated before dropping in the next. Follow that with your teaspoon of vanilla.
In a separate small bowl, just quickly whisk the milk and sour cream together until they look smooth. This is your wet mixture. Now for the crucial part: add the dry ingredients to the butter mixture in three separate additions, alternating them with the milk mixture. You must start and end with the dry ingredients. Mix only until just combined—seriously, stop the second you don’t see flour streaks! Finally, gently fold in that melted and cooled white chocolate. Don’t overmix it, or you’ll deflate all the air you just worked so hard to create.
Baking and Cooling Procedures
Divide that heavenly batter evenly between your two prepared pans and smooth the tops off with a spatula. Pop them into the hot oven and let them bake for 25 to 30 minutes. How do you know they are done? Use the toothpick test! Insert one right into the center; if it comes out clean, you’re golden. If it has wet batter, give it three more minutes.
Once they are baked, let them cool in the pans for about ten minutes. This gives them structure. Then, gently flip them out onto a wire rack. They have to cool completely—I mean stone cold—before you even think about touching them with frosting or filling. Warm cake equals melted disaster!
Crafting the Raspberry Filling and Whipped Cream
While the cakes cool, we make the filling. Take your fresh raspberries and mash them up right in a bowl. Then, stir in that raspberry jam until it’s all one lovely, slightly chunky mixture. That’s it for the filling! Easy, right?
For the frosting, make sure your heavy whipping cream is ice cold. Pour it into a clean bowl with the powdered sugar and the remaining teaspoon of vanilla. Start mixing on medium, then crank it up to high speed. You want stiff peaks—that means when you lift the whisk out, the peaks stand straight up and don’t flop over. If you overbeat it, you get butter, so watch it like a hawk!
Assembling Your White Chocolate Raspberry Cake
Time to build! Place one cooled cake layer on your serving plate. Now, spread that tangy raspberry filling evenly across the top. Don’t push too hard, or you might dent the cake! Next, dollop on a thick, generous layer of that beautiful whipped cream frosting. Take your second layer and place it gently on top, pressing just a tiny bit to make sure it settles.
Use the rest of the whipped cream to cover the top and sides of your magnificent white chocolate raspberry cake. Smooth it out or make pretty swirls—it’s your creation! Make sure you chill this beauty for at least 30 minutes before slicing so everything firms up nicely. That chilling time is non-negotiable for clean slices!

Tips for Baking the Perfect White Chocolate Raspberry Cake
Even with a great recipe, little things can make the difference between a good cake and a show-stopping cake. My biggest piece of advice, which I stressed above, is patience with the chocolate. You MUST let that melted white chocolate cool down to room temperature before you fold it into the batter. If it’s warm, it melts the butter/sugar structure you worked so hard to create, leading to a dense, greasy texture instead of that lovely light crumb we want. Don’t just wait five minutes; check the temperature!
Also, I cannot stress enough how important the chilling time is for this particular cake. Because we are using a light, delicate whipped cream frosting instead of heavy buttercream, the structure needs time to set up properly. If you slice it too soon, the layers slide, the filling squishes out, and it looks messy. We want elegance!
Ingredient Temperature and Timing Pro Tips
That 30-minute chill time I mentioned after assembly isn’t just a suggestion; it’s essential for this white chocolate raspberry cake. The cold helps the whipped cream firm up and locks the raspberry filling in place. If you plan on transporting the cake, chilling it solid beforehand ensures it travels safely. When you take it out to serve, let it sit on the counter for maybe 10 minutes so the whipped cream softens just slightly, but don’t let it sit too long!
Storing and Handling Your Finished Cake
Since this cake uses whipped cream instead of a traditional buttercream, how you store it matters a lot. You can’t leave this beauty sitting on the counter overnight—it needs to be kept cool to keep that frosting light and safe. If you have leftovers (which I doubt you will!), pop it straight into the fridge. It holds up really well for about three days, though honestly, the texture is best on day one or two. That beautiful white chocolate raspberry cake deserves the best care!
When you pull out that slice from the fridge, let it warm up just a tiny bit before cutting. Cold whipped cream can sometimes feel a little too firm. A few minutes on the counter makes it perfect again. Never try to freeze this version, as the whipped cream and fresh raspberries don’t freeze well, so just stick to the fridge!
Storage and Reheating Guidelines
Here’s the quick rundown on storage. Just remember refrigeration is your friend here. You don’t need to reheat anything; you just need to let it temper slightly before serving.
Storage Table
| Storage Duration | Method |
|---|---|
| 3 Days | Covered tightly in the refrigerator |
Frequently Asked Questions About This Cake
I get so many questions about substitutions, especially because this is such a delicate cake! Here are the few things people ask about most often when they are making their first white chocolate raspberry cake.
Common Questions Answered
Q1. What if I don’t have sour cream? Can I skip it or use something else?
You really need that acidity to balance the sweetness of the white chocolate, but if you absolutely can’t find sour cream, you can substitute it with plain Greek yogurt. Just make sure it’s full-fat yogurt, and try to drain off any excess liquid first so your batter doesn’t get too thin.
Q2. Can I use frozen raspberries for the filling instead of fresh ones?
You absolutely can use frozen raspberries, but you must thaw them completely first! Then, you need to drain off all the excess juice before mashing them with the jam. If you skip draining, the filling will be way too watery and soak right into your cake layers.
Q3. Can I use 2% milk instead of whole milk? I don’t keep whole milk on hand.
You can get away with using 2% milk, but I recommend whole milk because the fat content really helps keep the vanilla cake layers tender. If you use 2%, just be extra careful not to overmix the batter once you start adding the liquids, or you might end up with a slightly tougher crumb in your white chocolate raspberry cake.
Understanding the Nutrition in Your White Chocolate Raspberry Cake
Now, let’s talk numbers. Because this cake has butter, sugar, heavy cream, and white chocolate, it is definitely a treat meant for special occasions! I’m not a nutritionist, and frankly, when I’m baking something this delicious, I try not to look too closely at the details. It’s made with love, and that’s what matters most here!
Disclaimer Regarding Nutritional Data
The exact nutritional data for this recipe can vary quite a bit based on the specific brands of white chocolate, the fat content of your sour cream, and how much cream you use in your frosting peaks. Because of these variables and my focus on flavor over fine-tuning calorie counts, I haven’t provided precise calculations here. Please enjoy your slice, knowing it’s homemade and made with the best intentions!
Share Your White Chocolate Raspberry Cake Experience
I am so excited for you to try this recipe! It’s my go-to for birthdays now. Please, when you finish your beautiful creation, come back and tell me how it went! Rate the recipe and share a picture of your finished white chocolate raspberry cake on social media. I absolutely love seeing your baking successes! Share a picture of your finished creation on social media!
Tips for Baking the Perfect White Chocolate Raspberry Cake
Even with a great recipe, little things can make the difference between a good cake and a show-stopping cake. My biggest piece of advice, which I stressed above, is patience with the chocolate. You MUST let that melted white chocolate cool down to room temperature before you fold it into the batter. If it’s warm, it melts the butter/sugar structure you worked so hard to create, leading to a dense, greasy texture instead of that lovely light crumb we want. Don’t just wait five minutes; check the temperature!
Also, I cannot stress enough how important the chilling time is for this particular cake. Because we are using a light, delicate whipped cream frosting instead of heavy buttercream, the structure needs time to set up properly. If you slice it too soon, the layers slide, the filling squishes out, and it looks messy. We want elegance!
Ingredient Temperature and Timing Pro Tips
That 30-minute chill time I mentioned after assembly isn’t just a suggestion; it’s essential for this white chocolate raspberry cake. The cold helps the whipped cream firm up and locks the raspberry filling in place. If you plan on transporting the cake, chilling it solid beforehand ensures it travels safely. When you take it out to serve, let it sit on the counter for maybe 10 minutes so the whipped cream softens just slightly, but don’t let it sit too long!
Storing and Handling Your Finished Cake
Since this cake uses whipped cream instead of a traditional buttercream, how you store it matters a lot. You can’t leave this beauty sitting on the counter overnight—it needs to be kept cool to keep that frosting light and safe. If you have leftovers (which I doubt you will!), pop it straight into the fridge. It holds up really well for about three days, though honestly, the texture is best on day one or two. That beautiful white chocolate raspberry cake deserves the best care!
When you pull out that slice from the fridge, let it warm up just a tiny bit before cutting. Cold whipped cream can sometimes feel a little too firm. A few minutes on the counter makes it perfect again. Never try to freeze this version, as the whipped cream and fresh raspberries don’t freeze well, so just stick to the fridge!
Storage and Reheating Guidelines
Here’s the quick rundown on storage. Just remember refrigeration is your friend here. You don’t need to reheat anything; you just need to let it temper slightly before serving.
Storage Table
| Storage Duration | Method |
|---|---|
| 3 Days | Covered tightly in the refrigerator |
Frequently Asked Questions About This Cake
I get so many questions about substitutions, especially because this is such a delicate cake! Here are the few things people ask about most often when they are making their first white chocolate raspberry cake.
Common Questions Answered
Q1. What if I don’t have sour cream? Can I skip it or use something else?
You really need that acidity to balance the sweetness of the white chocolate, but if you absolutely can’t find sour cream, you can substitute it with plain Greek yogurt. Just make sure it’s full-fat yogurt, and try to drain off any excess liquid first so your batter doesn’t get too thin.
Q2. Can I use frozen raspberries for the filling instead of fresh ones?
You absolutely can use frozen raspberries, but you must thaw them completely first! Then, you need to drain off all the excess juice before mashing them with the jam. If you skip draining, the filling will be way too watery and soak right into your cake layers.
Q3. Can I use 2% milk instead of whole milk? I don’t keep whole milk on hand.
You can get away with using 2% milk, but I recommend whole milk because the fat content really helps keep the vanilla cake layers tender. If you use 2%, just be extra careful not to overmix the batter once you start adding the liquids, or you might end up with a slightly tougher crumb in your white chocolate raspberry cake.
Understanding the Nutrition in Your White Chocolate Raspberry Cake
Now, let’s talk numbers. Because this cake has butter, sugar, heavy cream, and white chocolate, it is definitely a treat meant for special occasions! I’m not a nutritionist, and frankly, when I’m baking something this delicious, I try not to look too closely at the details. It’s made with love, and that’s what matters most here!
Disclaimer Regarding Nutritional Data
The exact nutritional data for this recipe can vary quite a bit based on the specific brands of white chocolate, the fat content of your sour cream, and how much cream you use in your frosting peaks. Because of these variables and my focus on flavor over fine-tuning calorie counts, I haven’t provided precise calculations here. Please enjoy your slice, knowing it’s homemade and made with the best intentions!
Share Your White Chocolate Raspberry Cake Experience
I am so excited for you to try this recipe! It’s my go-to for birthdays now. Please, when you finish your beautiful creation, come back and tell me how it went! Rate the recipe and share a picture of your finished white chocolate raspberry cake on social media. I absolutely love seeing your baking successes! Check out our Pinterest page for more inspiration.
Print
Divine 3 Secret Steps White Chocolate Raspberry Cake
- Total Time: 1 hour 25 minutes
- Yield: 10 servings
- Diet: Vegetarian
Description
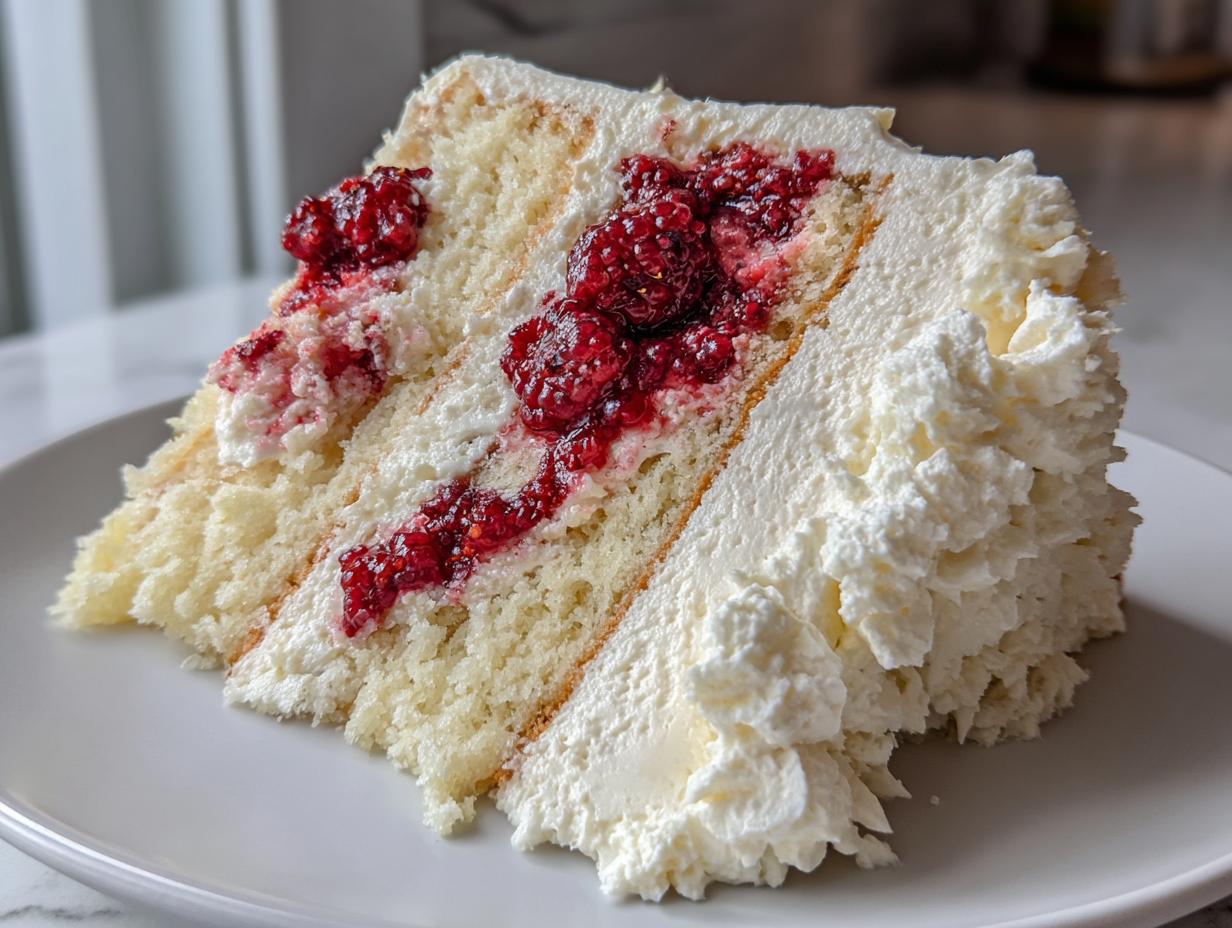
This white chocolate raspberry cake features moist vanilla layers, white chocolate mixed into the batter, a tangy raspberry filling, and fluffy whipped cream frosting. It is an elegant dessert perfect for celebrations.
Ingredients
- 2½ cups all-purpose flour
- 2 teaspoons baking powder
- ½ teaspoon baking soda
- ½ teaspoon salt
- 1 cup unsalted butter, softened
- 1½ cups granulated sugar
- 4 large eggs
- 1 teaspoon vanilla extract
- 1 cup whole milk
- ½ cup sour cream
- 6 ounces white chocolate, melted and cooled
- 1½ cups fresh raspberries
- ½ cup raspberry jam
- 2 cups heavy whipping cream
- 2 tablespoons powdered sugar
- 1 teaspoon vanilla extract (for frosting)
Instructions
- Preheat the oven to 350°F. Grease and flour two 9-inch round cake pans.
- Whisk together flour, baking powder, baking soda, and salt in a medium bowl.
- Beat butter and sugar in a large mixing bowl on medium speed until light and fluffy, about 3 minutes.
- Add eggs one at a time, mixing well after each addition, then blend in 1 teaspoon vanilla extract.
- Combine milk and sour cream in a small bowl until smooth.
- Add dry ingredients to the butter mixture in three parts, alternating with the milk mixture, starting and ending with dry. Mix just until combined.
- Gently fold in melted white chocolate until fully incorporated.
- Divide the batter evenly between the prepared pans and smooth the tops.
- Bake for 25 to 30 minutes, or until a toothpick inserted in the center comes out clean.
- Cool the cakes in pans for 10 minutes, then transfer to a wire rack to cool completely.
- To make the filling, mash fresh raspberries in a bowl and stir in raspberry jam until combined.
- For the whipped cream, beat heavy cream, powdered sugar, and 1 teaspoon vanilla on high speed until stiff peaks form.
- Place one cake layer on a serving plate, spread with raspberry filling, then top with a thick layer of whipped cream.
- Add the second layer, pressing gently, and cover the top and sides with remaining whipped cream.
- Chill for at least 30 minutes before serving to allow the layers to set.
Notes
- Cool the white chocolate completely before folding it into the batter.
- Chilling the cake for 30 minutes helps the layers set before slicing.
- Use fresh, high-quality raspberries for the best flavor in the filling.
- Prep Time: 20 minutes
- Cook Time: 35 minutes
- Category: Cake
- Method: Baking
- Cuisine: American