Okay, listen up, because I’ve found the absolute best snack for those days when you need something delicious *right now*. Seriously, if you think baking is too much effort, these No-Bake Yogurt Trail Mix Clusters are about to change your entire snack game. We’re talking protein-packed, super satisfying, and they come together faster than you can decide what to watch on TV.
When I first started trying to eat healthier, I was so intimidated by recipes that involved ovens or complicated chilling times. But these frozen yogurt bites? They require zero baking skill—trust me, if I can make them, anyone can! You just mix, scoop, and freeze. That’s it!
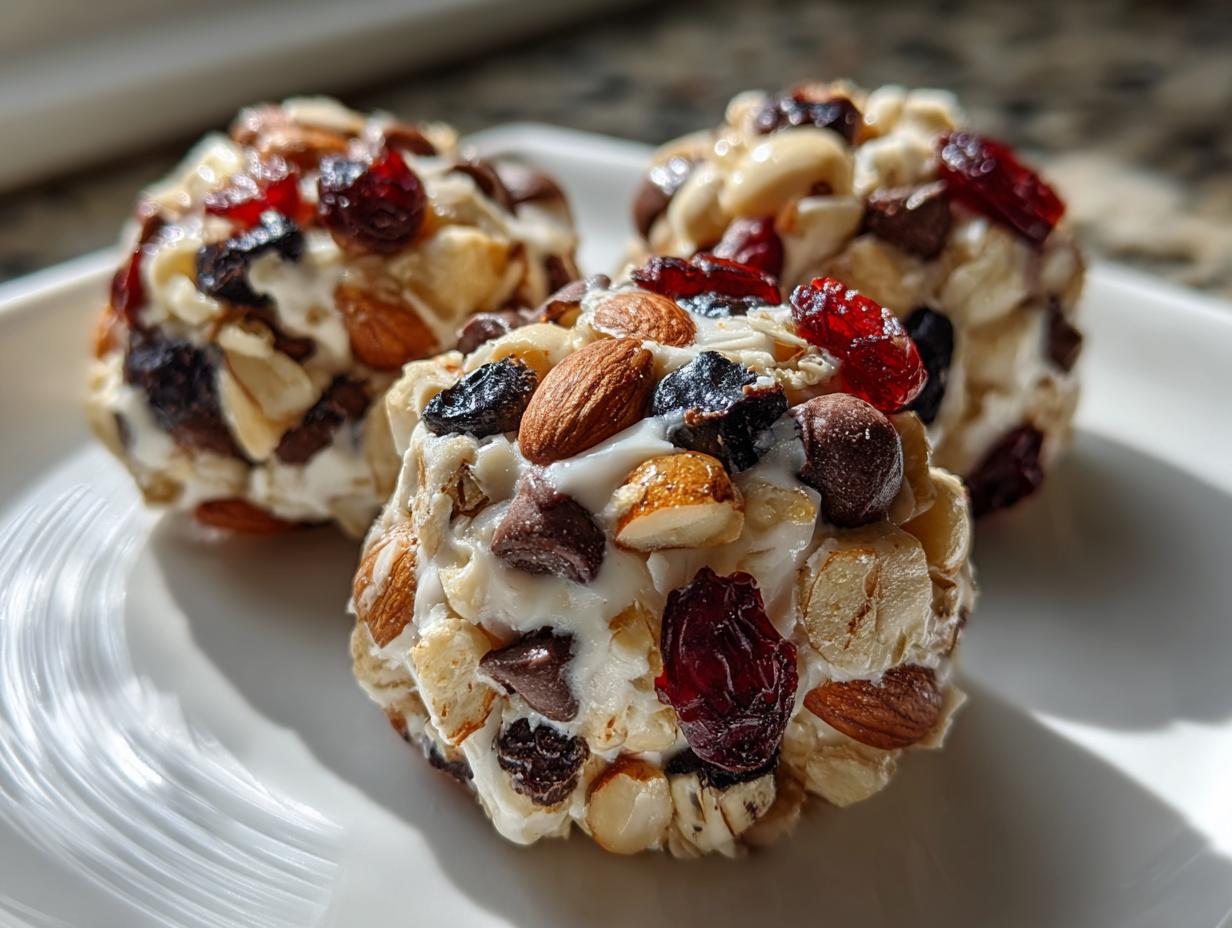
The best part is the texture. They are firm and icy, but that creamy Greek yogurt base melts just perfectly in your mouth while you get that crunch from the nuts and seeds. They are ready in about two hours, which means mid-afternoon slump? Solved. Need a quick, healthy dessert? Done. These No-Bake Yogurt Trail Mix Clusters are my secret weapon against grabbing something sugary from the pantry.

Gathering Your Ingredients for No-Bake Yogurt Trail Mix Clusters
Getting these clusters ready is honestly the easiest part of the whole process. We aren’t dealing with flour or rising agents here, so we can really focus on getting the *best* trail mix components we can find. Remember, since we aren’t baking away any weird flavors, the quality of your yogurt and honey really shines through. If you are looking for other quick snack ideas, check out our collection of snacks.
You only need five main things, plus that parchment paper to keep things neat. Check out what you need below. I promise, you probably have most of this sitting around already!
| Item | Quantity |
|---|---|
| Plain Greek Yogurt | 2 cups |
| Honey | 3 tablespoons |
| Vanilla Extract | 1 teaspoon |
| Trail Mix (nuts, seeds, dried fruit) | 1\u00bd cups |
| Mini Dark Chocolate Chips | \u00bc cup |
Ingredient Clarity for No-Bake Yogurt Trail Mix Clusters
Now, let’s talk specifics because this matters! For the Greek yogurt, you absolutely must use the thick, full-fat variety. If you use that watery low-fat stuff, your clusters will turn into yogurt puddles instead of firm snacks. Full-fat Greek yogurt holds up to the freezing process much better. For the honey, three tablespoons is the perfect amount to sweeten it up without making the final product rock hard when it freezes.
When you look at your trail mix, make sure the dried fruit—like the cranberries or raisins—isn’t overly sticky. If it feels tacky, just give it a quick pat dry with a paper towel before tossing it in. This stops everything from clumping together in one giant frozen blob.
Equipment Needed for Your Frozen Snack
You don’t need any fancy mixer for this, which is why I love it! Just grab a sturdy mixing bowl and a spoon or spatula for folding everything together. The most important tools are a standard large baking sheet and a roll of parchment paper. You need that paper to line the tray so the frozen yogurt won’t stick when you try to move them later.
A cookie scoop is my favorite thing to use here—it makes perfectly uniform rounds. If you don’t have one, don’t sweat it! Just use a regular tablespoon and try to keep your scoops roughly the same size so they all freeze evenly.
Step-by-Step Instructions for No-Bake Yogurt Trail Mix Clusters
Alright, let’s get these beauties assembled! Because we aren’t turning on the oven, the procedure is super straightforward, but timing is everything when dealing with something that needs to freeze solid. Make sure your freezer shelf is clear before you start mixing, because once they are scooped, they need to go straight into the cold!
Mixing the Base Yogurt Filling
First things first: grab that big bowl. You are going to put your two cups of thick Greek yogurt right in there. Then, drizzle in the three tablespoons of honey and the teaspoon of vanilla extract. Now, mix this gently but thoroughly. You want it completely smooth—no streaks of honey hanging around! I usually stir it for about a minute until it looks like one uniform, creamy mixture. It should smell sweet and tangy already, which is a great sign.
Incorporating the Trail Mix Components
This is where the fun happens! Dump in your 1\u00bd cups of trail mix and your little quarter cup of mini dark chocolate chips. Now, you *must* fold these in, don’t stir vigorously. Stirring too hard can break up the nuts and seeds or cause the yogurt to deflate a bit. Just use a rubber spatula and gently turn the mixture over on itself until everything is evenly dotted with chocolate and trail mix. You want every single spoonful to have a good mix of everything.
Forming and Freezing the No-Bake Yogurt Trail Mix Clusters
Grab that lined baking sheet—that parchment paper is your best friend, seriously! Use your cookie scoop to drop heaping spoonfuls onto the paper, leaving about an inch between each one so they don’t smoosh together when they spread a tiny bit. Once they are all scooped, take the back of a spoon and gently press down on the top of each mound, just flattening them slightly. They won’t spread much, but flattening helps them hold their shape better.
Now, hustle them into the deep freezer. They need a solid two hours in there, minimum, to get completely solid. Don’t try to rush this! Once they are hard as rocks, you can pop them off the paper and move them to your storage container. Here’s what you need to know about keeping them perfect:

| Handling Tip | Details |
|---|---|
| Storage Container | Airtight container or zip-top bag. |
| Layering | Use parchment paper between layers if stacking them up. |
| Best Texture Time | Remove from freezer 3-5 minutes before eating. |
| Shelf Life | Consume within 2 months for best quality. |
Tips for Perfect No-Bake Yogurt Trail Mix Clusters
I’ve made enough of these to know the little things that make a huge difference between an okay cluster and a fantastic, perfectly textured one. My biggest lesson learned was about the yogurt—I mentioned it before, but it bears repeating: use that full-fat, super thick Greek yogurt! If you try to use the thin, runny kind, you’ll end up with an icy mess that cracks apart when you try to move it.
Another pro-tip I picked up after my first batch was too sticky: check your dried fruit! If your raisins or cranberries look damp, give them a quick blot with a paper towel. That tiny bit of extra surface moisture can make the whole yogurt mix feel looser than it should be. Also, when you scoop them onto the tray, don’t skip gently pressing them down. They need that little bit of flattening so they don’t end up looking like weird, tall volcanoes when they freeze.
Frequently Asked Questions About Frozen Yogurt Clusters
People always have questions when they move into the frozen snack world, and that’s totally fine! These are a bit different than regular yogurt, so let’s clear up the common concerns.
Can I Substitute the Sweetener in My No-Bake Yogurt Trail Mix Clusters
You certainly can try! Honey is great because it mixes in smoothly, but if you prefer maple syrup, go ahead and swap it one-for-one. Maple syrup has a slightly different freezing point than honey, so they might be just a hair softer straight out of the freezer, but they still work great. Avoid using liquid sweeteners that are too thin, though, or you’ll thin out your base mixture too much.
How Long Do No-Bake Yogurt Trail Mix Clusters Last in the Freezer
Since these are essentially frozen yogurt, they last quite a while, but I always tell people to aim for eating them within two months. If you store them properly in a single layer or separated by parchment paper in a truly airtight container, they should be fine longer, but the texture is always best when they are fresher. Make sure your container prevents freezer burn!
Making Variations of No-Bake Yogurt Trail Mix Clusters
Once you master the basic formula, you can totally start customizing these! The beauty of this recipe is that it’s a flexible canvas for whatever your favorite additions are. If you aren’t a fan of dark chocolate, try swapping in white chocolate chips or even small chunks of peanut butter chips. They freeze up wonderfully! If you enjoy experimenting with different sweet treats, you might also like our recipe for edible cookie dough bites.
For the trail mix part, try swapping out some of the nuts. Maybe you prefer pecans over almonds, or perhaps you want to add some toasted coconut flakes for extra flavor. Just make sure that whatever you add is relatively dry. You can even skip the dried fruit entirely if you want a purely nutty, chocolatey cluster. They are so easy to adapt for whatever you have in the pantry!
Serving Suggestions for Your Protein Snack
These are definitely built to be eaten straight from the freezer when you need that icy hit! However, if you’re serving them to guests or kids who aren’t used to super hard frozen treats, remember that little 3 to 5-minute thaw time I mentioned. That slight softening makes them incredibly creamy.
They are fantastic paired with a hot cup of coffee in the morning—it’s the perfect contrast of hot and icy cold! They also make a great little addition alongside a bowl of fresh berries if you want to bulk up your snack without adding anything else that needs preparation.
Sharing Your No-Bake Yogurt Trail Mix Clusters Experience
I am so excited for you to try this super easy snack! Honestly, it feels like cheating because they are so good for how little effort they take. Once you’ve made your first batch of these frozen yogurt bites, I really want to hear what you think! You can share your results with us on Facebook.
Did you stick strictly to the recipe, or did you get adventurous with your mix-ins? Let me know in the comments below how they turned out for you and how long it took your family to gobble them all up! If you snap a picture, tag me—I love seeing your kitchen creations!
Tips for Perfect No-Bake Yogurt Trail Mix Clusters
I’ve made enough of these to know the little things that make a huge difference between an okay cluster and a fantastic, perfectly textured one. My biggest lesson learned was about the yogurt—I mentioned it before, but it bears repeating: use that full-fat, super thick Greek yogurt! If you try to use the thin, runny kind, you’ll end up with an icy mess that cracks apart when you try to move it.
Another pro-tip I picked up after my first batch was too sticky: check your dried fruit! If your raisins or cranberries look damp, give them a quick blot with a paper towel. That tiny bit of extra surface moisture can make the whole yogurt mix feel looser than it should be. Also, when you scoop them onto the tray, don’t skip gently pressing them down. They need that little bit of flattening so they don’t end up looking like weird, tall volcanoes when they freeze.
Frequently Asked Questions About Frozen Yogurt Clusters
People always have questions when they move into the frozen snack world, and that’s totally fine! These are a bit different than regular yogurt, so let’s clear up the common concerns. I want everyone to have success making these great protein snacks! For more quick recipes, check out our Medium page.
Can I Substitute the Sweetener in My No-Bake Yogurt Trail Mix Clusters
You certainly can try! Honey is great because it mixes in smoothly, but if you prefer maple syrup, go ahead and swap it one-for-one. Maple syrup has a slightly different freezing point than honey, so they might be just a hair softer straight out of the freezer, but they still work great. Avoid using liquid sweeteners that are too thin, though, or you’ll thin out your base mixture too much.
How Long Do No-Bake Yogurt Trail Mix Clusters Last in the Freezer
Since these are essentially frozen yogurt, they last quite a while, but I always tell people to aim for eating them within two months. If you store them properly in a single layer or separated by parchment paper in a truly airtight container, they should be fine longer, but the texture is always best when they are fresher. Make sure your container prevents freezer burn!
Making Variations of No-Bake Yogurt Trail Mix Clusters
Once you master the basic formula, you can totally start customizing these! The beauty of this recipe is that it’s a flexible canvas for whatever your favorite additions are. If you aren’t a fan of dark chocolate, try swapping in white chocolate chips or even small chunks of peanut butter chips. They freeze up wonderfully!
For the trail mix part, try swapping out some of the nuts. Maybe you prefer pecans over almonds, or perhaps you want to add some toasted coconut flakes for extra flavor. Just make sure that whatever you add is relatively dry. You can even skip the dried fruit entirely if you want a purely nutty, chocolatey cluster. They are so easy to adapt for whatever you have in the pantry!
Serving Suggestions for Your Protein Snack
These are definitely built to be eaten straight from the freezer when you need that icy hit! However, if you’re serving them to guests or kids who aren’t used to super hard frozen treats, remember that little 3 to 5-minute thaw time I mentioned. That slight softening makes them incredibly creamy.
They are fantastic paired with a hot cup of coffee in the morning—it’s the perfect contrast of hot and icy cold! They also make a great little addition alongside a bowl of fresh berries if you want to bulk up your snack without adding anything else that needs preparation. Sometimes I just eat three or four clusters alongside a glass of cold milk, and it feels like a real treat, even though it’s packed with protein! If you are looking for other high-protein breakfast ideas, check out our 14 High-Protein Breakfasts in 15 Minutes.
Sharing Your No-Bake Yogurt Trail Mix Clusters Experience
I am so excited for you to try this super easy snack! Honestly, it feels like cheating because they are so good for how little effort they take. Once you’ve made your first batch, I really want to hear what you think! Feel free to pin this recipe on Pinterest.
Did you stick strictly to the recipe, or did you get adventurous with your mix-ins? Were the chocolate chips the first thing to disappear? Tell me how they turned out for you and how long it took your family to gobble them all up! Drop a comment below and let me know your rating out of five stars.
If you snap a picture while you’re enjoying your frozen yogurt clusters, tag me on social media! I absolutely love seeing your kitchen creations and hearing about your successes. Happy scooping!
Print
Amazing 5-Minute No-Bake Yogurt Trail Mix Clusters
- Total Time: 2 hours 10 minutes
- Yield: 18 clusters (6 servings)
- Diet: Vegetarian
Description
Freeze Greek yogurt with trail mix into crunchy bite-sized clusters. This protein-packed frozen snack requires no baking and is ready in 2 hours.
Ingredients
- 2 cups plain Greek yogurt
- 3 tablespoons honey
- 1 teaspoon vanilla extract
- 1½ cups trail mix (dried cranberries, raisins, almonds, cashews, sunflower seeds)
- ¼ cup mini dark chocolate chips
Instructions
- Line a large baking sheet with parchment paper and place it near your freezer.
- Combine Greek yogurt, honey, and vanilla extract in a large bowl. Stir until smooth.
- Add trail mix and mini dark chocolate chips to the yogurt mixture. Fold until evenly distributed.
- Use a cookie scoop or tablespoon to drop heaping spoonfuls of the mixture onto the prepared baking sheet, spacing them 1 inch apart.
- Gently press down on each cluster with the back of a spoon to flatten slightly.
- Place the baking sheet in the freezer. Freeze for 2 hours or until completely solid.
- Remove clusters from the parchment paper. Transfer to a freezer-safe airtight container or zip-top bag.
- Store clusters in the freezer. Remove 3 to 5 minutes before eating for best texture.
Notes
- Use thick, full-fat Greek yogurt for the best texture.
- Pat dried fruit dry with paper towels if sticky to prevent clumping.
- Store in a single layer or separated by parchment paper for easier serving.
- Consume within 2 months.
- Prep Time: 10 minutes
- Cook Time: 0 minutes
- Category: Snack
- Method: No-Bake, Frozen
- Cuisine: American