You know those bakery scones that look amazing but taste like dry cardboard? Not this recipe! I’m absolutely thrilled to share my secret to making the most tender, flaky cranberry orange scones you’ve ever tasted. They are buttery, bursting with bright citrus, and honestly, they manage to be fancy without any fuss. Seriously, if you think baking scones is too complicated, stick with me. These come together faster than you can brew a pot of coffee!

Why This cranberry orange scones Recipe Works for Everyone
The biggest win with these beauties is that they are totally foolproof, even if you’ve never touched a pastry blender before. We’re focusing on that perfect balance—the tartness from the cranberries cuts right through the rich, buttery crumb. It’s the ultimate breakfast treat or afternoon snack. You get that intense orange flavor right from the zest, which wakes everything up. Trust me, the texture is what sets these apart; they are light, slightly crumbly, and never tough. It’s a recipe built for success!
My First Attempt at cranberry orange scones
Oh, my first batch was a disaster! I was way too heavy-handed with the cream and ended up with dense little hockey pucks. I completely overmixed the dough because I was nervous about the butter melting. After that little failure, I learned that with scones, less is truly more when it comes to mixing. Now, I treat the dough like it’s made of spun sugar—gentle handling is key to getting those gorgeous, flaky layers everyone raves about. If you are looking for other great breakfast ideas, check out my guide on 14 high protein breakfasts in 15 minutes.
Assembling Your cranberry orange scones Ingredients
Okay, before we even think about turning on the oven, we need to talk quality. The magic of these cranberry orange scones really does come down to how fresh your components are. Don’t try to skimp here; a few simple ingredients make all the difference in texture and taste. I always lay everything out on the counter first so I can see exactly what I’m working with. You can see more of my favorite baking tips on Medium.
Dry Ingredients for Flavorful cranberry orange scones
For the structure, we need two cups of all-purpose flour, but the flavor starts right in this dry mix. We’re adding three tablespoons of sugar for just a touch of sweetness, one tablespoon of baking powder to give them lift, and half a teaspoon of salt to balance everything out. The most important part of this dry mix, though, is scooping up that beautiful orange zest. Make sure you get at least half a tablespoon of *fresh* zest from about half an orange—that’s where the punch comes from in these cranberry orange scones.
Essential Wet and Cold Components
This is where we earn our flakiness! You absolutely must use half a cup of unsalted butter that has been cut into chunks and kept ice cold. Seriously, if it feels soft, put it back in the freezer for ten minutes. The liquid part is simple: one large egg whisked lightly with half a cup of heavy cream. Precise measurements here are vital because too much liquid makes these scones tough. For more baking inspiration, take a look at my 18 best bread recipes.
The Star Additions: Cranberries and Zest
Next up are our flavor stars. We are adding three-quarters of a cup of dried cranberries. They plump up just perfectly while baking. Remember, we already added the zest to the dry ingredients, but seeing those little bright orange flecks mixed in with the dark red cranberries is always so satisfying. They provide that wonderful tartness to contrast the butter.
Step-by-Step Baking Instructions for cranberry orange scones
Alright, let’s get messy! This is the fun part where all those careful ingredient choices come together. Follow these steps closely, and you’ll have the most amazing cranberry orange scones cooling on the rack before you know it. Remember, the key to flakiness happens in the first two steps!
Preparing Your Dough Base
First things first: heat your oven up to 400 degrees Fahrenheit, and line one of your baking sheets with parchment paper. This saves cleanup later, trust me. In a big bowl, whisk together all your dry stuff—the flour, sugar, baking powder, salt, and that bright orange zest we talked about. Now for the cold butter chunks. You need to “cut” this in until the mixture looks like coarse crumbs. You can use a pastry blender if you have one, but honestly, I just use my fingertips. Work quickly so the butter stays cold! Just pinch and rub the butter into the flour until you see pea-sized pieces remaining. Then, stir in those lovely dried cranberries.
Mixing and Shaping your cranberry orange scones Dough
In a separate small bowl, quickly whisk together your egg and the half cup of heavy cream. Pour all those wet ingredients into the dry mixture. Now, listen closely—this is the most important rule for tender scones: mix *only* until the dough just starts to look shaggy and come together. If you mix until it’s perfectly smooth, you’ve already lost the battle for flakiness! Turn that slightly messy dough out onto a lightly floured surface and gently pat it into a round disk, about three-quarters of an inch thick. Don’t knead it! Just shape it. Then, take a sharp knife or bench scraper and cut that disk into 12 equal wedges, like you are cutting a pizza.
Baking and Achieving Golden Perfection
Separate those wedges just a tiny bit on your prepared baking sheet—they need a little elbow room to puff up. For that beautiful bakery finish, take the extra tablespoon of heavy cream and brush it lightly over the tops of your cranberry orange scones. If you feel fancy, sprinkle a little coarse sugar on top for crunch! Slide them into the hot oven and bake them for 15 to 17 minutes. You’re looking for them to be golden brown around the edges and cooked through. They smell incredible when they’re done!

Glazing Your Delicious cranberry orange scones
Once those beautiful cranberry orange scones come out of the oven, they are almost perfect, but they definitely need a little sweet finish. We aren’t making anything complicated here—just a super simple, bright orange glaze that sets up nicely on top. This little drizzle is what takes them from great to absolutely irresistible! If you want to follow along on social media, check out my Facebook page.
Timing the Glaze Application
Here is a crucial tip that beginners often miss: you have to let the scones cool down first! If you try to pour the glaze over them while they are hot, it will just melt right off, soak into the scone, and leave you with a sticky, transparent mess instead of a nice white coating. I wait until they’ve been on the cooling rack for at least 15 minutes. While they cool, mix up the glaze by combining a quarter cup of powdered sugar with just one tablespoon of freshly squeezed orange juice. Whisk it until it’s smooth and pourable. If it seems too thick, add a tiny splash more juice. If it’s too thin, add a little more sugar. Drizzle it over the cooled scones and let it set up before you serve them!
Tips for The Best cranberry orange scones Results
Even with a great recipe, the little details make the difference between a good scone and a truly spectacular one. I’ve learned a few tricks over the years that guarantee that bakery-quality flakiness every single time. It all comes down to temperature and handling the dough like it’s precious cargo.
Mastering the Cold Butter Technique
I cannot stress this enough: the butter has to be cold! If your kitchen is warm, or if you feel like you’re taking too long cutting the butter into the flour, just stop. Pop the whole bowl back into the fridge for about 10 minutes. Those distinct, cold chunks of butter are what steam in the oven, creating those beautiful, flaky layers we are aiming for. If the butter melts before baking, you just end up with a dense, greasy pastry, and that’s a tragedy!
Avoiding Common Dough Mistakes
The number one mistake people make when baking these is overworking the dough once the liquid hits the dry ingredients. You want to mix it just until it barely comes together. If you keep stirring and kneading, you develop gluten, and gluten means tough scones. Also, don’t worry if your dough looks a little shaggy or messy when you turn it out onto the counter—that’s perfect! Just pat it gently into shape. If it’s really sticky and won’t cooperate before cutting, a quick 15-minute chill in the fridge firms it up perfectly for clean cuts.
Frequently Asked Questions About cranberry orange scones
I get so many messages about these treats, so I wanted to answer a few of the most common things people ask me when they are getting ready to bake their first batch of cranberry orange scones.
Can I use fresh cranberries instead of dried in the cranberry orange scones
That is a great question! You absolutely can, but you need to adjust. Fresh cranberries are much juicier, so they can make the dough a little wet. If you use fresh ones, I recommend tossing them with about a teaspoon of flour before adding them to the dry mix. This helps them hold their shape and stops them from bleeding color into the dough too much.
How long do homemade cranberry orange scones stay fresh
They are definitely best the day they are baked, warm from the oven! But they keep surprisingly well. Store them in an airtight container at room temperature, and they should stay good for up to two days. If they start feeling a little dry on day two, just pop one in the microwave for about 10 seconds—it brings back that fresh-baked softness!
What is the best way to cut scones for even baking
I always cut mine into wedges, like a pizza, from a single round disk of dough. This method works best because it maximizes the edges, giving you more of that delicious, crispy exterior that everyone loves. Just make sure the dough is about three-quarters of an inch thick before you cut. If your knife sticks, dust the blade with a little flour!
Storing and Serving Your Baked Goods
Once you’ve pulled these beauties out of the oven, you’ll probably want to eat them all right then and there, but saving a few for later is always smart! They reheat beautifully, too. Proper storage keeps that tender, flaky texture locked in so they taste almost as good the next day.
Storage Guidelines Table
I find that these are best kept simple—no need for refrigeration unless your kitchen is super humid. Just keep them covered on the counter. Here’s how I keep mine fresh:
-
Room Temperature (Airtight Container): Up to 2 days.
-
Freezing (Airtight Bag): Up to 2 months. Wrap individually before bagging!
-
Reheating (Microwave): 10-15 seconds until just warm.
Share Your cranberry orange scones Success
I truly hope you loved making these as much as I love sharing them with you. Now it’s your turn! Did they turn out perfectly flaky? Did you add a little extra orange zest? Drop a comment below and let me know how they went, or share a picture of your beautiful breakfast spread. I can’t wait to hear about your baking adventure! For more visual inspiration, follow me on Pinterest.
Print
Amazing 12 cranberry orange scones flavor
- Total Time: 32 minutes
- Yield: 12 scones
- Diet: Vegetarian
Description
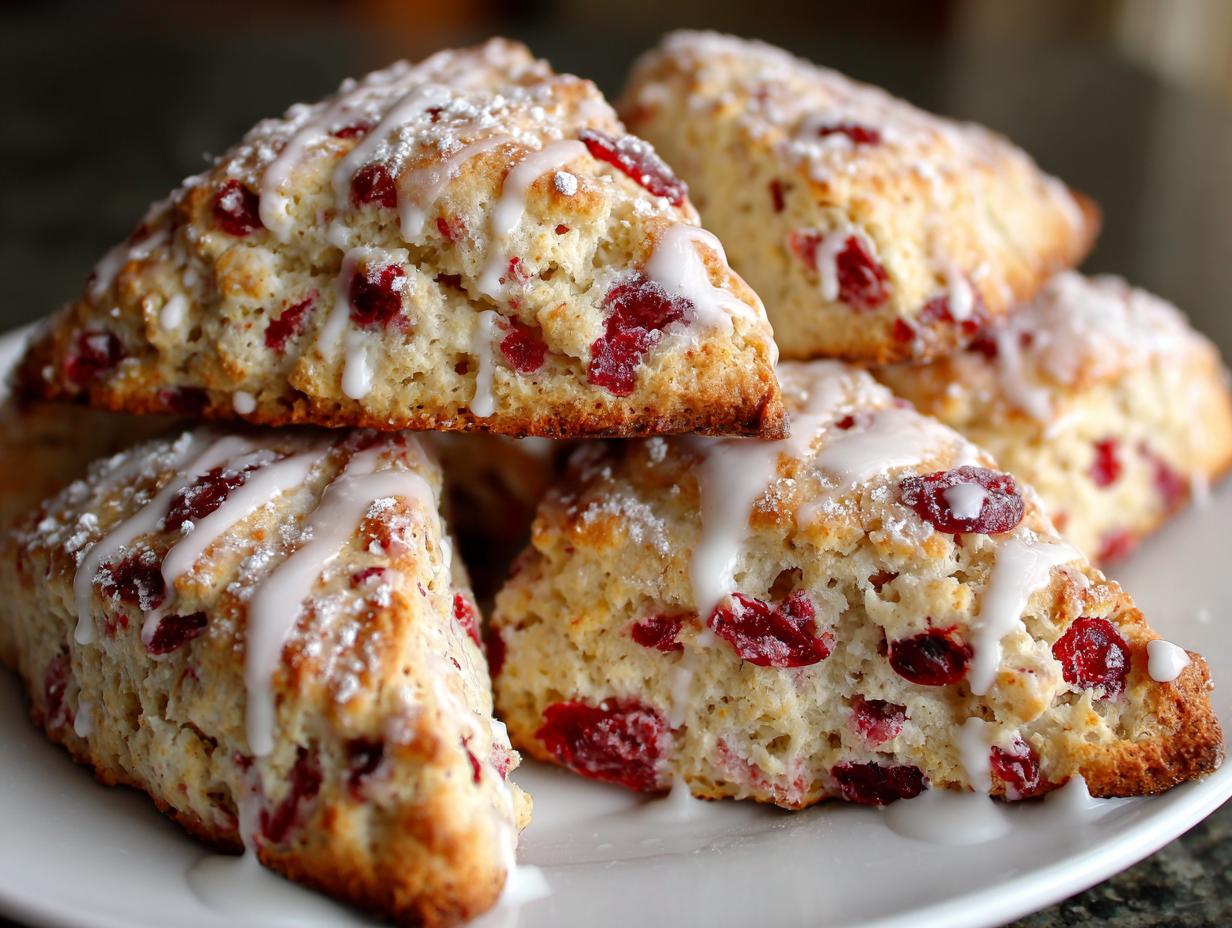
These flaky cranberry orange scones blend tangy cranberries and fresh orange zest for a perfect seasonal breakfast or snack. They offer a buttery texture with bright citrus flavor.
Ingredients
- 2 cups all-purpose flour
- 3 tablespoons sugar
- 1 tablespoon baking powder
- ½ teaspoon salt
- ½ tablespoon grated orange zest (from about ½ orange)
- ½ cup (1 stick) cold unsalted butter, cut into chunks
- 1 large egg, lightly beaten
- ½ cup heavy cream
- ¾ cup dried cranberries
- 1 tablespoon coarse sugar (optional, for topping)
- For glaze: ⅕ cup powdered sugar
- For glaze: 1 tablespoon freshly squeezed orange juice
- 1 tablespoon heavy cream (for brushing tops)
Instructions
- Preheat oven to 400°F. Line a baking sheet with parchment paper.
- Whisk together flour, sugar, baking powder, salt, and orange zest in a large bowl.
- Cut in cold butter using a pastry blender or your fingers until the mixture resembles coarse crumbs.
- Stir in cranberries.
- Whisk the egg and ½ cup heavy cream together in a separate bowl.
- Add wet ingredients to the dry mixture and mix only until the dough starts to come together. Do not overmix.
- Turn the dough onto a floured surface and form a round disk about ¾ inch thick.
- Cut the disk into 12 wedges and separate them slightly on the baking sheet.
- Brush the tops with the remaining 1 tablespoon of heavy cream and sprinkle with coarse sugar, if using.
- Bake for 15-17 minutes until the scones are golden and the edges are lightly browned.
- Cool the scones on a wire rack for 15 minutes.
- Mix the powdered sugar and orange juice until a drizzle consistency forms. Drizzle over the cooled scones.
Notes
- Use cold butter for the flakiest scones.
- Do not overwork the dough; mix only until combined.
- Chill the dough briefly if it is too soft before cutting.
- Brushing with cream provides a shiny, golden top.
- Let scones cool completely before applying the glaze to stop it from melting.
- Store scones in an airtight container at room temperature for up to 2 days.
- Prep Time: 15 minutes
- Cook Time: 17 minutes
- Category: Breakfast/Snack
- Method: Baking
- Cuisine: American