If you’ve been chasing that perfect, golden, unbelievably cheesy bite you usually only get at your favorite Italian spot, stop looking! I’m letting you in on my secrets today, and trust me, making copycat chicken parmesan at home is easier than you think. This isn’t just another weeknight meal; this is the recipe that finally convinced my skeptical husband that homemade can absolutely beat the restaurant version. We’re talking ultra-crispy cutlets, rich sauce, and cheese that stretches for miles!
I feel so confident in this technique now because I remember the first time I tried making it years ago. I ended up with soggy chicken and cheese that slid right off! It was a disaster. But by carefully following the steps for pounding, breading, and the two-stage cooking process, I finally cracked the code. You’ll see how simple it is to build that amazing texture that holds up perfectly under the sauce and cheese. Get ready to impress everyone!

Why This Copycat Chicken Parmesan Changes Dinner
Honestly, this recipe is a game-changer for anyone who thinks great texture is too hard to achieve at home. The secret isn’t in some fancy ingredient; it’s all in the technique, especially how we handle the pounding and the breading. I used to be terrified of frying, but this method is so straightforward, and frying in batches keeps everything nice and controlled.
I remember the first time I pulled this out of the oven and the cheese was bubbly brown and the edges of the crust were still peeking out golden—it felt like I’d earned a culinary degree right there in my own kitchen! It’s so rewarding to serve something that tastes this complex but actually comes together in under an hour total. You’re going to feel like a proper Italian chef!
Essential Ingredients for Copycat Chicken Parmesan
Okay, let’s talk about what you need to grab from the store. For this to taste truly restaurant-quality, we can’t skimp on the details here. Every ingredient plays a role, especially in getting that incredible crust texture. We need thin chicken, the right mix of crumbs, and good quality cheese that melts beautifully without getting oily.
Trust me on the Panko breadcrumbs; they are non-negotiable for that signature crunch that stands up to the sauce! Also, make sure you grab low-moisture mozzarella. If you use fresh mozzarella right out of the brine, it releases too much water and you risk losing that crispiness we worked so hard to build.
Categorizing Your Shopping List
To make your trip easier, I always group things mentally when I shop. It keeps me from running back and forth! You’ll need three main sections of ingredients.
First up is the Chicken: You need four boneless, skinless breasts that you’ll pound thin. Make sure you have your salt, pepper, garlic powder, and onion powder on hand for seasoning those cutlets!
Next is the Breading Station—this is crucial! You’ll need flour, two eggs whisked with a splash of water, and then your crumb mix: Panko, plain dry breadcrumbs, half a cup of grated Parmesan, oregano, basil, and paprika. Mix those crumbs really well so the herbs are evenly distributed.
Finally, for the Saucing and Topping, grab your marinara sauce—use the best one you can find, seriously! Then, you need your shredded low-moisture mozzarella, some extra slices of fresh mozzarella if you’re feeling extra decadent, and that final bit of grated Parmesan for the top layer.
Equipment Needed for Success
You actually don’t need a ton of fancy gear for this, but having the right tools makes the process so much smoother. First up, grab a meat mallet—or even a heavy rolling pin if you don’t have one—because pounding the chicken evenly is key to avoiding dry spots! If you want more ideas on great cooking tools, check out my baking essentials.
You’ll definitely want a large, heavy-bottomed skillet for that shallow frying step. And finally, make sure you have a good 9 by 13-inch baking dish ready to go for the assembly and baking part. That’s really it—simple tools for a restaurant-worthy result!
Step-by-Step Instructions for Copycat Chicken Parmesan
Now for the fun part! This is where we turn simple chicken breasts into that amazing, crispy, cheesy masterpiece. Follow these steps closely, especially around the breading, and I promise you’ll get that perfect texture. Remember, we cook this chicken in two stages: a quick fry for the crust, and then a bake to melt the cheese and finish the cooking.
Preparing the Cutlets and Setting Up the Breading Station
First things first, we need to get those chicken breasts nice and thin. Lay each breast between two sheets of parchment paper—this keeps everything clean! Use your meat mallet or rolling pin and pound them gently but firmly until they are all about a half-inch thick. Consistency is so important here so they cook evenly later on.
Once they are flat, season both sides. We’re using a mix of fine salt, pepper, garlic powder, and onion powder. Don’t be shy with the seasoning; this flavor gets locked into the meat!
Next, set up your dredging station in three shallow dishes. Dish one is your seasoned flour—just a pinch of salt and pepper in there. Dish two is for your eggs, whisked well with two tablespoons of water until they look smooth. Dish three is the star: combine your Panko, dry breadcrumbs, the half-cup of grated Parmesan, oregano, basil, and paprika. Mix that dry mix until those herbs are totally distributed.
Now, dredge each cutlet: first in the flour, shake off the excess really well, then dip it totally into the egg wash, letting the extra drip off. Finally, press that chicken firmly into the breadcrumb mix, making sure both sides are completely coated. This is important: set those coated cutlets on a tray and let them rest for about five minutes. This little pause helps the coating really stick!
Achieving the Signature Crispy Crust Through Frying
While your chicken is resting, get your oven preheating to 425°F. Now, grab that big skillet and pour in enough neutral oil—like canola or avocado—to create a shallow layer, maybe about a quarter-inch deep. Heat it over medium-high heat until it’s shimmering. You want it hot, but not smoking!
Carefully place the chicken cutlets into the hot oil. You have to fry these in batches, okay? If you crowd the pan, the oil temperature drops instantly, and your crust ends up soggy instead of crisp. Fry them for about three to four minutes per side until they are deeply golden brown and look crunchy. Remember, they don’t need to be cooked all the way through yet; we are just setting that glorious crust!
Once they are golden, transfer them to a plate lined with paper towels to drain any extra oil. Repeat this process until all your cutlets are fried. Keep an eye on your oil and add more if the pan looks dry between batches.
Assembling and Baking to Golden Perfection
Time to assemble in your 9×13 baking dish. Spread about a cup of your marinara sauce on the bottom—just enough to lightly coat the base, preventing sticking without drowning the chicken.
Lay your crispy, partially-fried cutlets right on top of that sauce base in a single layer. Now, spoon the remaining marinara right down the center of each piece. Try to leave the edges of the crust uncovered! This is crucial if you want those edges to stay crisp when it comes out of the oven.
Sprinkle the shredded low-moisture mozzarella evenly over the sauced parts. If you’re using those extra slices of fresh mozzarella, lay them on top now. Finish everything off with the last quarter cup of grated Parmesan sprinkled over the top. Pop that dish uncovered into the 425°F oven for about 12 to 15 minutes. You’re looking for the cheese to be bubbly and slightly browned, and the thickest part of the chicken should hit 165°F internally. Let it rest for five minutes before serving over hot pasta!

Tips for Copycat Chicken Parmesan Perfection
Even with the best recipe, a few little mistakes can turn that perfect crust into a sad, soggy mess. Don’t worry, I’ve made all those mistakes so you don’t have to! These little tweaks are what separate a good chicken parmesan from the incredible kind I serve now.
The key to restaurant quality is controlling moisture at every stage. We are battling moisture from the raw chicken, moisture from the sauce, and moisture from the cheese. If you follow these tips, you’ll win that battle every time!
Mastering the Breading Adherence
I cannot stress this enough: you must let your breaded cutlets rest for a few minutes before they hit the hot oil. When you press that crumb mixture onto the egg-washed chicken, the coating is just sitting there loosely. If you fry it immediately, it often flakes off into the oil, leaving you with sad, naked chicken.
Letting them sit on that tray for five minutes allows the moisture from the egg to absorb slightly into the breadcrumbs. This marriage between the coating and the chicken is what creates that strong, crisp shell we want. It gives the crust something to hold onto when it hits the heat.
Preventing Soggy Crust Underneath the Sauce
The bottom crust is always the toughest to protect because it sits right on top of the sauce in the pan. My number one rule here is to sauce sparingly and strategically. Only spoon the marinara down the center of the cutlet where the cheese will sit.
Leave a good half-inch border of that beautiful, fried crust exposed around the edges. That exposed crust gets direct heat in the hot oven and stays wonderfully crisp! Also, using a very hot oven—425°F—helps melt the cheese quickly before the moisture from the sauce has time to steam the bottom crust.
Frequently Asked Questions About Copycat Chicken Parmesan
I get so many questions about this recipe, especially from folks who are worried about the frying part or keeping that crust crunchy. It’s totally normal to have questions when you’re aiming for restaurant quality at home! Here are the most common things people ask me about nailing this copycat chicken parmesan.
Don’t hesitate to try this even if you’re new to frying—we only shallow fry for color, not for full cooking! The result is always worth the effort, especially when you use a great quality marinara sauce. If you want to see more of my favorite recipes, follow along on Pinterest!
Can I Bake Instead of Fry My Chicken Cutlets for This Copycat Chicken Parmesan Recipe?
You absolutely can, and I even have a note in my recipe about it if you want a lighter version! If you skip the shallow frying, you need to set your oven to 400°F and place the breaded cutlets on a wire rack set over a baking sheet. Bake them naked for about 15 minutes until they look crisp, then pull them out, sauce them, cheese them, and put them back in to finish baking. The rack lets air circulate, which is key to getting that nice crispy chicken texture without the oil!
What is the Best Way to Keep the Coating from Falling Off?
This is all about preparation and patience! First, make sure you are dredging correctly: flour first (shake off the excess!), then egg, then breadcrumbs. You need that flour layer so the egg has something to stick to. Second, and this is huge, you have to press the breadcrumbs onto the chicken firmly! Really pat them in there. And finally, remember that five-minute rest period after breading them? That brief time lets the coating set up so it doesn’t just slide right off when it hits the hot oil.
Storing and Reheating Your Leftover Copycat Chicken Parmesan
Oh my gosh, if you have leftovers—which, let’s be honest, is a sign of a truly great meal—you need to know how to treat them right. Reheating this can be tricky because we want that cheese gooey again but we absolutely do not want a mushy crust! The goal is to revive that crispiness we worked so hard to achieve the first time around.
Don’t even think about the microwave unless you absolutely have to! The oven or the air fryer are your best friends here. I always recommend reheating the cutlets without the pasta underneath, as the pasta will soak up all the sauce and get gummy.
Storage and Reheating Instructions Table
Here is the quick cheat sheet I keep taped on the side of my fridge for these amazing leftovers. Always let the chicken cool completely before you store it, by the way!
| Storage Method | Duration | Best Reheating Method |
|---|---|---|
| Refrigerator (Airtight Container) | Up to 3 days | Oven (covered, then uncovered) |
| Freezer (Flash Frozen First) | Up to 2 months | Oven (covered with foil) |
When you reheat in the oven, cover the dish with foil for the first 15 minutes at 350°F to heat the cheese and chicken through gently. Then, pull that foil off for the last few minutes to let the top brown up a little bit again. If you’re using an air fryer for a single serving, it heats up fast and gets that outside crust back to life beautifully! If you want to see more of my kitchen tips, check out my Medium page.
Deciding on Nutritional Estimates for Copycat Chicken Parmesan
I always feel a little funny putting numbers next to recipes, especially when they taste this good! But I know a lot of you track your meals, so I pulled the estimates for you. Remember, these numbers are just guidelines based on the ingredients list we used.
This calculation is for one serving—that’s one of those beautiful cutlets—and it does not include the spaghetti or any extra sauce you might ladle on top. So, if you’re counting, keep that in mind! It’s a hearty meal, packed with protein from all that chicken and cheese.
Here’s what the numbers look like for us:
- Calories: Around 520 per cutlet
- Protein: A whopping 46 grams!
- Fat: About 27 grams (that’s from the frying oil and the cheese, naturally!)
- Carbohydrates: Roughly 20 grams (mostly from the breading)
We left out the sugar, sodium, and saturated fat estimates because honestly, those numbers vary so wildly depending on the exact brand of marinara sauce you choose. If you use a low-sodium sauce, your sodium will drop way down, so adjust accordingly! Focus on that high protein count; that’s what makes this such a satisfying dinner. For more recipe updates, follow us on Facebook!
Print
Amazing 520 calorie copycat chicken parmesan
- Total Time: 45 minutes
- Yield: 4 servings
- Diet: Omnivore
Description
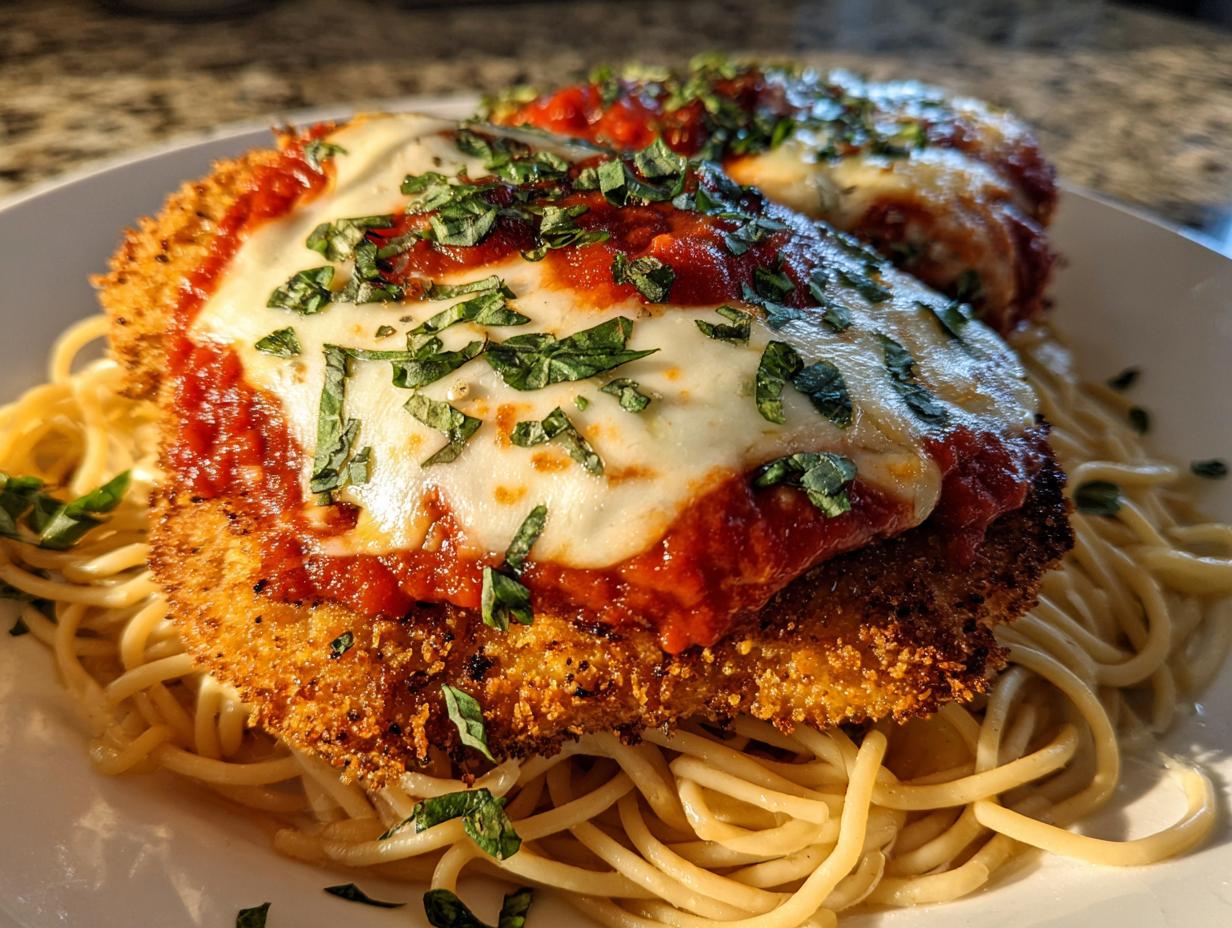
Make copycat Italian restaurant chicken Parmesan at home with ultra-crispy cutlets, rich marinara, and gooey mozzarella, baked until bubbly and golden.
Ingredients
- 4 boneless skinless chicken breasts, pounded into thin cutlets
- 1 1/2 teaspoons fine salt, divided
- 1 teaspoon black pepper, divided
- 1 teaspoon garlic powder
- 1 teaspoon onion powder
- 1/2 cup all-purpose flour
- 2 large eggs
- 2 tablespoons water
- 1 cup panko breadcrumbs
- 1/2 cup plain dry breadcrumbs
- 1/2 cup finely grated Parmesan cheese
- 1 teaspoon dried oregano
- 1 teaspoon dried basil
- 1/2 teaspoon paprika
- Neutral oil such as avocado or canola oil for shallow frying
- 2 1/2 cups marinara or tomato basil sauce
- 1 1/2 cups shredded low-moisture mozzarella cheese
- 4 to 6 slices fresh mozzarella optional for extra gooey topping
- 1/4 cup additional finely grated Parmesan cheese
- Cooked spaghetti or other pasta
- Fresh basil or flat-leaf parsley, chopped
Instructions
- Place each chicken breast between two sheets of parchment and pound to an even 1/2 inch thickness. Season both sides with 1 teaspoon salt, 1/2 teaspoon pepper, garlic powder, and onion powder.
- Place the flour in a shallow dish and season with a pinch of salt and pepper. In a second dish, whisk eggs with water until smooth. In a third dish, combine panko, dry breadcrumbs, 1/2 cup Parmesan, oregano, basil, and paprika, mixing well.
- Dredge each piece of chicken in flour, shaking off the excess. Dip into the egg mixture, letting extra drip away, then press firmly into the breadcrumb mixture so it coats both sides in an even layer. Set the breaded cutlets on a tray to rest for a few minutes so the coating adheres.
- Heat a generous layer of oil in a large skillet over medium-high heat until shimmering. Fry the cutlets in batches for 3 to 4 minutes per side, until the crust is deeply golden and crisp; the chicken does not need to be fully cooked yet. Transfer to a paper-towel-lined plate and repeat with remaining cutlets, adding more oil as needed.
- Preheat the oven to 425°F. Spread about 1 cup of marinara sauce over the bottom of a 9 by 13-inch baking dish, just enough to lightly coat the surface. Arrange the fried cutlets in a single layer over the sauce.
- Spoon the remaining marinara down the center of each cutlet, leaving some of the edges uncovered to keep the crust crisp. Sprinkle shredded mozzarella evenly over the sauced portions, then add fresh mozzarella slices on top if using. Finish with the remaining 1/4 cup Parmesan over all the cutlets.
- Bake uncovered at 425°F for 12 to 15 minutes, or until the cheese is melted and lightly browned, the sauce is bubbling at the edges, and the thickest part of the chicken reaches an internal temperature of 165°F 74°C.
- Let the chicken Parmesan rest for 5 minutes so the cheese sets slightly and the juices redistribute. Sprinkle with chopped fresh basil or parsley just before serving.
- Serve each cutlet over a bed of hot spaghetti or your favorite pasta, spooning extra sauce from the pan around the chicken, and add an extra sprinkle of Parmesan on top if you like.
Notes
- Use boneless skinless chicken thighs pounded thin for a richer, extra-juicy version.
- Swap part of the panko for whole wheat breadcrumbs for a slightly heartier crust.
- Use a spicy marinara sauce or add a pinch of crushed red pepper for gentle heat.
- Add a thin slice of provolone under the mozzarella for a deeper, restaurant-style cheese pull.
- Serve over creamy polenta or roasted seasonal vegetables instead of pasta for a cozy twist.
- For a lighter take, bake breaded cutlets at 400°F on a rack until crisp, then sauce and cheese them and return to the oven.
- Pound chicken evenly so it cooks at the same rate and stays juicy.
- Let breaded cutlets rest for a few minutes before frying to help the coating cling and crisp.
- Do not overcrowd the pan; frying in batches keeps the oil hot and the crust crunchy.
- Sauce only the center of the cutlets so some edges stay crisp under the cheese.
- Use a hot oven to quickly melt and brown the cheese without drying out the chicken.
- Store cooled chicken Parmesan in an airtight container in the refrigerator for up to 3 days.
- For longer storage, freeze individual cutlets on a tray until firm, then transfer to a freezer bag for up to 2 months.
- Reheat in a 350°F oven, covered with foil, for 15 to 20 minutes, then uncover for a few minutes to re-crisp the top.
- For single portions, reheat in a toaster oven or air fryer until hot and bubbly, which helps revive the crispy coating.
- Prep Time: 25 minutes
- Cook Time: 20 minutes
- Category: Main Dish
- Method: Pan-Frying and Baking
- Cuisine: Italian-American