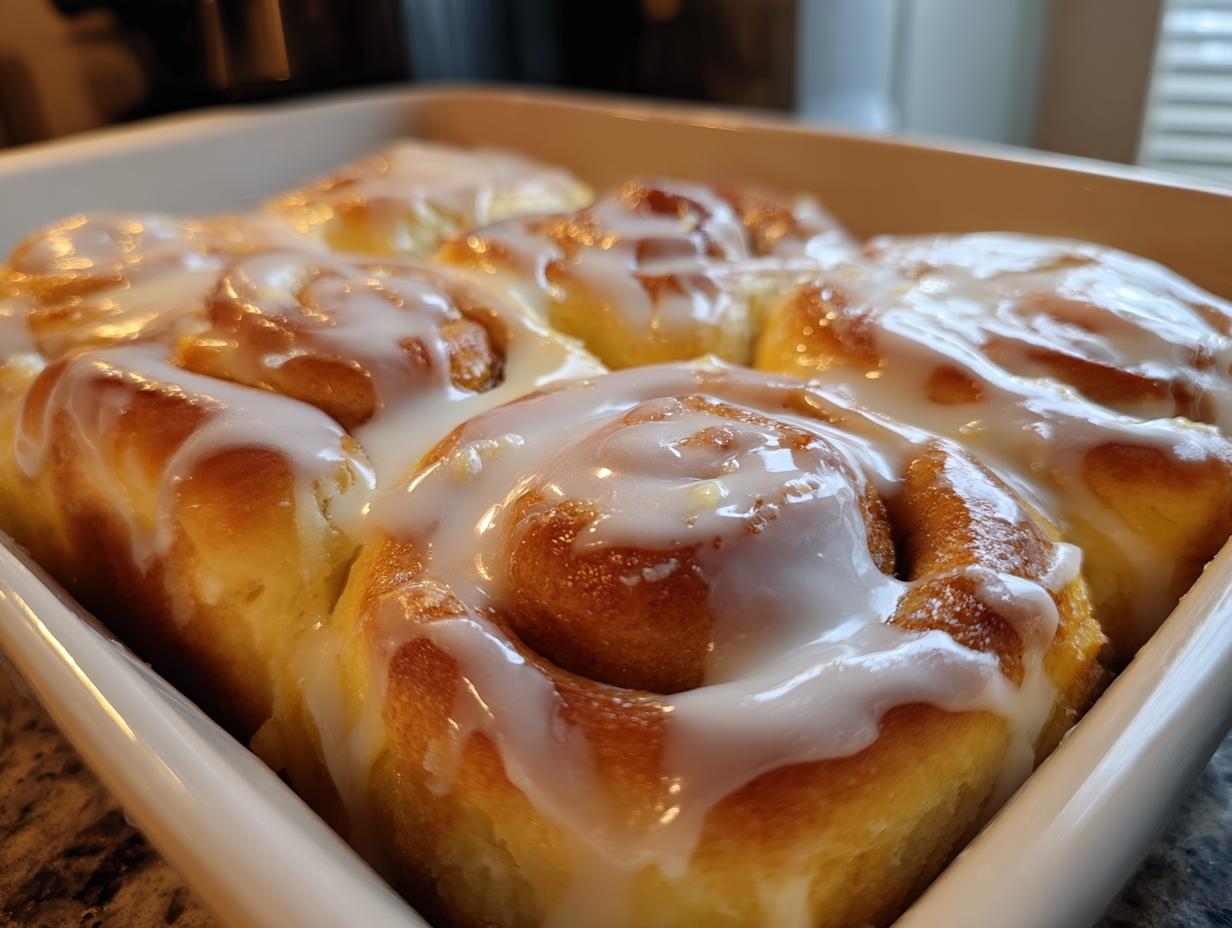
Oh my goodness, are you ready for the best breakfast you’ll ever make? Forget those dry, sad pastries you sometimes see—we are diving headfirst into the ultimate Cozy Winter Glazed Lemon Rolls. I swear, the smell alone is worth the effort. They are so incredibly soft, bright, and zesty, they practically taste like sunshine on a chilly morning.
When I first started baking with yeast, I was terrified. Seriously, I thought I was going to end up with a brick. But this recipe? It’s my secret weapon for proving that anyone can nail a fluffy, yeasted roll. I’ve made these dozens of times, usually when I need a little pick-me-up in January, and they never fail to impress. They’re surprisingly simple, despite looking fancy!
Why These Cozy Winter Glazed Lemon Rolls Are My Go-To
I know yeast dough can feel intimidating, but trust me on this one step: follow the rising times, and you’re golden. My biggest breakthrough when I first tried these was realizing that temperature matters more than anything. If your milk is too hot, you kill the yeast, and suddenly you have soup, not dough. If it’s too cool, you’re waiting forever!
I always make sure my milk is just warm to the touch—like a nice bath temperature. That perfect environment gets the yeast happy and active fast. Also, resist the urge to dump in extra flour while kneading! I know the dough feels sticky at first, but that slight tackiness is exactly what keeps these Cozy Winter Glazed Lemon Rolls so light and airy after they bake. It’s totally foolproof, I promise. You’re going to feel like a baking superstar!

Gathering Everything for Cozy Winter Glazed Lemon Rolls
Before we get our hands messy—and trust me, we are going to get messy in the best way—we need to make sure all our players are on the field. Getting your ingredients prepped first makes the whole process feel smooth, like a well-oiled machine, even when you’re dealing with sticky dough.
The secret to these rolls isn’t just the mixing; it’s making sure everything is ready to go when the recipe calls for it. Take that milk, for instance. It needs to be warm, not hot, so we don’t shock our precious yeast!
Dough Ingredients: Building the Soft Base
These ingredients create the cloud-like texture we are aiming for. Remember, precision here pays off big time!
- 1 cup warm whole milk (Make sure it’s just warm to the touch, not hot!)
- 2 1/4 teaspoons instant or active dry yeast
- 1/4 cup granulated sugar
- 4 tablespoons unsalted butter, melted and slightly cooled
- 1 large egg, room temperature
- 3 cups all-purpose flour, plus more for dusting
- 1/2 teaspoon fine sea salt
- 1 tablespoon finely grated lemon zest
The Bright Lemon Filling Components
This is where that beautiful zesty punch comes from. Make sure your butter is truly soft so it spreads easily without tearing the dough.
- 4 tablespoons unsalted butter, very soft
- 1/2 cup granulated sugar
- 1 tablespoon finely grated lemon zest
- 1 tablespoon fresh lemon juice
Crafting the Simple Lemon Glaze
The glaze is the grand finale! We want it thick enough to sit on top but thin enough to drizzle beautifully.
- 1 1/2 cups powdered sugar, sifted (Sifting prevents lumps, which is crucial for a smooth finish!)
- 3 to 4 tablespoons fresh lemon juice (Use 3 to start and add the fourth if you need it thinner.)
- 1 teaspoon finely grated lemon zest
Step-by-Step Guide to Perfect Cozy Winter Glazed Lemon Rolls
Okay, time to roll up those sleeves! Baking yeast dough can feel like a big commitment, but I promise, watching this dough transform is half the fun. We’re going to take this slow and steady so we get those perfect, pillowy swirls.
Activating the Yeast and Mixing the Dough
First up, let’s wake up that yeast. Whisk your warm milk, yeast, and sugar together in a big bowl. You absolutely must let this sit for about 5 to 10 minutes. If it doesn’t get foamy on top—like a creamy little head on a beer—your yeast is sad, and you need to start over with warmer milk. Don’t skip that foam check!
Once it’s looking happy and bubbly, whisk in your slightly cooled melted butter and that room temperature egg. Then, stir in your flour and salt, along with that gorgeous lemon zest. Mix it until it just comes together into a shaggy dough. It should look messy right now; don’t panic!
Kneading and the First Rise for Fluffy Cozy Winter Glazed Lemon Rolls
Now for the workout! Turn that dough out onto a lightly floured surface. You need to knead this for a good 6 to 8 minutes. You’re looking for it to stop sticking to your hands and feel smooth and elastic, kind of like playdough. It’s important not to add too much extra flour during this part, or your rolls will be tough!
Shape it into a nice ball, put it in a greased bowl, cover it with plastic wrap or a clean towel, and tuck it away somewhere warm. We need it to double in size, which usually takes about an hour to 75 minutes. Patience is key here! If you want more bread inspiration, check out our 18 Best Bread Recipes.
Preparing the Zesty Filling and Shaping the Rolls
While the dough is rising, mix up that filling. Just stir the very soft butter, sugar, zest, and lemon juice until it’s a nice, even paste. If your butter is cold, it’s going to rip your dough later, so make sure it’s really pliable.
When the dough has doubled, gently punch it down—it’s so satisfying! Roll it out on your floured surface into a big 12 by 16 inch rectangle. Spread that buttery filling evenly all over, but here’s a small trick: leave about an inch bare along that top long edge. That empty strip helps the seam seal shut later.
Rolling, Slicing, and the Final Proof
Starting from the long side, roll that rectangle up as tightly as you possibly can into a log. If you roll it tight, you get those beautiful spirals! Then, use a sharp knife or—my favorite trick—unflavored dental floss to slice that log into 12 equal pieces. Floss cuts them so cleanly!
Place the rolls spiral-side up in your greased 9×13 pan. Cover them again and let them have their second nap—this is the final rise, about 30 to 40 minutes. They should look puffy and just starting to touch each other. About halfway through this rise, go ahead and preheat your oven to 350°F.
Baking and Glazing Your Beautiful Lemon Rolls
Pop those puffy beauties into the 350°F oven for 20 to 25 minutes. You want them lightly golden on top and when you gently press the center, they should spring right back. Don’t overbake them! Pull them out and let them cool right in the pan for just 10 minutes.
While they cool just a touch, whisk up your glaze ingredients. If it’s too thick to drizzle, add that last tablespoon of lemon juice until it flows nicely. Drizzle that sunshine all over the warm rolls. The warmth helps the glaze seep into those swirls just a little bit before it sets. Enjoy them right away! If you want to see more of my baking adventures, follow me on Pinterest.

Tips for Success with Cozy Winter Glazed Lemon Rolls
Even with an easy recipe like this, a few little tricks can take your rolls from great to absolutely legendary. I learned these the hard way, so you don’t have to! It’s all about respecting the dough and knowing when to stop messing with it.
The biggest thing I want you to remember is that these rolls are meant to be soft. Soft means slightly sticky dough, and soft means you can’t overbake them for a second! Keep these pointers in mind, and you’ll have bakery-worthy results every time.
Achieving the Best Dough Texture
Seriously, go back to that milk temperature check. It needs to be warm to the touch, not hot! If you use milk that’s too hot, you’ll end up with flat rolls because the yeast dies. Also, when you’re kneading, fight the urge to keep adding flour. If the dough feels slightly tacky, that’s perfect! That little bit of stickiness is what guarantees a fluffy interior rather than a dense crumb.
Perfecting the Spiral and Glaze Finish
When you roll up that rectangle? Make it tight! A loose roll means the spirals fall apart when you slice them. I use unflavored dental floss to cut the log; it keeps the sides smooth and prevents squishing the layers. For the glaze, remember that powdered sugar absorbs liquid fast. Start with less lemon juice than you think you need, and only add more until it pours slowly off your spoon. If it soaks in too fast once it hits the warm rolls, just whisk up a tiny bit more glaze to drizzle on top right before serving!
Frequently Asked Questions About Lemon Rolls
I always get so many questions when I post pictures of these rolls! They seem complicated, but once you understand the timing, they’re a breeze. Here are the things I hear most often when people are making their first batch of these beautiful citrus treats.
Can I make the dough for these Cozy Winter Glazed Lemon Rolls ahead of time?
That’s a great question, especially if you want warm rolls for a weekend brunch! This recipe is best enjoyed the day it’s made because the yeast provides that incredible fluffiness. While you *could* let the dough rise slowly in the fridge overnight after Step 4, I really prefer them fresh. If you do slow-rise them, pull the pan out of the fridge about an hour before baking so they can warm up a bit before going into the oven. Otherwise, they are best eaten the moment they come out of the oven!
What kind of lemon juice works best for the filling and glaze?
Please, please, please use fresh lemon juice if you can! The bottled stuff just doesn’t have that vibrant, zesty pop we need to balance the sweetness of the sugar and dough. Fresh juice makes all the difference in both the filling and the final glaze. If you squeeze a couple of lemons, you’ll get plenty for both parts of the recipe. It really amplifies that bright flavor.
How do I store leftover Glazed Rolls?
These rolls disappear fast, but if you have any leftovers, you need to treat them right. They are best stored in an airtight container at room temperature for up to one day. If you need them to last longer—say, up to three days—you can refrigerate them, but they will firm up a bit. Don’t worry, though; we have a simple reheating trick coming up that brings them right back to life!
Serving Suggestions for Your Winter Baking Treat
Honestly, these Cozy Winter Glazed Lemon Rolls are perfect all by themselves, especially straight from the oven when that glaze is still a little runny. But if you’re serving them up for a holiday brunch or a weekend get-together, I always like to have a few things on the side to round out the spread.
A little bit of fresh fruit goes wonderfully with the bright citrus—think sliced oranges or maybe some fresh berries if you can find them. If you’re feeling extra indulgent, a side of thick, plain Greek yogurt adds a nice creamy tang that cuts through the sweetness of the glaze perfectly. And of course, you absolutely must have a huge pot of hot, strong coffee ready. The bitterness of the coffee is the perfect partner for the sweet, zesty roll! If you are looking for other cozy winter ideas, check out our 12 Cozy Winter Soups to Keep You Warm.
Storing and Reheating Your Cozy Winter Glazed Lemon Rolls
It’s rare that I have leftovers because my family practically inhales these the day they are made, but when I do, I want to make sure they taste just as good the next day. The main enemy of a great yeast roll is dryness, so we have to treat them gently!
The key is preventing air from getting to them. If you wrap them up too tightly when they are still warm, they might get sticky, so let them cool down completely first. Then, you can choose your storage adventure based on when you plan to eat them next. Reheating is essential for bringing back that fresh-baked softness!
Storage Guide Table
Use this quick guide to keep your rolls delicious for a few days:
| Storage Location | Maximum Time | Best For |
|---|---|---|
| Room Temperature (Airtight Container) | 1 Day | Immediate enjoyment, best texture. |
| Refrigerated (Airtight Container) | Up to 3 Days | Longer storage, requires reheating. |
When you’re ready to eat the refrigerated ones, don’t just leave them on the counter! A quick zap in the microwave or a short trip to a low oven makes all the difference. It softens the dough right back up, making them taste almost freshly baked again.
Sharing Your Experience with Cozy Winter Glazed Lemon Rolls
Now that you’ve got the recipe, I’m dying to know what you think! Seriously, the best part of sharing these recipes is hearing about your kitchen adventures. Did you add cardamom like I suggested in the notes? Did you manage to get those perfect, tight spirals? You can also share your results on Facebook!
When you pull those warm, glistening lemon rolls out of the oven, snap a quick picture and tag me! I love seeing how they turn out in different kitchens. If you have any tricks that worked brilliantly for you—maybe a specific way you kneaded the dough or a twist on the glaze—please leave a comment below.
Don’t be shy about leaving a rating, either! Five stars means I should keep sharing my family secrets, and anything less means you can tell me where I can improve my instructions. Happy baking, and I hope these Cozy Winter Glazed Lemon Rolls bring a little bit of sunshine to your winter days!
Print
Amazing 12 Cozy Winter Glazed Lemon Rolls
- Total Time: 2 hours 35 minutes
- Yield: 12 lemon rolls
- Diet: Omnivore
Description
Bake these cozy winter glazed lemon rolls for a soft, bright treat. Fluffy yeast dough, zesty lemon filling, and a simple lemon glaze.
Ingredients
- Dough: 1 cup warm whole milk
- Dough: 2 1/4 teaspoons instant or active dry yeast
- Dough: 1/4 cup granulated sugar
- Dough: 4 tablespoons unsalted butter, melted and slightly cooled
- Dough: 1 large egg, room temperature
- Dough: 3 cups all-purpose flour, plus more for dusting
- Dough: 1/2 teaspoon fine sea salt
- Dough: 1 tablespoon finely grated lemon zest
- Lemon filling: 4 tablespoons unsalted butter, very soft
- Lemon filling: 1/2 cup granulated sugar
- Lemon filling: 1 tablespoon finely grated lemon zest
- Lemon filling: 1 tablespoon fresh lemon juice
- Glaze: 1 1/2 cups powdered sugar, sifted
- Glaze: 3 to 4 tablespoons fresh lemon juice
- Glaze: 1 teaspoon finely grated lemon zest
Instructions
- Whisk the warm milk, yeast, and sugar in a large bowl; let stand 5 to 10 minutes until foamy.
- Whisk in the melted butter and egg; stir in the flour, salt, and lemon zest until a soft dough forms.
- Turn the dough onto a floured surface and knead for 6 to 8 minutes until smooth and elastic.
- Shape the dough into a ball, place it in a greased bowl, cover, and let rise in a warm spot until doubled, about 60 to 75 minutes.
- For the filling, stir together the soft butter, sugar, lemon zest, and lemon juice until you have a spreadable paste.
- Gently punch down the dough and roll it on a floured surface into a 12 by 16 inch rectangle.
- Spread the lemon filling evenly over the dough, leaving a border on the top long edge; roll the dough up tightly from the long side into a log.
- Slice the log into 12 even pieces and arrange them spiral-side up in a greased 9 by 13 inch baking pan.
- Cover the pan and let the rolls rise again until puffy and touching, about 30 to 40 minutes; preheat the oven to 350°F.
- Bake the rolls for 20 to 25 minutes until tops are lightly golden and centers spring back.
- Whisk the powdered sugar, 3 tablespoons lemon juice, and lemon zest for the glaze; add more lemon juice as needed for a thick but pourable consistency.
- Cool the hot rolls in the pan for 10 minutes; drizzle the lemon glaze generously over the warm rolls and serve.
Notes
- Use milk warm to the touch, not hot, for quick yeast activation.
- Keep the dough soft and slightly tacky for the fluffiest texture; avoid adding too much flour.
- Roll the dough into a tight log and slice with a sharp knife or unflavored dental floss for neat spirals.
- Tent the pan loosely with foil during the last few minutes of baking if rolls brown too fast.
- Glaze while the rolls are warm so the glaze seeps into the swirls but stays glossy on top.
- Store cooled rolls covered at room temperature for 1 day or refrigerated for up to 3 days.
- Reheat rolls in the microwave briefly or in a 325°F oven for 5 to 7 minutes for a crisp edge.
- If the glaze absorbs, drizzle with a little fresh lemon juice or extra glaze before serving again.
- For an orange version, use orange zest and juice.
- Add 1/2 teaspoon ground cardamom or cinnamon to the filling for winter warmth.
- Sprinkle 1/3 cup finely chopped nuts over the filling before rolling for crunch.
- Swap half the all-purpose flour for bread flour for extra chew.
- Finish with extra zest dusted over the glazed rolls for more citrus aroma.
- Prep Time: 25 minutes plus 1 hour 45 minutes rising
- Cook Time: 25 minutes
- Category: Breakfast Pastry
- Method: Baking
- Cuisine: American