Red Velvet Cake used to sound like something only professional bakers attempted. When I first tried making one for my sister’s birthday, it looked more like a pale pink disaster than a rich, dramatic dessert. I nearly gave up on baking altogether right there in my tiny apartment kitchen! But that failure taught me something important: baking, especially these classic American showstoppers, is all about following the rules, which is why I created NoobRecipes.
This recipe for a truly stunning, moist Red Velvet Cake is designed to take all the guesswork out. We aren’t messing around—we weigh everything! We use room-temperature ingredients exactly when we should. I promise you, if you follow these exact steps, you will end up with that perfect, deeply colored layer cake with the tangy, fluffy cream cheese frosting you see in magazines. Forget the intimidation; let’s bake something amazing together.

Why You’ll Love This Red Velvet Cake Recipe
I know you’re looking for a showstopping cake that doesn’t require an extra degree in pastry arts. That’s exactly what I built here! This isn’t just another recipe; it’s a blueprint for guaranteed Red Velvet success, even if you’re nervous about layers.
- Incredibly Moist Crumb: Thanks to the combination of buttermilk and sour cream, this cake stays wonderfully tender.
- Foolproof Steps: We measure everything precisely so you don’t have to guess about ratios—this is beginner success baked in.
- That Classic Flavor: You get that perfect, subtle hint of cocoa balanced by the tangy cream cheese frosting.
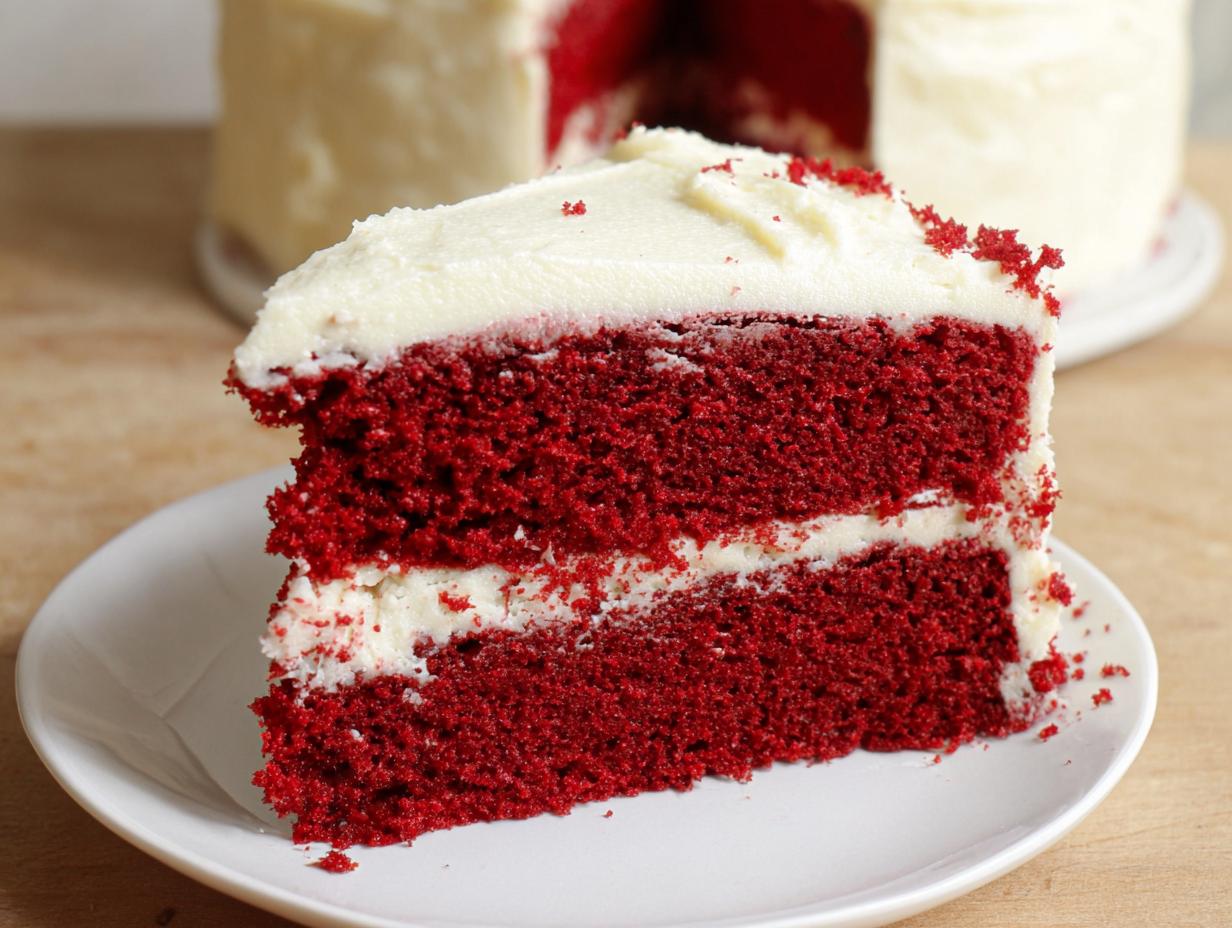
- Visually Stunning Results: That deep red color is achievable, and you’ll feel like a total pro when you pull those layers out!
Essential Equipment for Your Red Velvet Cake
When we talk about a perfect Red Velvet Cake, we’re talking about precision, especially with the layers needing to bake evenly. Don’t worry, you don’t need a commercial kitchen, but having the right gear makes all the difference between a flat cake and a beautiful, level stack. Trust me, skipping the weighing scale is where most people trip up!
Gathering Your Baking Tools
For this recipe, I really need you to pull out the good stuff. A reliable digital kitchen scale is your best friend here, seriously. You’ll also need your two 8-inch round cake pans—make sure they are identical so the layers bake at the same speed. And please, use a stand mixer if you have one, especially for that frosting step. It makes creaming the butter so much easier than doing it by hand.
Ingredients for the Perfect Red Velvet Cake
Okay, let’s talk ingredients because this is where the magic—and the science—happens. For a cake like Red Velvet, consistency is everything. If you want that beautiful, even crumb and that perfect deep red color every single time, you need to measure accurately. I know I sound like a broken record, but using a digital kitchen scale and weighing your flour, sugar, and cocoa powder is the single best step you can take to guarantee success.
When I started out, I just scooped flour, and my cakes were always dense or dry. Now, I weigh everything, and the results are night-and-day different. This adherence to precise measurement is part of what makes this recipe so reliable for beginners—it removes the guesswork! We need everything at room temperature for the wet ingredients, which helps everything emulsify smoothly. Trust me on this one!
Cake Batter Components for Red Velvet Cake
Ingredients Table
Remember, weighing is best, but I’ve included approximate volume measurements where possible, though I highly recommend grabbing that scale!
| Ingredient | Amount (Metric) | Preparation Notes |
|---|---|---|
| All-purpose flour | 300 g | Sifted |
| Granulated sugar | 300 g | Weighed |
| Unsweetened Dutch cocoa powder | 2 tablespoons | Sifted |
| Baking powder | 1 teaspoon | Level measurement |
| Baking soda | 1 teaspoon | Level measurement |
| Salt | 1 teaspoon | Level measurement |
| Buttermilk | 165 g | Room temperature |
| Sour cream (14-18%) | 180 g | Room temperature |
| Vegetable oil | 110 g | Weighed |
| Large eggs | 2 | Room temperature |
| White vinegar | 2 teaspoons | Level measurement |
| Vanilla extract | 2 teaspoons | Level measurement |
| Red gel food coloring (or vegan alternative) | 1 teaspoon | Adjust for deep color |
Making the Signature Cream Cheese Frosting
A Red Velvet Cake just isn’t complete without that tangy, rich cream cheese frosting. Honestly, if the cake is the star, the frosting is the spotlight! I used to think making frosting was just dumping powdered sugar into butter, but wow, was I wrong. The secret to a frosting that holds its shape beautifully, doesn’t taste overly sweet, and spreads like a dream is all about temperature control.
When the butter and cream cheese are perfectly soft—not melted, just yielding—they whip up into this unbelievably smooth, airy cloud. We beat that butter for ages to incorporate air, which gives the frosting its structure. Then, we gently fold in the sugar so we don’t deflate all that hard work. Keep your eye on the texture; it should be spreadable but firm enough to hold a nice peak!
Frosting Ingredients
Frosting Ingredient Table
These ingredients make the perfect topping for your vibrant Red Velvet Cake. Make sure your dairy is truly at room temperature!
| Ingredient | Amount (Metric) | Preparation Notes |
|---|---|---|
| Butter | 300 g | Softened to room temperature |
| Full-fat cream cheese | 150 g | Softened to room temperature |
| Powdered sugar | 540 g | Sifted well |
| Vanilla bean paste | ¾ teaspoon | For superior flavor |
Step-by-Step Instructions for Your Red Velvet Cake
Alright, this is it—the moment we turn ingredients into that stunning layer cake! I’ve broken this down into manageable chunks because nobody wants to feel overwhelmed when they are trying to achieve that perfect Red Velvet Cake. The key here is patience, especially when mixing and cooling. Don’t rush the preheating, and definitely don’t rush the cooling!
Preparing the Cake Layers
First things first: get that oven preheated to 170°C (340°F). Conventional ovens work best here, so set it accordingly. While it warms up, grab those two 8-inch pans and line the bottoms perfectly with parchment paper—this is your insurance policy against sticking! Now, let’s handle the dry stuff. Sift your flour, sugar, cocoa powder, baking powder, baking soda, and salt right into one big bowl. Give it a good stir so everything is evenly distributed. You want that cocoa mixed in now so you don’t get weird pockets of just chocolate later!
In a separate bowl—and I mean separate—whisk together your room-temperature buttermilk and sour cream, the oil, eggs, vinegar, vanilla, and that red food coloring. You might need to add a little extra color here; I usually aim for a deep, almost alarming red before mixing it in. Be gentle when whisking the wet side, especially around the eggs; we aren’t trying to whip them, just combine them smoothly. Now, slowly pour the entire wet mixture into the dry mixture. Stir gently until you see no more dry streaks. Stop stirring as soon as it looks combined—seriously, overmixing is the enemy of a tender Red Velvet Cake!
Baking and Cooling the Red Velvet Cake
Divide that beautiful batter evenly between your two prepared pans. Use a kitchen scale if you have one to make sure they are exact! Pop them into the preheated oven for about 28 to 30 minutes. You’ll know they are done when a cake tester inserted right into the center comes out clean, or maybe with just a few moist crumbs clinging to it. Pull them out, let them sit in those pans on a wire rack for exactly five minutes. After five minutes, gently flip them out onto the rack to cool completely. They must be completely cool before frosting, or you’ll have a melted mess!

Crafting the Cream Cheese Frosting
While those cakes cool down, let’s tackle the frosting, which needs soft butter and cream cheese—remember, room temperature is crucial! Cube the butter and put it in your stand mixer with the paddle attachment. Beat that butter on high speed for a solid five minutes until it looks pale and fluffy. Scrape down the sides, and mix for two more minutes. This step builds the structure!
Now add your soft cream cheese and the vanilla bean paste. Mix on medium speed just until they are incorporated, about a minute. Next, turn the speed down to low, and add your sifted powdered sugar in two batches. Let each batch mix in before adding the next. Once it’s all in, turn the mixer up to medium-high for two final minutes. Here’s my favorite trick: remove the bowl and use a sturdy rubber spatula to stir the frosting vigorously by hand for about 30 seconds. This knocks out those tiny air bubbles the mixer created, resulting in a much denser, smoother frosting that won’t collapse on your beautiful cake.
Assembling Your Red Velvet Cake
Once those layers are stone cold, use a serrated knife to gently slice off any domed tops so they are perfectly flat. Save those scraps—we need those for decorating later! Place your first layer on your serving plate or cake stand. Scoop two big dollops of frosting on top and use an offset spatula to spread it evenly to the edges. Place the second layer on top.
Now, cover the whole thing—top and sides—with a very thin layer of frosting. This is called the crumb coat, and it traps all those loose crumbs so your final layer looks pristine. Pop the cake in the fridge for about 15 minutes to set that coat. Finally, take the rest of the frosting and cover the cake completely. Smooth it out, or use your spatula to create those gorgeous wavy peaks I love so much. And don’t forget to press those reserved cake crumbs onto the sides for that classic, textured finish!
Tips for Success with Red Velvet Cake
I’ve made enough Red Velvet Cakes to know exactly where things go wrong, and it usually comes down to just a couple of things we can easily fix. If you follow these four quick rules, your cake will turn out moist and perfectly structured every time. No more sunken centers or dry edges!
- Temperature is Non-Negotiable: Make sure your buttermilk, sour cream, eggs, butter, and cream cheese are truly at room temperature. Cold ingredients fight each other, leading to a lumpy batter.
- Don’t Over-Color at First: Add only a teaspoon of gel coloring initially. You can always add more red, but you can’t take it out if you accidentally make it too dark!
- Mix Gently Once Combined: Once the wet ingredients hit the dry ingredients, switch to a light hand. Overmixing develops gluten, and that’s how you get a tough, chewy cake instead of a tender Red Velvet crumb.
- Beat That Butter Long Enough: For the frosting, you must cream that butter for a full five minutes before adding anything else. That aeration is what prevents the frosting from feeling heavy or collapsing later.
Storing and Reheating Your Red Velvet Cake
This Red Velvet Cake is so moist when it comes out of the oven, and we want to keep it that way! Because of that rich cream cheese frosting, we have to be smart about storage. You can’t just leave this sitting on the counter like a standard sugar cookie.
The high dairy content in the frosting means refrigeration is necessary to keep things safe and firm. The good news is that this cake actually tastes even better the next day once the flavors have settled in. Just make sure you bring it back to room temperature before serving so that frosting softens up nicely!
| Action | Instructions for Best Results |
|---|---|
| Short-Term Storage (1-3 Days) | Cover the cake loosely with a cake dome or loosely tent it with plastic wrap. Store in the refrigerator. Do not seal airtight initially, or the frosting might sweat. |
| Long-Term Storage (Up to 2 Months) | If freezing, slice the cake first. Wrap each individual slice tightly in plastic wrap, followed by a layer of foil. Label and freeze. |
| Thawing/Serving | Move frozen slices to the refrigerator overnight to thaw slowly. Before serving, let the cake sit at room temperature for at least 30-45 minutes so the frosting gets soft and creamy again. |
| Reheating Slices | If you want a slightly warm slice (maybe skip this if you prefer the frosting firm!), you can microwave an individual slice for about 10-15 seconds on low power. |
Frequently Asked Questions About Red Velvet Cake
I get so many questions about this recipe because people are nervous about getting that perfect texture and color mix. Don’t stress! Most issues are easy fixes, and I’ve answered the top ones right here so your next Red Velvet Cake comes out exactly right.
Can I substitute the buttermilk in this Red Velvet Cake?
Yes, you absolutely can if you’re in a pinch! Buttermilk is essential because its acidity reacts with the baking soda to help the cake rise beautifully and tenderize the crumb. If you don’t have any, just make a substitute: measure out 165g of whole milk and stir in 1 tablespoon of white vinegar or lemon juice. Let that sit on the counter for about five minutes until it starts to look slightly curdled. That’s your homemade buttermilk replacement, and it works like a charm in this classic layer cake!
Why is my Red Velvet Cake not vibrant red?
This is almost always down to the type and amount of food coloring you use. Traditional recipes used tiny amounts of cocoa, but modern recipes need a lot of color to stand out against the brown cocoa powder. You absolutely must use red gel food coloring, not the liquid drops you use for Easter eggs. Gel is concentrated! Start with the teaspoon listed, mix it into your wet ingredients, and if it looks more pink than deep red, add another half teaspoon until you hit that gorgeous color. Don’t be shy, but add it slowly!
Nutritional Information Disclaimer
Look, I’m Adam, and I run NoobRecipes. I’m here to show you how to make amazing food that tastes incredible, but I’m definitely not a registered dietitian! Because every single ingredient can change based on what brand you buy—like the percentage of fat in your sour cream or the exact size of your eggs—I don’t provide precise nutritional breakdowns for this Red Velvet Cake.
The amounts of sugar, fat, and calories will vary wildly depending on whether you use full-fat cream cheese or a lighter version, or if you decide to skip the frosting entirely. If you need exact nutritional counts for dietary reasons, I highly recommend plugging these ingredients into your preferred tracking app. But for now, let’s just focus on the fact that this cake is 100 percent delicious and 100 percent achievable for any beginner baker!
Share Your Red Velvet Cake Experience
I truly hope this recipe demystified the world of layer cakes for you! Making a stunning Red Velvet Cake from scratch used to feel impossible to me, but now it’s one of my go-to bakes when I need something guaranteed to impress. I put all my best beginner tips right into those steps, so I really want to hear how it went for you!
Did you nail the cream cheese frosting on the first try? Did you manage to get that perfect, deep red color without turning your kitchen into a crime scene? Tell me everything! Whether you thought it was easy, or maybe you ran into a hiccup we can troubleshoot together, leaving a rating and a comment helps other new bakers feel brave enough to tackle this showstopper. You can also follow along for more baking inspiration on Facebook or save this recipe on Pinterest.
Seriously, drop a comment below. I read every single one, and I love seeing your successes. If you made this Red Velvet Cake, let me know how many stars it gets from your family!
Print
Amazing Red Velvet Cake: 1 Flawless Try
- Total Time: 1 hour 30 minutes
- Yield: One 2-layer 8-inch cake
- Diet: N/A
Description
Follow these steps to create a classic, moist Red Velvet Cake with a rich cream cheese frosting. This recipe focuses on precise measurements for beginner success.
Ingredients
- 300 g all-purpose flour
- 300 g granulated sugar
- 2 tablespoon unsweetened Dutch cocoa powder
- 1 teaspoon baking powder
- 1 teaspoon baking soda
- 1 teaspoon salt
- 165 g buttermilk
- 180 g sour cream 14-18%, room temperature
- 110 g vegetable oil
- 2 large eggs room temperature
- 2 teaspoon white vinegar
- 2 teaspoon vanilla extract
- 1 teaspoon red gel food coloring or vegan food coloring
- 300 g butter
- 150 g full-fat cream cheese
- 540 g powdered sugar sifted
- ¾ teaspoon vanilla bean paste
Instructions
- Preheat your oven to 170ºC/340ºF conventional oven. Line two 20 cm/8 inch baking pans with parchment paper.
- In a bowl, sift the flour, sugar, cocoa powder, baking powder, baking soda, and salt. Stir to combine the dry ingredients.
- In a separate mixing bowl, whisk together the buttermilk, sour cream, vegetable oil, eggs, vinegar, vanilla extract, and red food coloring until combined. Add more color if needed for a deep red. Do not overmix the eggs.
- Slowly pour the wet ingredients into the dry mixture while gently stirring until no lumps remain in the batter.
- Divide the batter evenly between the prepared pans. Bake for 28-30 minutes, or until a cake tester comes out clean.
- Let the cakes cool in the tins for 5 minutes. Then, carefully remove them to a cooling rack to cool completely.
- For the frosting, take the butter and cream cheese out to reach room temperature (about 10 minutes before starting). Cut the butter into cubes and sift the powdered sugar.
- In a stand mixer with the paddle attachment, cream the butter for 5 minutes on high speed. Scrape down the sides and mix for 2 more minutes.
- Add the vanilla bean paste and cream cheese. Cream these with the butter for 1 minute on medium speed.
- Scrape down the sides again. On low speed, mix in the sifted powdered sugar in two parts, allowing each addition to incorporate before adding the next. Scrape down the sides and mix for a final 2 minutes.
- Remove the bowl from the mixer. Use a spatula to beat the frosting by hand to remove air bubbles.
- To assemble, use a serrated knife to level the tops of the cooled cake layers. Keep the scraps for decoration.
- Place the first cake layer on your serving dish. Add two large scoops of frosting and spread it evenly with an offset spatula.
- Add the second cake layer. Apply a thin crumb coat of frosting over the entire cake.
- Add the remaining frosting and smooth it over the cake. You can create a wavy design with the spatula and decorate the sides with the reserved cake crumbs.
Notes
- Weighing ingredients in grams provides more accurate results than using volume measurements.
- Adjust the amount of red gel food coloring based on your brand to achieve a deep red color.
- Be gentle when mixing the wet ingredients to avoid overmixing the eggs.
- Save the trimmed cake scraps for decorating the finished cake.
- Prep Time: 30 minutes
- Cook Time: 30 minutes
- Category: Dessert
- Method: Baking
- Cuisine: American