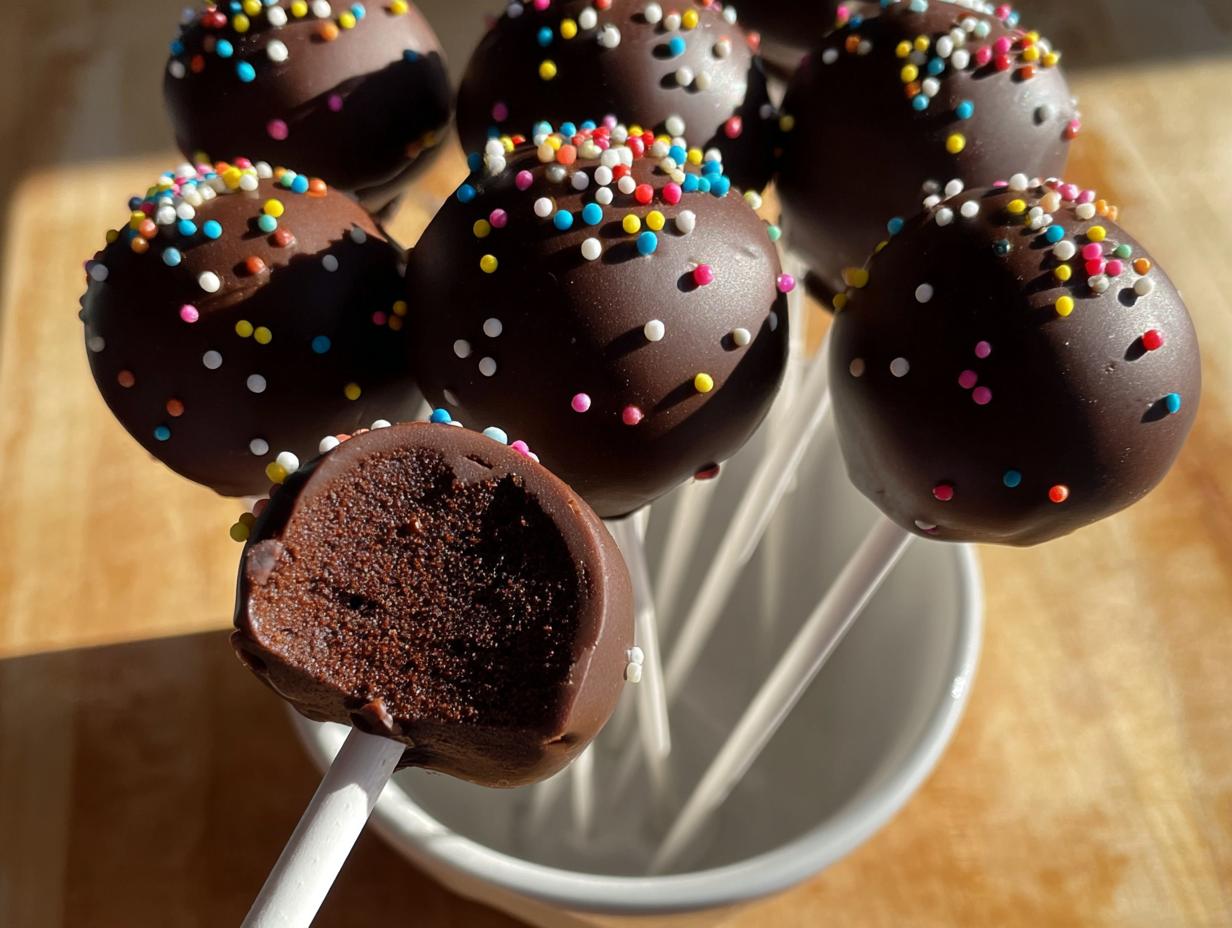
Chocolate Cake Pops always look like they belong on a fancy bakery display, right? When I first started NoobRecipes, I thought these were strictly for professional bakers who had mastered tempering chocolate and kneading dough for hours. I remember trying my first batch years ago, and honestly, it was a sticky, crumbly disaster that ended up looking more like chocolate mud balls than elegant treats. I almost gave up on the whole concept!
But here’s the secret I figured out—and this is why I’m sharing it with you—you don’t need a culinary degree to make these amazing. We’re using a simple cake mix base, which takes all the stress out of baking the actual cake part. Then, we bind it all together with a ridiculously easy, homemade cream cheese frosting that elevates everything instantly. It’s the perfect beginner baking project because the payoff looks huge, but the actual work required is surprisingly low.
Trust me, by the time you finish this recipe, you’ll have those perfectly round, decadent little bites ready for any party, and no one will ever guess how simple the process actually was. Get ready to impress everyone!

Gathering Your Supplies for Perfect Chocolate Cake Pops
Okay, before we even think about turning on the oven, let’s talk tools. When you’re trying something new, having the right equipment makes all the difference, especially when dealing with sticky cake batter and melted chocolate. Getting these things ready first means the actual assembly of your Chocolate Cake Pops moves fast and way less messy. Seriously, organization is my secret weapon for keeping things beginner-friendly!
I always lay everything out on the counter before I start mixing. It helps me stay focused and not forget a crucial step, like grabbing the chilling trays when I need them most. Don’t worry if you don’t have every single gadget under the sun; we can improvise a little, but these basics really help nail the texture and the dipping process.
Essential Tools for Making Chocolate Cake Pops
You’ll need a few things to get these looking bakery-worthy:
- A big bowl for crumbling the cake and mixing the batter.
- An electric hand mixer—this makes creaming the frosting and binding the cake so much easier than stirring by hand!
- A good sturdy spatula for scraping down the sides of the bowls.
- A baking sheet lined with parchment paper. This is non-negotiable for chilling and setting!
- A microwave-safe bowl for melting your chocolate wafers. Make sure it’s deep enough for dipping.
- A cake pop stick for every single ball you plan to make.
- Something to hold the sticks upright while the chocolate sets, like a block of styrofoam or even a tall glass filled with dry sugar or sprinkles.
Ingredients for Flavorful Chocolate Cake Pops
This recipe is brilliant because it relies on a few core, simple items. You’re using a box mix, which cuts out about 90% of the typical baking stress. The frosting we make from scratch is what gives these pops that incredible, fudgy texture that holds together perfectly. Don’t skimp on making the frosting right—that’s where the magic happens!
It’s important that your butter and cream cheese are truly softened. I mean it—room temperature, squishy soft. If they are cold, your frosting will be lumpy, and lumpy frosting means sad, cracked cake pops later on. Take them out early!
Cake and Frosting Components
| Item | Quantity/State |
| Chocolate Cake Mix | 1 box (plus ingredients required by box) |
| Salted Butter | 1/2 cup, softened to room temperature |
| Plain Cream Cheese | 8 oz, softened to room temperature |
| Vanilla Extract | 2 teaspoons |
| Powdered Sugar | 3 cups |
Coating and Decoration Needs for Your Chocolate Cake Pops
For the exterior, you’ll need your chocolate melting wafers—I usually grab milk chocolate, but dark or white are fantastic too if you want variety. You’ll need enough wafers to coat about 24 balls. And of course, grab the sprinkles now! Having them ready means you can decorate immediately after dipping, which is essential for getting those beautiful, festive Chocolate Cake Pops.
Step-by-Step Instructions for Your Chocolate Cake Pops
This is where we turn simple ingredients into impressive little spheres! Follow these steps closely, especially around the cooling and chilling parts, and you’ll see why this recipe is so reliable for first-timers.
Baking and Cooling the Cake Base
First things first: bake that box of chocolate cake mix. The package will tell you what to do, but here’s my pro-tip: if you want a richer, slightly denser cake that stands up better to the frosting, use whole milk instead of the water it calls for. It’s a small change, but it makes a difference!
Once it’s baked, you absolutely must let it cool completely in the pan. If you try to crumble a warm cake, you just end up with mushy, greasy crumbs. Once it’s cool to the touch, move it gently onto a wire rack to finish cooling down. Patience here is huge!
Creating the Smooth Cream Cheese Frosting
While the cake is cooling, whip up that amazing frosting. In a big bowl, start by beating the softened butter, softened cream cheese, and vanilla extract together until they are looking smooth. Now, here comes the powdered sugar. Don’t dump it all in at once! Add one cup, blend it up, scrape the sides down really well. Add the second cup, mix again, scrape again. Finally, add that last cup until everything is totally creamy. This slow addition prevents a sugar cloud from taking over your kitchen!
Mixing the Chocolate Cake Pop Batter
Time to bring it all together. Take your completely cooled cake and crumble it right into a separate large bowl. You want fine crumbs, so don’t be afraid to squeeze it a bit with your hands. Now, add about 1 cup of that gorgeous cream cheese frosting.
Using your electric mixer on low, start combining the cake and frosting. You’re aiming for a play-dough consistency—something that sticks together when you squeeze it but doesn’t feel greasy or wet. You might need up to 1/4 cup more frosting, but stop adding it the second the crumbs hold their shape easily. We are aiming for about 1.5 cups of frosting total used for the best texture in your Chocolate Cake Pops.
Shaping and Prepping the Chocolate Cake Pops for Dipping
Once the batter is mixed, cover the bowl and pop it into the fridge for about 30 to 45 minutes. Chilling is essential! This firms up the batter so you can roll it without everything sticking to your hands.
Line a baking sheet with parchment paper—this is your resting spot later. Scoop out about 1.5 tablespoons of the chilled batter and roll it quickly between your palms into a nice, tight ball. Place it on the prepared sheet.
Now, take a cake pop stick. Dip the very tip—just the tip!—into your melted chocolate (we’ll melt that next). Then, gently insert that chocolate-dipped end about halfway into the bottom of the cake ball. This little chocolate “glue” keeps the stick firmly in place. Put the sheet back in the fridge while you melt the chocolate for dipping.
Mastering the Chocolate Coating Process for Your Chocolate Cake Pops
Melt your chocolate wafers in a microwave-safe bowl. Use short bursts—30 seconds at a time—stirring well between each session. If you overheat it, it will seize up and become unusable. You want it smooth and liquidy.
Take your cake balls out of the fridge—they need to be cold for the best coating! If your chocolate looks too thick, give it one more quick 15-second zap. Hold the stick, dip the whole ball down into the chocolate, and slowly rotate it to coat completely. Lift it out and gently tap the stick against the side of the bowl to let the excess chocolate drip off. This prevents thick, messy bottoms on your Chocolate Cake Pops.

Final Decoration and Setting of the Chocolate Cake Pops
The second that pop comes out of the chocolate bath, it’s time for sprinkles! They have to go on right away before the coating starts to harden. Gently place the coated pop back down onto the parchment paper.
Once they are all decorated, let them sit at room temperature until they are set, or if you are impatient like me, pop the whole tray back into the fridge for about 20-30 minutes for a super snappy, crunchy exterior. Success!
Tips for Achieving Professional-Looking Chocolate Cake Pops
Look, even though this recipe is designed to be foolproof for us beginners, sometimes things still go a little sideways. That’s okay! That’s just baking. The key to getting those perfectly smooth, crack-free Chocolate Cake Pops is paying attention to temperature and texture right before you dip them. I’ve learned a few tricks over the years that saved me from throwing out a whole batch!
Don’t panic if your batter feels weird or if the chocolate starts looking grainy. We can usually fix it with a small adjustment. Remember, the goal here is impressive results without the headache!
Texture Check: What to Do If Your Batter Is Too Dry or Too Wet
If your cake crumbles when you try to roll it, or it cracks as soon as you touch it, your batter is too dry. You need more binder! Add another small spoonful—maybe a tablespoon—of that leftover cream cheese frosting and mix it in gently until it holds together. If the batter feels greasy, sticky, and is basically melting in your hands, you added too much frosting. Pop the whole bowl back into the fridge for an extra 15 minutes to firm up before rolling again.
Preventing Cracking and Splitting During the Chocolate Coating
The number one reason your coating cracks when it cools is temperature shock! If your cake balls are ice cold from the freezer and the chocolate is piping hot, the rapid change causes the coating to stress and crack later. Make sure those balls are just chilled, not frozen solid, when dipping. Also, if your melted chocolate starts getting thick while you’re working, don’t just keep adding more heat! Add a tiny bit of vegetable shortening or coconut oil (maybe half a teaspoon) and stir it in; this thins the chocolate right back out without making it watery, ensuring a smooth finish on your Chocolate Cake Pops.
Storing Your Homemade Chocolate Cake Pops
Once you’ve made these beauties, you want them to last, right? Luckily, thanks to that homemade cream cheese frosting inside, these hold up really well! The main thing to remember is that they are best stored in the fridge, but you don’t want them sitting in open air where they can dry out or absorb fridge smells.
I always make sure the chocolate coating is completely set before I even think about putting them away. If you try to seal them up while the chocolate is still soft, you’ll end up with a messy container!
| Storage Location | Maximum Time |
| Airtight Container (Recommended) | Up to five days |
| Freezer (Wrapped Individually) | Up to one month |
Frequently Asked Questions About Chocolate Cake Pops
I know you might have a few lingering questions, especially if this is your first time making these fun little treats. That’s totally normal! When I started out, I had a million questions written down on sticky notes next to my mixer. Here are the ones I hear the most about making perfect Chocolate Cake Pops.
Can I use a different type of frosting in my Chocolate Cake Pops?
You certainly can, but the cream cheese frosting is what gives these their signature dense, fudgy texture that binds so well. If you must substitute, make sure you use a very stiff, thick frosting, like a simple American buttercream made with powdered sugar and butter. But please, avoid anything too thin or runny, or your cake balls will end up falling apart when you try to dip them!
How long do Chocolate Cake Pops last?
Because we are using real cream cheese in the binder, these need to stay chilled for safety and quality. Stored properly in an airtight container in the fridge, your homemade Chocolate Cake Pops should stay delicious for about five days. If you need to keep them longer, wrap each one individually in plastic wrap and freeze them; they’re great for up to a month!
What is the best way to get the chocolate coating smooth?
The secret to a super smooth coating is all in the melting process. Use short bursts in the microwave—30 seconds max, then stir! If you try to rush it, the chocolate will seize up. Also, make sure your cake balls are cold when they go into the chocolate; this cools the coating down quickly, preventing it from soaking into the cake and keeping your exterior nice and crisp.
Share Your Success with These Chocolate Cake Pops
I really hope these easy Chocolate Cake Pops bring you as much joy as they bring my family. Seriously, if you made it through the dipping stage, you deserve a big pat on the back! Let me know in the comments how they turned out for you. Rate the recipe below, and please snap a picture and share it—I love seeing your beginner baking wins! You can also follow along for more easy recipes on our Pinterest page.
Print
Amazing 3 easy Chocolate Cake Pops tricks
- Total Time: 1 hour 45 minutes
- Yield: 24 cake pops
- Diet: N/A
Description
Create delicious Chocolate Cake Pops easily using a simple cake mix base and homemade cream cheese frosting. These treats are perfect for beginners wanting a fun, impressive dessert.
Ingredients
- 1 box chocolate cake mix
- Additional ingredients to make the cake per box instructions
- 12 oz chocolate melting wafers
- Sprinkles, for decoration
- 1/2 cup salted butter, softened to room temperature
- 8 oz plain cream cheese, softened to room temperature
- 2 tsp vanilla extract
- 3 cups powdered sugar
- 24 cake pop sticks
Instructions
- Prepare and bake the chocolate cake mix following package directions. Substitute water with milk for richer cake if you prefer.
- Cool the baked cake completely in the pan, then move it to a cooling rack.
- Make the cream cheese frosting: Combine butter, cream cheese, vanilla extract, and 1 cup of powdered sugar in a large bowl.
- Mix with an electric hand mixer. Scrape the sides, add another cup of powdered sugar, and mix again.
- Add the final cup of powdered sugar and mix until the frosting is smooth and creamy.
- Crumble the cooled cake into a separate large bowl.
- Add about 1 cup of frosting to the crumbled cake. Use the electric hand mixer to combine the cake and frosting.
- Add up to 1/4 cup more frosting if needed until you reach a texture that rolls smoothly into a ball (aim for about 1.5 cups total frosting used).
- Chill the cake pop batter in the fridge for 30-45 minutes.
- Scoop about 1.5 tbsp of batter and roll it into a ball. Place the ball on a parchment paper-lined baking sheet.
- Repeat until all batter is used, keeping the sheet in the fridge while you melt the chocolate.
- Melt the chocolate wafers in a microwave-safe dish using 30-second intervals, stirring between each until smooth.
- Remove the cake pop balls from the fridge. Dip the end of a cake pop stick into the melted chocolate, then insert it into a cake pop ball. Place it back on the parchment paper.
- Repeat this step for all cake pops.
- Chill the baking sheet in the fridge for 30-45 minutes or in the freezer for 20-30 minutes.
- Remove the chilled pops. Re-melt the chocolate if necessary.
- Dip each cake pop into the melted chocolate, fully coating it. Allow excess chocolate to drip off.
- Place the coated pop back on the parchment paper and immediately add sprinkles before the chocolate sets.
- Repeat until all cake pops are coated.
- Let the cake pops set completely at room temperature, or chill them for a crunchier exterior.
Notes
- You can use dark, milk, or white chocolate wafers for variety in coating.
- Add colorful sprinkles or drizzle extra melted chocolate for decoration.
- Store cake pops in an airtight container in the fridge for up to five days.
- Prep Time: 45 minutes
- Cook Time: 30 minutes
- Category: Dessert
- Method: Baking and Mixing
- Cuisine: American