Okay, stop whatever you are doing right now, because I have found the absolute best bread recipe you will ever try. Seriously! Forget those sad, dry loaves you buy at the supermarket. We are making bakery-quality bread right here in our own kitchens. This recipe for Homemade Asiago Cheese Bread With Crispy Crust is pure magic.
I know what you’re thinking—cheese bread sounds complicated, right? Wrong! This recipe is surprisingly straightforward, even if you’re just dipping your toes into yeast baking for the first time. The payoff is huge: a soft, savory interior kissed by that incredible, golden, cheesy crust. It’s the kind of bread you want to tear apart immediately while it’s still warm. Trust me, once you try this, it’s going to become your new obsession!

Why You Will Prepare Homemade Asiago Cheese Bread With Crispy Crust
I’ve tried countless savory bread recipes over the years, and this one keeps pulling me back. It just hits every single marker for perfect homemade bread. You get that incredible chewiness from the high-protein flour, but the inside stays tender and never tough. It smells amazing while it bakes, filling the whole house with that sharp, nutty Asiago scent!
The best part is that you don’t need to be a master baker to achieve results that look like they came straight from a high-end artisan shop. I mean, who doesn’t want bakery-style results without the bakery price tag? This recipe proves you can have it all: amazing flavor, fantastic texture, and simple steps.
Key Benefits of This Savory Bread
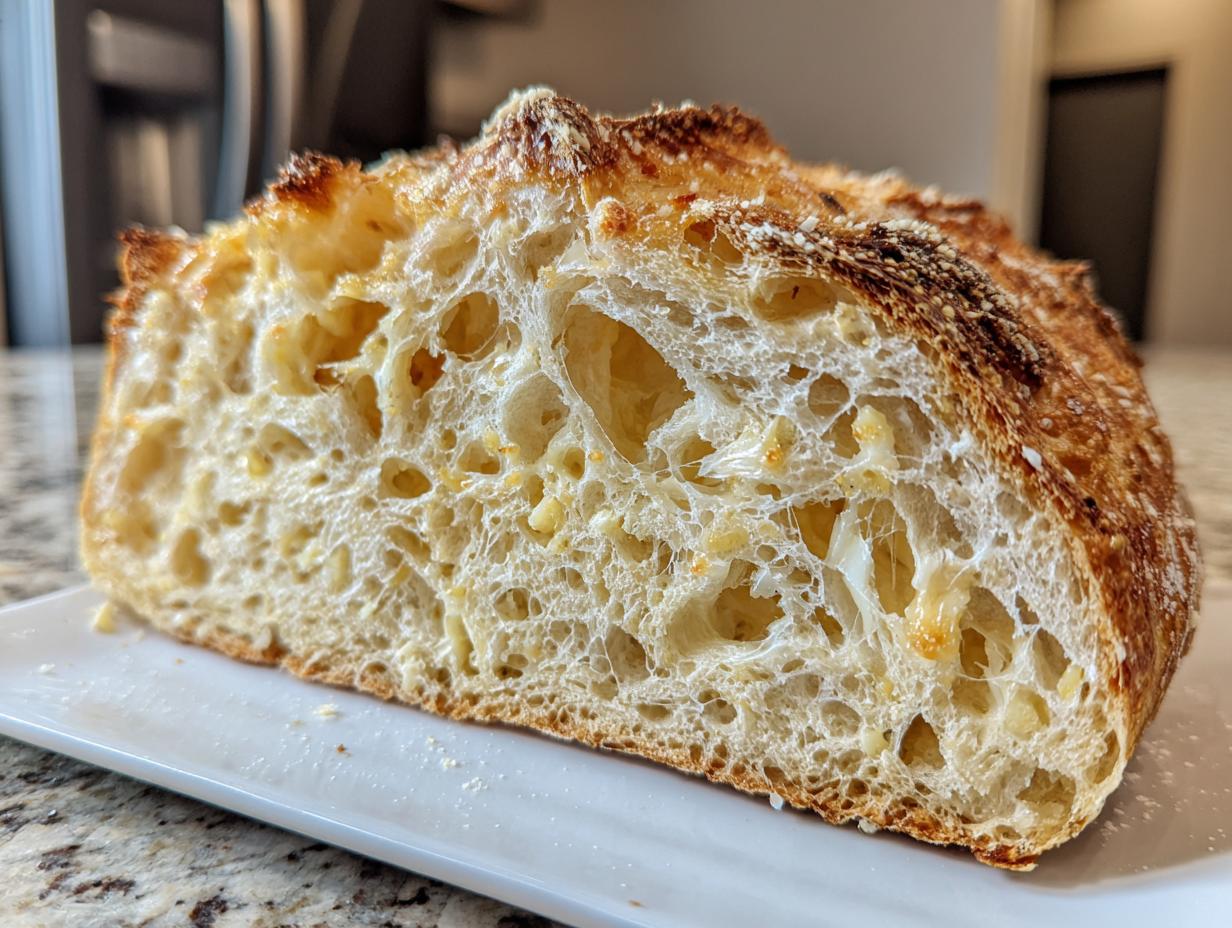
- The interior crumb is unbelievably soft, almost cloud-like, contrasting perfectly with the exterior.
- It packs a serious savory punch thanks to the generous amount of sharp Asiago cheese mixed right into the dough.
- The process is quick enough that you can whip up a batch after work, though you’ll have to fight the urge to eat it all immediately.
- It’s very forgiving if you’re new to working with yeast—the milk and butter keep things pliable.
Essential Components for Homemade Asiago Cheese Bread With Crispy Crust
Okay, gathering your supplies is half the battle won, right? For this Homemade Asiago Cheese Bread With Crispy Crust, the quality of your ingredients really shines through because there aren’t too many things masking the flavor. We need good flour and, of course, plenty of cheese! Pay close attention to the milk temperature—that’s crucial for waking up the yeast properly.
I always lay everything out before I start, a little ritual I picked up from my aunt. It keeps things moving smoothly, especially when you’re dealing with rising times. Don’t skimp on the Asiago; it’s the star here! If you are looking for other easy bread recipes, check out this easy no-knead peasant bread.
Ingredient List for Bakery Style Bread
You’ll find the full measurements below in the table format. Just a heads up: make sure you measure out your Asiago cheese into two separate piles before you start mixing. We use a big chunk mixed into the dough for flavor, and the rest goes on top for that amazing crust we are chasing!
| Ingredient | Amount |
|---|---|
| Bread Flour | 3\u00bc cups |
| Instant Yeast | 2\u00bc teaspoons |
| Kosher Salt | 1\u00bd teaspoons |
| Granulated Sugar | 1 teaspoon |
| Black Pepper | \u00bc teaspoon |
| Whole Milk (warmed) | 1\u00bc cups |
| Unsalted Butter | 2 tablespoons |
| Shredded Asiago Cheese (divided) | 1\u00bd cups |
| Large Egg | 1 |
| Warm Water | 1 tablespoon |
Necessary Equipment
You don’t need a million fancy gadgets, but a stand mixer really makes kneading dough a breeze. If you don’t have one, don’t panic—I’ll tell you how to manage by hand later!
- A reliable stand mixer with a dough hook attachment.
- A large, lightly greased bowl for the first rise.
- A sturdy baking sheet, preferably a rimmed one.
- Parchment paper is non-negotiable for easy cleanup and release.
- A pastry brush for getting that egg wash on top.
Step-by-Step Guide to Making Homemade Asiago Cheese Bread With Crispy Crust
Now for the fun part! Getting this Homemade Asiago Cheese Bread With Crispy Crust made is all about following the rhythm of the dough. Don’t rush the rising times; that’s where the flavor and texture really develop. We’re moving from simple ingredients to a magnificent loaf!
Mixing the Dry and Wet Bases
First things first, get your stand mixer ready. In the bowl, whisk together your flour, yeast, salt, sugar, and that kick of black pepper. You want these dry guys totally combined before we introduce any liquid. This ensures the yeast is evenly distributed—no weird clumps!
Next, we handle the wet ingredients. Warm up your whole milk until it is hot to the touch—think pleasantly hot, but definitely not boiling, or you’ll kill the yeast! Once it’s warm, stir in your two tablespoons of butter until it melts right into the milk. Pour this warm, buttery milk mixture into the dry ingredients. Mix it slowly on low speed until everything looks smooth and incorporated. It’s going to be a thick batter at this stage.
Developing the Asiago Dough
This is where the savory goodness comes in! Stir in about one and a quarter cups of that gorgeous shredded Asiago cheese. Mix just until you see it disappear into the dough. Now, start adding the rest of your flour gradually. You need to stop adding flour when the dough pulls away from the sides but is still slightly sticky—I mean, just slightly! If you add too much flour now, you’ll end up with a dense brick instead of soft bread, so be careful here.
Attach the dough hook and let your mixer work for a solid five minutes. Kneading develops that gluten structure we need for a good chew. Five minutes is perfect for developing strength without overworking it.
The Rising Process and Shaping Loaves
Once kneading is done, pop that sticky, cheesy ball into a lightly greased bowl. Cover it loosely with plastic wrap or a damp towel and let it rest somewhere warm for about 30 to 45 minutes. You want it to nearly double in size. Don’t walk away for an hour, though; keep an eye on it!
When it’s puffed up, gently punch the air out—it’s very satisfying! Divide the dough evenly into two pieces. Shape each piece loosely into a nice loaf shape and place them side-by-side on a baking sheet lined with parchment paper. Cover them again and let them rest for their second rise, which is shorter this time: about 20 to 30 minutes. While they are proofing, go ahead and preheat that oven to 375°F.

Final Proof and Achieving the Crispy Crust
Right before these loaves go into the oven, we need to give them that beautiful, golden finish. Whisk your single egg with that tablespoon of warm water to create an egg wash. Brush this mixture lightly but completely over the tops of both loaves. Don’t let it drip down the sides too much.
Now, take that remaining Asiago cheese—the rest of the cup and a half—and sprinkle it generously all over the egg-washed tops. This cheese is what melts, browns, and crisps up to give us that signature bakery crust we’re aiming for!
Baking to Bakery Perfection
Slide that tray into your preheated 375°F oven. They bake for about 30 to 35 minutes. You are looking for a deep golden brown color on that cheese topping. But color isn’t everything! Stick an instant-read thermometer into the center of one loaf; you’re aiming for an internal temperature of 190°F. That’s how you know the middle is cooked through but still soft. Once they hit that mark, pull them out immediately and let them cool completely on a wire rack before you even think about slicing. Patience pays off here!
Tips for Success with Your Homemade Asiago Cheese Bread With Crispy Crust
This recipe is already pretty straightforward, but I’ve picked up a few tricks over the years to make sure every loaf of Homemade Asiago Cheese Bread With Crispy Crust comes out absolutely perfect. Remember that note about not overflouring? That’s rule number one! If the dough feels too sticky when kneading, resist the urge to dump in more flour. Just let the mixer run its course; the dough hooks are designed to handle a little tackiness.
My biggest tip for that incredible crispy crust is twofold: use the egg wash generously, and don’t be shy with the final layer of cheese. The egg wash acts like glue, but it also helps brown the top beautifully. Also, make sure your oven is fully preheated to 375°F before those loaves go in. A hot oven sets the crust immediately.
Another thing I’ve learned about achieving bakery quality is the cooling process. Seriously, let it cool! If you slice into this savory bread while it’s piping hot, the steam escapes too fast, and you lose that soft interior texture. A good 30 minutes on a wire rack makes all the difference. If you want to see more of our baking adventures, follow us on Pinterest.
Storing and Reheating Your Savory Cheese Bread
Don’t you hate it when leftover bread goes stale overnight? Me too! Luckily, this savory cheese bread holds up really well if you store it correctly. The high fat and cheese content helps keep it fresh longer than a plain white loaf.
Once the loaves are completely cool—and I mean totally cool, or you’ll trap moisture—wrap them tightly in plastic wrap, and then tuck that into a zip-top bag or an airtight container. They do great sitting on the counter for two or three days. If you need them to last longer, the freezer is your friend!
Here’s a quick guide for keeping your leftovers delicious:
| Storage Method | Duration | Reheating Tip |
|---|---|---|
| Countertop (Airtight) | 2-3 Days | Wrap slice in damp paper towel and microwave for 15 seconds. |
| Freezer (Double wrapped) | Up to 3 Months | Wrap slice in foil and bake at 350°F for 10 minutes until warm. |
If you reheat a whole loaf, just wrapping it loosely in foil and popping it into a 350°F oven for about ten minutes brings back that initial soft texture beautifully! You can also connect with us on Facebook for quick updates.
Frequently Asked Questions About This Cheese Bread Recipe
I always get questions when people try this recipe for the first time, especially about getting that perfect texture. Baking with yeast can feel intimidating, but I promise, you’ll be surprised how easy it yields fantastic results. Here are the things folks ask me most often about making this savory bread!
Can I Use Different Cheeses in This Homemade Asiago Cheese Bread With Crispy Crust
Yes, you absolutely can experiment, but you might lose some of that signature nutty bite! Asiago is fantastic because it melts well but still has a sharp flavor that stands up to the bread. If you must substitute, I’d recommend a blend of sharp white cheddar mixed with a little Parmesan for that salty kick. But for the crust, stick with something that melts nicely, like Mozzarella, if you want a stretchier pull!
What if I Do Not Have a Stand Mixer
Don’t worry if your counter doesn’t host a heavy-duty mixer! You can totally do this by hand. When mixing the dry and wet ingredients (Steps 1-3), just use a big wooden spoon or a sturdy spatula until it forms a shaggy mass. Then, turn the dough out onto a lightly floured surface.
For kneading (Step 5), you’ll need some elbow grease. Push the dough away from you with the heel of your hand, fold it back over, turn it a quarter turn, and repeat. It will take longer—maybe 8 to 10 minutes by hand—but you’ll get there! Keep going until the dough feels smooth and less sticky. It’s a great workout, honestly! For more baking tips, check out our Medium page.
How can I make this Homemade Asiago Cheese Bread With Crispy Crust faster
If you’re really pressed for time, you can try speeding up the first rise by placing the covered bowl in a slightly warm oven (make sure the oven is OFF, just warm from a recent bake). However, I really advise against rushing the second rise. That final proofing time is what gives the loaves their final lift before baking, and rushing it often leads to a bread that collapses a bit in the oven. Good things take time, especially when yeast is involved!
Where to Find Estimated Nutritional Data
I know some of you count macros or just like to keep tabs on what you’re eating, especially with savory cheese bread! I’ve put together the best estimates I could calculate based on the ingredients used here. Remember, these numbers are just a guide since factors like exact cheese fat content can shift things around.
This data is based on dividing the recipe yield into approximately 12 slices total. Here’s a quick look:
| Nutrient | Estimated Amount |
|---|---|
| Calories | 130 |
| Fat | 4 g |
| Protein | 6 g |
| Carbohydrates | 16 g |
Share Your Bakery Style Creation
I just absolutely love seeing your results when you try my recipes! Seriously, nothing makes my day more than seeing a photo of your beautiful, golden-brown loaves. If you made this savory cheese bread, please leave a rating below and tell me how it went. Did you manage that perfect crispy crust? I want to hear all about it!
Print
Amazing 3 Step Homemade Asiago Cheese Bread With Crispy Crust
- Total Time: 1 hour 55 minutes
- Yield: 2 small loaves
- Diet: Vegetarian
Description
This asiago cheese bread has a golden cheesy crust and soft interior with savory flavor. Make bakery style asiago cheese bread at home.
Ingredients
- Bread Flour: 3¼ cups
- Instant Yeast: 2¼ teaspoons
- Kosher Salt: 1½ teaspoons
- Granulated Sugar: 1 teaspoon
- Black Pepper: ¼ teaspoon
- Whole Milk (warmed): 1¼ cups
- Unsalted Butter: 2 tablespoons
- Shredded Asiago Cheese (divided): 1½ cups
- Large Egg: 1
- Warm Water: 1 tablespoon
Instructions
- Whisk 1½ cups of the flour, yeast, salt, sugar, and black pepper in a stand mixer bowl.
- Warm the milk until hot to the touch and stir in the butter until melted.
- Add the milk mixture to the flour mixture and mix on low speed until smooth.
- Add 1¼ cups of the shredded Asiago cheese and mix just until combined.
- Gradually add the remaining flour to form a soft, slightly sticky dough. Knead with a dough hook for 5 minutes.
- Transfer the dough to a lightly greased bowl, cover, and let rise in a warm place for 30 to 45 minutes until nearly doubled.
- Punch down the dough and divide it into two equal portions. Shape each into a loaf and place on a parchment lined baking sheet.
- Cover loosely and let rise 20 to 30 minutes while preheating the oven to 375°F.
- Whisk the egg with water and brush over the tops of the loaves. Sprinkle with the remaining Asiago cheese.
- Bake for 30 to 35 minutes until golden brown and the internal temperature reaches 190°F. Cool before slicing.
Notes
- Do not overflour the dough or the bread may become dense instead of soft.
- Prep Time: 20 minutes
- Cook Time: 35 minutes
- Category: Bread
- Method: Baking
- Cuisine: American