Oh my gosh, you are going to absolutely *love* this recipe. Forget those dry, crumbly brownies you’ve accidentally made before. We are diving headfirst into the absolute best dessert hybrid I’ve ever created: the ultimate cheesecake brownies! Seriously, these things are legendary in my house.
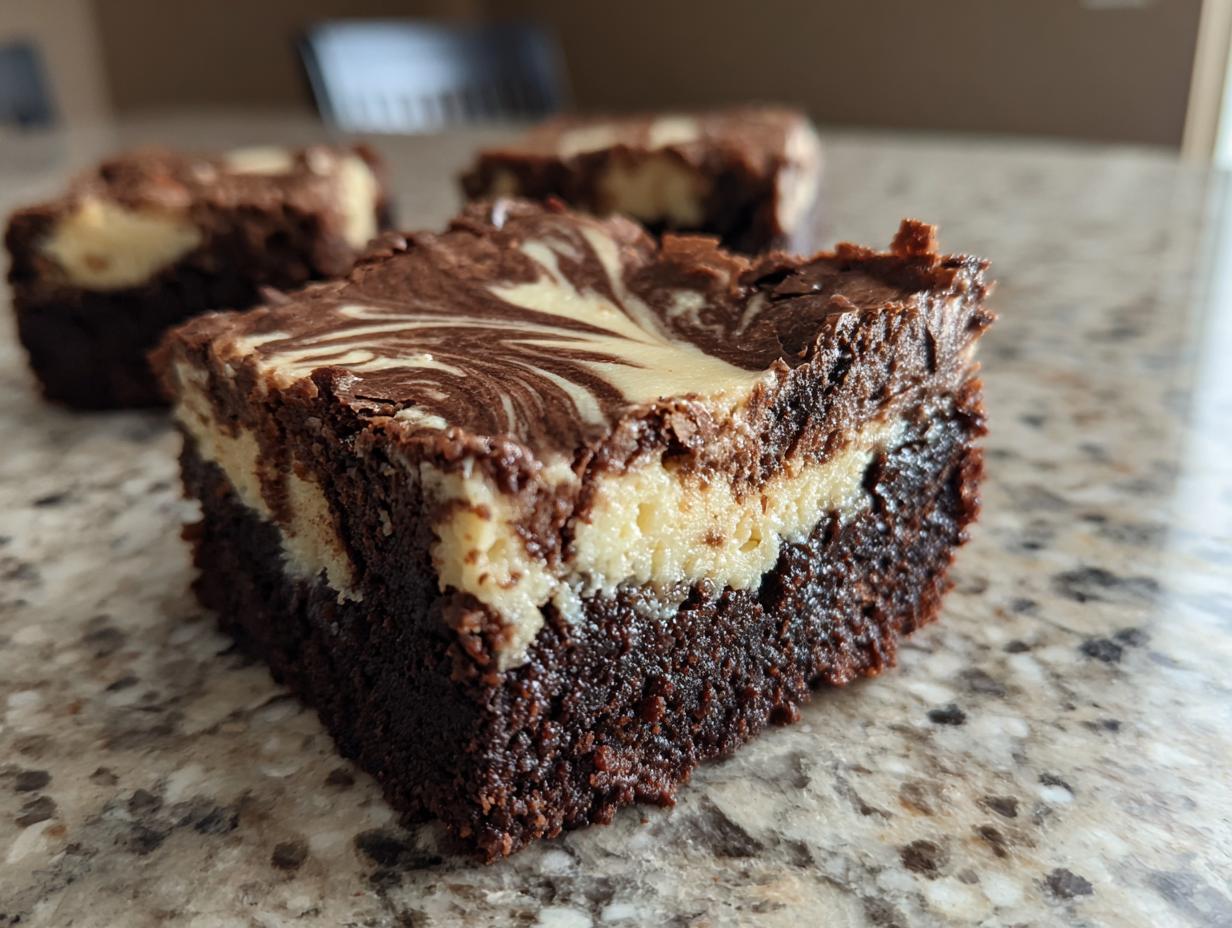
What makes them so special? It’s that perfect marriage of textures. You get that deep, dark, incredibly fudgy chocolate base, and then BAM! A cool, tangy ribbon of creamy cheesecake cuts right through it. They look impressive with that gorgeous marbled top, but please, don’t let that intimidate you.
I developed this version specifically so that even if you’ve never baked anything more complicated than toast, you can nail these cheesecake brownies on your first try. Trust me, once you pull that pan out of the oven, smelling that rich cocoa, you’ll know you’ve hit the jackpot.

Why You Will Make These cheesecake brownies Again and Again
I remember the first time I tried making a layered dessert. I thought it required professional skill. Standing in my kitchen, staring at the recipe, I worried about deflating the cream cheese layer. But these cheesecake brownies changed that perception entirely.
Seriously, the prep time is ridiculously fast—like fifteen minutes max! You get that intense, fudgy chocolate flavor paired with the smooth tanginess of the cream cheese swirl. If you are new to baking, this recipe proves you can create stunning, bakery-quality treats without stress. You’ll be making them every weekend, I guarantee it.
Essential Ingredients for Perfect cheesecake brownies
Okay, let’s talk about what you need. For these cheesecake brownies to come out perfectly—that dense, fudgy bottom and that creamy top—you can’t just eyeball things. Measurements matter here, especially because we are balancing the density of the chocolate with the lightness of the cream cheese. Make sure your eggs are at room temperature; it really helps them mix into the butter properly without getting weird lumps.
We are splitting the ingredients into two important groups. Don’t mix them until the very last second, or you’ll end up with one giant, messy batter! Stick to what I list below, and you’ll be golden.
Brownie Batter Components
For the base, we need that rich chocolate punch. You absolutely must use melted butter here, not softened. It’s what gives us that crackly top and that deep, fudgy texture we are aiming for. We’re using standard granulated sugar for sweetness in the base, but wait until you see the next section for the powdered sugar!
The dry stuff—cocoa powder, flour, and salt—should be sifted together before folding them into the wet mix. This stops those annoying pockets of dry flour from hiding at the bottom of your pan. And don’t skip the chocolate chips; they melt slightly during baking and add little pockets of extra gooeyness. Yum!
Creamy Cheesecake Swirl Ingredients
This is where the magic tang comes in! The number one rule for the cheesecake layer is that your cream cheese must be completely, totally softened. If it’s cold, you’ll end up with little white chunks in your swirl, and nobody wants that. Let it sit out for at least an hour before you start.
You only need three things here: the softened cream cheese, powdered sugar for a smooth texture (granulated sugar would make it gritty), and just a touch of vanilla extract to keep things bright. Beat this mixture until it’s light and fluffy before you even think about layering it!

Equipment Needed for Your cheesecake brownies
Setting up your station correctly makes this recipe fly by! You absolutely must have an 8×8-inch pan. If you use anything bigger, the layers will be too thin and they’ll bake too fast, turning them into dry cakes instead of fudgy brownies. You’ll also want a couple of good mixing bowls—one for the brownie stuff and a smaller one for that creamy cheesecake layer.
Grab a whisk for the initial mixing, but make sure you have a sturdy rubber spatula on hand for gently folding the flour in later. Oh, and parchment paper is your best friend for easy cleanup!
Step-by-Step Instructions for Baking cheesecake brownies
Alright, time to put it all together! This process moves quickly once you have your ingredients ready. First thing, get that oven preheated to 350 degrees Fahrenheit. I always line my 8×8-inch pan with parchment paper, leaving an overhang on two sides. This acts like little handles to lift the whole thing out later, which is a lifesaver.
Preparing the Brownie Base
Start with your wet ingredients for the brownie batter. Whisk that melted butter and granulated sugar together until they look happy and smooth. Then, add your room-temperature eggs one at a time, making sure each one is fully mixed in before adding the next. Stir in that vanilla extract.
Now for the dry components. In a separate bowl, sift together the cocoa powder, flour, and salt. This is crucial! Gently fold these dry ingredients into your wet mixture. I mean gently—stop mixing the second you don’t see any more white streaks of flour. Overmixing the flour is how you turn fudgy brownies into tough ones. Finally, fold in those chocolate chips by hand.
Creating the Cream Cheese Layer
While you’re doing that, you should have already whipped up your cheesecake mixture (cream cheese, powdered sugar, vanilla). If you haven’t, stop now! You want this mixture to be completely lump-free and smooth. If you see any stubborn bits of cream cheese, just keep beating until it looks like fluffy frosting. No lumps allowed in this layer!
Layering and Creating the Marbled Finish
This is the fun part where we make these cheesecake brownies look like they came from a fancy bakery. Pour about half of that rich brownie batter into your prepared pan and spread it out evenly. It doesn’t have to be perfect since we’re covering it up!
Next, spoon the entire cream cheese mixture right on top of that first brownie layer. Try to distribute it evenly. Then, take the remaining brownie batter and drop it in dollops all over the cream cheese layer. Don’t pour it—dollop it! This makes swirling easier.
Grab a butter knife, and this is key: swirl gently! You don’t want to mix everything into one muddy brown color. Just run the knife lightly through the layers a few times in an ‘S’ pattern. You want distinct ribbons of white and dark brown showing on the surface. Bake this beauty for about 30 to 35 minutes. Remember, you want moist crumbs on the toothpick, not wet batter!
Tips for Achieving Perfect cheesecake brownies Slices
You’ve waited patiently for these to bake, now don’t ruin the final presentation by cutting them warm! This is my biggest piece of advice for beautiful squares. These cheesecake brownies need to cool completely—and I mean completely—before you even think about slicing. If you try to cut them warm, the fudgy layer will smear everywhere, and the cream cheese will ooze out. Don’t do it!
I actually pop mine in the refrigerator for about 30 minutes after they’ve cooled on the counter. That chill firms everything up beautifully. When it’s time to slice, use a large, sharp knife that you’ve dipped in hot water and wiped clean between every single cut. That warm, clean blade glides right through the layers, giving you those sharp, professional edges. That simple trick makes all the difference!
Variations on Classic cheesecake brownies
While these classic fudgy brownies with the cream cheese swirl are amazing exactly as written, sometimes I like to mix things up a little bit without messing with the structure. We want to keep that perfect bake, so we aren’t changing the main ratios, just adding some extra flavor pops!
My absolute favorite little tweak is swapping out the vanilla extract in the cheesecake layer for almond extract. Just use half a teaspoon! That little hint of nuttiness pairs so well with the dark chocolate. Or, if you want a bright wake-up call, zest half an orange right into that cream cheese mixture instead of using vanilla. The citrus brightens everything up wonderfully.
You can also add mix-ins to the brownie layer along with those chocolate chips. A handful of chopped pecans or walnuts works great for a little crunch, or even some mini peanut butter chips if you’re feeling decadent. Just make sure whatever you add doesn’t change the wetness too much!
Storing and Reheating Your Dessert
The best part about these rich treats is that they keep so well! Because of that lovely layer of cream cheese, they actually taste better the next day once they’ve settled in the fridge. You shouldn’t keep them out on the counter for too long, especially if your kitchen runs warm.
I always store my cheesecake brownies in an airtight container. If you stack them, put a small piece of wax paper or parchment paper between the layers so they don’t stick together. They are firmest and easiest to cut after being chilled, as I mentioned earlier.
If you want to reheat one for a gooey, fresh-out-of-the-oven feel, don’t use the microwave for too long or the cheesecake layer gets weirdly soft. Just pop a single square on a plate in a low oven—say 300 degrees—for about five minutes. That warms the chocolate right up!
Here is how I keep track of how long they last:
- Countertop (Airtight): Up to 2 days
- Refrigerator (Airtight): Up to 5 days
- Freezer (Wrapped tightly): Up to 3 months
Understanding the Nutrition in These Treats
I always feel a little guilty digging into these rich squares, but honestly, knowing what’s in them helps me enjoy them guilt-free—mostly! Since this recipe is so unique, blending fudgy chocolate with the cream cheese, the exact numbers can vary based on how much you swirl. Remember, these are just my best estimates based on the ingredients I use, so consider this your ballpark figure.
You are getting a solid dose of energy from the fat and carbs, but they pack a nice little protein punch too, which is more than you get from a standard sugar cookie! If you are looking for other sweet treats, check out my guide on chocolate chip sweet sourdough recipe.
Estimated Nutritional Breakdown
Here’s a quick look at what you can expect in one of those glorious squares. Please remember this is an estimate, because homemade baking is an art, not an exact science!
| Nutrient | Estimated Amount Per Serving |
| Calories | 210 |
| Fat | 12g |
| Carbohydrates | 22g |
| Protein | 3g |
Your Questions About Making cheesecake brownies Answered
I get so many emails about these decadent treats! People always want to know the little tricks that make the difference between an okay brownie and a truly amazing one. Don’t worry if you have questions; that’s why I’m here! If you want to see more of my baking adventures, follow me on Facebook.
Q1. How do I make sure my brownies are extra fudgy and not cakey?
That’s all about the flour and the mixing! For the fudgiest brownies, you must avoid overmixing once you add the flour. Stop folding as soon as the streaks disappear. Also, using melted butter instead of softened butter really helps push that texture toward the dense, gooey side. You want moist crumbs, not a dry toothpick!
Q2. My cream cheese swirl sank to the bottom. What went wrong?
Oh, that’s a common frustration! Usually, that happens for one of two reasons. Either your brownie batter was too thin—check your flour measurement—or you poured the cream cheese layer in too quickly before spreading the second layer of batter on top. You need that top layer of batter to act like a blanket to keep the cream cheese swirl contained.
Q3. Can I skip chilling them before slicing?
I know it’s hard to wait, but yes, you really should chill them! If you try to slice them warm, you’ll just end up with messy smears instead of clean squares. Chilling them sets the texture of both the chocolate base and the cream cheese layer beautifully. A quick 30 minutes in the fridge makes all the difference for clean cuts! For more baking tips, check out my Medium page.
Q4. What if I don’t have an 8×8 pan?
If you only have a 9×9 pan, you can use it, but you need to watch the time closely. The batter will spread thinner, so they will bake faster—probably closer to 25 minutes. Keep an eye on the edges! A 9×13 pan is too big for this amount of batter; you’d end up with crispy edges and no center.