Okay, listen up, because this is my absolute favorite breakfast hack when the mornings are chaos and I need something genuinely good, not just another box of sugary flakes. If you’re looking for a soft, fluffy, and naturally sweet way to start the day that involves almost zero cleanup, you’ve hit the jackpot. We are talking about **flourless banana oat waffles**, and yes, the magic happens entirely in your blender. Seriously, toss everything in, hit ‘go,’ and 20 minutes later you’re eating wholesome, gluten-free goodness.
I keep this recipe pinned right next to my fridge because it’s my go-to. It meets all my criteria for a great recipe: it’s fast, it tastes like a treat, and it uses ingredients I always have on hand. My kids devour these, and I love that they are getting whole oats and fruit instead of refined flour. Trust me, once you make these **flourless banana oat waffles** this way, you won’t even look at your old waffle iron recipe again. It’s just too easy and too delicious to bother!

Why You Will Love These flourless banana oat waffles
I know you’re busy, so here’s the deal: These aren’t just quick; they are genuinely satisfying. You get that perfect balance of soft inside and just a little crisp on the outside, all thanks to the oats doing the heavy lifting where the flour usually goes. Plus, they taste great because the sweetness comes straight from those wonderfully spotted bananas.
Here’s why I think you’ll be making these all the time:
- Zero fuss prep time—it’s all done in the blender!
- Naturally sweet, so I don’t feel guilty adding a drizzle of syrup.
- The texture is unbelievably soft and tender, not gummy at all.
- They are naturally gluten-free, which is a huge win for my friend group.
Gathering Your Ingredients for flourless banana oat waffles
The best part about this recipe is that you probably have most of this stuff sitting in your pantry right now. We are keeping this super simple because we are using the blender to do all the hard work, which means no sifting and no messy bowls!
The most important thing to remember here is the quality of your bananas. Don’t even think about using those firm, yellow ones—they need to be spotty, almost black on the peel. Those soft, mushy bananas are what give these **flourless banana oat waffles** their natural sweetness and moisture. If you need them to be gluten-free, make absolutely sure your oats are certified gluten-free, because cross-contamination happens easily with oats.
Here’s what you need to gather up before you start throwing things in the machine:
| Ingredient | Measurement/Description |
|---|---|
| Old-fashioned rolled oats | 1 3/4 cups (certified gluten-free if needed) |
| Ripe bananas | 2 (spotted and soft) |
| Large eggs | 2 |
| Unsweetened almond milk | 1/3 cup (or specified alternatives) |
| Vanilla extract | 1 teaspoon |
| Ground cinnamon | 1 1/2 teaspoons |
| Baking powder | 1 1/2 teaspoons |
| Salt | Pinch |
Necessary Equipment for Your Waffles
You absolutely need a decent, high-speed blender for this to work right. Since we aren’t using flour, the blender needs the power to completely break down those oats into a smooth batter consistency. And, of course, you need your waffle maker ready to go! Make sure it’s clean and you have some nonstick spray handy.
Step-by-Step Guide to Perfect flourless banana oat waffles
This is where the speed of this recipe really shines. Forget whisking dry ingredients separately! We’re going straight into that blender jar. It saves time and guarantees everything is perfectly incorporated. Just follow these steps, and you’ll have beautiful, soft waffles ready in no time.
Preparing the Simple Blender Batter
First things first: everything goes in! Dump the oats, those mushy bananas, the eggs, your milk of choice, vanilla, cinnamon, baking powder, and that tiny pinch of salt right into the blender carafe. Don’t overthink the order too much, but maybe put the liquid in first to help the blades move.
Now, cover it up tight—seriously, make sure that lid is locked on because it can splatter! Blend it on high for about 30 to 45 seconds. You are aiming for completely smooth. If you can still see little chunks of oats, keep blending until it looks like a thick, pourable pancake batter. That’s step one done!
Allowing the flourless banana oat waffles Batter to Rest
This next step is crucial, so don’t skip it, even if you’re starving! Once blended, stop the machine and let that batter sit right there in the blender pitcher for about five minutes. Why? Because those beautiful old-fashioned oats need a moment to soak up some of that liquid.
If you skip this rest time, your batter will be too thin, and your **flourless banana oat waffles** might come out a bit flat or floppy. That five minutes lets the oats hydrate and thicken things up just enough so you get that lovely, light, fluffy interior texture we are aiming for. It’s worth the short wait, I promise!

Cooking Your Waffles to Golden Perfection
While the batter is resting, get your waffle iron screaming hot. I mean preheat it properly! Once it’s ready, give the plates a good spritz of nonstick spray or brush them lightly with butter. Even though this batter is naturally a bit richer, you never want to risk a sticky situation.
Pour the batter in, making sure you don’t overfill it—oats expand a little differently than traditional batter. Cook them according to your machine’s instructions, usually around 3 to 5 minutes, until they are deeply golden brown and that steam coming off has slowed down a lot. That usually means the edges are getting nice and crisp!
When the first batch is done, pull them out and immediately pop the next ladleful of batter in. You’ll need to re-grease the iron between batches most of the time, especially if you are making a big stack. Keep going until all your batter is used up. Let them sit for just a minute on a cooling rack before you pile them high with toppings!
Tips for Making Exceptional flourless banana oat waffles
Even though this recipe is super straightforward, there are a couple of little tricks I’ve learned over the years that really take these **flourless banana oat waffles** from good to absolutely incredible. It’s all about tweaking the batter just before it hits the iron. Don’t panic if things look a little different than you expected after that five-minute rest period!
Addressing Batter Consistency and Thickness
If you let the batter rest and it seems way too thick—almost like oatmeal paste instead of thick pancake batter—don’t worry! It happens, especially if your bananas were huge. Just stir in another tablespoon or two of your milk choice until it loosens up and pours nicely. You want it thick enough to hold its shape but loose enough to spread a little in the iron.
Now, if you accidentally added too much milk and it seems watery, that’s a bit trickier since we skipped the flour. Wait about ten minutes instead of five. Sometimes the oats just need extra time to absorb the moisture. If after that extra time it’s still too thin, you can quickly blend in one more tablespoon of dry rolled oats—just one!—to bulk it up before cooking.
Achieving Crispy Edges Every Time
For me, the secret to getting that satisfying crunch on the outside lies in the heat. Your waffle maker needs to be hot—really hot—before you pour the batter in. If you pour cold batter onto a lukewarm iron, you steam the waffle instead of baking it, and it ends up soft all the way through.
Also, don’t be afraid to let them cook slightly longer than the machine suggests. When the steam coming out of the sides almost completely stops, that’s a good visual cue that the moisture is gone and the crispness is setting in. If you finish a batch and they seem soft, toss them on a wire rack in a warm oven (like 200 degrees) while you cook the rest. That helps them firm up beautifully before serving!
Serving Suggestions for Your Quick Breakfast
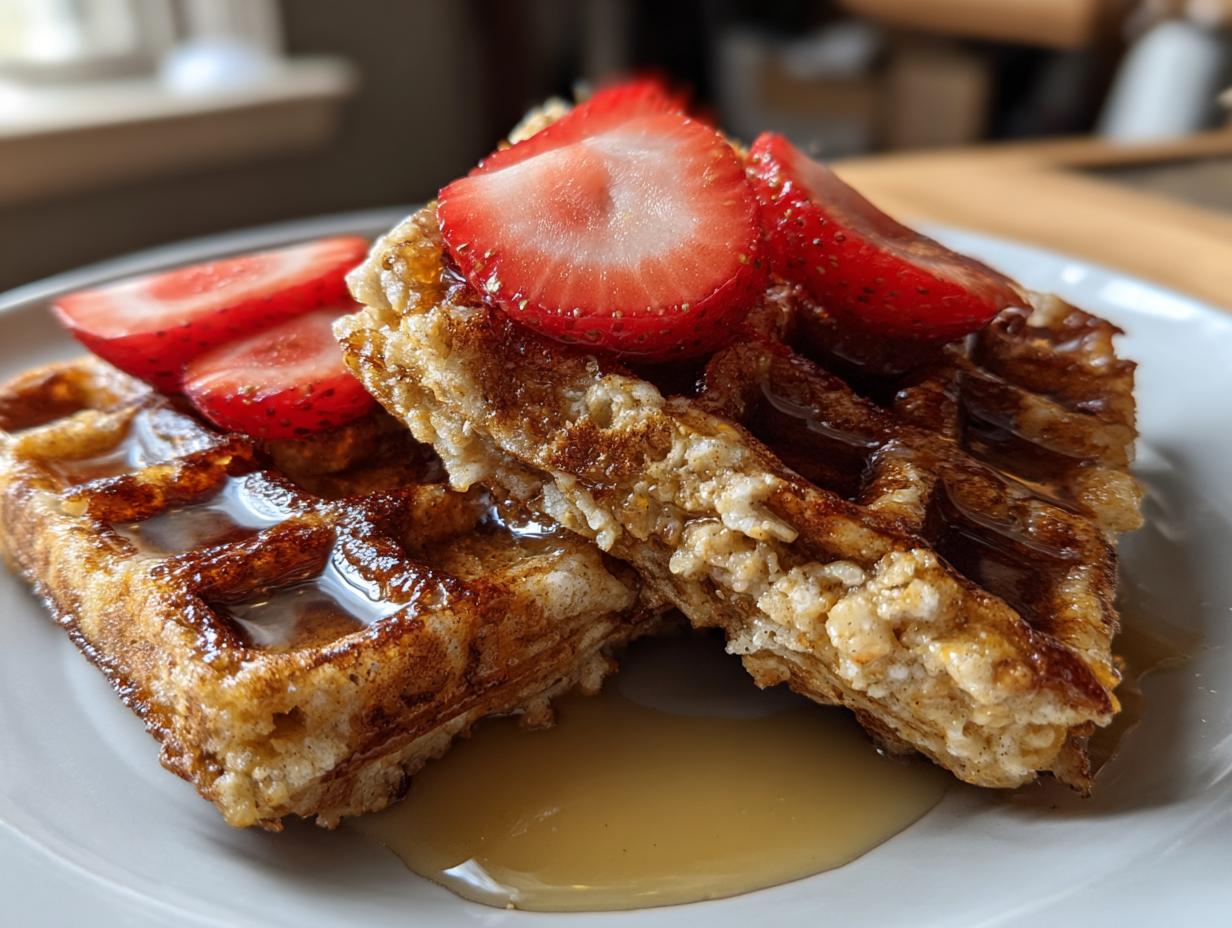
These waffles are naturally sweet, so you don’t need to drown them in sugary toppings, though you certainly can if that’s your style! I like to keep the toppings wholesome since the base recipe is so clean.
My favorite way to serve them is with a generous spread of creamy almond butter or peanut butter. This adds healthy fat and protein, which keeps you full until lunchtime. A big handful of fresh blueberries or sliced strawberries on top adds color and a nice burst of fresh flavor.
If you need a little extra sweetness, a light drizzle of pure maple syrup is perfect. You only need a little bit because the banana already sweetens the whole waffle beautifully. They are excellent served warm right off the iron!
Storing and Reheating Leftover flourless banana oat waffles
Morning chaos doesn’t always mean you finish your stack, and that’s okay! These waffles hold up beautifully for later. I always make a double batch just so I have some ready to go during the busy work week. Leftovers are your friend here, and they taste almost as good as fresh!
You can keep your **flourless banana oat waffles** in the fridge for a few days, but honestly, the freezer is where they shine for long-term storage. Just make sure they are completely cooled before you wrap them up tightly so they don’t get freezer burn. It’s so nice to pull out a pre-made breakfast! If you want more quick breakfast ideas, check out our guide on easy breakfast roll ups.
Here’s the simple breakdown for keeping them perfect:
| Storage Method | Duration | Reheating Instructions |
|---|---|---|
| Refrigerator | Up to 3 days | Toaster or oven at 350°F for 5–7 minutes |
| Freezer | Up to 3 months | Toaster or oven at 350°F for 5–7 minutes |
When you’re ready to eat them, skip the microwave if you can. The toaster or a quick trip to a moderate oven brings back that crisp edge we worked so hard to achieve. They come out wonderfully warm and ready for toppings!
Frequently Asked Questions About Oat Waffles
I get so many questions about this recipe because people can’t believe how easy it is to get such a great texture without any wheat flour! People often ask about dietary needs or if they can speed up the process even more. I’ve gathered a few of the most common things folks wonder about when making their first batch of **flourless banana oat waffles**.
Are these truly gluten-free waffles?
They absolutely can be, yes! The recipe calls for old-fashioned rolled oats, and oats themselves are naturally gluten-free. However, oats are often processed in facilities that also handle wheat, so if you have Celiac disease or a severe intolerance, you must buy oats specifically labeled as certified gluten-free. If you use certified oats, then yes, these are wonderful, wholesome gluten-free waffles!
Can I prepare the batter ahead of time?
This is tricky. Because the oats are the main structural component here instead of flour, they continue to absorb liquid even after blending. If you make the batter the night before, it will likely be far too thick by morning—almost like a dense paste that won’t pour. I really recommend blending it fresh right before you cook. That five-minute rest is enough time; anything longer and you’ll need to thin it out significantly.
What milk substitute works best in this blender recipe?
Honestly, I’ve tried almost everything, and they all work fine since the banana provides most of the moisture and richness. If you want a neutral flavor that doesn’t impact the banana or cinnamon, unsweetened almond milk or cashew milk is my top choice. If you want a richer texture, whole dairy milk or oat milk works perfectly too. Just stick to about the 1/3 cup measurement—you can always thin it slightly if needed!
Share Your Experience with our flourless banana oat waffles
I really hope you loved how easy and satisfying this breakfast was! If you whipped up a batch of these **flourless banana oat waffles** this morning, please let me know how they turned out. Did you go for maple syrup or nut butter on top? Drop a rating below and share your favorite tips in the comments. I’m always looking for new ways to enjoy them! You can follow our latest recipe updates on Facebook.