Oh, homemade bread! There’s just nothing like it, right? That warm, comforting smell filling your kitchen, the satisfying crunch of the crust, and that soft, airy inside. For years, I just *dreamed* of having that experience with gluten-free bread. It felt like trying to bake a cloud – so many recipes out there were dense, crumbly, or just… sad. I was convinced truly good gluten-free bread was a myth, a unicorn of the baking world!
But then, a lightbulb moment! What if the secret wasn’t more kneading, more complex flours, or more ingredients, but actually *less*? And that’s how I stumbled upon the magic of this No Knead Gluten Free Bread recipe. Seriously, you guys, this is a game-changer. It’s so simple, so forgiving, and the results? Absolutely delicious. We’re talking about a crusty outside and a wonderfully tender inside, just like the “real” thing. This recipe has become my go-to for easy, homemade gluten-free bread, and I can’t wait for you to try it.
Trust me, if I can make perfect No Knead Gluten Free Bread, you can too. It’s truly a triumph of simplicity over complication, and it’ll make your kitchen smell amazing!
Why You’ll Love This No Knead Gluten Free Bread
Okay, so by now you know I’m pretty stoked about this recipe, but let me tell you *why* I think you’re going to fall head over heels for this No Knead Gluten Free Bread too. It’s truly a kitchen miracle, especially if you’ve ever felt intimidated by homemade bread before. This recipe takes all the fuss out of it and leaves you with pure, delicious satisfaction. Seriously, get ready to impress yourself!
- It’s ridiculously easy – minimal fuss, maximum flavor.
- No special equipment needed, just a bowl and a Dutch oven.
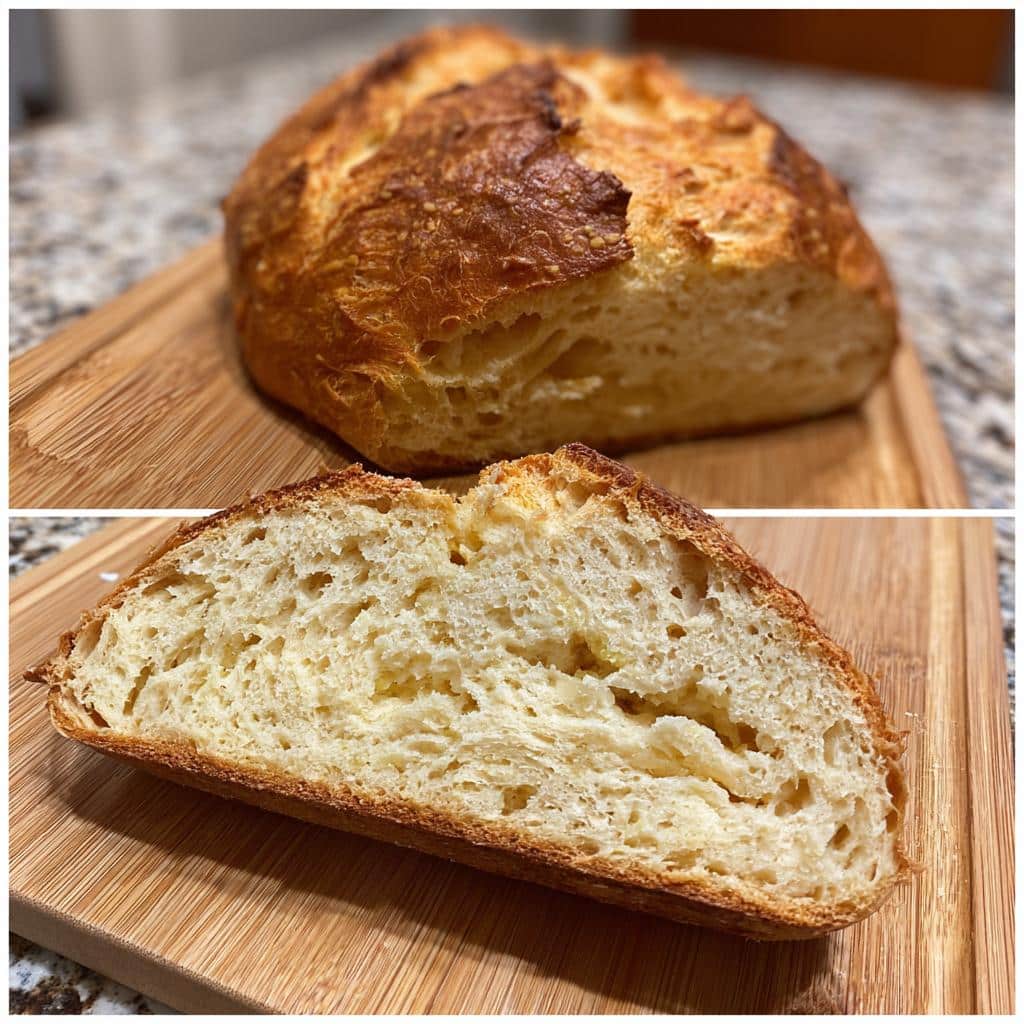
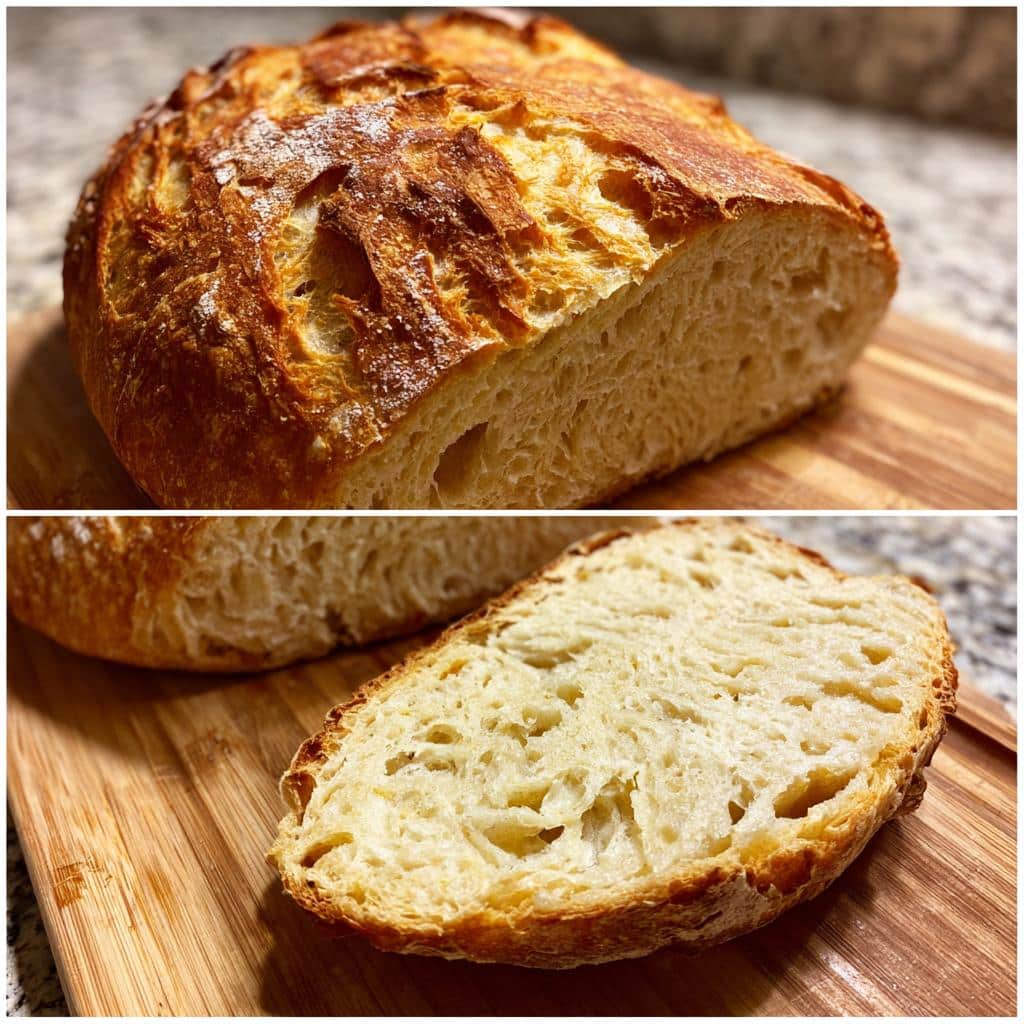
- The texture is spot-on: crispy crust, soft, airy inside.
- It fills your home with the most amazing fresh bread smell.
- You get to say, “I made that!” and feel like a total baking rockstar.
- It’s naturally gluten-free, so everyone can enjoy it!
The Simplicity of No Knead Gluten Free Bread
The “no knead” part is what makes this recipe an absolute dream. Forget about sticky hands, floured countertops, and endless arm workouts. This method means you just mix, let it rest (the magic happens while you sleep!), and then bake. It’s perfect for busy folks, or if you’re just starting your baking journey. Trust me, it completely simplifies making delicious No Knead Gluten Free Bread.
Essential Ingredients for Your No Knead Gluten Free Bread
Alright, let’s talk ingredients! Just like with any good recipe, what you put in really matters, especially when it comes to baking. For this amazing No Knead Gluten Free Bread, we’re not using anything super fancy, but getting the right stuff and measuring it properly is key. Think of these as the building blocks for your perfect loaf. Don’t worry, I’ll walk you through each one and why it’s important. It’s all about setting ourselves up for success, right?
- 3 cups gluten-free flour blend (with xanthan gum, or add it separately!)
- 1 tablespoon psyllium husk
- 2 teaspoons instant dry yeast
- 1 ¼ teaspoons salt
- 2 tablespoons olive oil
- 2 cups warm water (about 110°F or 43°C – like a warm bath for your finger, not hot!)
Understanding Your No Knead Gluten Free Bread Ingredients
So, why these specific ingredients for our No Knead Gluten Free Bread? First up, the gluten-free flour blend. This is your foundation! I usually grab one that already has xanthan gum in it, because that’s our gluten substitute – it gives the bread elasticity and keeps it from crumbling. If yours doesn’t have it, no biggie, just add about 1 teaspoon of xanthan gum per cup of flour. Psyllium husk is another secret weapon; it helps with structure and moisture, making the bread less dense. And the yeast? Make sure it’s *instant* dry yeast so you don’t have to proof it first. Oh, and that warm water is crucial for waking up the yeast – too hot, and you’ll kill it; too cold, and it won’t activate. Just right, and you’ll have a happy, bubbly dough!
How to Make Your No Knead Gluten Free Bread
Alright, friends, this is where the magic happens! Making this No Knead Gluten Free Bread is genuinely simple, but following these steps carefully will ensure you get that perfect, crusty, tender loaf every single time. Don’t rush it, especially the resting part – that’s where all the flavor and texture development happens without you lifting a finger! It’s truly remarkable how little effort goes into something so delicious. Let’s get baking!
Step-by-Step Guide to No Knead Gluten Free Bread
- Mix Your Dry Ingredients: Grab a really big bowl – seriously, bigger than you think you’ll need! In it, whisk together your gluten-free flour, psyllium husk, instant yeast, and salt. Give it a good whisk to make sure everything is evenly distributed. This is important for consistent results.
- Add the Wet Stuff: Now, pour in your warm water (remember, like a warm bath!) and the olive oil. Take a sturdy wooden spoon and stir, stir, stir! You want to mix it until everything is just combined. Don’t overmix; once you don’t see any dry flour spots, you’re good. It’ll be a shaggy, sticky dough, and that’s exactly what we want.
- The Long Rest (The “No Knead” Part!): Cover your bowl tightly with plastic wrap or a clean kitchen towel. Now, here’s the patience part: let it sit at room temperature for a good 8 to 12 hours. I usually mix it before bed and let it rest overnight. By morning, it’ll be bubbly and beautiful!
- Shape and Prep for Baking: When your dough has rested, preheat your oven to a blazing 450°F (232°C) *with* your Dutch oven inside. This is crucial for that crispy crust! While the oven heats, gently turn your dough out onto a piece of parchment paper. Your hands should be *wet* for this – it prevents sticking. Gently shape it into a round loaf. Don’t fuss too much; a rustic shape is charming!
- Bake It Up: Carefully, using oven mitts, take the scorching hot Dutch oven out of the oven. Lift your dough (still on the parchment paper!) and gently place it into the hot Dutch oven. Pop the lid back on. Bake for 30 minutes with the lid on.
- Get That Golden Crust: After 30 minutes, remove the lid. The bread should look pale but puffed. Now, bake for another 15 to 20 minutes, or until it’s beautifully golden brown and sounds hollow when you tap the bottom.
- Cool Completely (This is SO Important!): Slide your gorgeous loaf out of the Dutch oven and onto a wire rack. I know, I know, it smells amazing and you want to slice into it right away! But trust me, you *must* let it cool completely – I’m talking hours, usually 2-3 at least – before slicing. This allows the internal structure to set and prevents a gummy texture. Patience, my friend, patience!
Tips for Perfect No Knead Gluten Free Bread
Okay, so you’ve got the steps down, but sometimes a few little tricks can take your No Knead Gluten Free Bread from good to absolutely *amazing*. I’ve learned a few things over my years of baking (and a few oopsie loaves!) that I really want to share with you. These aren’t complicated, just clever little nudges that help ensure your loaf turns out perfect every single time. Think of these as my personal baking hacks for you!
Ensuring Success with Your No Knead Gluten Free Bread
First off, if you have one, grab a kitchen scale! Measuring flour by weight (usually around 120-130g per cup for GF blends) is way more accurate than by volume, and accuracy really helps with gluten-free baking. Also, don’t skimp on that long resting period; it’s not just for convenience, it’s where the yeast does its slow, magical work, building flavor and texture that you just can’t rush. That bubbly look is a great sign! When it comes to baking, your Dutch oven is your best friend for a super crispy crust. It traps the steam, which is exactly what we want for that beautiful crackle. And how do you know it’s done? Besides the golden color, gently tap the bottom – if it sounds hollow, you’ve got a perfectly baked loaf of No Knead Gluten Free Bread!
Frequently Asked Questions About No Knead Gluten Free Bread
I know when you’re trying a new recipe, especially something like bread, questions pop up! It’s totally normal. I’ve been there, staring at a dough and wondering if I messed it up. So, I’ve put together some of the most common questions I get about this No Knead Gluten Free Bread recipe. Hopefully, these answers will clear things up and give you even more confidence in your baking journey!
Common Queries on No Knead Gluten Free Bread
Q1. Can I use a different gluten-free flour blend for this No Knead Gluten Free Bread?
You absolutely can, but be aware that different blends absorb liquid differently. My recipe is tested with a blend that includes xanthan gum. If your blend doesn’t have it, you’ll definitely want to add about 1 teaspoon of xanthan gum per cup of flour to get that essential structure. You might need to adjust the water slightly, so start with the given amount and add a tiny bit more if your dough seems too dry.
Q2. How do I store my homemade No Knead Gluten Free Bread?
Once your beautiful loaf is completely cool (seriously, wait!), you can store it at room temperature in an airtight container or a bread bag for 2-3 days. For longer storage, I love to slice it and then freeze the slices in a freezer-safe bag. That way, you can just grab a slice or two whenever you want a fresh piece, toast it up, and it’s like freshly baked bread all over again!
Q3. Why is my No Knead Gluten Free Bread dense?
There are a few culprits here! The most common reason for a dense loaf is not letting it cool completely before slicing. That internal structure needs time to set. Another reason could be inactive yeast – make sure your water isn’t too hot or too cold. Also, ensure your gluten-free flour blend has enough xanthan gum or that you added enough psyllium husk; these are crucial for preventing a gummy, dense texture in gluten-free baking.
Q4. Can I add seeds or nuts to my No Knead Gluten Free Bread?
Oh, absolutely! That’s one of my favorite ways to customize this recipe. You can totally fold in about 1/2 to 3/4 cup of your favorite seeds (like sunflower, pumpkin, or chia) or chopped nuts (walnuts or pecans are lovely) when you’re mixing the dough. It adds fantastic flavor and texture. Just remember, they might make the dough slightly stiffer, but it usually bakes up just fine!
Storing Your Delicious No Knead Gluten Free Bread
Alright, you’ve made this incredible No Knead Gluten Free Bread, and you’ll want to make sure every single slice stays as delicious as possible! Proper storage is key, especially with gluten-free loaves, because they can sometimes dry out faster than traditional bread. But don’t worry, I’ve got you covered with all my favorite tips for keeping your hard work fresh and tasty for days (or even weeks!).
Keeping No Knead Gluten Free Bread Fresh
Once your loaf is completely, utterly cool (seriously, resist the urge to cut it hot!), you can keep it at room temperature for about 2-3 days. I usually store mine in a paper bag inside a plastic bag, or just a really good airtight container. If you won’t eat it all within a few days, freezing is your best friend! Slice the entire loaf, then pop the slices into a freezer-safe bag or container. This way, you can just grab a slice or two whenever you want. To reheat, simply toast a frozen slice, or if you’re reheating a whole loaf, wrap it in foil and warm it in a 350°F (175°C) oven for about 10-15 minutes until it’s lovely and warm again. It’s almost like baking a fresh loaf of No Knead Gluten Free Bread all over again!
Estimated Nutritional Information for Your No Knead Gluten Free Bread
Okay, so you might be curious about the nutritional side of this amazing loaf! I get it, it’s good to know what you’re putting into your body. Just a quick heads-up: the nutritional information I’m providing here is an estimate. Why? Because things like the specific brand of gluten-free flour you use, or even the type of olive oil, can cause slight variations. So, while I’ve done my best to give you a good ballpark, remember it’s not an exact science. It’s just a helpful guide for your delicious No Knead Gluten Free Bread!
Your Feedback on This No Knead Gluten Free Bread
Well, there you have it! My absolute favorite recipe for No Knead Gluten Free Bread. I truly hope you love it as much as I do. Now that you’ve got all the secrets, I’d absolutely love to hear from you! Did you give it a try? How did your loaf turn out? Did you add any fun mix-ins? Please, drop a comment below and share your baking experience. Your feedback means the world to me, and it helps other bakers in our community too. Happy baking!
Print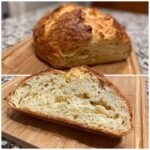
No Knead Gluten Free Bread: Banish 1 Baking Fear!
- Total Time: 8 hours 45 minutes
- Yield: 1 loaf
- Diet: Gluten Free
Description
A simple recipe for gluten-free bread that requires no kneading, perfect for an easy homemade loaf.
Ingredients
- 3 cups gluten-free flour blend with xanthan gum or add separately
- 1 tbsp psyllium husk
- 2 tsp instant dry yeast
- 1 ¼ tsp salt
- 2 tbsp olive oil
- 2 cups warm water 110°F/43°C
Instructions
- In a large bowl, whisk together gluten-free flour, psyllium husk, yeast, and salt.
- Pour in warm water and olive oil. Stir with a wooden spoon until fully combined.
- Cover bowl with plastic wrap or a towel and let rest at room temperature for 8–12 hours.
- After resting, gently shape the dough on parchment using wet hands.
- Place in a preheated Dutch oven (450°F/232°C). Cover and bake for 30 minutes.
- Remove lid and bake another 15–20 minutes until golden brown.
- Cool completely before slicing for best texture.
Notes
- Dough resting for fermentation after mixing—no kneading needed.
- Cooling completely before slicing ensures the best texture.
- Prep Time: 15 minutes
- Cook Time: 45 minutes
- Category: Bread
- Method: Baking
- Cuisine: American