Oh, honey, let me tell you about this chili. When I first started cooking for myself, I made a thousand tiny batches of things, and honestly, it was exhausting! That’s why I perfected this recipe for the absolute best freezer friendly chili you will ever taste. It’s designed to be beginner-friendly—seriously, if you can brown meat, you can make this masterpiece. We’re making one huge pot, which means you get all the reward of a home-cooked meal without having to chop onions every single night. Trust me, future you will thank you when you find a perfectly portioned container waiting in the deep freeze!

Why This Freezer Friendly Chili is a Weeknight Hero
This isn’t just a recipe; it’s a strategy for surviving busy weeks! I learned early on that freezing food properly is an art, or at least, it needs some rules. Because we’re freezing this big batch of freezer friendly chili, we have to make sure we cool it down fast and leave room for expansion. That’s why I always let it sit on the counter for an hour before bagging it up—it keeps the texture beautiful when it thaws. This method locks in all that deep, smoky flavor so it tastes just as good next month as it does tonight.
Gather Your Ingredients for Freezer Friendly Chili
You don’t need anything fancy here, which is part of why I love it so much. We are using pantry staples to create something truly amazing. Before you start, make sure your beans are drained and rinsed well; that cuts down on extra sodium and keeps the chili from getting too soupy later on. Having everything prepped before the heat goes on is my number one tip for keeping your sanity while making this big batch of freezer friendly chili.
The Essential Shopping List
- 2 tablespoons olive oil
- 2 pounds ground beef
- 1 large yellow onion, diced
- 2 bell peppers, diced (any color you like!)
- 4 cloves garlic, minced
- 3 tablespoons chili powder
- 2 tablespoons ground cumin
- 1 tablespoon smoked paprika
- 2 teaspoons garlic powder
- 2 teaspoons salt
- 1 teaspoon black pepper
- 1 can (28 ounces) crushed tomatoes
- 1 can (14.5 ounces) diced tomatoes
- 1 can (15 ounces) tomato sauce
- 2 cans (15 ounces each) kidney beans, drained and rinsed
- 1 can (15 ounces) pinto beans, drained and rinsed
- 2 cups beef broth
- 2 tablespoons brown sugar
Step-by-Step Guide to Making Freezer Friendly Chili
Okay, let’s get cooking! Making this freezer friendly chili is a simple process, but the order of operations really makes a difference in the final flavor profile. Don’t rush the beginning—that’s where the magic happens!
Building the Flavor Base
First things first, get your big pot or Dutch oven hot over medium-high heat. We want that olive oil shimmering, not smoking, before we toss in the two pounds of ground beef. Brown that meat thoroughly, breaking it up as you go. Once it’s all browned up nicely, drain off any excess grease—we want flavor, not oil slick! Next, throw in your diced onion, bell peppers, and minced garlic. Let those veggies soften up for about five or six minutes; you’ll start smelling that wonderful savory base building.
Now for my favorite part: blooming the spices! This is non-negotiable, people. Add your chili powder, cumin, smoked paprika, garlic powder, salt, pepper, and that little bit of brown sugar right into the hot pot with the cooked meat and veggies. Stir constantly for just one or two minutes. You’ll notice the scent intensify—it goes from smelling like spices to smelling like a five-alarm firehouse! That short toast awakens all those oils and makes the final chili taste so much deeper.
Simmering and Developing Depth
Once your spices are fragrant, it’s time to bring in the liquids and tomatoes. Pour in the crushed tomatoes, the diced tomatoes, the tomato sauce, and your beef broth. Stir everything really well so nothing is stuck to the bottom. Now, add those drained and rinsed kidney and pinto beans. Give it one final, thorough stir to make sure everything is mixed evenly throughout the big pot.
Turn the heat up high until you get a full, rolling boil. Once it’s bubbling happily, immediately drop the heat way down to low. We need to let this simmer gently for a good 45 to 60 minutes. This long, slow cook is what marries all those flavors together. Just remember to stir it every 15 minutes or so. Trust me, if you don’t stir, the bottom will stick and burn, and nobody wants that flavor in their freezer friendly chili!
Cooling and Proper Portioning for Freezing
When that hour is up, kill the heat. This next part is crucial for texture preservation: you must let the chili cool down completely on the counter. I usually let mine sit for a full hour until it’s just warm to the touch—don’t rush it into the fridge while it’s hot! Freezing hot food can mess with the texture and might even risk thawing other things in your freezer. Once it’s cooled, portion it out into your freezer-safe containers or heavy-duty bags.
Here’s the pro tip for freezing: always leave about half an inch of space at the top—that’s the headspace—because liquids expand when they freeze. Label everything clearly with the date so you know what’s what later. Stacking the bags flat saves so much freezer real estate! This is how you guarantee easy meals for months to come with this fantastic freezer friendly chili.

Tips for Perfect Freezer Friendly Chili Success
Making a huge batch of chili is rewarding, but you need to know a couple of tricks to make sure it tastes amazing when you pull it out months later. My biggest piece of advice for any freezer friendly chili is patience during the cooling phase. If you seal it up piping hot, you’ll get weird ice crystals that break down the texture when you reheat it. We want that rich, thick texture to stay intact!
Also, don’t be afraid to adjust things right before you freeze it. If it tastes a little flat after simmering, add another pinch of salt or a tiny splash of vinegar—it brightens everything up. If it seems too thick for easy pouring into bags, thin it slightly with water or broth before portioning. These little tweaks ensure that every single serving of your freezer friendly chili is perfect when you finally decide to eat it. If you want more great meal prep ideas, check out our cozy winter loaded chicken chili bake!
Storage and Reheating Specifics
Knowing how to store and reheat properly is half the battle when you’re batch cooking. If you seal it up tight and keep it frozen solid, this chili stays fantastic for a long time. Here’s my quick reference guide for keeping your work fresh:
- Maximum Storage Time: 3 to 6 months sealed tight.
- Thawing Advice: Always try to thaw overnight in the refrigerator first. It thaws more evenly that way.
- Stovetop Reheat: Medium-low heat, stirring often until it hits 165°F. Perfect for larger portions.
- Microwave Reheat: Great for single servings. Heat for 2 to 3 minutes, stopping halfway to stir and break up any hot spots.
- Too Thick? If it seems too dense after reheating, just stir in a splash of beef broth or even water until you hit your preferred consistency.
Answering Your Freezer Friendly Chili Questions
I know when I start a big project like this, I always end up with a million questions swirling around in my head. It’s smart to double-check your technique, especially when you’re planning on freezing things for later. Don’t worry, I’ve thought of everything you might need to know to make sure this freezer friendly chili is a huge success for your meal prep rotation! For more tips on batch cooking, follow us on Facebook.
How long does this freezer friendly chili last?
If you seal it up tight and keep it in a consistent, cold freezer—that means no opening the freezer door every five minutes!—this chili is good for about three to six months. I always write the date on the bag or container with a permanent marker. Honestly, it usually disappears way faster than that because it’s just too easy to grab a portion for a quick lunch!
Can I make this vegetarian?
Oh, absolutely! Swapping out the ground beef is super easy in this recipe. Instead of browning the beef in Step 2, I recommend sautéing about 16 ounces of chopped mushrooms (like cremini or portobello) until they release all their moisture and start to brown nicely. You could also use a hearty lentil blend. Just follow the rest of the steps exactly the same way, adding your mushrooms or lentils right where the beef would have gone. It still develops that amazing flavor base! If you are looking for other vegetarian options, check out our sweet potato black bean breakfast tacos.
What is the best way to reheat frozen chili?
I have two favorite ways, depending on how much time I have. If I plan ahead, I take a portion out of the freezer the night before and let it thaw slowly in the fridge—that’s the best way. Then, I just heat it on the stovetop over medium-low heat until it’s steaming hot all the way through. If you’re in a major rush? Microwave single servings for a couple of minutes, but make sure you stop halfway to stir it up so it heats evenly. Nobody wants a frozen chunk in the middle of their perfect freezer friendly chili!
Serving Suggestions for Your Make Ahead Chili
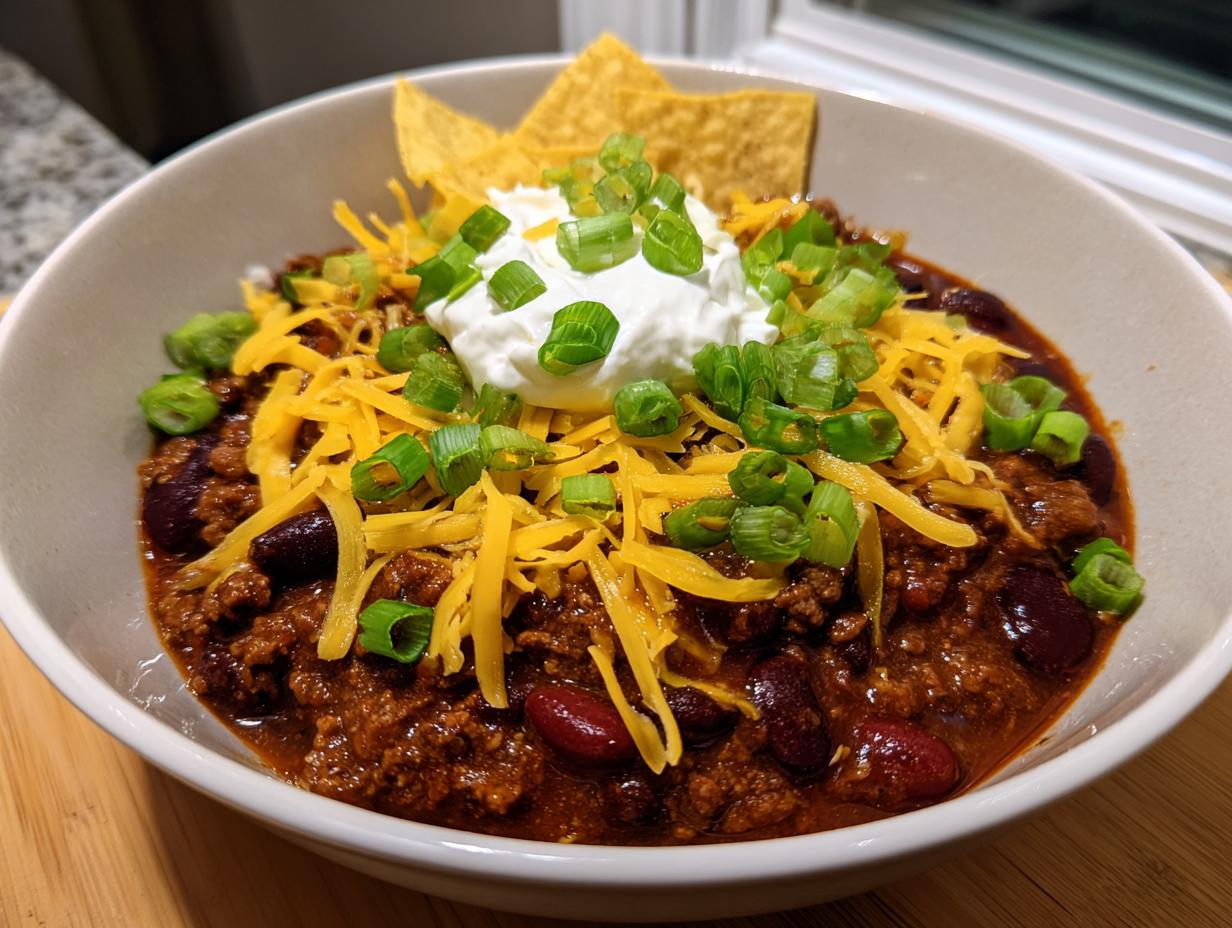
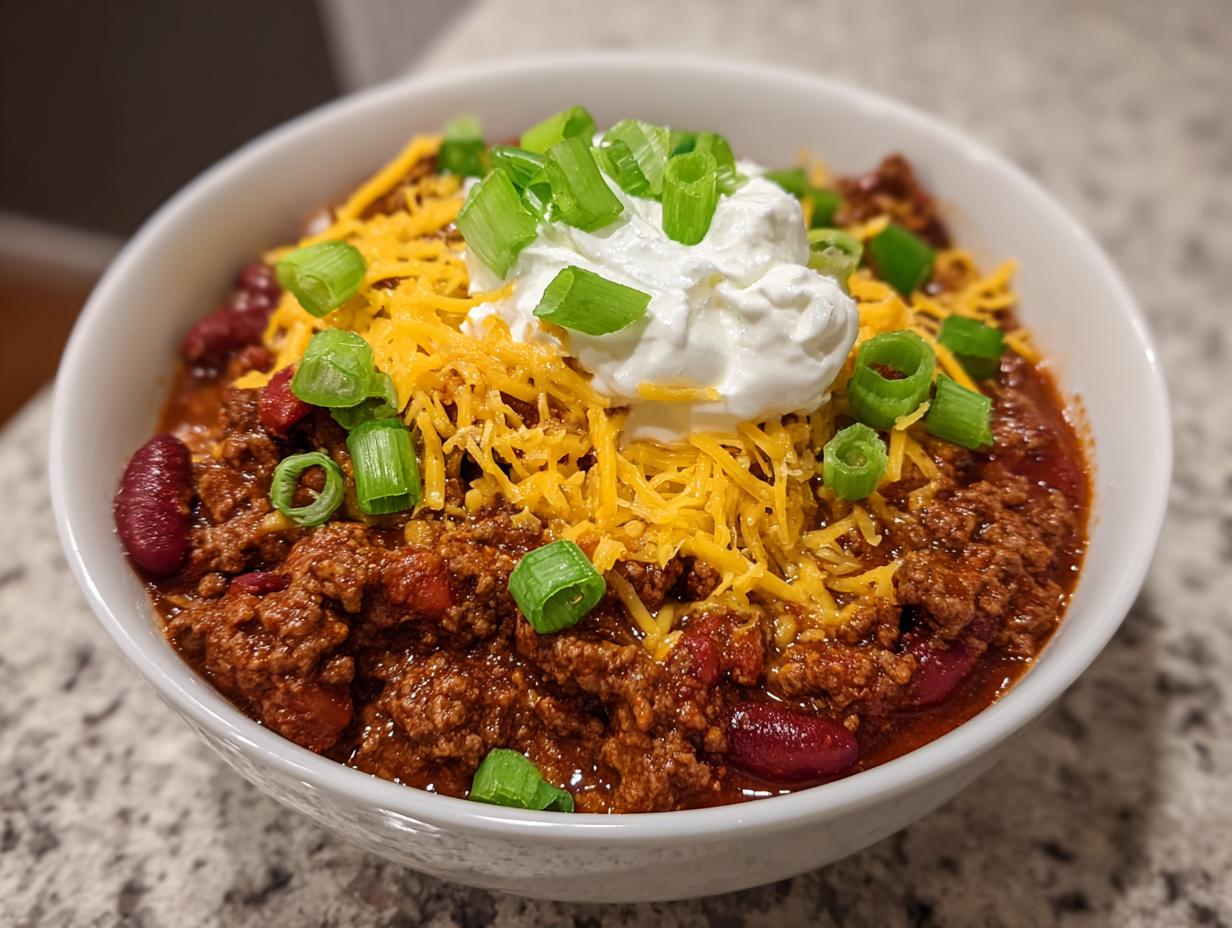
Now that you have a freezer stocked with perfect chili, let’s talk about how to serve it! This recipe is so robust, it honestly doesn’t need much fuss, but the toppings really take it over the top. Forget fancy additions; we stick to the classics that everyone loves. My kids always go straight for mounds of sharp, shredded cheddar cheese—it melts right into that hot surface and adds the perfect salty tang.
A dollop of cool sour cream is essential for balancing the spice, and don’t skip the fresh green onions sprinkled on top for a little bit of crunch and color. If you’re serving this up for a cozy dinner, you absolutely must have some warm cornbread on the side for dipping. Honestly, sometimes I just bake a batch of cornbread and use it as a scoop! It makes for the easiest, most satisfying meal you can imagine. You can find more great ideas on our Pinterest page.
See What Others Are Making
I am so excited for you to try this recipe, but I always love hearing how it turns out in your kitchen! Once you’ve made a batch of this delicious chili and stashed it away, please come back and leave a quick rating. Tell me how many servings you made and what toppings you couldn’t live without. Happy cooking, and enjoy your easy meals! You can also share your results on Medium.
Print
Get 1 amazing freezer friendly chili secret
- Total Time: 2 hours 35 minutes (includes 1 hour cooling time)
- Yield: 10 servings
- Diet: Omnivore
Description
This beginner-friendly chili recipe makes one large batch perfect for meal prepping. Portion, freeze, and reheat individual servings all week long with minimal effort.
Ingredients
- 2 tablespoons olive oil
- 2 pounds ground beef
- 1 large yellow onion, diced
- 2 bell peppers, diced
- 4 cloves garlic, minced
- 3 tablespoons chili powder
- 2 tablespoons ground cumin
- 1 tablespoon smoked paprika
- 2 teaspoons garlic powder
- 2 teaspoons salt
- 1 teaspoon black pepper
- 1 can (28 ounces) crushed tomatoes
- 1 can (14.5 ounces) diced tomatoes
- 1 can (15 ounces) tomato sauce
- 2 cans (15 ounces each) kidney beans, drained and rinsed
- 1 can (15 ounces) pinto beans, drained and rinsed
- 2 cups beef broth
- 2 tablespoons brown sugar
- For Serving: Shredded cheddar cheese, Sour cream, Sliced green onions, Cornbread or crackers
Instructions
- Heat olive oil in a large pot or Dutch oven over medium-high heat until shimmering.
- Add ground beef and cook for 8 to 10 minutes, breaking it into small crumbles until completely browned; drain excess fat.
- Add diced onion, bell peppers, and garlic to the pot with the beef; cook for 5 to 6 minutes until vegetables soften.
- Stir in chili powder, cumin, smoked paprika, garlic powder, salt, black pepper, and brown sugar; cook for 1 to 2 minutes until the spices become fragrant.
- Pour in crushed tomatoes, diced tomatoes, tomato sauce, and beef broth; stir well to combine all ingredients.
- Add kidney beans and pinto beans to the pot and stir thoroughly to distribute evenly.
- Bring the mixture to a rolling boil over high heat, stirring occasionally.
- Reduce heat to low, cover the pot partially, and simmer for 45 to 60 minutes, stirring every 15 minutes to prevent sticking.
- Remove from heat and let the chili cool completely at room temperature for about 1 hour.
- Once cooled, portion the chili into individual or family-sized servings using freezer-safe containers or heavy-duty gallon-sized freezer bags, leaving ½ inch of headspace.
- Label each container or bag with the name and date; freeze flat if using bags.
- To reheat, thaw chili overnight in the refrigerator, then heat on the stovetop over medium-low heat until 165°F, or microwave individual portions for 2 to 3 minutes, stirring halfway through.
Notes
- Cool chili completely before freezing to preserve texture.
- Portion into meal-sized servings to thaw only what you need.
- Freeze bags flat and stack vertically to save space.
- Leave ½ inch of headspace in containers as chili expands when frozen.
- Chili lasts 3 to 6 months in the freezer when sealed and labeled.
- If chili is too thick after reheating, add a splash of beef broth or water.
- Prep Time: 15 minutes
- Cook Time: 1 hour 10 minutes
- Category: Main Dish
- Method: Stovetop Cooking
- Cuisine: American