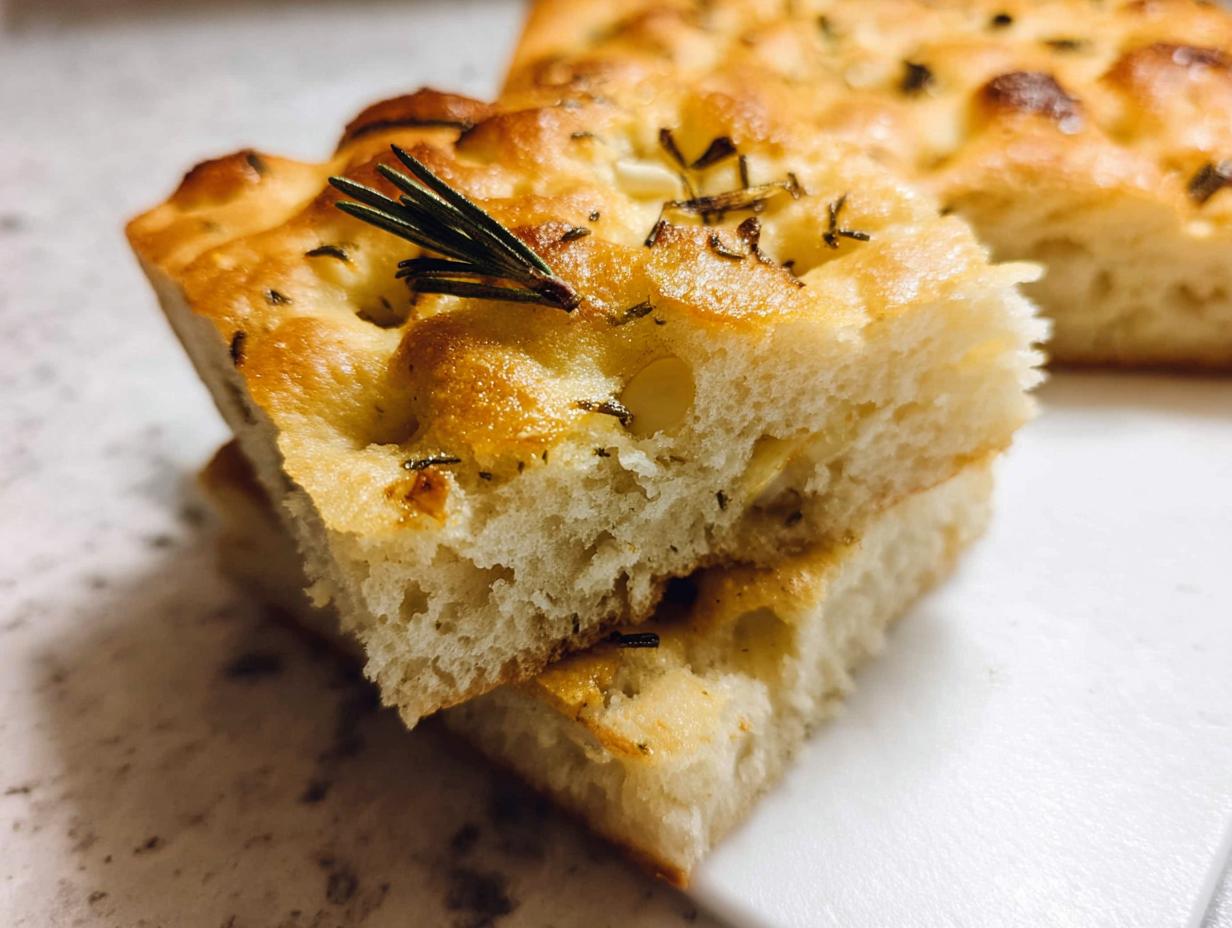
Roasted Garlic Rosemary Focaccia Bread is the recipe that truly convinced me that my little blog, NoobRecipes, was actually worth keeping up. I remember the first time I tried making it. I was terrified of yeast, honestly. I thought any bread that wasn’t store-bought was reserved for people with fancy kitchen gadgets and years of experience. But I dove in, following the steps exactly, and when that smell hit me—that deep, sweet roasted garlic mixed with piney rosemary—I knew I had cracked some secret code!
It’s so easy to look at a beautiful, dimpled loaf of focaccia and think, “Nope, too hard.” But trust me, this recipe is designed for the absolute beginner. We’re talking about mixing dough, waiting patiently, poking holes, and then drowning it in glorious olive oil. That’s it! You don’t need to be a pastry chef to pull off this incredible Roasted Garlic Rosemary Focaccia Bread. This loaf is proof that anyone, even a self-proclaimed noob like me, can achieve bakery-quality results just by following a few simple steps. Get your oven preheated, because we’re making magic!

Why You Will Master Roasted Garlic Rosemary Focaccia Bread
I want you to stop worrying about bread right now. Seriously. This isn’t one of those fussy recipes that demands perfect humidity or temperature. This Roasted Garlic Rosemary Focaccia Bread is built for success, which is why I put it right at the top of the NoobRecipes list. You get maximum flavor payoff for minimal actual work. It’s a real confidence booster when you pull this out of the oven!
Quick Preparation and Simple Steps
- The active prep time is shockingly short—we’re talking about 25 minutes of actual hands-on mixing before the dough does all the heavy lifting for you.
- You don’t need complex folding techniques; just mix the yeast, dump everything in the bowl, and let the mixer (or your hands!) do the hard work.
- The two-stage rise is simple: cover it, forget it, and come back when it looks puffy.
Superior Flavor Profile
Forget plain bread! The combination here is just spectacular. That roasted garlic melts right into the dough, becoming sweet and nutty instead of sharp. When you add the fresh rosemary and then that final sprinkle of sea salt right before baking? Wow. The smell alone is worth the effort, and the final texture is soft, chewy, and perfect for dipping in extra olive oil.
Essential Equipment for Roasted Garlic Rosemary Focaccia Bread
You don’t need a professional bakery setup to nail this recipe. Honestly, the equipment required is pretty basic, which is great news for all of us just starting out. Having the right dish size is actually the most important thing here for getting that perfect, thick, chewy crumb in your Roasted Garlic Rosemary Focaccia Bread.
Mixer Options
- Your stand mixer with the dough hook attachment is super handy for the 4-5 minute mix time.
- But please don’t panic if you don’t have one! You can absolutely use a sturdy hand mixer with dough hooks, or even just a big wooden spoon and some elbow grease. If you knead by hand, just plan on putting in about 12 to 14 minutes of solid work.
Pan Preparation
This is crucial: you must use a 9×13 inch baking dish. If your pan is smaller, the dough will be too thick and won’t bake through correctly. Make sure you have plenty of olive oil ready—we use it to grease the pan generously so the bottom gets that gorgeous, crisp, golden crust!
Gathering Your Ingredients for Roasted Garlic Rosemary Focaccia Bread
Okay, let’s talk ingredients. Because this is a simpler recipe, the quality of what you put in really shines through, especially with the garlic and rosemary. The aroma that fills your kitchen while this Roasted Garlic Rosemary Focaccia Bread is rising and baking is just incredible, and it all comes down to these core components. Don’t stress too much, though; we aren’t looking for anything exotic here, just good standard pantry staples and a few flavorful stars.
Ingredient Notes and Substitutions
- If you want a slightly chewier, more professional texture—and I know some of you are already getting ambitious—try swapping out some of the all-purpose flour for bread flour. The recipe note suggests 1 1/4 cup bread flour mixed with 2 1/2 cups AP flour.
- Yeast is the other key player. Make sure you use one full packet (that’s 2 1/4 teaspoons) of instant yeast. It needs that sugar and warm water to wake up properly, so don’t skip the blooming step!
Ingredient Table
| Quantity | Ingredient |
|---|---|
| 1 1/3 cup | warm water (105-110ºF) |
| 2 teaspoons | sugar |
| 1 (0.25 ounce) packet (2 1/4 teaspoons) | instant yeast |
| 3 3/4 cup | flour, plus more as needed |
| 2 teaspoons | kosher salt |
| 1/2 cup | olive oil, plus more for greasing and finishing |
| 1 tablespoon | chopped rosemary, plus more for topping |
| 1/4 cup | roasted garlic, roughly chopped |
| As needed | flaked sea salt for topping |
Step-by-Step Instructions for Perfect Roasted Garlic Rosemary Focaccia Bread
Alright, let’s get our hands messy! This is where the magic really happens for your Roasted Garlic Rosemary Focaccia Bread. Don’t rush these steps, especially the waiting parts. Bread loves patience, and I promise, the results are worth every minute of quiet anticipation. We’re going from simple ingredients to an amazing loaf in just a few easy stages.
Activating the Yeast
First up, we have to wake up the yeast—it needs a warm, sugary bath to get happy. Grab your measuring cup and pour in the 1 1/3 cup of warm water. It’s important here: the water needs to be between 105 and 110 degrees Fahrenheit. If it’s too cold, the yeast sleeps; if it’s too hot, it dies! Add your 2 teaspoons of sugar and the whole packet of instant yeast. Give it a gentle stir, then just leave it alone for a full 15 minutes. When you come back, it should look foamy and bubbly on top—that’s your signal that the yeast is ready to go to work.
Mixing and Initial Kneading
While the yeast is blooming, get your stand mixer bowl ready. Toss in your 3 3/4 cups of flour, the kosher salt, half of your olive oil (1/4 cup), all that chopped rosemary, and the beautiful roasted garlic. Mix this briefly with the dough hook just to combine everything loosely. Now, slowly pour in that foamy yeast mixture while the mixer is running on low speed. Once it’s incorporated, bump the speed up to medium and let it mix for 4 to 5 minutes. It might look a little shaggy or sticky—that’s totally normal! If it seems like it’s just sticking to the sides and won’t form a ball, add just a tablespoon or two of extra flour until it starts to pull away cleanly. Once it forms a nice ball, take it out and shape it briefly by hand.
The First Rise
Grab that big bowl you used earlier, rub a little olive oil around the inside, and place your dough ball in there. Rub some oil right over the top of the dough, cover the bowl tightly with plastic wrap, and find it a warm spot. It needs to rest for 1 to 1 and 1/2 hours until it’s nearly doubled in size. If your kitchen is chilly, try my trick: heat your oven on high for about four minutes, turn it completely OFF, and then place your covered dough inside. Keep the door shut, and it creates the perfect little sauna for rising!
Dimpling and Topping
Once the dough has puffed up, punch it down gently. Now, grease your 9×13 dish with about 2 tablespoons of olive oil—don’t skimp here; this is what makes the bottom crispy! Place the dough into the oiled pan and gently use your fingers to push and stretch it until it fills the entire dish. It might resist a bit, so cover it again and let it relax for just 20 minutes. After that second rest, brush the remaining olive oil over the top. Now for the fun part: use your fingertips to poke deep holes all over the surface, pressing right down to the bottom of the pan. Finally, sprinkle generously with extra rosemary and that beautiful flaked sea salt.

Baking Times and Finishing Touches
Get your oven preheated to 400ºF and make sure that rack is right in the center. Slide the focaccia in and bake it for 20 to 25 minutes. You’re looking for a deep golden brown color on top and you want it to sound hollow when you tap the bottom. As soon as it comes out, drizzle just a tiny bit more olive oil over the hot surface—it soaks right in and keeps the crust tender. Let it cool in the pan for about 10 minutes before slicing. Enjoy that amazing aroma!
Tips for Achieving Expert Results with Your Homemade Bread
Even though this recipe is super forgiving, there are a couple of tiny things I learned after making dozens of loaves that really bump up the quality when you are finishing up. Remember, baking is all about feel, and these little tweaks will make your bread taste like you’ve been doing this for years, even if this is your very first attempt!
Dough Consistency Control
When you’re mixing, if the dough seems overly sticky, don’t panic and dump in a ton of extra flour. A slightly sticky dough is actually what we want because it traps more moisture, leading to a softer interior. If it’s truly unmanageable after the initial 4-5 minutes of mixing, add flour one tablespoon at a time. When you transfer it to the oiled pan, use oiled hands to help you push it into the corners—this prevents sticking way better than adding more flour.
Achieving Golden Crust
The oven rack placement is key for that perfect bottom crust. Make sure your rack is set squarely in the center of the oven. This ensures the heat circulates evenly around the 9×13 pan. When checking for doneness after 20 minutes, don’t just rely on color. Gently tap the bottom of the bread; if it sounds hollow, it’s done. If it still sounds dull or wet, give it another three to five minutes.
Storing and Reheating Your Roasted Garlic Rosemary Focaccia Bread
Even though this bread disappears fast—it usually does in my house—sometimes you end up with a little leftover Roasted Garlic Rosemary Focaccia Bread. Don’t even think about throwing it out! Focaccia is one of those breads that actually reheats beautifully if you treat it right. We just want to bring back that soft interior and that slightly crisp, oily bottom crust, right?
Storage Table
| Storage Method | Duration | Best Reheating Method |
|---|---|---|
| Room Temperature (Airtight Container) | Up to 2 days | Wrap loosely in foil and bake at 300ºF for 5-7 minutes. |
| Refrigerated (Airtight Container) | Up to 5 days | Wrap in foil, drizzle lightly with olive oil, and bake at 325ºF for 10 minutes. |
| Freezer (Heavy Duty Wrap) | Up to 2 months | Thaw completely, then follow the refrigerated reheating instructions above. |
Frequently Asked Questions About Roasted Garlic Rosemary Focaccia Bread
I get so many questions about yeast and flour when folks try this recipe for the first time, and that’s totally fine! Bread baking can feel intimidating, but these answers should make your next attempt at Roasted Garlic Rosemary Focaccia Bread even smoother. If you have other questions, just drop them in the comments below! You can also ask us on Facebook.
Can I make this focaccia without a stand mixer?
Absolutely, yes! Please don’t let a lack of a stand mixer stop you. You can use a hand mixer with dough hooks, or you can mix it all by hand in a sturdy bowl. If you’re kneading by hand, just plan on putting in a good 12 to 14 minutes of solid, consistent work until the dough starts feeling smooth and elastic. It’s a workout, but totally worth it!
How can I ensure my yeast is active?
This is the most common beginner mistake, so listen up! You need that water to be between 105ºF and 110ºF. If you don’t have a thermometer, test it on your wrist; it should feel pleasantly warm, not hot. If you see a nice layer of foam after 15 minutes, your yeast is alive and ready to make your homemade bread rise beautifully.
What is the best flour type for this recipe?
For the best possible texture in your focaccia, I highly recommend mixing your flours. If you can, use 1 1/4 cups of bread flour mixed with 2 1/2 cups of all-purpose flour. Bread flour has higher protein, which gives the dough more structure and chewiness. If you only have AP flour, that’s fine—just use the full 3 3/4 cups, but know that the mixed approach gives superior results. For more bread inspiration, check out our artisan bread recipe.
Share Your Success
I truly hope this recipe gave you the confidence boost I got when I first made it. Seeing that beautiful, golden loaf come out of your oven is the best feeling! If you tried this Roasted Garlic Rosemary Focaccia Bread, please take a moment to rate the recipe below and leave a comment telling me how it turned out. I love hearing about your kitchen wins! Pin this recipe for later!
Print
Amazing Roasted Garlic Rosemary Focaccia Bread 1
- Total Time: 2 hours 30 minutes
- Yield: 1 loaf
- Diet: Vegetarian
Description
This recipe shows you how to make soft, flavorful Roasted Garlic Rosemary Focaccia Bread. It is simple enough for any beginner to master.
Ingredients
- 1 1/3 cup warm water (105-110ºF)
- 2 teaspoons sugar
- 1 (0.25 ounce) packet instant yeast (2 1/4 teaspoons)
- 3 3/4 cup flour, plus more
- 2 teaspoons kosher salt
- 1/2 cup olive oil, plus more for greasing
- 1 tablespoon chopped rosemary, plus more for topping
- 1/4 cup roasted garlic, roughly chopped
- flaked sea salt for topping
Instructions
- Add the warm water, sugar, and yeast to a 2-cup measuring cup. Stir it and let the yeast bloom for 15 minutes until foamy.
- In a stand mixer bowl, combine the flour, salt, 1/4 cup olive oil, chopped rosemary, and roasted garlic. Mix briefly with the dough hook.
- Pour the yeast mixture into the flour mixture while the mixer runs on low. Increase speed to medium and mix for 4-5 minutes. Scrape down the sides if needed. Add 1-2 tablespoons of extra flour if the dough is too sticky, then form it into a ball by hand.
- Transfer the dough to a greased large bowl. Rub a small amount of olive oil on the dough surface and cover it with plastic wrap. Let it rest in a warm place for 1 to 1 1/2 hours until nearly doubled.
- Preheat your oven to 400ºF and place a rack in the center. Grease a 9×13 dish with 2 tablespoons of olive oil.
- Remove the plastic wrap and place the dough in the prepared dish. Gently push the dough with your fingers to fill the pan. Cover it again and let it rest for 20 minutes.
- Brush the remaining 2 tablespoons of olive oil onto the dough. Poke holes all over the surface, pressing down to the pan. Sprinkle with extra rosemary and flaked sea salt.
- Bake for 20-25 minutes until the top is golden brown and the bread is cooked through. Remove it from the oven, drizzle with a little more olive oil, and let it cool slightly before slicing and serving.
Notes
- You can use 3 3/4 cups of all-purpose flour, or for slightly better results, use 1 1/4 cup bread flour and 2 1/2 cups all-purpose flour.
- To create a warm proofing spot, turn your dryer on high for 4-5 minutes, turn it off, place the covered dough bowl inside, and keep the door closed for 1 hour.
- You can use a hand mixer with a dough hook, a bread dough machine, or knead the dough by hand for about 12-14 minutes.
- Prep Time: 25 minutes
- Cook Time: 25 minutes
- Category: Bread
- Method: Baking
- Cuisine: Italian