Black Forest Trifle for Holidays! When the holidays roll around, I always hear from people who are terrified of making a show-stopping dessert. They think they need to be fancy pastry chefs, but trust me, that’s just not true. Last year, I was completely slammed trying to get my healthy weeknight recipes finalized, and I almost skipped dessert entirely until I remembered this layering trick.
I needed something that looked incredible—something worthy of the main table—but that I could assemble in under 30 minutes of active time. This Black Forest Trifle for Holidays was the answer. It takes the intense, gorgeous flavors of a classic Black Forest cake—chocolate, cherry, and cream—and turns it into a foolproof assembly job. You just bake a cake, stir some pudding, and layer! It’s designed specifically for us home cooks who want maximum ‘wow’ factor with minimum kitchen panic. Seriously, if you can scoop, you can make this dessert!

Why You’ll Love This Black Forest Trifle for Holidays
I designed this recipe because the holidays are stressful enough without complicated baking schedules. This Black Forest Trifle for Holidays gives you all the complexity of a traditional layered cake without any of the messy frosting or delicate slicing. It’s pure joy in a glass dish, and it’s built for people like us who are still learning the ropes.
- It’s incredibly easy to assemble, requiring zero fancy piping skills.
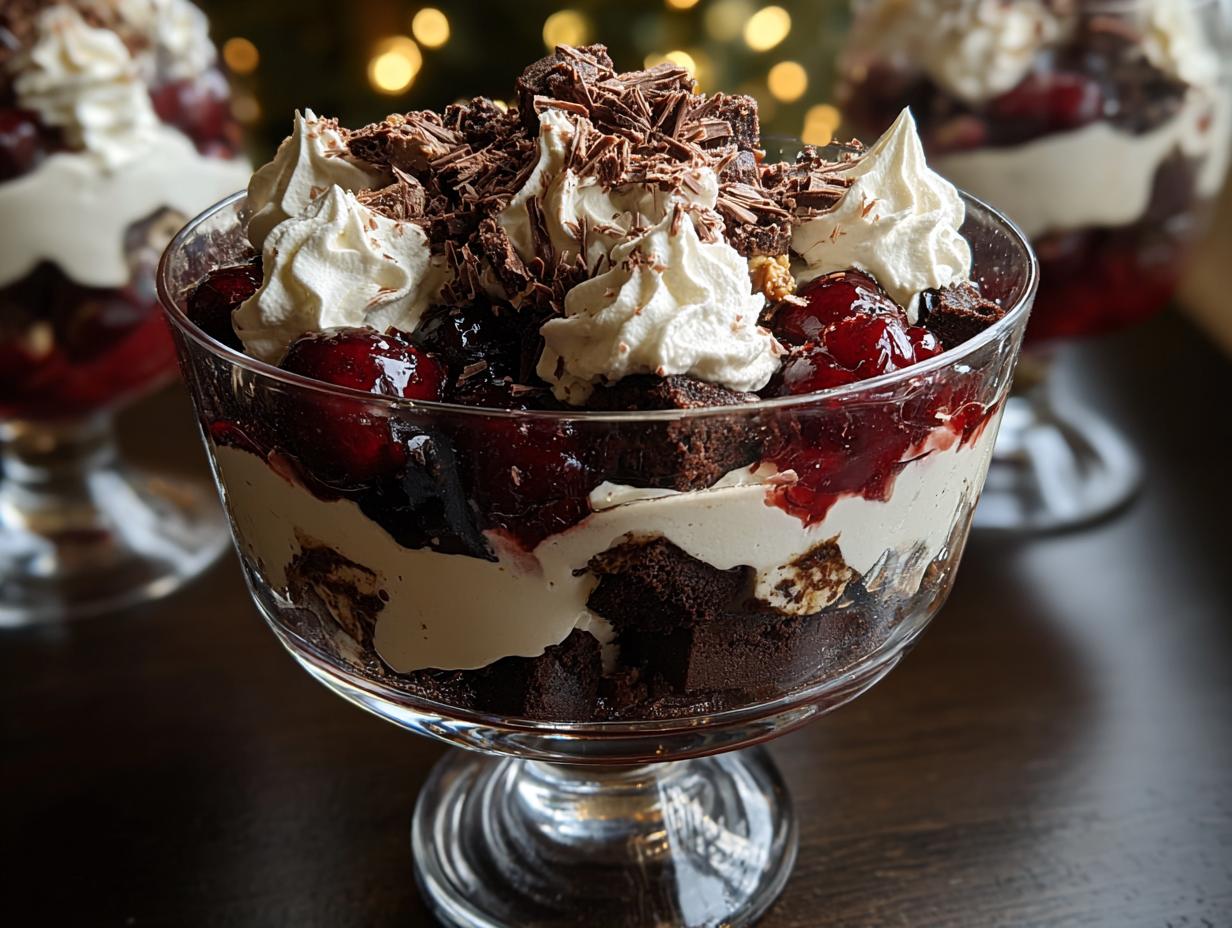
- The visual appeal is stunning; those clear layers always impress guests.
- It tastes rich and decadent—like a fancy restaurant dessert, honestly.
- This recipe is totally beginner-proof, even if you’ve never made a trifle before!
Quick Prep Time for Busy Seasons
The active work time on this thing is shockingly low. Once your cake is baked and cooled (which is hands-off time!), you are looking at maybe 20 minutes of actual stirring, chopping, and layering. That means you can get this gorgeous Black Forest Trifle for Holidays assembled right before your guests arrive, or even the morning of, and then let the fridge do the rest of the heavy lifting.
Essential Equipment for Your Black Forest Trifle for Holidays
You don’t need a specialized bakery setup to make this happen! Honestly, the equipment list for this Black Forest Trifle for Holidays is super basic. If you have standard baking gear, you’re already set to go. We are focusing on assembly, not complicated machinery here.
Here’s what you’ll definitely need:
- A large mixing bowl for the whipped cream.
- A handheld or stand mixer (or just a strong arm and a whisk!).
- Cutting board and a sharp knife for the cake.
- Spatula or large spoon for layering.
Selecting the Right Trifle Dish
This is important! Since the beauty of the trifle is seeing those distinct layers, you absolutely need a deep, clear glass dish. A standard 3-quart (or larger) bowl works perfectly. If the dish is opaque, you lose the visual appeal, and trust me, people eat with their eyes first when they see this glorious Black Forest Trifle for Holidays.
Gathering Ingredients for Black Forest Trifle for Holidays
Okay, let’s talk about what you need to pull off this amazing Black Forest Trifle for Holidays. Because this is an assembly dessert, the quality of your components really shines through. I’ve laid out the standard list below, but I’m very specific about how you should buy or prepare these things so you don’t end up with a watery mess. Don’t worry, I promise it’s not scary! Just follow these notes exactly.
| Ingredient | Amount | Prep Note |
|---|---|---|
| Chocolate Cake | 1 Box Mix (or baked equivalent) | Must be fully cooled before cutting. |
| Heavy Cream | 1 Cup | Must be very cold for whipping! |
| Powdered Sugar | 1/2 Cup | For sweetening the cream. |
| Vanilla Extract | 1 Teaspoon | Use the good stuff if you have it! |
| Cherries (Canned/Fresh) | 2 Cups Pitted | Keep the juice/syrup separate. |
| Cherry Juice/Syrup | 1/4 Cup | This moistens the cake layers. |
| Vanilla Pudding | 2 Cups | Store-bought or homemade, just make sure it’s set. |
| Chocolate Shavings | 1/2 Cup | For the top garnish. |
Ingredient Notes and Simple Substitutions
The biggest time-saver for this Black Forest Trifle for Holidays is the cake. If you genuinely don’t have time to bake, please, don’t stress! You can absolutely grab a box of your favorite fudgy brownies or even a good quality pre-made sponge cake. Just cube it up the same way. The key is that whatever you use must be completely cool, or it will melt the pudding.
When it comes to the cherries, if you use canned ones, make sure you drain off most of the thick syrup, but save that 1/4 cup of juice we need. If you’re using fresh cherries, chop them roughly and then add a splash of good quality cherry juice or even a teaspoon of kirsch if you want that authentic kick. Don’t skip marinating them slightly; that’s where the moisture comes from!
Step-by-Step Assembly: Making the Black Forest Trifle for Holidays
This is the fun part! Once you have all your components ready—the cooled cake, the set pudding, and the whipped cream—assembling the Black Forest Trifle for Holidays is like building a delicious, edible tower. Since we aren’t using an oven here, the timing is totally in your control. Just take your time, make sure each layer is relatively even, and remember that messy layers look amazing once they settle in the fridge!
Preparing the Cake Base
First things first: that chocolate cake has to be completely, totally cool. I can’t stress this enough. If it’s even slightly warm, it will steam the pudding and make everything mushy later on. Once it’s cool, slice it into roughly 1-inch cubes. You want these cubes to be bite-sized, but not so small that they turn into crumbs when you press them into the bottom of the dish. Place a generous, snug layer of these cubes right at the bottom of your clear trifle bowl. Give them a gentle press down with the back of your spoon—we want a nice foundation.
Creating the Cream Component
Now for the cloud layer! Take your heavy cream, powdered sugar, and vanilla extract. If you’re using a stand mixer, use the whisk attachment. Start on low speed so the sugar doesn’t blast out of the bowl! Gradually increase the speed. You are whipping until you get what bakers call ‘stiff peaks.’ For us beginners, that means when you lift the whisk out of the cream, the peak that forms stands straight up without flopping over. If it looks like soft-serve ice cream, keep going! If you over-whip it, it turns into butter, so watch it closely!
Marinating the Cherries
This step adds the signature tartness and moisture. Take your pitted cherries and drizzle that saved 1/4 cup of cherry juice over them. If you are using canned cherries, the syrup is usually sweet enough, but if you used fresh ones, this juice helps them release their flavor. Give them a gentle stir and let them sit for about five minutes while you handle the pudding layer. This little soak makes a huge difference in the final taste of your Black Forest Trifle for Holidays.
Layering the Masterpiece
It’s time to build! Follow this sequence strictly, and make sure you spread the pudding and cream layers evenly so they reach the edges of the glass. The sequence is: Cake, Pudding, Cherries, Cream. Spread the vanilla pudding evenly over the cake layer. Then, spoon the cherries—and any juice that collected—over the pudding. Next, dollop on a good layer of your freshly whipped cream. You’ve now completed one tier! Repeat this entire sequence until your dish is full, always ending with a beautiful, thick blanket of whipped cream on top.
The Crucial Chilling Time
Resist the urge to dig in right away! Even though this Black Forest Trifle for Holidays is assembled, it needs time to become *one* dessert instead of just separate layers. You must chill this for a minimum of three hours. Honestly, overnight is even better. This resting time allows the cake cubes to absorb just the right amount of moisture from the pudding and cherries. It firms up the pudding, stabilizes the cream, and makes slicing (or scooping!) much cleaner when serving.

Mastering the Black Forest Trifle for Holidays Presentation
Once your trifle has chilled and all those beautiful layers have settled into a perfect stripe pattern, it’s time for the grand finale: the garnish! This is what makes this dessert look professional, even though you barely lifted a finger, right? For this Black Forest Trifle for Holidays, we are going for simple elegance. Take your dark chocolate shavings—I like to use a vegetable peeler on a nice bar of dark chocolate for the best texture—and sprinkle them generously over the top layer of whipped cream.
If you want a little extra visual flair, you can dust a very light veil of cocoa powder over the whole thing using a fine-mesh sieve. Place a few extra whole cherries right in the center for color contrast. This final professional touch makes everyone forget you spent less than 30 minutes assembling this incredible Black Forest Trifle for Holidays!
Common Questions About Your Black Forest Trifle for Holidays
I get asked the same few questions every time I post this recipe, so let’s clear them up now! People worry most about timing, which is understandable when you’re juggling holiday meals. This Black Forest Trifle for Holidays is very forgiving, but a few tips can make it perfect.
Q1. Can I make the layers ahead of time?
You absolutely can! You can bake and cube your cake the day before, and even mix your cherries. However, I strongly recommend keeping the whipped cream separate until the final assembly. Whipped cream can start to weep or deflate if it sits too long, even chilled. Do the final layering and chilling (at least 3 hours) on the day you plan to serve it.
Q2. What if my pudding isn’t setting?
If your vanilla pudding is too soft, it will run into the cake layer and make things soupy. If you used instant pudding, make sure you used cold milk and let it sit on the counter for the full recommended time before chilling. If it’s still too loose, you can try gently folding in a tablespoon of softened cream cheese to help it firm up before you layer it.
Q3. Can I use different fruit besides cherries?
Yes, you can! This recipe works beautifully with raspberries or sliced strawberries mixed with a little simple syrup instead of the cherry juice. It shifts the flavor profile, but the structure of the Black Forest Trifle for Holidays remains sound.
Q4. How thick should the cake layer be?
Keep your cake layer about 1 to 1.5 inches thick. You need enough cake to soak up the flavors, but not so much that it dominates the cream and pudding layers. It should look balanced in the glass.
Can I make the layers ahead of time?
Oh yeah, you can definitely prep ahead! I usually bake the cake the day before because it needs to be completely cool anyway. You can even mix those lovely cherries with their juice. But please, don’t whip the cream until just before you assemble everything. That fresh whipped cream is the softest component, and if it sits for more than 12 hours, it starts getting a little sad. Assemble the Black Forest Trifle for Holidays the night before, but keep the cream separate until the morning you serve it, or just whip it an hour before final assembly.
What is the best way to store leftover Black Forest Trifle for Holidays?
If you have any of this amazing chocolate cherry dessert left over, you need to treat it like a dairy product. Cover that dish tightly—I mean *really* tight—and get it straight back into the fridge. Because of the fresh cream, it’s best eaten within two days for the absolute best texture. If you try to freeze it, the pudding and the whipped cream will separate, and you’ll end up with a watery mess. Just keep scooping it cold!
Storing and Serving Your Holiday Dessert
Since this dessert relies on fresh dairy and delicate structure, storage is simple but important. We want the Black Forest Trifle for Holidays to stay fresh and firm for leftovers. Because it has so much cream and pudding, it’s definitely not a dessert you want sitting out on the counter for hours while people mingle.
The best way to handle storage is to cover the trifle dish tightly with plastic wrap—make sure the wrap isn’t touching the chocolate shavings on top, or they’ll stick! Keep it in the coldest part of your refrigerator. It stays perfectly delicious for about three days, though honestly, it rarely lasts that long in my house!
| Storage Method | Maximum Duration | Notes |
|---|---|---|
| Refrigerated (Covered) | 3 Days | Best flavor on Day 2. |
| Freezing | Not Recommended | Cream and pudding separate badly when thawed. |
Serving Temperature Guidance
Always serve this chilled straight from the fridge. If you let it sit out for more than an hour, the whipped cream starts to deflate, and the pudding gets a little too soft. Keep it cold, keep it covered, and enjoy that crisp, cool bite!
Share Your Success with This Black Forest Trifle for Holidays
I really hope this recipe takes the pressure off your holiday dessert planning! If you managed to assemble this stunning Black Forest Trifle for Holidays and it didn’t end up looking like a chocolate lava flow, I want to hear about it! Please consider leaving a rating below so other beginner cooks know they can tackle this showstopper too. Happy holidays, everyone! Follow along for more holiday inspiration.
Mastering the Black Forest Trifle for Holidays Presentation
Once your trifle has chilled and all those beautiful layers have settled into a perfect stripe pattern, it’s time for the grand finale: the garnish! This is what makes this dessert look professional, even though you barely lifted a finger, right? For this Black Forest Trifle for Holidays, we are going for simple elegance. Take your dark chocolate shavings—I like to use a vegetable peeler on a nice bar of dark chocolate for the best texture—and sprinkle them generously over the top layer of whipped cream.
If you want a little extra visual flair, you can dust a very light veil of cocoa powder over the whole thing using a fine-mesh sieve. Place a few extra whole cherries right in the center for color contrast. This final professional touch makes everyone forget you spent less than 30 minutes assembling this incredible Black Forest Trifle for Holidays!
Common Questions About Your Black Forest Trifle for Holidays
I get asked the same few questions every time I post this recipe, so let’s clear them up now! People worry most about timing, which is understandable when you’re juggling holiday meals. This Black Forest Trifle for Holidays is very forgiving, but a few tips can make it perfect.
Q1. Can I make the layers ahead of time?
You absolutely can! You can bake and cube your cake the day before, and even mix your cherries. However, I strongly recommend keeping the whipped cream separate until the final assembly. Whipped cream can start to weep or deflate if it sits too long, even chilled. Do the final layering and chilling (at least 3 hours) on the day you plan to serve it.
Q2. What if my pudding isn’t setting?
If your vanilla pudding is too soft, it will run into the cake layer and make things soupy. If you used instant pudding, make sure you used cold milk and let it sit on the counter for the full recommended time before chilling. If it’s still too loose, you can try gently folding in a tablespoon of softened cream cheese to help it firm up before you layer it.
Q3. Can I use different fruit besides cherries?
Yes, you can! This recipe works beautifully with raspberries or sliced strawberries mixed with a little simple syrup instead of the cherry juice. It shifts the flavor profile, but the structure of the Black Forest Trifle for Holidays remains sound.
Q4. How thick should the cake layer be?
Keep your cake layer about 1 to 1.5 inches thick. You need enough cake to soak up the flavors, but not so much that it dominates the cream and pudding layers. It should look balanced in the glass.
Can I make the layers ahead of time?
Oh yeah, you can definitely prep ahead! I usually bake the cake the day before because it needs to be completely cool anyway. You can even mix those lovely cherries with their juice. But please, don’t whip the cream until just before you assemble everything. That fresh whipped cream is the softest component, and if it sits for more than 12 hours, it starts getting a little sad. Assemble the Black Forest Trifle for Holidays the night before, but keep the cream separate until the morning you serve it, or just whip it an hour before final assembly.
What is the best way to store leftover Black Forest Trifle for Holidays?
If you have any of this amazing chocolate cherry dessert left over, you need to treat it like a dairy product. Cover that dish tightly—I mean *really* tight—and get it straight back into the fridge. Because of the fresh cream, it’s best eaten within two days for the absolute best texture. If you try to freeze it, the pudding and the whipped cream will separate, and you’ll end up with a watery mess. Just keep scooping it cold!
Storing and Serving Your Holiday Dessert
Since this dessert relies on fresh dairy and delicate structure, storage is simple but important. We want the Black Forest Trifle for Holidays to stay fresh and firm for leftovers. Because it has so much cream and pudding, it’s definitely not a dessert you want sitting out on the counter for hours while people mingle.
The best way to handle storage is to cover the trifle dish tightly with plastic wrap—make sure the wrap isn’t touching the chocolate shavings on top, or they’ll stick! Keep it in the coldest part of your refrigerator. It stays perfectly delicious for about three days, though honestly, it rarely lasts that long in my house!
| Storage Method | Maximum Duration | Notes |
|---|---|---|
| Refrigerated (Covered) | 3 Days | Best flavor on Day 2. |
| Freezing | Not Recommended | Cream and pudding separate badly when thawed. |
Serving Temperature Guidance
Always serve this chilled straight from the fridge. If you let it sit out for more than an hour, the whipped cream starts to deflate, and the pudding gets a little too soft. Keep it cold, keep it covered, and enjoy that crisp, cool bite!
Share Your Success with This Black Forest Trifle for Holidays
I really hope this recipe takes the pressure off your holiday dessert planning! If you managed to assemble this stunning Black Forest Trifle for Holidays and it didn’t end up looking like a chocolate lava flow, I want to hear about it! Please consider leaving a rating below so other beginner cooks know they can tackle this showstopper too. Happy holidays, everyone! See our latest posts on Facebook.
Mastering the Black Forest Trifle for Holidays Presentation
Once your trifle has chilled and all those beautiful layers have settled into a perfect stripe pattern, it’s time for the grand finale: the garnish! This is what makes this dessert look professional, even though you barely lifted a finger, right? For this Black Forest Trifle for Holidays, we are going for simple elegance. Take your dark chocolate shavings—I like to use a vegetable peeler on a nice bar of dark chocolate for the best texture—and sprinkle them generously over the top layer of whipped cream.
If you want a little extra visual flair, you can dust a very light veil of cocoa powder over the whole thing using a fine-mesh sieve. Place a few extra whole cherries right in the center for color contrast. This final professional touch makes everyone forget you spent less than 30 minutes assembling this incredible Black Forest Trifle for Holidays!
Common Questions About Your Black Forest Trifle for Holidays
I get asked the same few questions every time I post this recipe, so let’s clear them up now! People worry most about timing, which is understandable when you’re juggling holiday meals. This Black Forest Trifle for Holidays is very forgiving, but a few tips can make it perfect.
Q1. Can I make the layers ahead of time?
You absolutely can! You can bake and cube your cake the day before, and even mix your cherries. However, I strongly recommend keeping the whipped cream separate until the final assembly. Whipped cream can start to weep or deflate if it sits too long, even chilled. Do the final layering and chilling (at least 3 hours) on the day you plan to serve it.
Q2. What if my pudding isn’t setting?
If your vanilla pudding is too soft, it will run into the cake layer and make things soupy. If you used instant pudding, make sure you used cold milk and let it sit on the counter for the full recommended time before chilling. If it’s still too loose, you can try gently folding in a tablespoon of softened cream cheese to help it firm up before you layer it.
Q3. Can I use different fruit besides cherries?
Yes, you can! This recipe works beautifully with raspberries or sliced strawberries mixed with a little simple syrup instead of the cherry juice. It shifts the flavor profile, but the structure of the Black Forest Trifle for Holidays remains sound.
Q4. How thick should the cake layer be?
Keep your cake layer about 1 to 1.5 inches thick. You need enough cake to soak up the flavors, but not so much that it dominates the cream and pudding layers. It should look balanced in the glass.
Can I make the layers ahead of time?
Oh yeah, you can definitely prep ahead! I usually bake the cake the day before because it needs to be completely cool anyway. You can even mix those lovely cherries with their juice. But please, don’t whip the cream until just before you assemble everything. That fresh whipped cream is the softest component, and if it sits for more than 12 hours, it starts getting a little sad. Assemble the Black Forest Trifle for Holidays the night before, but keep the cream separate until the morning you serve it, or just whip it an hour before final assembly.
What is the best way to store leftover Black Forest Trifle for Holidays?
If you have any of this amazing chocolate cherry dessert left over, you need to treat it like a dairy product. Cover that dish tightly—I mean *really* tight—and get it straight back into the fridge. Because of the fresh cream, it’s best eaten within two days for the absolute best texture. If you try to freeze it, the pudding and the whipped cream will separate, and you’ll end up with a watery mess. Just keep scooping it cold!
Storing and Serving Your Holiday Dessert
Since this dessert relies on fresh dairy and delicate structure, storage is simple but important. We want the Black Forest Trifle for Holidays to stay fresh and firm for leftovers. Because it has so much cream and pudding, it’s definitely not a dessert you want sitting out on the counter for hours while people mingle.
The best way to handle storage is to cover the trifle dish tightly with plastic wrap—make sure the wrap isn’t touching the chocolate shavings on top, or they’ll stick! Keep it in the coldest part of your refrigerator. It stays perfectly delicious for about three days, though honestly, it rarely lasts that long in my house!
| Storage Method | Maximum Duration | Notes |
|---|---|---|
| Refrigerated (Covered) | 3 Days | Best flavor on Day 2. |
| Freezing | Not Recommended | Cream and pudding separate badly when thawed. |
Serving Temperature Guidance
Always serve this chilled straight from the fridge. If you let it sit out for more than an hour, the whipped cream starts to deflate, and the pudding gets a little too soft. Keep it cold, keep it covered, and enjoy that crisp, cool bite!
Share Your Success with This Black Forest Trifle for Holidays
I really hope this recipe takes the pressure off your holiday dessert planning! If you managed to assemble this stunning Black Forest Trifle for Holidays and it didn’t end up looking like a chocolate lava flow, I want to hear about it! Please consider leaving a rating below so other beginner cooks know they can tackle this showstopper too. Happy holidays, everyone!
Print
Stunning Black Forest Trifle for Holidays 1
- Total Time: 4 hours
- Yield: 8-10 servings
- Diet: N/A
Description
This Black Forest Trifle for Holidays layers rich chocolate cake with creamy vanilla pudding, sweet cherries, and light whipped cream. It is a simple yet impressive dessert perfect for holiday gatherings.
Ingredients
- 1 box chocolate cake mix (or 1 homemade chocolate cake)
- 1 cup heavy cream
- 1/2 cup powdered sugar
- 1 teaspoon vanilla extract
- 2 cups canned or fresh cherries (pitted, with juice or syrup)
- 1/4 cup cherry juice (from canned cherries or fresh)
- 2 cups vanilla pudding (store-bought or homemade)
- 1/2 cup dark chocolate shavings (or grated chocolate)
- 1 tablespoon cocoa powder (optional for garnish)
Instructions
- Bake the chocolate cake per package directions or your recipe. Cool the cake completely before assembly.
- Cut the cooled chocolate cake into bite-sized cubes, about 1-inch each.
- Beat the heavy cream, powdered sugar, and vanilla extract until stiff peaks form. Set the whipped cream aside.
- If using canned cherries, drain them, saving the juice. If using fresh cherries, pit and chop them. Mix the cherries with their juice or syrup.
- In a trifle dish, start by placing a layer of chocolate cake cubes at the bottom. Press lightly.
- Spread a layer of vanilla pudding evenly over the cake layer.
- Spoon a layer of the marinated cherries and some juice over the pudding.
- Add a generous layer of whipped cream over the cherries.
- Repeat the layers: cake, pudding, cherries, and whipped cream, until the dish is full. Finish with a top layer of whipped cream.
- Garnish the top with chocolate shavings and a few extra cherries.
- Refrigerate the trifle for at least 3 hours, or preferably overnight, before serving.
Notes
- You can substitute store-bought brownies or sponge cake for the chocolate cake to save time.
- Ensure the cake is fully cooled before layering to prevent the trifle from becoming soggy.
- Chilling overnight allows the layers to fully set and the flavors to combine well.
- Prep Time: 20 minutes
- Cook Time: 30 minutes (for cake baking, assumed)
- Category: Dessert
- Method: Layering/No-Bake Assembly
- Cuisine: American/European Fusion